Table of Contents
Advertisement
Quick Links
012B
WELLS MANUFACTURING
265 Hobson Street, Smithville, Tennessee 37166
telephone: 314-678-6314
www.wells-mfg.com
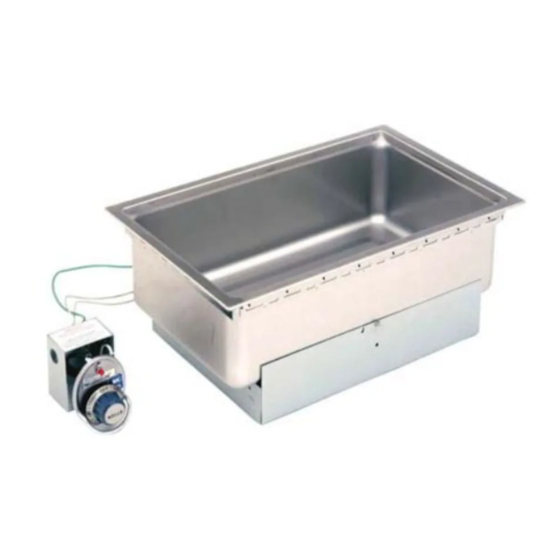
OWNERS MANUAL
DROP-IN and
BOTTOM-MOUNT
UNSHROUDED
WARMERS
with
INFINITE SWITCH
CONTROL
SS206
MODELS
SS206(D)
SS206E(D)
SS206ER(D)
Includes
INSTALLATION
USE & CARE
EXPLODED VIEW
PARTS LIST
SS206E
WIRING DIAGRAM
IMPORTANT: DO NOT DISCARD THIS MANUAL
This manual is considered to be part of the appliance and is to be given to the OWNER or
MANAGER of the restaurant, or to the person responsible for TRAINING OPERATORS of
this appliance. Additional manuals are available from your WELLS DEALER.
THIS MANUAL MUST BE READ AND UNDERSTOOD BY ALL PERSONS USING OR
INSTALLING THIS APPLIANCE. Contact your WELLS DEALER if you have any
questions concerning installation, operation or maintenance of this equipment.
308028 Rev. C
03/18
2M-
Advertisement
Table of Contents

Related Manuals for Wells SS206


Summary of Contents for Wells SS206
- Page 1 Additional manuals are available from your WELLS DEALER. THIS MANUAL MUST BE READ AND UNDERSTOOD BY ALL PERSONS USING OR INSTALLING THIS APPLIANCE. Contact your WELLS DEALER if you have any questions concerning installation, operation or maintenance of this equipment.
- Page 2 Wells’ discretion have the parts replaced or codes, including incorrect gas or electrical connection. Wells is not liable repaired by Wells or a Wells-authorized service agency.
-
Page 3: Table Of Contents
PARTS & SERVICE CUSTOMER SERVICE DATA INTRODUCTION Thank You for purchasing this Wells Manufacturing appliance. Proper installation, professional operation and consistent maintenance of this appliance will ensure that it gives you the very best performance and a long, economical service life. -
Page 4: Features & Operating Controls
“on” time to “off” time. Thus, no temperature sensing devise is required. B. MOUNTING Top-mounted built-in warmers (i.e SS206) are equipped with WELLSLOKS, uniquely designed turnout tabs which help secure the warmer top flange to the countertop. Bottom-mounted warmers (i.e SS206E) require that the cutout be flanged to provide a mounting means. -
Page 5: Precautions & General Information
Damage Do not operate this appliance if the control panel is damaged. Call to the appliance may result if your Authorized Wells Service Agent for service. these instructions are not The technical content of this manual, including any wiring diagrams, followed. -
Page 6: Installation
OVAL CONTROL PANEL Instructions provided with the specific instructions. warmer. SS206 units use an oval control panel to mount the infinite switch. SS206E and SS206ER units mount the infinite switch directly to the cabinet face. Verify style of control mounting before making cutout. - Page 7 INSTALLATION For “bottom-mounted” warmers (i.e. warmers mounted to a formed flange from underneath the counter top), apply a bead of food-grade silicone sealant to the top inside lip of the pan prior to attaching to the counter flange. For “top-mounted” warmers (i.e. warmers mounted from above the counter top): a.
-
Page 8: Operation
CAUTION: between the change in wet or dry operation. SHOCK HAZARD c. Wells Manufacturing recommends operating WET for consistent food heating. DO NOT splash or pour water d. If your wet-operation warmer is allowed to run dry, turn it onto control panel or wiring. -
Page 9: Maintenance Instructions
Never use metal implements, wire brushes, abrasive scratch pads or steel wool to clean stainless steel. Warmer pans, insets and other vessels are subject to a harsher environment. Wells Manufacturing uses an very high quality stainless steel (#304DDQ) for our food warmer pans. -
Page 10: Cleaning Instructions
Contact your Authorized Wells Service Agency to inspect warmer if water or grease contamination is suspected. Close drain valve. Add proper amount of warm water. Turn control... - Page 11 CLEANING INSTRUCTIONS CAUTION: WEEKLY CLEANING INSTRUCTIONS CHEMICAL BURN PREPARATIONS: Remove any insets, pans and/or adapter HAZARD tops. Drain or remove water from well if used Deilimng chemicals may be for wet operation. caustic. Wear appropriate personal protective equipment. FREQUENCY: Weekly, or whenever lime or scale is seen Follow cleaner manufacturer’s accumulating on the sides of the warmer instructions for safest use.
-
Page 12: Troubleshooting Suggestions
Set control to desired temperature Verify flange-to counter seal is sound, or reseal Wet insulation with food-grade silicone sealant Pan leaking or other internal Contact your Authorized Wells Service Agency for Warmer trips circuit breaker damage repairs Contact your Authorized Wells Service Agency for... - Page 13 NOTES...
- Page 14 EXPLODED VIEW: SS206, SS206D Model: SS206, SS206D PL012B IL1861 Rev. A 8/10/09...
- Page 15 Part No Description P2-31869 SCREEN DRAIN ASSY WARMERS P2-30401 PAN W/O DRAIN P2-30402 PAN W/DRAIN WS-62059 BOX CONTROL SS8, SS10, SS206 2E-34594 SWITCH INFINITE 120V 2E-34593 SW INF 240V B CAM 13/16S 2C-43271 CLIP RETAINER PILOT LIGHT 2V-WL0049 PANEL, CONTROL OVAL/GUARD...
- Page 16 EXPLODED VIEW: SS206E, SS206ED, SS206ER, SS206ERD Model: SS206E, SS206ED, SS206ER, SS206ERD, PL012B IL1862 Rev. B 2/12/15...
- Page 17 WARM ELEM 240V 1200W 208/240V N1-307797 PAN ELEM SS206 ET 2H-31882 INSUL FG PAD MP 2K-37748X FTG CONDUIT STRAIGHT 3/8 WS-50374 THERMO HI-LIMIT SAFETY P2-WL0086 PAN ELEM ASSY SS206 INF SWT 120V P2-WL0085 PAN ELEM ASSY SS206 INF SWT 208/240V...
-
Page 18: Wiring Diagram
WIRING DIAGRAM WIRING DIAGRAM FOR SS-206 120 OR 208/240V, SINGLE PHASE & UP SER. NO. SS-206 PILOT LIGHT CONNECTOR (2) INFINITE SWITCH 16GA. NICKEL STRANDED APPLIANCE WIRE GREEN NOMINAL AMPS HEATING ELEMENT WATTS VOLTS PER LINE 1200 10.0 SAFETY THERMO 1200 1500 12.5... - Page 19 NOTES...
- Page 20 NOTES...
- Page 21 NOTES...
-
Page 22: Parts & Service
Always use an inset. DO NOT place food directly into the warmer pan. ADAPTERS & INSETS ADAPTER TOP, convert SS206 to hold two 7 qt. insets WS-20176 ADAPTER TOP, convert SS206 to hold two 4 qt. insets and two 2½ qt. insets WS-20434 ADAPTER TOP, convert 12”... -
Page 23: Customer Service Data
“D” models only, excluding “DM” models 5P-20385 contact your Wells authorized service agency, or call: Wells Manufacturing 265 Hobson Street Smithville, Tennessee 37166 U.S.A. - Page 24 WELLS MANUFACTURING 265 Hobson Street, Smithville, Tennessee 37166 telephone: 314-678-6314 fax: 314-781-2714 www.wells-mfg.com...