
Related Manuals for Henny Penny Evolution Elite EEG-16 Series


Summary of Contents for Henny Penny Evolution Elite EEG-16 Series
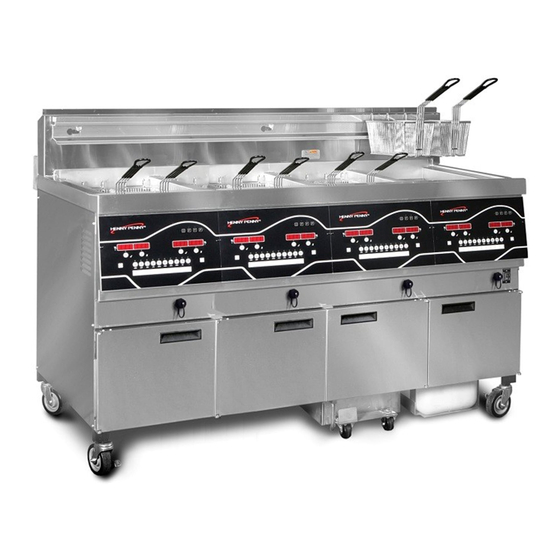
- Page 1 TECHNICAL MANUAL E E V V O O L L U U T T I I O O N N E E L L I I T T E E ™ ™ ( ( G G a a s s ) ) O O p p e e n n F F r r y y e e r r EEG-16X EEG-241...
-
Page 3: Table Of Contents
Table of Contents Safety and Compliance....................v Chapter 1 Troubleshooting ....................1 1.1 Introduction ......................1 1.2 Troubleshooting .....................1 1.3 Error Codes ......................3 Chapter 2 Information & Filter Button Stats ...............7 2.1 Info Button Stats ....................7 2.1.1 Actual Oil Temperature ..................7 2.1.2 Set-point Temperature..................7 2.1.3 Recovery Information For Each Vat ..............7 2.2 Filter Button Stats ....................7 2.2.1 Cook Cycles Remaining before Filtering ............7... - Page 4 5.1.12 SP-12 Clean-Out Temperature ..............24 5.1.13 SP-13 Cooking User IO ................24 5.1.14 SP-14 Number Of Baskets................25 5.1.15 SP-15 Cooking Indicator ................25 5.1.16 SP-16 2nd Language ...................25 5.1.17 SP-17 2nd Volume ..................25 5.1.18 SP-18 Energy Save Mode................25 5.1.19 SP-19 Fryer Type ..................25 5.1.20 SP-20 Vat Type ....................25 5.1.21 SP-21 Auto-Lift Enabled ................26 5.1.22 SP-22 Bulk Oil Supply ..................26...
- Page 5 6.12 Blower Replacement ..................51 6.13 Blower Wheel Replacement ................52 6.14 FILTER BEACON™ Replacement ...............52 6.15 Air Pressure Switches..................54 6.16 Pilot Replacement ....................55 Chapter 7 Parts ......................57 7.1 Introduction ......................57 7.2 Genuine Parts......................57 7.3 When Ordering Parts....................57 7.4 Prices........................57 7.5 Delivery.......................57 7.6 Warranty ......................57 7.7 Recommended Spare Parts For Distributors ............58 Chapter 8 Diagrams ......................79...
- Page 6 List of Tables Table 1-1 Troubleshooting....................1 Table 1-2 Error Codes......................3 Table 5-1 Special Program Modes ..................19 Table 6-1 Preventative Maintenance Schedule ..............35 Table 6-2 RTD Resistance Chart ..................39 Table 7-1 ........................58 Table 7-2 Pilot Kit Numbers ....................67 Table 7-3 Vat (Pot) Replacement Kit Numbers ..............67 Table 7-4 Gas Conversion Kits for Units with Serial Numbers Prior to NX1611006 (Black Housing) ......................67 Table 7-5 Gas Conversion Kits for Units with Serial Numbers After NX1611006 (Silver...
- Page 7 S S a a f f e e t t y y a a n n d d C C o o m m p p l l i i a a n n c c e e Henny Penny fryers have many safety features incorporated. However, the only way to ensure safe operation is to fully understand the proper installation, operation, and maintenance procedures.
- Page 8 These are the original version controlled Henny Penny instructions for Evolution Elite Gas (EEG) model 252, 253 or 254 (EEG-252/253/254). This manual is available on the Henny Penny Public website (www.hennypenny.com). Read these instructions completely prior to installation and operation of this appliance to ensure compliance to all required installation, operation and safety standards.
- Page 9 person responsible for their safety. Children should be supervised to ensure that they do not play with the appliance. This appliance is not intended to be operated by means of an external timer or a separate remote control system. T T e e c c h h n n i i c c a a l l D D a a t t a a F F o o r r C C E E / / A A G G A A M M a a r r k k e e d d P P r r o o d d u u c c t t s s Nominal Heat Input (Net): Natural (I ) = 19.8 KW (67,560 Btu/h)
- Page 10 Natural (I ) = 25 mbar Natural (I ) = 25 mbar Natural (I ) = 25 mbar 2E (43.46 - 45.3 mj/m (0°c)) Liquid Propane (I ) = 30/37/50 mbar (3.0/ 3.7/5.0 kPa) Liquid Propane / Butane (I ) = 30/37/50 3 B/P mbar (3.0/3.7/5.0 kPa) Test Point Pressure...
-
Page 11: Figure-1 Guidelines For Gas Piping
Use an approved flexible hose with a length that does not exceed 1.5 m. Also follow these guidelines: Figure-1 Guidelines for Gas Piping... -
Page 13: Table 1-1 Troubleshooting
C C h h a a p p t t e e r r 1 1 T T r r o o u u b b l l e e s s h h o o o o t t i i n n g g 1 1 . - Page 14 Problem Cause Correction Improper filtering. Refer to filtering procedures. Improper rinsing after Clean and rinse vat and then dry thoroughly. cleaning the vat. Oil will not Drain valve clogged Open valve, force cleaning brush through drain. drain from with crumbs. vat.
-
Page 15: Table 1-2 Error Codes
1 1 . . 3 3 E E r r r r o o r r C C o o d d e e s s In the event of a control system failure, the digital display shows an error message. The message codes are shown in the display column below. - Page 16 Display Cause Panel Board Correction Flue or hood Check the fryer flue and hood system for obstructions. obstruction. “E-20-D" Failure to ignite/ Press power button to vat off and back on again, if E-20-D “IGNITION no flame sense. persists, check gas line connections; check gas shut-off FAILURE”...
- Page 17 Display Cause Panel Board Correction “E-83-A” Pressure too Check filter system in Vat #1. high. “E-83-B” Pressure too Check filter system in Vat #2. high. “E-83-C” Pressure too high Check filter system in Vat #3. “E-83-D” Pressure too Check filter system in Vat #4 high.
-
Page 19: Actual Oil Temperature
C C h h a a p p t t e e r r 2 2 I I n n f f o o r r m m a a t t i i o o n n & & F F i i l l t t e e r r B B u u t t t t o o n n S S t t a a t t s s NOTE: If no buttons are pressed within 5 seconds in any of stats modes, the controls revert back to normal operation. -
Page 21: Chapter 3 Information Mode
1 1 6 6 . . USB SUPPORT NOTE: Not all Information Mode functions are discussed in this section. To ensure proper operation of fryer, please consult Henny Penny Corp. before changing any of these settings. For more information on these functions, contact Technical Support at 1-800-417- 8405, or 1-937-456-8405. -
Page 22: Last Load
Press the down arrow and if an error was recorded, “B. (date, time, and error 3 3 ) ) code information)” shows in display. This is the latest error code that the controls recorded. Sometimes the characters “L:” and “R:” appear in front of the error code on the display which refers to the left or right vat of a split vat. -
Page 23: Daily Stats
3 3 . . 1 1 . . 3 3 3 3 . . D D a a i i l l y y S S t t a a t t s s The Daily Stats section provides operational information of the fryer for the last 7 days. -
Page 24: Oil Stats
3 3 . . 1 1 . . 4 4 4 4 . . O O i i l l S S t t a a t t s s The Oil Stats section provides information of current oil and average of last four batches of oil. -
Page 25: Inputs
Function Display Example Number of times oil discarded (L/R) DISPOSE Total number of cook cycles (L/R) TOT CK Number of cycles stopped before *DONE* QUIT CK Cook Cycles for Product #1 COOK -1- Cook Cycles for Product #2 COOK -2- Cook Cycles for Product #3 COOK -3- Cook Cycles for Product #4... -
Page 26: Outputs
I = IGNITION MODULE - Press product button 3 or 8 to open and close the outputs on the ignition modules. H = HEAT OUTPUTS - Press product button 4 or 9 to turn on and off the heating outputs (ex: gas valve). 3 3 . - Page 27 C C h h a a p p t t e e r r 4 4 P P r r o o d d u u c c t t P P r r o o g g r r a a m m M M o o d d e e This mode allows you to program the following: •...
- Page 28 A A s s s s i i g g n n B B u u t t t t o o n n Press the right arrow until “ASSIGN BTN” shows in the display, along with the 6 6 ) ) product (ex: NUGGETS).
-
Page 29: Chapter 4 Product Program Mode
and temperature of the cooking load. Press the product buttons, or up or down arrow, to change this value of 0 to 20. L L o o a a d d C C o o m m p p e e n n s s a a t t i i o o n n R R e e f f e e r r e e n n c c e e Press the right arrow until “LCMP REF”... -
Page 31: Table 5-1 Special Program Modes
C C h h a a p p t t e e r r 5 5 L L e e v v e e l l 2 2 P P r r o o g g r r a a m m m m i i n n g g Used to access the following: •... -
Page 32: Mixed
S S P P - - 7 7 C C Idle Set-Point Temperature S S P P - - 8 8 Filter Tracking Mode - 1.MIXED or 2.GLOBAL S S P P - - 8 8 A A Suggest Filter At... - 75% to 100% (MIXED) S S P P - - 8 8 B B Filter Lockout Enabled? - YES or NO (MIXED) S S P P - - 8 8 A A... - Page 33 S S P P - - 3 3 0 0 Skip ‘SKIM’ Prompt? - YES or NO S S P P - - 3 3 1 1 Skip ‘EXP FLTR CONFIRM’ Prompt? - YES or NO S S P P - - 3 3 2 2 2-Stage Wash Enabled? - YES or NO S S P P - - 3 3 3 3 Daily Filter Lockout Enabled? - YES or NO...
-
Page 34: Global
Press and release the right arrow until “SP-7” “IDLE MODE ENABLED?” flashes 1 1 ) ) in the left display. Press the up or down arrow to choose “YES” or “NO”. 2 2 ) ) With “YES” in the display, press the right arrow and “SP-7A” “USE ‘0’ FOR 3 3 ) ) IDLE”... -
Page 35: Split Vat
filtering after 3/4 of the programmed cook cycles must be completed before the control suggests filtering. Press the right arrow and “SP-8B” “LOCKOUT ENABLED?” shows in the left 3 3 ) ) display. Press the up or down arrow to choose “YES or “NO”. 4 4 ) ) If set to “YES”, when controls suggest filtering, “FILTER LOCKOUT”/“YOU 5 5 ) ) -
Page 36: Full Vat
5 5 . . 1 1 . . 8 8 . . 2 2 . . 2 2 F F u u l l l l V V a a t t If unit is a full vat, “SP-8A” and “FULL VAT FILTER CYCLES” shows in the left 1 1 ) ) display, and the number of cook cycles between filters shows on the right display (0 to 99). -
Page 37: Sp-14 Number Of Baskets
5 5 . . 1 1 . . 1 1 4 4 S S P P - - 1 1 4 4 N N u u m m b b e e r r O O f f B B a a s s k k e e t t s s Press and release the right arrow until “SP-14 NUMBER OF BASKETS”... -
Page 38: Sp-22 Bulk Oil Supply
Press the up or down arrow to choose “SPLIT” or “FULL”. 2 2 ) ) 5 5 . . 1 1 . . 2 2 1 1 S S P P - - 2 2 1 1 A A u u t t o o - - L L i i f f t t E E n n a a b b l l e e d d Press and release the right arrow until “SP-21 AUTOLIFT ENABLED?”... -
Page 39: Sp-27 Dispose Requires Code
5 5 . . 1 1 . . 2 2 6 6 S S P P - - 2 2 6 6 U U s s a a g g e e C C o o d d e e C C h h a a n n g g e e This allows the operator to change the reset usage code (factory set at 1, 2, 3) to reset the usage amounts of each product. -
Page 40: Tech Mode
C C o o n n t t r r o o l l M M o o d d e e s s The Data Logging, Heat Control, Tech, Stat and Filter Control Modes are advanced diagnostic and program modes, mainly for Henny Penny Corp. use only. For more information on these modes, contact the Service Department at 1-800-417-8405 or 1- 937-456-8405. - Page 41 • T-25 Total Initialization NOTE: Not all Tech Mode functions are discussed in this section. To ensure proper operation of fryer, please consult Henny Penny Corp. before changing any of these settings. For more information on these functions, contact the Service Department at 1-800-417-8405, or 1-937-456-8405.
- Page 42 5 5 . . 4 4 . . 5 5 T T - - 6 6 - - D D i i g g i i t t s s T T e e s s t t Press the timer 1 button to view all segments of each digit across the displays. 1 1 ) ) 5 5 .
- Page 43 DTx = tank full 5 5 . . 4 4 . . 1 1 1 1 T T - - 2 2 1 1 - - P P u u m m p p s s & & V V a a l l v v e e s s Press the down arrow and “LIGHTS”...
- Page 44 • F = Filter Pump (Fx = Filter pump is on) • J = JIB Pump (Jx = JIB pump is on) • N = New Oil Pump(if present) (Nx = RTI new oil pump on) • DI = Discard Valve(if present) (DIo = Disc. valve open/DIc=closed) •...
-
Page 45: Do Not Disturb
• ST-16 System RAM Fade Count • ST-17 Cook RAM Fade Count • ST-18 Product RAM Fade Count • ST-19 Stat RAM Fade Count • ST-20 RAM Data Error Count • ST-21 Data Total Loss Count • ST-22 User Initialization Count •... - Page 46 Press the program button to move to the next timer period, M-F 2. 8 8 ) ) Repeat steps 5, 6, 7, and 8 for other desired time periods. 9 9 ) )
-
Page 47: Table 6-1 Preventative Maintenance Schedule
6 6 . . 3 3 P P r r e e v v e e n n t t a a t t i i v v e e M M a a i i n n t t e e n n a a n n c c e e As in all food service equipment, the Henny Penny open fryer does require care and proper maintenance. - Page 48 6 6 . . 4 4 C C o o n n t t r r o o l l P P a a n n e e l l & & M M e e n n u u C C a a r r d d R R e e p p l l a a c c e e m m e e n n t t Should the control panel become inoperative, or the menu card needs changed, follow these instructions: Remove electrical power supplied to the vat.
- Page 49 Unplug the connectors going to the control board (1). 5 5 ) ) Install a new control panel in reverse order. 6 6 ) ) 6 6 . . 5 5 H H i i g g h h T T e e m m p p e e r r a a t t u u r r e e L L i i m m i i t t C C o o n n t t r r o o l l Remove electrical power supplied to the unit.
-
Page 50: Control Panel & Menu Card Replacement
Using a 3/8” wrench, remove the nuts. 5 5 ) ) Remove the clamp bars. 6 6 ) ) Slide the high limit control off of mounting studs. 7 7 ) ) Install the new control in reverse order. 8 8 ) ) 6 6 . -
Page 51: Table 6-2 Rtd Resistance Chart
6 6 . . 7 7 T T e e m m p p e e r r a a t t u u r r e e P P r r o o b b e e The temperature probe is the center probe inside the vat and it relays the actual oil temperature to the control. - Page 52 6 6 . . 7 7 . . 1 1 T T e e m m p p e e r r a a t t u u r r e e P P r r o o b b e e C C h h e e c c k k o o u u t t W W A A R R N N I I N N G G ! ! S S H H O O C C K K H H A A Z Z A A R R D D T T o o a a v v o o i i d d e e l l e e c c t t r r i i c c a a l l s s h h o o c c k k o o r r p p r r o o p p e e r r t t y y d d a a m m a a g g e e , , m m o o v v e e t t h h e e p p o o w w e e r r s s w w i i t t c c h h t t o o O O F F F F a a n n d d d d i i s s c c o o n n n n e e c c t t m m a a i i n n c c i i r r c c u u i i t t b b r r e e a a k k e e r r , , o o r r u u n n p p l l u u g g c c o o r r d d a a t t w w a a l l l l r r e e c c e e p p t t a a c c l l e e .
- Page 53 Using a 1/2” wrench, remove the nut on the compression fitting, and remove the 4 4 ) ) temperature probe from the vat. Using a terminal extractor, remove the probe terminals from the connector and 5 5 ) ) pull remove probe from unit. Place the nut and new ferrule on the new temperature probe and insert the 6 6 ) ) temperature probe into the compression fitting.
-
Page 54: Figure 6-1 Probe Assembly Install
Hand-tighten compression nut and then a half turn with wrench. 8 8 ) ) Excess force will damage temperature probe. NOTICE Locate temperature probe through pot wall. 9 9 ) ) Place gauge against pot wall as shows in Figure 6-1 Probe Assembly Install , 1 1 0 0 ) ) page Figure 6-1 Probe Assembly Install... - Page 55 6 6 . . 8 8 S S o o l l e e n n o o i i d d V V a a l l v v e e s s Fryers with serial numbers prior to NE1707001 will have solenoid for each vat plumbed into the oil return lines.
- Page 56 6 6 . . 8 8 . . 2 2 S S o o l l e e n n o o i i d d V V a a l l v v e e R R e e p p l l a a c c e e m m e e n n t t Using an adjustable wrench, loosen the front and rear fittings to solenoid (1).
-
Page 57: Figure 6-2 Aif Board
6 6 . . 9 9 S S e e l l e e c c t t o o r r V V a a l l v v e e s s Fryers with serial numbers after NE1707001 will have selector valve for each vat plumbed into the oil return lines. -
Page 58: Figure 6-3 Motor Encoder Assembly, Spool Coupler, And Selector Valve
Figure 6-3 Motor Encoder Assembly, Spool Coupler, and Selector Valve Separate old motor encoder assembly (2) from selector valve (3). See Figure 3 3 ) ) Figure 6-3 Motor Encoder Assembly, Spool Coupler, and Selector Valve , page Connect both harnesses from new motor encoder assembly to AIF board. 4 4 ) ) Power up fryer to let valve find home position. -
Page 59: Figure 6-4 Spool Alignment Indicators Over Port 10
Figure 6-4 Spool Alignment Indicators over Port 10 Align spool coupler (4), valve, and motor encoder assembly, and then seat 7 7 ) ) Figure 6-3 Motor Encoder motor encoder assembly on valve. See Figure Assembly, Spool Coupler, and Selector Valve , page Replace 3 button head cap screws. - Page 60 6 6 . . 1 1 0 0 J J I I B B P P u u m m p p R R e e p p l l a a c c e e m m e e n n t t Remove electrical power supplied to the unit.
-
Page 61: Wheel Removal Cleaning
6 6 . . 1 1 1 1 B B l l o o w w e e r r C C l l e e a a n n i i n n g g W W A A R R N N I I N N G G ! ! S S H H O O C C K K H H A A Z Z A A R R D D T T o o a a v v o o i i d d e e l l e e c c t t r r i i c c a a l l s s h h o o c c k k o o r r p p r r o o p p e e r r t t y y d d a a m m a a g g e e , , m m o o v v e e t t h h e e p p o o w w e e r r s s w w i i t t c c h h t t o o O O F F F F a a n n d d d d i i s s c c o o n n n n e e c c t t m m a a i i n n c c i i r r c c u u i i t t b b r r e e a a k k e e r r , , o o r r u u n n p p l l u u g g c c o o r r d d a a t t w w a a l l l l r r e e c c e e p p t t a a c c l l e e . - Page 62 Attach wheel puller to OD of wheel hub by tighten 3 hex head bolts down with 1/ 2 2 ) ) 2" wrench, making sure to keep the puller centered along the wheel/shaft axis. Turn screw to remove the wheel from the motor shaft. 3 3 ) ) With wheel removed apply degreaser and wash wheel in dishwasher or sink to 4 4 ) )
-
Page 63: Blower Replacement
Turn on blower and verify that pressure is 1.7 inwc at 60 Hz (1.4 inwc at 50 Hz) 7 7 ) ) or greater. If less than 1.7 inwc at 60 Hz (1.4 inwc at 50 Hz) verify the flue is not obstructed then continue to “WHEEL REPLACEMENT”. -
Page 64: Figure 6-5 Filter Beacon Rear
6 6 . . 1 1 3 3 B B l l o o w w e e r r W W h h e e e e l l R R e e p p l l a a c c e e m m e e n n t t Refer to images in 6.11 Blower Cleaning , page 49 for visual reference. -
Page 65: Figure 6-6 Pulling Front Of Filter Beacon
Figure 6-6 Pulling Front of Filter Beacon Locate and cut the light wires and pull the light from unit. See Figure 6-7 Filter 3 3 ) ) Beacon Wires , page Figure 6-7 Filter Beacon Wires Connect new light wires, using wirenuts and install light in reverse order. 4 4 ) ) Restore power to the unit. - Page 66 6 6 . . 1 1 5 5 A A i i r r P P r r e e s s s s u u r r e e S S w w i i t t c c h h e e s s W W A A R R N N I I N N G G ! ! S S H H O O C C K K H H A A Z Z A A R R D D T T o o a a v v o o i i d d e e l l e e c c t t r r i i c c a a l l s s h h o o c c k k o o r r p p r r o o p p e e r r t t y y d d a a m m a a g g e e , , m m o o v v e e t t h h e e p p o o w w e e r r s s w w i i t t c c h h t t o o O O F F F F a a n n d d d d i i s s c c o o n n n n e e c c t t m m a a i i n n c c i i r r c c u u i i t t b b r r e e a a k k e e r r , , o o r r u u n n p p l l u u g g c c o o r r d d a a t t w w a a l l l l r r e e c c e e p p t t a a c c l l e e .
- Page 67 6 6 . . 1 1 6 6 P P i i l l o o t t R R e e p p l l a a c c e e m m e e n n t t W W A A R R N N I I N N G G ! ! S S H H O O C C K K H H A A Z Z A A R R D D T T o o a a v v o o i i d d e e l l e e c c t t r r i i c c a a l l s s h h o o c c k k o o r r p p r r o o p p e e r r t t y y d d a a m m a a g g e e , , m m o o v v e e t t h h e e p p o o w w e e r r s s w w i i t t c c h h t t o o O O F F F F a a n n d d d d i i s s c c o o n n n n e e c c t t m m a a i i n n c c i i r r c c u u i i t t b b r r e e a a k k e e r r , , o o r r u u n n p p l l u u g g c c o o r r d d a a t t w w a a l l l l r r e e c c e e p p t t a a c c l l e e .
- Page 68 Disconnect the flame sensor. 8 8 ) ) Replace pilot in reverse order. 9 9 ) ) When screwing the pilot back to the burner assembly, be sure to connect the 1 1 0 0 ) ) ground wire to the right hand screw.
-
Page 69: Prices
7 7 . . 2 2 G G e e n n u u i i n n e e P P a a r r t t s s Use only genuine Henny Penny parts in your fryer. Using a part of lesser quality or substitute design may result in damage to the unit or personal injury. -
Page 70: Figure 7-1 Operating Components
7 7 . . 7 7 R R e e c c o o m m m m e e n n d d e e d d S S p p a a r r e e P P a a r r t t s s F F o o r r D D i i s s t t r r i i b b u u t t o o r r s s Recommended replacement parts are indicated with A or B in the parts lists: A = parts to be stocked on service vans or trucks. - Page 71 Stock Description Qty. Item No. Part No. Level - - - - - DRAIN VALVE/LINKAGE ASSEMBLY 1/VAT (SEE Figure 7-9 Manual Drain Valve Link- age (Units Manufactured prior to April 2018) , page 73 FOR BREAKDOWN) 77575 CASTER - SWIVEL W/ BRAKE (FRONT) 77679 CASTER - SWIVEL W/O BRAKE (BACK) 151704...
-
Page 72: Table 7-1
Figure 7-2 Drain Pan Assembly Stock Item Description Qty. Part No. Level 152634 ASSY - DRAIN PAN W/ CASTER 152635 — ASSY - DRAIN PAN COVER 163322 — WELD ASSY - CRUMB CATCHER 85503 — WELD ASSY - FILTER WEIGHT 85519 —... -
Page 73: Figure 7-3 Thermocouple & Probe Assembly
Stock Item Description Qty. Part No. Level 19004 — CASTER - SWIVEL 2 IN SC01-009 — SCREW 1/4 - 20 X 1/2 THD 4/WHEEL NS04-005 — LOCKNUT 1/4 - 20 4/WHEEL 86349 O-RING - 116 SUCTION LINE 11 * 12074 SMART FILTERS (PAD) - 30 COUNT 11 * 12076... -
Page 74: Figure 7-4 Burner Assembly
Figure 7-4 Burner Assembly Stock Item Part No. Description Qty. Level 77941–001 ASSY - BURNER PILOT MANF FULL - NAT, 1/VAT I2H, I2E <5K 77941–002 ASSY - BURNER PILOT MANF FULL - PRO- 1/VAT PANE, I3P <5K 77941–004 ASSY - BURNER PILOT MANF FULL - NAT >5K 1/VAT 77941–005 ASSY-BURNER PILOT MANF FULL - I2S 1/VAT... - Page 75 Stock Item Part No. Description Qty. Level 77941–013 ASSY-BURNER PILOT MANF FULL - PRO- 1/VAT PANE >5K 77942–001 ASSY-BURNER PILOT MANF SPLIT - NAT, 1/VAT I2H, I2E <5K 77942–002 ASSY-BURNER PILOT MANF SPLIT - PRO- 1/VAT PANE, I3P <5K 77942–004 ASSY-BURNER PILOT MANF SPLIT - NAT >5K 1/VAT 77942–005...
-
Page 76: Figure 7-5 Eeg-16X / 24X Door Break Down
Figure 7-5 EEG-16X / 24X Door Break Down Bottom Hinge Bottom Hinge Door Handle Door Hinge Bushing (Door) (Frame) (Pocket Pull) Number (Door) 1 1 5 5 0 0 3 3 0 0 0 0 93370 93369 150624 39752 41836 9 9 2 2 3 3 4 4 8 8 93370 93369... -
Page 77: Figure 7-6 Burners, Gas Valves & Transformers
Figure 7-6 Burners, Gas Valves & Transformers Stock Item Description Qty. Part No. Level 87663-101 SVC-PACK - GAS VALVE - NAT - FULL WELL 87663-102 SVC-PACK - GAS VALVE- NAT - SPLIT WELL * = Not Shown / BRNR = Burner... -
Page 78: Table 7-2 Pilot Kit Numbers
Stock Item Description Qty. Part No. Level 87663-103 SVC-PACK - GAS VALVE - LP - FULL WELL 87663-104 SVC-PACK - GAS VALVE - LP - SPLIT WELL 87663-105 SVC-PACK - GAS VALVE - NAT - CE FULL WELL 87663-106 SVC-PACK - GAS VALVE - NAT - CE SPLIT WELL - LEFT 87663-107 SVC-PACK - GAS VALVE - LP - CE FULL... -
Page 79: Table 7-3 Vat (Pot) Replacement Kit Numbers
T T a a b b l l e e 7 7 - - 2 2 P P i i l l o o t t K K i i t t N N u u m m b b e e r r s s Kit Number Description 140296... - Page 80 T T a a b b l l e e 7 7 - - 6 6 F F l l e e x x T T u u b b e e P P a a r r t t N N u u m m b b e e r r s s Length (in.) Stock Level Part Number...
-
Page 81: Table 7-7 Misc Kit Numbers
T T a a b b l l e e 7 7 - - 7 7 M M I I S S C C K K i i t t N N u u m m b b e e r r s s D D e e s s c c r r i i p p t t i i o o n n K K i i t t N N u u m m b b e e r r 140229... -
Page 82: Figure 7-7 Blower Motor Assembly
Figure 7-7 Blower Motor Assembly Stock Item Description Qty. Part No. Level 79213 TRANSDUCER - PRESSURE 30 92963-001 BLOWER MOTOR - FLUE EX- 1/WELL HAUST 115V— Applies to serial numbers before NX1611006 92963-002 BLOWER MOTOR - FLUE EX- 1/WELL HAUST 230V — Applies to serial numbers before NX1611006 162245–001 BLOWER MOTOR —... -
Page 83: Table 7-6 Flex Tube Part Numbers
Stock Item Description Qty. Part No. Level 162245–002 BLOWER MOTOR — FLUE EX- 1/WELL HAUST 220–240V— Applies to serial numbers after NX1611006 Table 7-6 Flex 77523–XXX FLEX TUBE (SEE - - - - - Tube Part Numbers , page 152902-001 CORD - POWER 151744 VALVE - 120V SOLENOID 1/2NPT... -
Page 84: Figure 7-8 Smart Touch Drain Valve
Figure 7-8 Smart Touch Drain Valve Stock Description Qty. Item No. Part No. Level 81911 DRAIN VALVE AND ACTUATOR ASSEMBLY 86157 DRAIN VALVE ACTUATOR MO- TOR ONLY 140244 DRAIN VALVE (Includes O-ring) 84415 O-RING * = Not Shown Recommended Parts Stock Level: A = Truck Stock / B = Dist. Stock... -
Page 85: Figure 7-9 Manual Drain Valve Linkage (Units Manufactured Prior To April 2018)
Figure 7-9 Manual Drain Valve Linkage (Units Manufactured prior to April 2018) Stock Item Description Qty. Part No. Level 154051 VALVE - DRAIN 1 1/2 NPT & CAM LOCK 1/VAT 81911 DRAIN VALVE/ACTUATOR ASSY 1/VAT — 86157 — DRAIN VALVE ACTUATOR (ACTUA- 1/VAT TOR ONLY) —... - Page 86 Stock Item Description Qty. Part No. Level 151156 PIVOT BUSHING ROD LINKAGE 1/VAT 150181 SPACER - DRAIN ROD LINKAGE 1/VAT PN01-039 PIN - COTTER 3/32 X 1 1/VAT 95704-002 TUBE - VALVE TO TROUGH 4.5 1/VAT ROD - DRAIN 1/VAT 16101 KNOB - SPINDLE (BLACK) 1/VAT...
-
Page 87: Figure 7-10 Manual Drain Valve Linkage (Units Manufactured After April 2018)
Figure 7-10 Manual Drain Valve Linkage (Units Manufactured after April 2018) Stock Item Description Qty. Part No. Level * = Not Shown (see notice) 154051 VALVE - DRAIN 1 1/2 NPT & CAM LOCK 1/VAT 18227 SWITCH-MICRO-250F X 1/VAT 163730 WELD ASSY-DRAIN SWITCH LINKAGE 1/VAT NS01–020... -
Page 88: Figure 7-11 Filter Pump Motor Assembly (Units Manufactured Prior To Sept. 2018)
Figure 7-11 Filter Pump Motor Assembly (Units Manufactured Prior to Sept. 2018) Stock Item Description Qty. Part No. Level 151534-001 ASSY - FILTER PUMP MOTOR 60HZ — 67583 — MOTOR - 1/2 HP FILTER PUMP — 17437 — ASSY - SUB PUMP 5 GPM —... -
Page 89: Figure 7-12 Filter Pump Motor Assembly (Units Manufactured After Sept. 2018)
Figure 7-12 Filter Pump Motor Assembly (Units Manufactured After Sept. 2018) Stock Item Part No. Description Qty. Level 164184–001 MOTOR, 1/2 HP — 60 Hz — Applies to serial num- bers after NX1708071 164184–002 MOTOR, 1/2 HP — 50 Hz — CE — Applies to seri- al numbers after NE1711020 164323 PUMP ASSEMBLY, 5 GPM HUBMOUNTED... -
Page 90: Figure 7-13 Behind Side Panels
Figure 7-13 Behind Side Panels Stock Item Description Qty. Part No. Level ME90-008 P&B T92 RELAY 12VDC COIL 30AMP ME90-005 RELAY 12V OC COIL SPDT 84454 ASSY - EVOLUTION ELITE AIF PCB 85698 ASSY - MCD LOV SELECTOR AIF 77992 SWITCH - PRESSURE 0.80 1/VAT 79443... - Page 91 C C h h a a p p t t e e r r 8 8 D D i i a a g g r r a a m m s s 8 8 . . 1 1 P P l l u u m m b b i i n n g g D D i i a a g g r r a a m m...
- Page 92 8 8 . . 2 2 W W i i r r i i n n g g D D i i a a g g r r a a m m s s...
-
Page 93: Table 8-1 Wiring Legend
T T a a b b l l e e 8 8 - - 1 1 W W I I R R I I N N G G L L E E G G E E N N D D ABBREVIATION DEFINITION ABBREVIATION... -
Page 95: Table 9-1 Annual (12 Month) Inspection Checklist
C C h h a a p p t t e e r r 9 9 A A n n n n u u a a l l I I n n s s p p e e c c t t i i o o n n C C h h e e c c k k l l i i s s t t F F o o r r m m T T a a b b l l e e 9 9 - - 1 1 A A n n n n u u a a l l ( ( 1 1 2 2 m m o o n n t t h h ) ) I I n n s s p p e e c c t t i i o o n n C C h h e e c c k k l l i i s s t t A A s s s s e e s s s s V V a a t t a a n n d d F F r r a a m m e e ( ( r r e e m m o o v v e e r r e e a a r r c c o o v v e e r r a a n n d d b b o o t t h h... - Page 96 Remove all pressure system tubing. Inspect, clean, or replace any tubing or fitting that is blocked, or ob- structed. If leaking is found at any fitting, clean and re- place the compression fitting. Filter Components and Drain Oil Verify all components of the drain pan are present and not damaged.
- Page 97 the modules. Verify high limit thermocouples are clean and mounted properly to the heating elements. Test filtration system – motor is running, oil is pumping freely back to fry pot. No leaks and no leaks back to drain pan (drain valve, check valve not leaking). Pump all oil back to fry pot.
- Page 98 H H e e n n n n y y P P e e n n n n y y C C o o r r p p o o r r a a t t i i o o n n P P .