Advertisement
Advertisement
Table of Contents

Summary of Contents for Swann SWWHD-DP890C
- Page 1 Security Made Smarter Wireless Doorphone Intercom INSTRUCTION MANUAL...
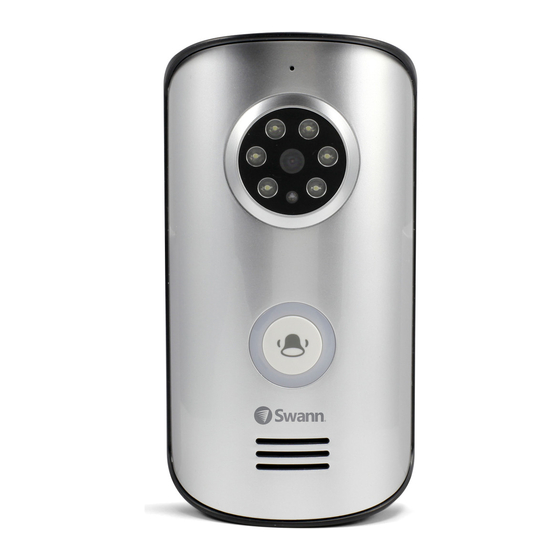
- Page 2 DOORBELL OVERVIEW MICROPHONE LEDS CAMERA LENS LIGHT SENSOR Detects ambient light and turns on the LEDS to provide clear color night images, if necessary DOORBELL BUTTON LED RING SPEAKER...
-
Page 3: Handset Overview
HANDSET OVERVIEW DISPLAY SPEAKER LEFT SOFTKEY RIGHT SOFTKEY (MONITOR / (MENU / SELECT) SNAPSHOT / BACK) ACCEPT CALL END CALL / POWER BATTERY COMPARTMENT CHARGING LED / UNLOCK NAVIGATION KEYS MICROPHONE Carefully peel off the protective film. -
Page 4: Installing The Handset Battery
INSTALLING THE HANDSET BATTERY Battery Remove the battery compartment cover from the back of the handset and insert the supplied battery. Make sure to peel off the gold protective film covering the battery contact points. Slide the battery compartment cover back into place. -
Page 5: Installing The Handset Charger
INSTALLING THE HANDSET CHARGER Plug the handset charger Plug the charger adapter The LED on the handset adapter into the socket into a power outlet and then charger lights up to indicate marked DC12V underneath switch on the power outlet. that it is powered. - Page 6 INSTALLING THE DOORBELL The doorbell can be powered using either a direct power connection with the power adapter supplied or two size "C" batteries (see next page). Doorbell Power Adapter Connection CAUTION - DO NOT SWITCH ON POWER SUPPLY UNTIL WIRES HAVE BEEN CONNECTED TO THE DOORBELL.
-
Page 7: Doorbell Battery Installation
INSTALLING THE DOORBELL Doorbell Battery Installation You can also power the doorbell with two size "C" batteries for a fast, wire-free installation. Use premium quality alkaline batteries for long-lasting performance. CAUTION - DO NOT USE BATTERIES AND MAINS POWER CONNECTION TOGETHER TO POWER DOORBELL. DOING SO MAY CAUSE THE BATTERIES TO SWELL OR EXPLODE. - Page 8 CHANGING THE DOORBELL BATTERY SETTING If the doorbell is powered by batteries and you want to use the "Monitor" function on the handset, you will need to change the battery setting on the doorbell from Power Saving mode, which is the default, to Normal Power mode.
- Page 9 MOUNTING THE DOORBELL The ideal installation height of the doorbell is at about chest height, around 1.6m / 5.2ft from the ground. Before mounting the doorbell, make sure you test if the location you install the doorbell is in range. Tamper sensor Detects if the doorbell is detached from the...
-
Page 10: Using The Handset
USING THE HANDSET Turning the power on/off • To power on, press and hold for 1 second. • To power off, press and hold for 3 seconds. Waking up the display When the handset is idle after 15 seconds, the display turns off. •... - Page 11 USING THE HANDSET Checking the handset battery level You can check the battery icon at the top right of the display for an indication of the charge remaining in the battery. When the battery icon is flashing red, the battery level is low and the handset should be charged immediately using the charger before it automatically powers off.
- Page 12 THE HANDSET MENU Volume Allows you to adjust the following volume settings: • Talking Volume - The listening volume during a call. • Ringing Volume - The volume of the ringtone. • Ringing Time - The amount of time the handset rings when there is an incoming call. Brightness Allows you to adjust the brightness of the display.
- Page 13 THE HANDSET MENU Door Set Allows you to manage the following doorbell settings: • Volume - The speaker volume of the doorbell. • Ring Time - The amount of time the doorbell chime rings when the doorbell button is pressed. •...
- Page 14 APPENDIX Registering a doorbell The supplied doorbell and handset units are pre-registered. If, for some reason, the doorbell is not registered to the handset (you have reset the handset, for example), or if you have an additional doorbell to register, follow the steps below: Doorbell 1.
- Page 15 You must present your receipt as proof of date of purchase for warranty validation. Any unit which proves defective during the stated period will be repaired without charge for parts or labour or replaced at the sole discretion of Swann. The end user is responsible for all freight charges incurred to send the product to Swann’s repair centres.
-
Page 16: Helpdesk / Technical Support Details
Helpdesk / Technical Support Details Telephone Helpdesk USA & CANADA 1800 627 2799 AUSTRALIA 1800 788 210 NEW ZEALAND 0800 479 266 0808 168 9031 Technical Support All Countries E-mail: tech@swann.com © Swann Communications 2017 MDP890CVER1E...


