SATO MB200i Quick Manual
Hide thumbs
Also See for MB200i:
- Programming reference manual (158 pages) ,
- Operator's manual (86 pages) ,
- Service manual (84 pages)
Table of Contents
Advertisement
Quick Links
Barcode Printer
1 2 3 4 5 6 7 8 9 0 1 2 3 4 5 6 7 8 9 0 1 2 3 4 5 6 7 8 9 0 1
1 2 3 4 5 6 7 8 9 0 1 2 3 4 5 6 7 8 9 0 1 2 3 4 5 6 7 8 9 0 1
1 2 3 4 5 6 7 8 9 0 1 2 3 4 5 6 7 8 9 0 1 2 3 4 5 6 7 8 9 0 1
1 2 3 4 5 6 7 8 9 0 1 2 3 4 5 6 7 8 9 0 1 2 3 4 5 6 7 8 9 0 1
1 2 3 4 5 6 7 8 9 0 1 2 3 4 5 6 7 8 9 0 1 2 3 4 5 6 7 8 9 0 1
1 2 3 4 5 6 7 8 9 0 1 2 3 4 5 6 7 8 9 0 1 2 3 4 5 6 7 8 9 0 1
Quick Guide
1 2 3 4 5 6 7 8 9 0 1 2 3 4 5 6 7 8 9 0 1 2 3 4 5 6 7 8 9 0 1
1 2 3 4 5 6 7 8 9 0 1 2 3 4 5 6 7 8 9 0 1 2 3 4 5 6 7 8 9 0 1
1 2 3 4 5 6 7 8 9 0 1 2 3 4 5 6 7 8 9 0 1 2 3 4 5 6 7 8 9 0 1
1 2 3 4 5 6 7 8 9 0 1 2 3 4 5 6 7 8 9 0 1 2 3 4 5 6 7 8 9 0 1
1 2 3 4 5 6 7 8 9 0 1 2 3 4 5 6 7 8 9 0 1 2 3 4 5 6 7 8 9 0 1
1 2 3 4 5 6 7 8 9 0 1 2 3 4 5 6 7 8 9 0 1 2 3 4 5 6 7 8 9 0 1
1 2 3 4 5 6 7 8 9 0 1 2 3 4 5 6 7 8 9 0 1 2 3 4 5 6 7 8 9 0 1
1 2 3 4 5 6 7 8 9 0 1 2 3 4 5 6 7 8 9 0 1 2 3 4 5 6 7 8 9 0 1
1 2 3 4 5 6 7 8 9 0 1 2 3 4 5 6 7 8 9 0 1 2 3 4 5 6 7 8 9 0 1
1 2 3 4 5 6 7 8 9 0 1 2 3 4 5 6 7 8 9 0 1 2 3 4 5 6 7 8 9 0 1
1 2 3 4 5 6 7 8 9 0 1 2 3 4 5 6 7 8 9 0 1 2 3 4 5 6 7 8 9 0 1
1 2 3 4 5 6 7 8 9 0 1 2 3 4 5 6 7 8 9 0 1 2 3 4 5 6 7 8 9 0 1
1 2 3 4 5 6 7 8 9 0 1 2 3 4 5 6 7 8 9 0 1 2 3 4 5 6 7 8 9 0 1
1 2 3 4 5 6 7 8 9 0 1 2 3 4 5 6 7 8 9 0 1 2 3 4 5 6 7 8 9 0 1
1 2 3 4 5 6 7 8 9 0 1 2 3 4 5 6 7 8 9 0 1 2 3 4 5 6 7 8 9 0 1
1 2 3 4 5 6 7 8 9 0 1 2 3 4 5 6 7 8 9 0 1 2 3 4 5 6 7 8 9 0 1
1 2 3 4 5 6 7 8 9 0 1 2 3 4 5 6 7 8 9 0 1 2 3 4 5 6 7 8 9 0 1
1 2 3 4 5 6 7 8 9 0 1 2 3 4 5 6 7 8 9 0 1 2 3 4 5 6 7 8 9 0 1
1 2 3 4 5 6 7 8 9 0 1 2 3 4 5 6 7 8 9 0 1 2 3 4 5 6 7 8 9 0 1
1 2 3 4 5 6 7 8 9 0 1 2 3 4 5 6 7 8 9 0 1 2 3 4 5 6 7 8 9 0 1
1 2 3 4 5 6 7 8 9 0 1 2 3 4 5 6 7 8 9 0 1 2 3 4 5 6 7 8 9 0 1
1 2 3 4 5 6 7 8 9 0 1 2 3 4 5 6 7 8 9 0 1 2 3 4 5 6 7 8 9 0 1
1 2 3 4 5 6 7 8 9 0 1 2 3 4 5 6 7 8 9 0 1 2 3 4 5 6 7 8 9 0 1
1 2 3 4 5 6 7 8 9 0 1 2 3 4 5 6 7 8 9 0 1 2 3 4 5 6 7 8 9 0 1
1 2 3 4 5 6 7 8 9 0 1 2 3 4 5 6 7 8 9 0 1 2 3 4 5 6 7 8 9 0 1
1 2 3 4 5 6 7 8 9 0 1 2 3 4 5 6 7 8 9 0 1 2 3 4 5 6 7 8 9 0 1
1 2 3 4 5 6 7 8 9 0 1 2 3 4 5 6 7 8 9 0 1 2 3 4 5 6 7 8 9 0 1
1 2 3 4 5 6 7 8 9 0 1 2 3 4 5 6 7 8 9 0 1 2 3 4 5 6 7 8 9 0 1
1 2 3 4 5 6 7 8 9 0 1 2 3 4 5 6 7 8 9 0 1 2 3 4 5 6 7 8 9 0 1
1 2 3 4 5 6 7 8 9 0 1 2 3 4 5 6 7 8 9 0 1 2 3 4 5 6 7 8 9 0 1
1 2 3 4 5 6 7 8 9 0 1 2 3 4 5 6 7 8 9 0 1 2 3 4 5 6 7 8 9 0 1
1 2 3 4 5 6 7 8 9 0 1 2 3 4 5 6 7 8 9 0 1 2 3 4 5 6 7 8 9 0 1
1 2 3 4 5 6 7 8 9 0 1 2 3 4 5 6 7 8 9 0 1 2 3 4 5 6 7 8 9 0 1
1 2 3 4 5 6 7 8 9 0 1 2 3 4 5 6 7 8 9 0 1 2 3 4 5 6 7 8 9 0 1
Advertisement
Table of Contents

Related Manuals for SATO MB200i


Summary of Contents for SATO MB200i
- Page 1 Barcode Printer 1 2 3 4 5 6 7 8 9 0 1 2 3 4 5 6 7 8 9 0 1 2 3 4 5 6 7 8 9 0 1 1 2 3 4 5 6 7 8 9 0 1 2 3 4 5 6 7 8 9 0 1 2 3 4 5 6 7 8 9 0 1 1 2 3 4 5 6 7 8 9 0 1 2 3 4 5 6 7 8 9 0 1 2 3 4 5 6 7 8 9 0 1 1 2 3 4 5 6 7 8 9 0 1 2 3 4 5 6 7 8 9 0 1 2 3 4 5 6 7 8 9 0 1 1 2 3 4 5 6 7 8 9 0 1 2 3 4 5 6 7 8 9 0 1 2 3 4 5 6 7 8 9 0 1...
-
Page 2: Table Of Contents
Introduction Table of Contents This manual is intended to help you become familiar with the Safety Precautions ........4 basic operation of MB200i/MB201i the barcode printer in a Markings and Symbols ......4 short time. Precautions in Use ........ 13 Please read this manual carefully to make full use of the Unpacking .......... -
Page 3: Safety Precautions
Symbol examples 1. Safety Precautions The triangle ( ) indicates something you should In this section, safety precautions about printer operation take absolute care with. The cautions are indicated concretely within the symbol. The symbol on the left are explained to ensure proper care and usage. Make sure indicates a risk of electric shock. - Page 4 Warning Warning Liquid Abnormal Conditions Do not place any container with water or chemicals, Continued use of the printer while it is emitting smoke such as flower vase or cup, as well as small metallic or strange odors creates the danger of fire or electric objects, near the printer.
- Page 5 Warning Caution AC Adapter/Battery Charger (Option) Location • Use only the specified voltage. Using a different Do not locate the printer in the area subjected to high voltage may create the danger of fire or electric humidity or dew. If dew forms inside the printer, shock.
- Page 6 Warning Warning This device complies with Part 15 of the FCC Rules. This manual show that both the specification of Bluetooth and wireless Operation is subject to the following two conditions: LAN. Please refer to the corresponding section which shows (1) This device may not cause harmful interference, and specification of Bluetooth or wireless LAN.
-
Page 7: Precautions In Use
Precautions in Use Caution Replacing the Battery Pack Do not place the printer in a hot or cold place. • Use only the specified battery pack. The operation temperature range is -15°C to 50°C. Do not • When replacing the battery pack, make sure to place the printer in an area with high humidity or at the install the pack with the correct direction. -
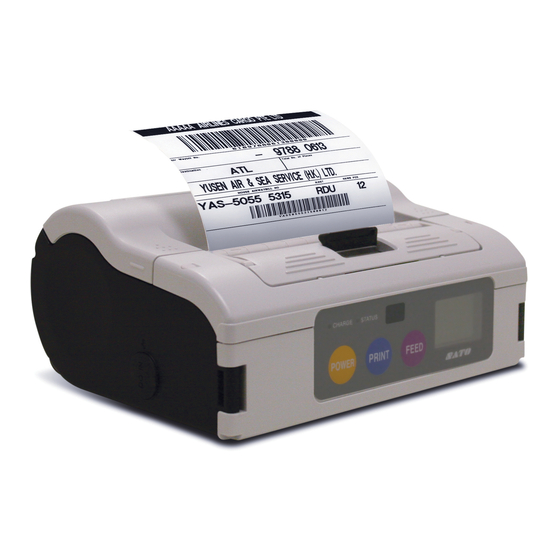
Page 9: Parts Name
3. Parts Name Label ejection Open cover Platen Easy cutter Cover open/close lever Label width scale Label guide Dispenser unit Label guide adjust dial RS-232C cover LCD * Label guide adjust dial cover Battery cover POWER key RS-232C Cover for DC input jack connector PRINT key Belt clip... -
Page 10: Name And Function Of Controls
Name and Function of Controls 4. Before Starting RS-232C Interface: Connects to Belt clip: Used when hanging the Charging the Battery Pack PC or handy terminal. Used for printer on your belt. connecting to a computer. * Do not hang the printer on to Signal:Low level -6.6 to +6.6 V anything but a belt. - Page 11 CHARGE lamp may blink for a while. This does not indicate an error. You completed (fully charged), can continue charging. the CHARGE lamp goes off. In case of five-socket • The battery pack can be recharged by about 300 times (when used in charger, charging starts and normal temperature).
-
Page 12: Installing And Removing The Battery Pack
In the case of the LCD built- Installing and removing the Battery Pack in wireless LAN interface model, CHARGE LED lights red when charging starts and Open the battery cover. is completed (fully charged), the CHARGE LED goes off. Charging Time It takes about 5 hours for the battery pack to reach full charge from a fully discharged state. -
Page 13: Using Ac Adapter
* Make sure to turn the printer power off when Using AC Adapter removing or replacing the battery. When the printer is turned off, the STATUS LED Follow the procedure below to use the printer with the AC goes off. Do not remove the battery while the adapter (option). -
Page 14: Setting Labels
Open the label guide Setting Labels adjust dial cover and turn the dial till the The method of setting label may vary depending on the print label guide fits with mode. label roll. Label guide adjust dial Continuous mode Labels Journal Turn the label roll lightly by the hand and confirm that it... -
Page 15: Test Printing
5. Test Printing 6. Reference Options Pressing and holding the FEED key, set the User Option POWER key . The PO W printer enters the test Battery Pack (Supplied with the P R IN mode. Press the FEED printer) FE E key again to start test Preparing a spare battery pack printing. -
Page 16: Dip Switch
AC Adapter DIP Switch Setting Used to supply power from DIP switch Starting mode Cover domestic power supply. PRINT FEED Interface Description The DC output terminal of the AC Close RS-232C Normal print mode adapter is connected to the Close User test print mode Model No. -
Page 17: Basic Specifications Of Mb200I/Mb201I
0°, 90°, 180°, 270° Print speed 103 mm/s max. (The speed varies depending on Character type SATO standard font: X20, X21, X22, X23, X24, print duty and environment of use.) OCR-A, OCR-B, POP character Dimensions Printer: 119 mm (width) x 64 mm (depth) x 88 mm... - Page 18 Item Description Options Battery pack, AC adapter, Battery charger (Single- socket), Battery charger (5-socket), Rainproof case, Shoulder belt, Belt hook (one-touch type), Waist case, RS-232C cable...
- Page 20 A A d d d d i i t t i i o o n n a a l l P P a a g g e e U U s s e e r r O O p p t t i i o o n n 1 1 .