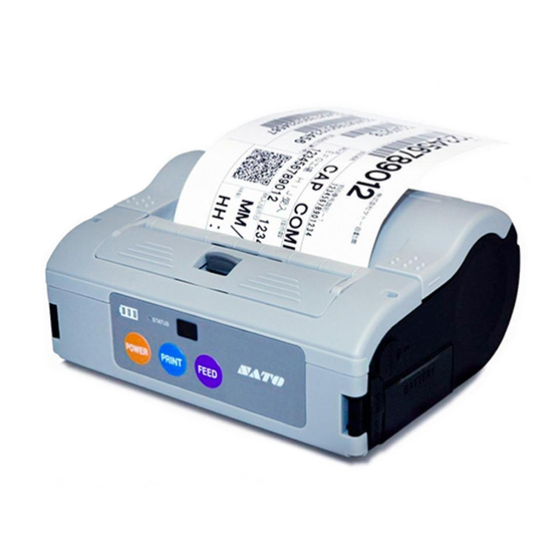
SATO MB400I Quick Manual
Sato printer user manual
Hide thumbs
Also See for MB400I:
- Operator's manual (86 pages) ,
- Quick manual (52 pages) ,
- Specifications (2 pages)
Table of Contents
Advertisement
Quick Links
Barcode Printer
Quick Guide
1 2 3 4 5 6 7 8 9 0 1 2 3 4 5 6 7 8 9 0 1 2 3 4 5 6 7 8 9 0 1 2 1 2 3 4 5 6 7
1 2 3 4 5 6 7 8 9 0 1 2 3 4 5 6 7 8 9 0 1 2 3 4 5 6 7 8 9 0 1 2 1 2 3 4 5 6 7
1 2 3 4 5 6 7 8 9 0 1 2 3 4 5 6 7 8 9 0 1 2 3 4 5 6 7 8 9 0 1 2 1 2 3 4 5 6 7
1 2 3 4 5 6 7 8 9 0 1 2 3 4 5 6 7 8 9 0 1 2 3 4 5 6 7 8 9 0 1 2 1 2 3 4 5 6 7
1 2 3 4 5 6 7 8 9 0 1 2 3 4 5 6 7 8 9 0 1 2 3 4 5 6 7 8 9 0 1 2 1 2 3 4 5 6 7
1 2 3 4 5 6 7 8 9 0 1 2 3 4 5 6 7 8 9 0 1 2 3 4 5 6 7 8 9 0 1 2 1 2 3 4 5 6 7
1 2 3 4 5 6 7 8 9 0 1 2 3 4 5 6 7 8 9 0 1 2 3 4 5 6 7 8 9 0 1 2 1 2 3 4 5 6 7
1 2 3 4 5 6 7 8 9 0 1 2 3 4 5 6 7 8 9 0 1 2 3 4 5 6 7 8 9 0 1 2 1 2 3 4 5 6 7
1 2 3 4 5 6 7 8 9 0 1 2 3 4 5 6 7 8 9 0 1 2 3 4 5 6 7 8 9 0 1 2 1 2 3 4 5 6 7
1 2 3 4 5 6 7 8 9 0 1 2 3 4 5 6 7 8 9 0 1 2 3 4 5 6 7 8 9 0 1 2 1 2 3 4 5 6 7
1 2 3 4 5 6 7 8 9 0 1 2 3 4 5 6 7 8 9 0 1 2 3 4 5 6 7 8 9 0 1 2 1 2 3 4 5 6 7
1 2 3 4 5 6 7 8 9 0 1 2 3 4 5 6 7 8 9 0 1 2 3 4 5 6 7 8 9 0 1 2 1 2 3 4 5 6 7
1 2 3 4 5 6 7 8 9 0 1 2 3 4 5 6 7 8 9 0 1 2 3 4 5 6 7 8 9 0 1 2 1 2 3 4 5 6 7
1 2 3 4 5 6 7 8 9 0 1 2 3 4 5 6 7 8 9 0 1 2 3 4 5 6 7 8 9 0 1 2 1 2 3 4 5 6 7
1 2 3 4 5 6 7 8 9 0 1 2 3 4 5 6 7 8 9 0 1 2 3 4 5 6 7 8 9 0 1 2 1 2 3 4 5 6 7
1 2 3 4 5 6 7 8 9 0 1 2 3 4 5 6 7 8 9 0 1 2 3 4 5 6 7 8 9 0 1 2 1 2 3 4 5 6 7
1 2 3 4 5 6 7 8 9 0 1 2 3 4 5 6 7 8 9 0 1 2 3 4 5 6 7 8 9 0 1 2 1 2 3 4 5 6 7
1 2 3 4 5 6 7 8 9 0 1 2 3 4 5 6 7 8 9 0 1 2 3 4 5 6 7 8 9 0 1 2 1 2 3 4 5 6 7
1 2 3 4 5 6 7 8 9 0 1 2 3 4 5 6 7 8 9 0 1 2 3 4 5 6 7 8 9 0 1 2 1 2 3 4 5 6 7
1 2 3 4 5 6 7 8 9 0 1 2 3 4 5 6 7 8 9 0 1 2 3 4 5 6 7 8 9 0 1 2 1 2 3 4 5 6 7
1 2 3 4 5 6 7 8 9 0 1 2 3 4 5 6 7 8 9 0 1 2 3 4 5 6 7 8 9 0 1 2 1 2 3 4 5 6 7
1 2 3 4 5 6 7 8 9 0 1 2 3 4 5 6 7 8 9 0 1 2 3 4 5 6 7 8 9 0 1 2 1 2 3 4 5 6 7
1 2 3 4 5 6 7 8 9 0 1 2 3 4 5 6 7 8 9 0 1 2 3 4 5 6 7 8 9 0 1 2 1 2 3 4 5 6 7
1 2 3 4 5 6 7 8 9 0 1 2 3 4 5 6 7 8 9 0 1 2 3 4 5 6 7 8 9 0 1 2 1 2 3 4 5 6 7
1 2 3 4 5 6 7 8 9 0 1 2 3 4 5 6 7 8 9 0 1 2 3 4 5 6 7 8 9 0 1 2 1 2 3 4 5 6 7
1 2 3 4 5 6 7 8 9 0 1 2 3 4 5 6 7 8 9 0 1 2 3 4 5 6 7 8 9 0 1 2 1 2 3 4 5 6 7
1 2 3 4 5 6 7 8 9 0 1 2 3 4 5 6 7 8 9 0 1 2 3 4 5 6 7 8 9 0 1 2 1 2 3 4 5 6 7
1 2 3 4 5 6 7 8 9 0 1 2 3 4 5 6 7 8 9 0 1 2 3 4 5 6 7 8 9 0 1 2 1 2 3 4 5 6 7
1 2 3 4 5 6 7 8 9 0 1 2 3 4 5 6 7 8 9 0 1 2 3 4 5 6 7 8 9 0 1 2 1 2 3 4 5 6 7
1 2 3 4 5 6 7 8 9 0 1 2 3 4 5 6 7 8 9 0 1 2 3 4 5 6 7 8 9 0 1 2 1 2 3 4 5 6 7
1 2 3 4 5 6 7 8 9 0 1 2 3 4 5 6 7 8 9 0 1 2 3 4 5 6 7 8 9 0 1 2 1 2 3 4 5 6 7
1 2 3 4 5 6 7 8 9 0 1 2 3 4 5 6 7 8 9 0 1 2 3 4 5 6 7 8 9 0 1 2 1 2 3 4 5 6 7
1 2 3 4 5 6 7 8 9 0 1 2 3 4 5 6 7 8 9 0 1 2 3 4 5 6 7 8 9 0 1 2 1 2 3 4 5 6 7
1 2 3 4 5 6 7 8 9 0 1 2 3 4 5 6 7 8 9 0 1 2 3 4 5 6 7 8 9 0 1 2 1 2 3 4 5 6 7
1 2 3 4 5 6 7 8 9 0 1 2 3 4 5 6 7 8 9 0 1 2 3 4 5 6 7 8 9 0 1 2 1 2 3 4 5 6 7
1 2 3 4 5 6 7 8 9 0 1 2 3 4 5 6 7 8 9 0 1 2 3 4 5 6 7 8 9 0 1 2 1 2 3 4 5 6 7
1 2 3 4 5 6 7 8 9 0 1 2 3 4 5 6 7 8 9 0 1 2 3 4 5 6 7 8 9 0 1 2 1 2 3 4 5 6 7
1 2 3 4 5 6 7 8 9 0 1 2 3 4 5 6 7 8 9 0 1 2 3 4 5 6 7 8 9 0 1 2 1 2 3 4 5 6 7
1 2 3 4 5 6 7 8 9 0 1 2 3 4 5 6 7 8 9 0 1 2 3 4 5 6 7 8 9 0 1 2 1 2 3 4 5 6 7
1 2 3 4 5 6 7 8 9 0 1 2 3 4 5 6 7 8 9 0 1 2 3 4 5 6 7 8 9 0 1 2 1 2 3 4 5 6 7
1 2 3 4 5 6 7 8 9 0 1 2 3 4 5 6 7 8 9 0 1 2 3 4 5 6 7 8 9 0 1 2 1 2 3 4 5 6 7
1 2 3 4 5 6 7 8 9 0 1 2 3 4 5 6 7 8 9 0 1 2 3 4 5 6 7 8 9 0 1 2 1 2 3 4 5 6 7
1 2 3 4 5 6 7 8 9 0 1 2 3 4 5 6 7 8 9 0 1 2 3 4 5 6 7 8 9 0 1 2 1 2 3 4 5 6 7
1 2 3 4 5 6 7 8 9 0 1 2 3 4 5 6 7 8 9 0 1 2 3 4 5 6 7 8 9 0 1 2 1 2 3 4 5 6 7
1 2 3 4 5 6 7 8 9 0 1 2 3 4 5 6 7 8 9 0 1 2 3 4 5 6 7 8 9 0 1 2 1 2 3 4 5 6 7
1 2 3 4 5 6 7 8 9 0 1 2 3 4 5 6 7 8 9 0 1 2 3 4 5 6 7 8 9 0 1 2 1 2 3 4 5 6 7
1 2 3 4 5 6 7 8 9 0 1 2 3 4 5 6 7 8 9 0 1 2 3 4 5 6 7 8 9 0 1 2 1 2 3 4 5 6 7
1 2 3 4 5 6 7 8 9 0 1 2 3 4 5 6 7 8 9 0 1 2 3 4 5 6 7 8 9 0 1 2 1 2 3 4 5 6 7
Advertisement
Table of Contents

Related Manuals for SATO MB400I


Summary of Contents for SATO MB400I
- Page 1 Barcode Printer 1 2 3 4 5 6 7 8 9 0 1 2 3 4 5 6 7 8 9 0 1 2 3 4 5 6 7 8 9 0 1 2 1 2 3 4 5 6 7...
-
Page 2: Table Of Contents
Preface Thank you for purchasing the Barcode Printer, MB400i/410i. This manual is created so that a first-time user of MB400i/410i can learn its basic operations in a short time. Please read this manual carefully to make full use of the functions of MB400i/410i. -
Page 3: Safety Precautions
Markings and Symbols The following symbols or markings are used in this manual and on the printer so that you can properly use the printer, and to prevent any damage to property, harm or injury to yourself and others. Make sure to read their explanations carefully to familiarize yourself with their meanings. - Page 4 AC adapter or battery charger. Doing so creates the danger of electric shock. • The AC adapter set provided for this printer is specific to this printer. Do not use it for other electric equipment. Thermal Head and Stepping Motor •...
-
Page 5: Precautions In Use
Do not place the printer in a hot or cold place. The operation temperature range is -15°C to 50°C (for wireless LAN: 0 to 50°C) where humidity does not cause condensation. Do not place the printer in an area with high humidity or at a temperature outside the specified range. -
Page 6: Names Of Parts
3. Names of Parts Main cover Label dispenser Cover release lever Dispenser unit Battery life indicator (LED) * STATUS (LED) Infrared communication sensor USB/DIP switch cover DC input terminal cover PRINT button POWER button Label guide Easy cutter RS-232C cover Battery cover Only provided on wireless LAN interface operating panel (manufacturer option). -
Page 7: Names And Functions Of Operating Parts
• Charging by installing the battery pack in the battery charger (optional) Install the battery pack in the battery charger (optional) and charge it. The optional battery charger set provided for this printer is specific to this printer. Do not use it for other electric equipment. -
Page 8: Installing And Removing The Battery Pack
• Charging by installing the specialized AC adapter (optional) on the printer This charges the battery pack while it is installed in the printer. The AC adapter set provided for this printer is specific to this printer. Do not use it for other electric equipment. -
Page 9: Using Ac Adapter
Using AC Adapter Install the specialized AC adapter (optional) on the printer for use. The AC adapter set provided for this printer is specific to this printer. Do not use it for other electric equipment. • Use AC ADAPTER: Model No. TG-5001+19v (LEAD YEAR ENTERPRISE Co.,LTD.) -
Page 10: Dispense Mode Printing
Confirm that the label roll can be rotated easily by hand. If rotation is labored, this can cause a feed error. Remove the label roll and adjust the label guide. Note that the label guides do not require adjustment when you are using labels with the same width. -
Page 11: Switching From Dispense Mode Printing To Continuous Printing Mode
Load the paper in the printer. Make sure the roll is oriented correctly. Confirm that the label roll can be rotated easily by hand. If rotation is labored, this can cause a feed error. Remove the label roll and adjust the label guide. Note that the label guides do not require adjustment when using labels with the same width. -
Page 12: Turning The Power On
When the IN T remaining battery power is charge the battery. * If a problem occurs, contact the retail store or dealer where you purchased the printer from, or our sales personnel or service center. P O W IN T ”. -
Page 13: Operation With An Rs-232C Cable
Insert the RS-232C cable into the connector. Match the arrow on the RS-232C cable connector with the arrow beside the printer connector, and insert it firmly. Connect the other end of the RS-232C cable to the connector RS-232C cable on the PC or the handheld terminal. -
Page 14: Operation Via Infrared Communication
Place the printer within 20 cm of the PC or handheld terminal for infrared communication. Adjust the printer position so that the PC or handheld terminal is within a 30° area vertically and horizontally (cone shape) from the center of the infrared communication sensor. -
Page 15: Printing
* When the non-separated labels are severed somewhere other than the perforated line, and the next label is not printed, perform the operations on page 29. When the next label is not printed With the printer online, press the PRINT button to take the printer offline (STATUS LED turns off). -
Page 16: Troubleshooting
12. Troubleshooting The status of this printer is indicated by the STATUS LED display and a buzzer sound. When the STATUS LED display or buzzer indicates the status below, the STATUS LED/buzzer Mode LED: ON (red) All modes LED: Blinking (red) every 2 seconds... -
Page 17: Daily Care
(See P. 43) 2 Operate using operation 2 for the dispenser operation Using the printer setup tool, switch the dispenser operation to operation 2. When operation 2 is set for the dispenser operation, if harsh light is preventing printing, print using the following procedure. -
Page 18: Reference
* Do not use thinner, benzene, or kerosene. 14. Reference Included Items • Shoulder belt This belt allows you to carry the printer on your shoulder. Platen Thread the shoulder belt through the belt holes on the printer, from the outside to the inside. - Page 19 • Be careful not to damage the cord. • Unplug for storage when not in use. • The AC adapter set provided for this printer is specific to this printer. Do not use it for other electric equipment. • Shoulder case with rainproof cover This is a version of the Belt case that has a rainproof cover.
- Page 20 This protective case is for carrying the printer by attaching it to your belt. Fastening method Open the cover and place the printer in with the operating parts facing up. Place the lower side in the case so that the printer is completely in the case.
-
Page 21: Operation Modes
STATUS (LED) is off. The battery life indicator (LED) remains on even when the printer is OFFLINE. The printer enters sleep mode (standby status) when it has not been operated for five seconds. Normal status is resumed by pressing the PRINT button or the FEED button, by receiving data, or by opening and closing the main cover. - Page 22 Test printing mode (FEED button + POWER ON) POWER ON FEED button + POWER Start test printing FEED button Test printing FEED FEED button button Stop printing The LED display for the test printing mode is as follows. Operation status STATUS (LED) Starting test printing mode ON (orange)
- Page 23 Head check setting mode In the head check setting mode, a check can be performed in two checking areas: the printing area and the barcode printing area. The presence of the head check function and the head check range settings are set by the DIP switch (DSW) settings when the power is turned on, by button pressing status, and by the cover status.
- Page 24 Buzzer sound mode setting A buzzer can be sounded upon starting up the printer and upon errors. The buzzer is enabled by default. This can be enabled or disabled by the initial operation and by online command. Change buzzer sound setting...
-
Page 25: Dip Switch
DIP Switch • Setting DIP switch Turn the power OFF. Open the DIP switch cover. Use a pointed object, such as the tip of a ballpoint pen, to change the switch position. • DIP switch setting items DIP switch Button Cover PRINT FEED... -
Page 26: Basic Specifications Of Mb400I/Mb410I
MB410i 1 to 6 times 0°, 90°, 180°, 270° SATO standard fonts: ×20, ×21, ×22, ×23, ×24, OCR-A, OCR-B, POP fonts Kanji 16 × 16, 22 × 22, 24 × 24 square Gothic (JIS level-1 and level-2 set), Mark-down fonts...