Table of Contents
Advertisement
Quick Links
Download this manual
See also:
User Manual
Advertisement
Table of Contents

Related Manuals for Belkin F1DE101G


Summary of Contents for Belkin F1DE101G
- Page 1 OmniView ™ Remote IP Console Remotely control a server, or multiple servers with a KVM Switch, over TCP/IP networks User Manual ENTERPRISE Quad-Bus Series F1DE101G...
-
Page 2: Table Of Contents
Overview Introduction ........1 Package Contents . -
Page 3: Overview
RIPC can be easily configured to accommodate your existing LAN setup, large or small. Belkin has designed and developed the RIPC with the server administrator in mind. The result is a powerful, yet easy-to-install and -use remote solution that surpasses all other solutions with advanced features and functionality. -
Page 4: Feature Overview
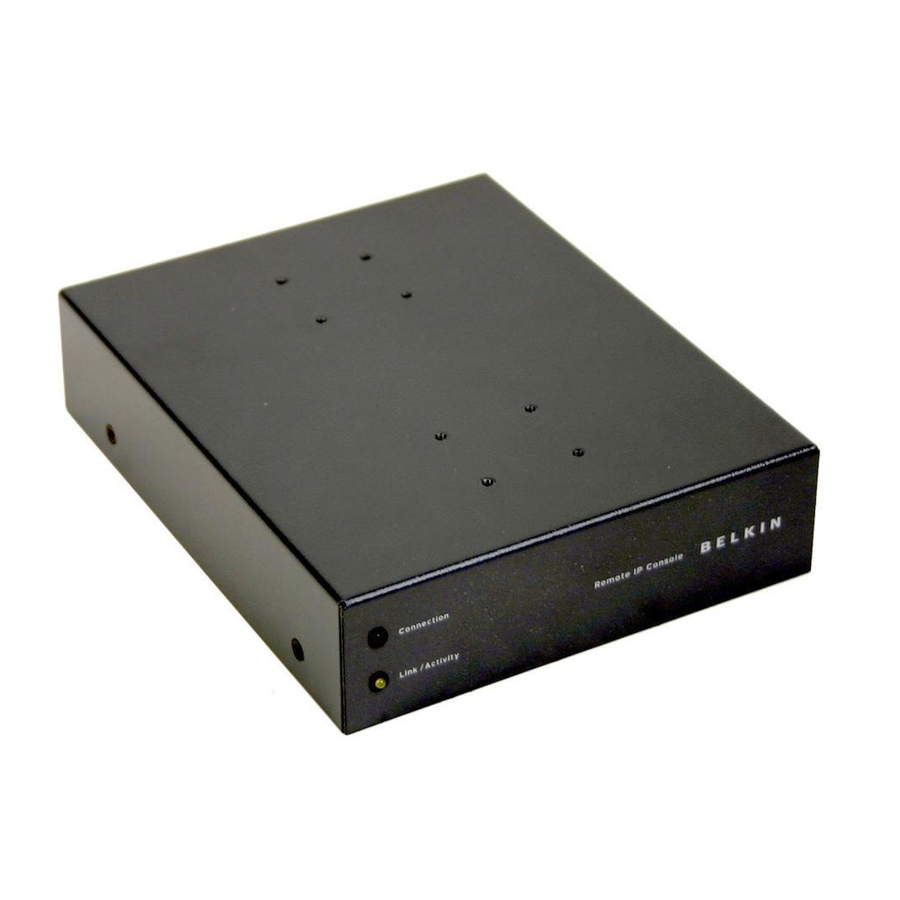
These updates ensure that your RIPC continues to work with the latest devices and computers. Firmware upgrades are free for the life of the RIPC. Visit belkin.com for upgrade information and support. LED display Located on the face of the RIPC, the LED display provides an easy way for you to monitor the status of your connection, link, and activity. -
Page 5: Equipment Requirements
OVERVIEW Equipment Requirements Hardware Requirements • OmniView ENTERPRISE Quad-Bus Series Remote IP Console (included) • PS/2 cable kit (included) • 5V DC, 2000mA power supply (included) • Keyboard, monitor, and mouse • Connection to network using 10/100Base-T Ethernet port (RJ45) •... -
Page 6: Specifications
OVERVIEW Specifications Part Number: F1DE101G Power: 5V DC, 2000mA Network Connection: 10/100Base-T connection (standard RJ45 connector) Keyboard Emulation: PS/2 Mouse Emulation: PS/2 Monitors Supported: Supports all VESA graphics modes, and text modes Max. Resolution: 1280x1024@60Hz Bandwidth: 117MHz Keyboard Input: 6-pin miniDIN (PS/2) -
Page 7: Ripc Diagrams
RIPC Diagrams Connection LED Connection Link / Activity Link/Activity LED Power Jack Serial 02 Port Serial 02 power Serial 01 Reset Button Serial 01 port OVERVIEW Remote IP Console Console VGA Port LAN Port console reset Console Keyboard Port Mouse Port CPU/KVM VGA Port CPU/KVM... -
Page 8: Installation
*** Cautions and Warnings *** Before attempting to connect anything to the RIPC or your computer(s), please ensure that all your computer equipment and devices are powered off. Belkin Corporation is not responsible for damage caused by your failure to do so. - Page 9 1. Power down your server or KVM Switch. 2. Connect your PS/2 type keyboard and mouse to the appropriate PS/2 “Console” ports. 3. Take the video cable that is attached to your VGA monitor and connect it to the “Console” port.
- Page 10 Connecting the Computer or KVM Using the provided PS/2 cable kit, connect one end of the VGA and PS/2 cables to your server. Connect the other end to the “CPU/KVM” ports on the back of the RIPC. INSTALLATION Serial 02 power Serial 01 reset...
- Page 11 Connecting the Computer or KVM Using the provided PS/2 cable kit, connect one end of the VGA and PS/2 cables to the RIPC on the KVM Switch. Connect the other end to the “CPU/KVM” ports on the back of the RIPC.
- Page 12 2. Attach the barrel plug into the power jack located on the rear of the RIPC to the power unit. Serial 02 power Serial 01 reset 3. Turn on your KVM Switch. If you do not have a KVM Switch, please proceed with powering up your computers. INSTALLATION console CPU/KVM...
-
Page 13: Initial Network Configuration
2. Set the IP address on your computer to be in the same range as 1.2.3.4 (example: 1.2.3.6). 3. Open the Microsoft® Internet Explorer web browser. 4. Enter the IP address “1.2.3.4”. 5. Enter the default login name “administrator”. 6. Enter the default password “belkin”. INSTALLATION Serial 02 power console... -
Page 14: Initial Network Configuration
Initial Network Configuration 7. Under Setting & Configurations, click on “Network”. (Note: Uncheck “DHCP” check box.) 8. Enter the desired network settings and click on “Apply Changes” to save new network settings. 9. Reset the local IP address settings on the computer used for configuration of the RIPC. -
Page 15: Remote Access
INSTALLATION Remote Access Remote Access is a Java™ applet that displays the redirected screen, keyboard, and mouse of the remote host system to which the RIPC is attached. The web browser used for accessing the RIPC must supply a Java Runtime Environment, version 1.1 or higher. - Page 16 Configuration via serial On a computer that has HyperTerminal Services software installed, connect the provided DB9 serial cable by attaching one end to your computer and the other end to the port labeled “Serial 1” on the RIPC. Open the HyperTerminal software and use the following parameters: Serial line parameters Parameter Bits/second...
-
Page 17: Using Your Ripc
USING YOUR RIPC Prerequisites The RIPC features an embedded operating system and applications that offer a variety of standard user interfaces. The information following will describe their use in detail. All of the interfaces are accessed using the TCP/IP protocol, and can be used over either the built-in Ethernet adapter or the modem. -
Page 18: Log Into The Ripc
To establish an unsecured connection, you must enter the following into the address line of your browser: http://192.168.1.22/ For a secure connection, you must enter: https://192.168.1.22/ The RIPC has a built-in administrator-user that has permission to administrate your system: Login name Password USING YOUR RIPC administrator Belkin... -
Page 19: Main Screen
USING YOUR RIPC Note: Be sure to change the administrator-user password immediately after you have installed and accessed your RIPC for the first time. Main Screen After a successful login, the RIPC will present its main screen frames (see Figure below). The home button brings you instantly to the home page from one of the administration menu points. -
Page 20: Log Out From The Ripc
USING YOUR RIPC Log Out from the RIPC This link logs out the current user and presents a new login screen. An automatic logout will occur if there is no admin activity for a period of 30 minutes—following a prompt for re-entry of the password. Control Host Remote Access The Remote Access is the redirected screen, keyboard, and mouse of the remote host system the RIPC controls. - Page 21 Special button keys to send the defined key combinations to the remote system. If defined in KVM Port Settings, you can switch the current KVM port by sending the appropriate hot key to the KVM switch. Toggles the read-only mode on and off. If the Monitor mode check box is selected, the Remote Access will not accept any local input for either keyboard or mouse.
- Page 22 USING YOUR RIPC Remote Access Options The Remote Access title bar displays information about the incoming (In:) and outgoing (Out:) network traffic. If you are using the compressed encoding, both compressed and uncompressed incoming traffic will be indicated. Remote Access Title Bar Power Management Unit This provides a Java applet that enables the telnet protocol to open a connection to the RIPC.
- Page 23 USING YOUR RIPC Single (Direct) Mouse Mode If all synchronization options fail, it is still possible to work with the remote mouse by selecting the single-mouse mode, using the image button. If activated, all mouse movements are transmitted directly to the host, so you can adjust the host mouse settings to less extreme values, or work in this mode if mouse acceleration is turned off.
-
Page 24: Video Settings
USING YOUR RIPC Video Settings The RIPC features a panel to set up the following video options, available in the Remote Access Options menu. Note: Brightness and contrast controls affect all modes and KVM ports globally; the other settings are changed specifically for each mode on each KVM port. -
Page 25: Security
SECURITY Ports & Protocols Force HTTPS If this option is enabled, access to the Web front-end is only possible using an HTTPS connection. The RIPC won’t work on the HTTP port for incoming connections. HTTPS Port Port number at which the HTTPS server is set to. If left unused or open, the default value will be used. -
Page 26: Firewall
Firewall IP access control parameters Parameter Description Enable Firewall Enables access control based on IP source addresses. Default Policy This option controls arriving IP packets that don’t match any of the configured rules. They can be accepted or dropped. Note: If you set this to DROP and you have no ACCEPT rules configured, access to the Web over LAN is disabled. -
Page 27: Certificate Management
Certificate Management The RIPC uses the SSL protocol for any encrypted network traffic between itself and a connected client. During connection establishment, the RIPC has to expose its identity to a client using a cryptographic certificate. SSL Certificate Request Parameter Common name Organizational unit Organization... - Page 28 Certificate Request Required Information However, it is possible to generate and install a new certificate that is unique for a particular card. In order to do that, the RIPC is able to generate a new cryptographic key and the associated Certificate Signing Request that needs to be certified by a certification authority (CA).
- Page 29 SSL Certificate Signing Request Note: If you destroy the CSR on the RIPC, there is no way to get it back! If you delete it by mistake, repeat the three steps. Settings & Configuration Network Parameter Description IP address IP address in the usual dot notation. Subnet mask The net mask of the local network.
-
Page 30: Network Settings Menu
NETWORK SETTINGS MENU Remote Access Settings While some parameters can be changed while Remote Access is running, others must be set in the Remote Access settings prior to activating it. Remote Access Settings... - Page 31 Remote Access Options Table Control Description Transmission Encoding The Transmission Encoding setting allows you to change the image-encoding algorithm that is used to transmit the video data to the Remote Access window. With these settings, it is possible to optimize the speed of the remote screen depending on the number of parallel users and the bandwidth of the connection line (Modem, ISDN, DSL, LAN, etc.).
-
Page 32: Users & Passwords
NETWORK SETTINGS MENU Users & Passwords Upon delivery, each RIPC is pre-configured with a supervisor user called “administrator” having the password “belkin”. IMPORTANT: Be sure to change the administrator-user password immediately after you have installed and initially accessed your RIPC. - Page 33 Description Users & Passwords Table Field Description Existing Users Select an existing user for modification or deletion. Once a user has been selected, click the “Lookup User” button to see complete user information. New User Name In order to create a new user, enter a new login name in this field. The new name must not already exist as user.
-
Page 34: Serial Port
Serial Port The RIPC’s Serial Settings allow you to specify which devices are connected to the serial port and how to use them. The options are listed and described in the table below. Serial Port Settings Table Function Modem Port Access via Telnet Modem Settings The RIPC offers remote access using a telephone line in addition to the... - Page 35 If you have a special modem or the modem is connected to a local telephone switch that requires a special dial sequence in order to establish a connection to the public telephone network, you can change this setting by giving a new string.
-
Page 36: Keyboard/Mouse Settings
Keyboard/Mouse Settings The RIPC supports different keyboard and mouse models. The panel shown in the Keyboard/Mouse Settings Menu is used to adjust settings (see table below). Keyboard/Mouse Options Table Control Targeted KVM Port Keyboard Model Mouse Mode Reset Mouse/ Keyboard Emulation NETWORK SETTINGS MENU Description Selects the KVM port to which the settings made below... -
Page 37: Kvm Switches
Keyboard/Mouse Settings Menu KVM Switches It is possible to select the number of ports used by the connected KVM switch, and you may assign each port a name. In order to provide KVM port switching through the RIPC, key combinations have to be defined for the ports. - Page 38 NETWORK SETTINGS MENU The syntax to define a new hot key is as follows: < keycode > [+| - [_] < keycode >]* For example: Ctrl-Ctrl-A-Enter or Ctrl+A-*1-Enter Multiple key codes can be concatenated with a + or a - sign. The + sign builds key combinations;...
-
Page 39: Update Firmware
Flash upgrades allow you to obtain the latest firmware updates for your RIPC. These updates ensure that your RIPC continues to work with the latest devices and computers. Firmware upgrades are free for the life of the RIPC. Visit belkin.com for upgrade information and support. Firmware Upload Menu RIPC Video Modes Table B.1 lists the video modes the RIPC supports. -
Page 40: Hot Key Table
The Hot Key Table shows the key codes used to defines keystrokes. Please note that these key codes do not necessarily represent key characters that are used on international keyboards. They name a key on a standard 104-key PC keyboard with U.S. English language mapping. However, most modifier keys and other alphanumeric keys used for hot key purposes in application programs are on an identical position, no matter what language mapping you are using. -
Page 41: Glossary
ACPI A specification that enables the operating system to implement power management and system configuration. Advanced Technology Extended: A particular specification of a motherboard introduced by Intel® in 1995. DHCP Dynamic Host Configuration Protocol: Protocol for dynamically assigning IP configurations in local networks. Domain Name System: Protocol used to locate computers on the Internet by their name. -
Page 42: Faqs
KVM Switches? Yes, it does. Does the RIPC work with non-Belkin KVM switches? Yes, the RIPC works with non-Belkin PS/2 KVM switches, however, be advised that degradation in performance may result if a lesser-quality KVM switch is used. What operating systems does the RIPC support? The RIPC supports Windows NT, 2000, and XP. -
Page 43: Troubleshooting
TROUBLESHOOTING The remote mouse doesn’t work or is not synchronous. Make sure the mouse settings match the mouse model. The video quality is bad or the picture is grainy. Try to correct the brightness and contrast settings until they are out of a range where the picture looks grainy. -
Page 44: Information
Belkin Corporation warrants this product against defects in materials and workmanship for its warranty period. If a defect is discovered, Belkin will, at its option, repair or replace the product at no charge provided it is returned during the warranty period, with transportation charges prepaid, to the authorized Belkin dealer from whom you purchased the product. - Page 45 Fax: +61 (0) 2 4372 8603 Belkin Tech Support US: 310.898.1100 ext. 2263 800.223.5546 ext. 2263 Europe: 00 800 223 55 460 Australia: 1800 666 040 P74238-A © 2003 Belkin Corporation. All rights reserved. All trade names are registered trademarks of respective manufacturers listed.