Follett Horizon Elite series Installation Instructions Manual
For harmony
Hide thumbs
Also See for Horizon Elite series:
- Installation instructions manual (21 pages) ,
- Installation instructions manual (17 pages) ,
- Installation instructions manual (17 pages)
Table of Contents
Advertisement
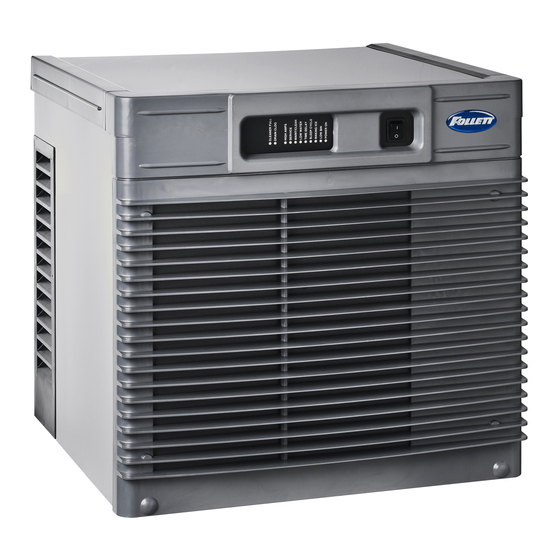
Horizon Elite
HMD/HCD710AHS,
HCC/HCE/HMC/HME: 1010AHS, 1010WHS, 1410AHS, 1410WHS
(See model number configurator on page 2 for details.)
Order parts online
www.follettice.com
to fit most countertop dispensers manufactured by
Ice Machine with RIDE
™
Installation Instructions for Harmony
Horizon ice machines with RIDE technology
Cornelius • Lancer • SerVend
801 Church Lane • Easton, PA 18040, USA
Toll free (877) 612-5086 • +1 (610) 252-7301
www.follettice.com
Technology
™
™
self-contained
01113224R02
Advertisement
Table of Contents

Related Manuals for Follett Horizon Elite series


Summary of Contents for Follett Horizon Elite series
- Page 1 Horizon Elite Ice Machine with RIDE Technology ™ ™ Installation Instructions for Harmony ™ HMD/HCD710AHS, HCC/HCE/HMC/HME: 1010AHS, 1010WHS, 1410AHS, 1410WHS (See model number configurator on page 2 for details.) Order parts online www.follettice.com self-contained Horizon ice machines with RIDE technology to fit most countertop dispensers manufactured by Cornelius •...
- Page 2 Chewblet Ice Machine Model Number Configurations ® 1810 Application Configuration Icemaker Voltage Series Condenser MC Maestro™ C 208-230/60/1 (icemaking head) 425 up to A Air-cooled, self-contained V Vision™ S RIDE™ Self-contained only. 425 lbs Chewblet ® W Water-cooled, self-contained H Harmony™ (RIDE remote D 115/60/1 (icemaking head) (193 kg)
-
Page 3: Table Of Contents
Contents Unpack ....................................4 Unpack Ice Machine ..............................4 Site Preparation ................................5 Installation site requirements .............................5 Dispenser Top Preparation ............................6 Top preparation ................................6 Install shuttle actuator ..............................6 Mount Ice Machine .................................7 Ice machine in cabinet ...............................7 External Connections ..............................10 Transport tube installation ............................10 Air-cooled ice machines only ...........................12 Water-cooled ice machines only ..........................12 Internal Connections ..............................13... -
Page 4: Unpack
Unpack Carefully unpack and inspect the contents of your Follett ice machine. Unpack Ice Machine ➋ ➌ ➊ ➎ ➍ 7/16" DO NOT TILT ICE MACHINE TO ACCESS BOLTS! COMPRESSOR DAMAGE 7/16" WILL RESULT ➐ ➏ HARMONY • RIDE Technology... -
Page 5: Site Preparation
Site Preparation Provide drainage, potable water supply and electrical power to within 6 feet (2 m) of ice machine in accordance with local and national codes. Outdoor installation is not recommended and will void warranty. Installation site requirements H_C1010 NEMA 6-15 ➊... -
Page 6: Dispenser Top Preparation
Dispenser Top Preparation WARNING! § Prior to installing the louvered docking assembly, ensure that the drain fitting is oriented (right or left) correctly for your installation. An optional straight drain fitting is also supplied. You may need to remove the back panel of the docking assembly in order to re-orient or change the drain fitting. -
Page 7: Mount Ice Machine
Mount Ice Machine Mounting options: Cabinet, Wall, Stand In cabinet Wall bracket Stand 22.00" 6.00" (15.24 cm) (55.9 cm) 25.50" 28.70" (64.8 cm) 21.00" 29.50" (72.9 cm) (53.3 cm) (74.9 cm) Ice machine in cabinet Ice machines can be installed undercounter/in-cabinet to fill bins or dispensers using RIDE technology. Care must be taken to ensure proper cabinet venting to avoid recirculation of hot air. - Page 8 Front View Top View Access panel/ door on counter ➌ ➊ 2" 2" (51 mm) 2.25" (51 mm) (57 mm) ➍ 24" x 15" cutout (610 mm x 381 mm) bottom of ice machine side of ice machine CAUTION • Keep ventilation openings in the appliance enclosure clear of obstruction. Failure to do so could result in damage to equipment.
- Page 9 supplied grilles ice transport tube Horizon minimum 1/4" per foot ice machine 18.00" (2 cm per meter) (45.7 cm) min. pitch toward ice 24.50" machine (62.2 cm) min. secure to prevent dips and traps from forming electric see dispenser specification 23.55"...
-
Page 10: External Connections
External Connections Transport tube installation ➋ ➍ Hot Water 160 F (71 C) ➎ ➏ ➐ ➑ ➒ ➊ ➓ ➌ 1/4" Ice transport tube tips ➊ § Insulate entire length of ice transport tube ➋ § Secure ice transport tube as needed to prevent dips and traps from forming. - Page 11 5.1.1 Long tube run recommendations max. 2 ft (.6m) ➊ 1/4" ➋ ➊ § Pitch ice transport tube to allow melt water to drain towards ice machine ➋ § Secure insulated ice transport tube at least every 2 ft (.6m) to prevent dips or traps §...
-
Page 12: Air-Cooled Ice Machines Only
Air-cooled ice machines only Water-cooled ice machines only ➊ ➊ ➏ ➋ ➋ ➐ ➌ ➌ ➏ Minimum 8" Minimum 8" ➑ radius radius 2 ft. x 1" OD 2 ft. x 1" OD silicone tubing silicone tubing 3/4" barb x 3/4" FPT 3/4"... -
Page 13: Internal Connections
Internal Connections Air-cooled ice machines – follow steps 6.1 and 6.4. Ice transport tube Potable water lines ➋ ➊ ➊ § Slide ice machine into louvered docking ➊ § Insert potable water line into valve assembly ensuring that drain tube is fully seated on barbed drain fitting ➊... -
Page 14: Tds Switch
TDS switch HIGH CLEAN § Set the TDS switch on the electrical box: – HIGH: for extended service life – LOW: for low-scale water Water-cooled ice machines – follow steps 6.6 through 6.11. Cooling Lines Ice transport tube ➋ ➊ Install ice machine cooling water lines to louvered §... -
Page 15: Potable Water Line
Potable Water Line Cooling lines and power ➋ ➊ ➊ ➊ ➊ § Insert potable water line into valve § Connect cooling water lines to ice machine (Water "Out" connects to water regulator.) § Water valve is set at the factory. DO NOT remove ➋... -
Page 16: Tds Switch
6.12 TDS switch HIGH CLEAN § Set the TDS switch on the electrical box: – HIGH: for extended service life – LOW: for low-scale water HARMONY • RIDE Technology Horizon Elite 710/1010/1410... -
Page 17: Front Cover
Front Cover Install front cover to ice machine. Install cover - undercounter air-cooled Install front cover application only ➊ ➋ ➋ ➌ ➌ ➊ § Slide ice machine cover over machine, ensuring NOTICE! that tabs on back of cover slip under louvers ➊... -
Page 18: Dispenser Agitation Adjustment
Dispenser Agitation Adjustment - CORNELIUS Agitation adjustments E-BOARD AGITATOR TIMER MOTOR ON TIME: SET TO 1 SECOND TIME TIME MOTOR OFF TIME: SET TO 1 HOUR Cornelius models ED, DB, DF, IDC and Flavor Fusion § Adjust the agitation tier located on the Cornelius PC board to 1 second on, 1 hour off. Note: See Cornelius manual or call Cornelius Technical Service at 1-800-238-3600 for more information. -
Page 19: Agitation Adjustments - Lancer Fs Series
Agitation adjustments – LANCER FS SERIES Initialization Screen (Boot Up Only) Lancer FS-16 Ver. 0.200 Main Menu Sub-Catagory FS-16 Setup Brands Per Side Major/Minor V:1 L:2 R:1 FS-16 Setup Bonus Key Setup Enter Cancel Config Bonus Key V:1 T:F M:S B:W FS-16 Setup Soda/Plain Water Soda/Plain Water... -
Page 20: Dispenser Diverter Plate Overview - Cornelius, Ed, Df And Db Series (Installation On Next Page)
Dispenser diverter plate overview – CORNELIUS, ED, DF AND DB SERIES (installation on next page) Single Agitator P/N 307277 — Diverter plate (single agitator Cornelius dispensers and left-hand dispense chute on dual-agitator Cornelius dispensers) Dual Agitator P/N 307277 — Diverter plate (single agitator Cornelius dispensers and left-hand dispense chute on dual-agitator... -
Page 21: Dispenser Diverter Plate Installation - Cornelius, Ed, Df And Db Series
Dispenser diverter plate installation – CORNELIUS, ED, DF AND DB SERIES GATE MOUNTING PLATE STORAGE HOPPER FLANGE EXTENDS INTO STORAGE HOPPER THROUGH GATE OPENING ICE DIVERTER ICE CHUTE COVER APPLY RTV TO THIS SURFACE TO SEAL TO HOPPER GATE MOUNTING PLATE 10-32 WASHER GASKET ICE CHUTE... -
Page 22: Ride Model Ice Machine Start Up Procedure
RIDE model ice machine start up procedure The start-up procedure below is intended to ensure that ice machine is operating properly after installation has been made. Check each item listed and call factory immediately for assistance if you experience problems with unit. - Page 23 HARMONY • RIDE Technology Horizon Elite 710/1010/1410...
- Page 24 Horizon, Horizon Elite, and Harmony are trademarks of Follett LLC. Follett, Chewblet and RIDE are registered trademarks of Follett LLC, registered in the US. 801 Church Lane • Easton, PA 18040, USA Toll free (877) 612-5086 • +1 (610) 252-7301 01113224R02 www.follettice.com...