Table of Contents
Advertisement
Advertisement
Table of Contents

Related Manuals for Sherwood Newcastle V-756


Summary of Contents for Sherwood Newcastle V-756
- Page 1 O P E R A T I N G I N S T R U C T I O N S V-756 DVD PLAYER...
-
Page 2: Introduction
Introduction UNPACKING AND INSTALLATION Congratulations on Your Purchase! Your new DVD Player is designed to deliver maximum enjoyment and years of trouble free service. Please take a few moments to read this manual thoroughly. It will explain the features and operation of your unit and help ensure a trouble free installation. -
Page 3: Read This Before Operating Your Unit
READ THIS BEFORE OPERATING YOUR UNIT FOR U.S.A. AND CANADA ...120 V FOR YOUR SAFETY Units shipped to the U.S.A. and Canada are designed for operation on 120 V AC only. Observe all safety precautions with use of a polarized AC plug. However, some products may be supplied with a nonpolarized plug. -
Page 4: Table Of Contents
CONTENTS Introduction UNPACKING AND INSTALLATION READ THIS BEFORE OPERATING YOUR UNIT System Connections CONNECTING TO A/V AMPLIFIER OR RECEIVER CONNECTING TO TV WITH AUDIO AND VIDEO INPUTS CONNECTING TO ADDITIONAL COMPONENT WITH VIDEO AND DIGITAL OUTS CONNECTING SYSTEM CONTROL CONNECTING TO TV AND VCR WITH SCART CONNECTORS (Regional Option) Front Panel &... -
Page 5: System Connections
“SETTING THE TV SCREEN” on page 31.) CONNECTING TO AN A/V AMPLIFIER OR RECEIVER The Sherwood Newcastle V-756 DVD Player/Decoder is a very versatile unit. Because it has built-in decoding for DTS, Dolby Digital, Dolby Pro Logic, Dolby Virtual, Circle Surround, MPEG Multichannel and 6.1 Extended surround it can be used with 5.1 (or 6.1) ready amplifiers and receivers that do... - Page 6 Notes : You must select the appropriate digital output mode on this DVD player before trying to use it with an outboard amplifier or receiver via the digital connections. Otherwise, operation with the incorrect digital mode may result in a loud noise through your speakers that could damage the speakers and/or our hearing.
-
Page 7: Connecting To Tv With Audio And Video Inputs
For correct connection and use, refer to “Connecting DIGITAL OUTs” and “Connecting 6.1 CH AUDIO OUTs” on the previous page. The audio component such as CD player, etc. can be also connected to these DIGITAL INs only, not the VIDEO INs. DVD player, etc. Optical digital cord (not supplied) -
Page 8: Connecting System Control
CONNECTING SYSTEM CONTROL Connect this jack to the DIGI LINK jack of some Sherwood receivers such as RV-5106/R, RD-6106/R, RD- 7106/R, R-756/R, R-956/R, etc. that uses the DIGI LINK III remote control system. (For details, refer to the operating instructions of that unit.) When connecting this jack to the DIGI LINK jack of some Sherwood receivers such as RV-5106/R, RD-6106/R, RD-7106/R, R-756/R, R-956/R, etc., only this unit does not respond to system power control due to the auto... -
Page 9: Connecting To Tv And Vcr With Scart Connectors (Regional Option)
CONNECTING TO TV AND VCR WITH SCART CONNECTORS (Regional Option) For some countries like Europe, the unit incorporates the TV and VCR SCART connectors. You can connect the unit to TV and VCR easily using the SCART connections without other cumbersome audio and video connections. -
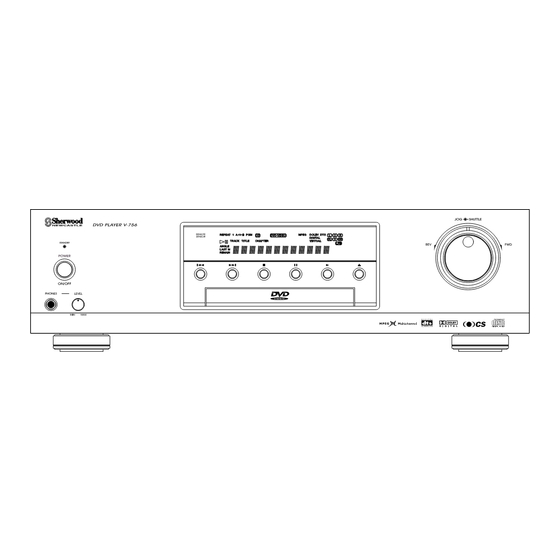
Page 10: Front Panel & Remote Controls
Front Panel & Remote Controls Front Panel Controls Remote Controls... - Page 11 1. POWER SWITCH Press to turn the power of the unit between the standby and off modes. 2. STANDBY indicator. Lights up in the standby mode and goes off in power on mode. 3. POWER BUTTON Press to turn the power of the unit from power on to standby or vice versa.
-
Page 12: Remote Control Operation Range
■FLUORESCENT DISPLAY REPEAT INDICATORS PROGRAM INDICATOR LAST MEMORY INDICATOR REMAINING TIME INDICATOR ANGLE INDICATOR PLAY/PAUSE INDICATORS REMOTE CONTROL OPERATION RANGE LOADING BATTERIES Remove the cover. SURROUND MODE INDICATORS CD/DVD INFORMATION INDICATORS MULTI-INFORMATION DISPLAY SPEAKER INDICATORS Use the remote control unit within a range of about 7 meters (23 feet) and angles of up to 30 degrees aiming at the remote sensor. -
Page 13: Preliminary Knowledge About Discs
DVD player is different from that of the DVD Video, playback of the DVD Video will not be allowed by the DVD player. (In this case, “WRONG REGION CODE” is displayed on the TV screen) -
Page 14: Symbol And Message About Invalid Operation
SYMBOL AND MESSAGE ABOUT INVALID OPERATION When you press a button, if the unit does not accept that operation, appears on the TV screen. Operations are occasionally unacceptable even if is not displayed. During operation, if the “WRONG REGION CODE” is displayed on the TV screen, it means the region code number of the unit is different from that of the DVD Video and playback will not be allowed. -
Page 15: Basic Playback
Operations BASIC PLAYBACK ■Preparations Turn on the TV and select the video input source connected to the unit. To enjoy the sound of the disc from your audio system, turn on the audio system and select the input source connected to the unit. Set the TV screen type correctly to match your TV. - Page 16 To start playback from the menu To select the preferred item, tilt the CURSOR/ENTER button in the desired direction and press the CURSOR/ENTER button (or PLAY button), or press the NUMERIC buttons. Playback of the selected item starts. When using the NUMERIC buttons to select an item, it may be necessary, with some discs, to also press the PLAY (or ENTER) button to start playback of your selection.
- Page 17 To stop playback Main unit To skip ahead or back during playback To skip ahead Main unit Each time the button is pressed, a chapter (for DVD Videos) or a track (for CDs) is skipped. To pause playback during playback Main unit Frame advance / reverse playback [DVD Video only] In the still picture mode,...
-
Page 18: General Information About On-Screen Symbols
Rapid (/slow) advance / reverse playback during playback You can play back discs at various speeds. To reverse To advance To reverse Note : Only in U.S.A., Canada, etc. where this unit conforms to the NTSC color system, slow reverse playback can be available. -
Page 19: Playing The Desired Section Of Disc (Title/Chapter/Track/Time Search)
PLAYING THE DESIRED SECTION OF DISC (TITLE/CHAPTER/TRACK/TIME SEARCH) During playback, press the SEARCH button to select the preferred search mode. Select the section to be played with the NUMERIC buttons. Examples) When entering the title or chapter No. 2 When searching the point at 8 min. 35 sec. ■When correcting the numbers entered. -
Page 20: Playing A Specific Item [Dvd Video Only]
PLAYING A SPECIFIC ITEM [DVD Video only] When using a title menu If some DVD Videos which contain more than one title may have the menu like as a list of the titles, the TITLE button can be used to select the desired title. (The details of operation differ depending on the disc used.) During playback, press the TITLE button. -
Page 21: Repeat Playback
REPEAT PLAYBACK You can play back a current title, chapter, track or section repeatedly. (Title repeat, enitire disc repeat, chapter/track repeat, A-B repeat) Note : Repeat playback may not work correctly on some DVD Videos. Repeating a title, chapter or track During playback of the desired title, chapter or track, press the REPEAT MODE button. -
Page 22: Introscan Playback [Cd Only]
INTROSCAN PLAYBACK [CD only] You can play back the first 10 seconds of each track. Start introscan playback. To return to normal playback, press this button again. CHANGING THE TIME DISPLAY DURING PLAYBACK Press the TIME button. Each time this button is pressed, the time display changes depending on the disc as follows; DVD Video : Elapsed time of the title Remaining time of the title... -
Page 23: Changing The Camera Angle [Dvd Video Only]
CHANGING THE CAMERA ANGLE [DVD Video only] Some DVD Videos contain scenes which have been shot simultaneously from multiple camera angles. For these discs, the same scene can be viewed from each of these different angles. The recorded angles differ depending on the disc used. During playback of the scene recorded from multiple camera angles, press the ANGLE button. -
Page 24: Changing The Subtitle Language [Dvd Video Only]
CHANGING THE SUBTITLE LANGUAGE [DVD Video only] It is possible to change the subtitle language to a different language from the one selected at the initial settings. (For details, refer to “SETTING THE LANGUAGE” on page 30.) This operation works only with discs on which multiple subtitle languages are recorded. During playback, press the SUBTITLE button. -
Page 25: Playing A Scene Close-Up [Dvd Video Only]
PLAYING A SCENE CLOSE-UP [DVD Video only] It is possible to zoom in on a part of the scene. You can select and view any part of the scene according to the initial settings. (For details, refer to “When selecting the ZOOM SETUP” on page 37.) During playback or in the still pause mode, press the ZOOM button. -
Page 26: Listening With Headphones
LISTENING WITH HEADPHONES For private listening, connect the headphones. Main unit Adjust the volume level of the headphones as desired. Main unit Headphones with a 1/4 inch (6.3 mm) stereo plug can be connected. Note : Listening at extremely high levels may be harmful to your ears and headphones. -
Page 27: Initial Settings
Initial Settings The initial settings made to this unit at the factory are stored in memory and can be modified as desired, later. While the unit is in the “STOP” mode, press the SETUP button to enter the SETUP mode. The setup menu screen appears on the TV screen. - Page 28 ■When selecting TV SCREEN S C R E E N S E L E C T : + 4 : 3 L E T T E R B O X 4 : 3 P A N - S C A N 1 6 : 9 I D E R E T U R N :...
-
Page 29: Setting The System
SETTING THE SYSTEM You can use the unit as DVD player or as a digital surround sound decoder (or both). For use as a surround sound decoder, be sure to connect the DIGITAL OUTs of the associated source unit to the DIGITAL INs of this unit. -
Page 30: Setting The Language
SETTING THE LANGUAGE L A N G U A G E S E L E C T : + A U D I O E N G L I S H S U B T I T L E P O R T U G M E N U H I N D I R E T U R N :... -
Page 31: Setting The Tv Screen
SETTING THE TV SCREEN You can select the TV screen type to match your TV during playback of DVD Videos recorded for wide screen TVs. When you connect a normal TV with 4:3 aspect ratio to the unit, select either 4:3 LETTERBOX or 4:3 PAN- SCAN and when you connect a wide TV with 16:9 aspect ratio, select 16:9 WIDE . -
Page 32: Setting The Audio Setup
SETTING THE AUDIO SETUP A U D I O T U P S E L E C T : + I G I T A L O U T P U S T A N D A U R R O U N D D O L P R O L O G I C S P E A K E R... - Page 33 Continued When selecting the Dynamic Range Control This function can be activated in the Dolby Digital mode only. (Refer to When selecting SURROUND on this page.) You can compress the dynamic range of the Dolby Digital sound if you need. Using this function, you can listen to sound at low volume levels easily.
- Page 34 Continued When selecting the SPEAKER OPTIONS When the 6.1 CH AUDIO OUTS of the unit are connected to the 6.1 (or 6) CH INs of your amplifier or receiver to enjoy high-quality audio and surround with the built-in decoder, these items should be set correctly. Tilt the CURSOR/ENTER button upward or downward to select SPEAKER OPTIONS, then press the CURSOR/ENTER button.
- Page 35 Continued Repeat the above steps 2 and 3 to adjust each speaker setting correctly. Notes : The delay time(s) is (are) automatically adjusted, based on the distance entered. When PRESENT is selected for the rear center speaker type, the rear center signal is extracted from the rear left and right signals and reproduced during playback of 5.1 CH program sources such as Dolby Digital, DTS and MPEG Multichannel.
-
Page 36: Setting The Custom Setup
SETTING THE CUSTOM SETUP C U S T O M S E T U P S E L E C T : + Z O O M S E T U P C O L O R S C H E M E Y E L L O W C O M P O N E N T V I D... - Page 37 Continued When selecting ZOOM SETUP You can select the initial setting as preferred for zoom playback of DVD Video. Tilt the CURSOR/ENTER button upward or downward to select the ZOOM SETUP, then press the CURSOR/ENTER button. Tilt the CURSOR/ENTER button upward or downward to select the preferred item, then press the CURSOR/ENTER button.
- Page 38 Continued When selecting the SCART OUTPUT (Regional Option) For some countries like Europe, the unit incorporates the TV and VCR SCART connectors which can deliver either the regular video and RGB signals or the S-video (Y and C) signals as well as the mixed audio L and R signals for easy connection.
-
Page 39: Setting The Rating Level
SETTING THE RATING LEVEL This function restricts playback of DVD Video which contains violent and other scenes according to the level set by the user. For example, if a movie which includes violent scenes supports the parental lock feature, such scenes which you do not want to let children view can be cut or replaced with other scenes. -
Page 40: Setting The Disc Setup
SETTING THE DISC SETUP D I S C S E T U P S E L E C T : + P R O G R A M M E N U F A V O R I T E C O N D C L E A R D I S C... - Page 41 Continued Repeat the above steps ②~④ until your selections is completed. Start the programmed playback in the desired sequence. Main unit ■Correcting any wrong programmed item. In the program menu mode, move to the program number you want by tilting the CURSOR/ENTER button repeatedly.
- Page 42 Continued When selecting the FAVORITE CONDITION Each time a DVD Video is loaded, the LANGUAGE, TV SCREEN and PROGRAM MENU settitings should be adjusted to your favorite condition. However, once the LANGUAGE, TV SCREEN and PROGRAM MENU settings for a DVD Video are memorized using the SAVE FC (Favorite Condition), each time a disc is loaded, your chosen settings will be selected automatically.
- Page 43 Continued ■Playing back a DVD Video in the factory settings for the LANGUAGE, TV SCREEN and PROGRAM MENU. You can play back a DVD Video in the factory defaults for the LANGUAGE, TV SCREEN and PROGRAM MENU without clearing the favorite condition. In the FAVORITE CONDITION menu, tilt the CURSOR/ENTER button upward or downward to select the FACTORY DEFAULTS, then press the CURSOR/ENTER button.
-
Page 44: Definition Of Terms
Definition Of Terms DVD Video This refers to a high-density optical disc on which high-quality pictures and sound have been recorded by means of digital signals. Incorporating a new video compression technology (MPEG II) and high-density recording technology. DVD Video enables esthetically pleasing full-motion video to be recorded over long periods of time (for instance, a whole movie can be recorded). -
Page 45: Troubleshooting Guide
Troubleshooting Guide If a fault occurs, run through the table below before taking your unit for repair. If the fault persists, attempt to solve it by switching the unit off and on again. If this fails to resolve the situation, consult your dealer. -
Page 46: Specifications
Specifications ■TYPE System Signal read system ■D/A CONVERSION SECTION D/A conversion Oversampling Sampling freqnency : 44.1, 48 kHz / 96 kHz ■AUDIO SECTION Frequency response Sampling frequency : 44.1 kHz Sampling frequency : 48 kHz Sampling frequency : 96 kHz Signal to noise ratio, A wtd. -
Page 47: Dvd Language Code List
DVD Language Code List Code No. Language 6565 Afar 6566 Abkhazian 6570 Afrikaans 6577 Amharic 6582 Arabic 6583 Assamese 6588 Aymara 6590 Azerbaijani 6665 Bashkir 6669 Byelorussian 6671 Bulgarian 6672 Bihari 6678 Bengari ; Bangla 6679 Tibetan 6682 Breton 6765 Catalan 6779 Corsican... - Page 48 O P E R A T I N G I N S T R U C T I O N S V-756 DVD PLAYER 5707-04724-001-0...
Need help?
Do you have a question about the Newcastle V-756 and is the answer not in the manual?
Questions and answers