
Related Manuals for Sharp Aquos LC-65D90U


Summary of Contents for Sharp Aquos LC-65D90U
- Page 1 LC-65D90U LIQUID CRYSTAL TELEVISION TÉLÉVISEUR ACL TELEVISOR CON PANTALLA DE CRISTAL LÍQUIDO TELEVISOR DE CRISTAL LÍQUIDO OPERATION MANUAL MODE D’EMPLOI MANUAL DE OPERACIÓN MANUAL DE OPERAÇÃO...
-
Page 2: Important Information
LIQUID CRYSTAL TELEVISION • The illustrations and on-screen displays in this operation manual are for explanation purposes and may vary slightly from the actual operations. • Menu items that are not selectable are grayed out. IMPORTANT: To aid reporting in case of loss or theft, please record the TV’s model and serial numbers in the space provided. - Page 3 DECLARATION OF CONFORMITY SHARP LIQUID CRYSTAL TELEVISION, MODEL LC-65D90U This device complies with Part 15 of the FCC Rules. Operation is subject to the following two conditions: (1) This device may not cause harmful interference, and (2) this device must accept any interference received, including interference that may cause undesired operation.
-
Page 4: Dear Sharp Customer
DEAR SHARP CUSTOMER Thank you for your purchase of the Sharp Liquid Crystal Television. To ensure safety and many years of trouble-free operation of your product, please read the Important Safety Instructions carefully before using this product. IMPORTANT SAFETY INSTRUCTIONS Electricity is used to perform many useful functions, but it can also cause personal injuries and property damage if improperly handled. - Page 5 IMPORTANT SAFETY INSTRUCTIONS • Water and Moisture — Do not use this product near water – for example, near a bath tub, wash bowl, kitchen sink, or laundry tub; in a wet basement; or near a swimming pool; and the like.
- Page 6 IMPORTANT SAFETY INSTRUCTIONS • Outdoor Antenna Grounding — If an outside antenna is connected to the television equipment, be sure the antenna system is grounded so as to provide some protection against voltage surges and built-up static charges. Article 810 of the National Electrical Code, ANSI/NFPA 70, provides information with regard to proper grounding of the mast and supporting structure, grounding of the lead-in wire to an antenna discharge unit, size of grounding conductors, location of antenna-discharge unit, connection to grounding electrodes, and requirements for the grounding electrode.
-
Page 7: Quick Reference
QUICK REFERENCE STOP! To safely remove the AQUOS television from the box It’s best to use 2 people to remove the AQUOS television for stability. 1. Use the cardboard holders on either side of the AQUOS television to remove it from the box. - Page 8 IF THE UNIT DOES NOT POWER ON - UNPLUG THE AQUOS TELEVISION FROM THE OUTLET AND REPEAT THE INSTALLATION STEPS. IF YOU STILL ENCOUNTER NO POWER, PLEASE CONTACT US AT 1-800-BE-SHARP. Please refer to the BASIC ADJUSTMENT SETTINGS SECTION for EZ setup and basic channel setup functions and USING EXTERNAL EQUIPMENT SECTION for other device connections (DVD, VCR, AUDIO, etc) in your AQUOS operation manual.
- Page 9 QUICK REFERENCE TV GUIDE ON SCREEN™ QUICK SETUP SHEET Once you set up the TV according to this operation manual, you are ready to set up TV Guide On Screen! Note: TV Guide On Screen™ interactive program guide supports cable-ready, cable box and digital cable services as well as over-the-air broadcast.
- Page 10 QUICK REFERENCE On-Screen Setup • TV Guide uses setup information to provide TV listings and lineups. The first two screens ask you about your location. Follow the on-screen instructions. Press c/d to move the highlight. Press 0-9 or a/b to enter a ZIP Code or Postal Code.
-
Page 11: Table Of Contents
Contents IMPORTANT INFORMATION ……………………… 1 DEAR SHARP CUSTOMER ………………………… 3 IMPORTANT SAFETY INSTRUCTIONS …………… 3 QUICK REFERENCE ………………………………… 6 Contents …………………………………………… 10 Trademarks ………………………………………… 11 COPYRIGHT AND LICENSE NOTICE ………… 11 PATENT NOTICE …………………………………… 11 Supplied accessories …………………………… 12 Part names ………………………………………… 13 TV (Front) ………………………………………... -
Page 12: Trademarks
Gemstar-TV Guide International, Inc. COPYRIGHT AND LICENSE NOTICE • It is the intent of Sharp that this product be used in full compliance with the copyright laws of the United States and that prior permission be obtained from copyright owners whenever necessary. -
Page 13: Supplied Accessories
• Always use the AC cord supplied with the LCD-TV. • AC cord enclosed in this product are for 110-125V. When using this product on the 220-240V, please consult the following: SHARP ELECTRONICS CORPORATION 6100 Blue Lagoon Drive, Suite 230, Miami, Florida 33126, U.S.A. -
Page 14: Part Names
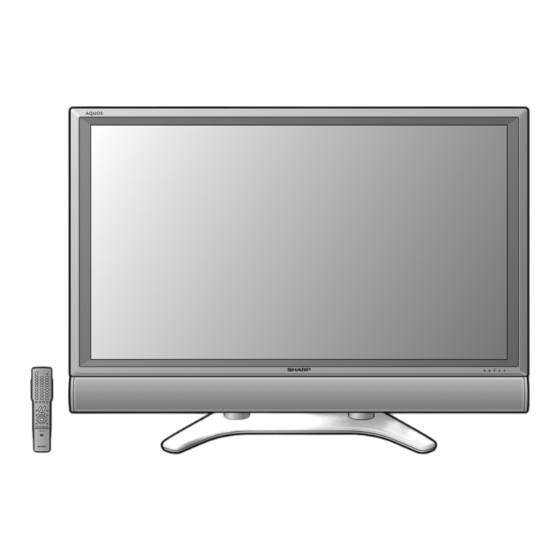
Part names TV (Front) Remote control sensor NOTE • See page 17 for the TV status indicator. POWER button INPUT button* Channel buttons** (CHs/r) Volume buttons (VOLl/k ) * INPUT button works as ENTER in TV Guide On Screen ** Channel buttons work as a/b in TV Guide On Screen DL indicator** OPC indicator*... -
Page 15: Tv (Rear)
Part names TV (Rear) MONITOR/ REC. OUT terminals INPUT 3 terminals INPUT 1 terminals DIGITAL CABLE IN terminal * Press RESET if the TV cannot return to its original state after performing various operations. • AV MODE resets to DYNAMIC (Fixed) •... -
Page 16: Remote Control Unit
Part names Remote control unit TV POWER: Switches the Liquid Crystal Television power on or enters Standby mode. (See page 17.) DISPLAY: Displays the channel information. SOURCE POWER: Turns the power of the external equipment on and off. External equipment operational buttons: Operates the external equipment. -
Page 17: Preparation
Preparation Using the remote control unit Use the remote control unit by pointing it towards the remote control sensor on the TV. Objects between the remote control unit and the remote control sensor may prevent proper operation. Cautions regarding remote control unit •... -
Page 18: Watching Tv
Watching TV Simple operations for watching a TV program POWER DL indicator** OPC indicator* POWER indicator TV POWER Turning on the power Press POWER on the TV or press TV POWER on the remote control. • POWER indicator (Blue): The TV is on. (After a few seconds, a window appears with sound.) NOTE •... -
Page 19: Initial Setup
Watching TV Initial setup When you turn on the TV for the first time, it will automatically memorize the broadcasting channels where you live. Perform the following steps before you press TV POWER on the remote control unit. 1. Insert the batteries into the remote control unit. (See page 7.) 2. -
Page 20: Using The Tv Guide On Screen™ (Interactive Program Guide)
Watching TV (TV Guide On Screen) Using the TV Guide On Screen™ (Interactive Program Guide) The TV Guide On Screen system is a free, on-screen interactive television program guide (“IPG”) built into your LCD-TV. The TV Guide On Screen system was developed to help today’s TV viewers, overwhelmed by myriad viewing choices, find what they want to watch quickly and easily, directly from their TV screen. -
Page 21: Tv Guide On Screen Initial Setup
Watching TV (TV Guide On Screen) Info Box Info Box contains information about a show, service, ad, or provides general help. A Show Listing Info Box can have up to three sizes: Small, Large, and “No”. The default size of the Info Box is Small. Press INFO to cycle among the sizes. - Page 22 Watching TV (TV Guide On Screen) Basic initial setup Follow the on-screen prompts to configure the basic settings. Select your location. 1 Press a/b to select the country. 2 Enter the ZIP code (or postal code) for your location using the number buttons or a/b.
- Page 23 Watching TV (TV Guide On Screen) VCR setting Connect a VCR to your TV and use the TV Guide On Screen system’s program listings to easily schedule recordings using the one-touch recording feature. Set TV Guide On Screen to control your VCR.
-
Page 24: Using Tv Guide On Screen
Watching TV (TV Guide On Screen) Using TV Guide On Screen Basic buttons on the remote control Button Description • When watching TV, enters the Guide and TV GUIDE highlights a program listing. • When in the Guide, exits the Guide without changing channels. - Page 25 Watching TV (TV Guide On Screen) Searching programs You can search for programs alphabetically, by category - HDTV, MOVIES, SPORTS, CHILDREN, EDUCATIONAL, NEWS, VARIETY, SERIES - or by keyword, and the result is displayed in a list. Search by category You can search for programs by specifying category in the “Confirmation”...
- Page 26 Watching TV (TV Guide On Screen) Edit keyword This Guide stores all the keywords you created. Highlight “SEARCH” on the Service Bar and press ENTER or b. Press c/d to select “KEYWORD”. • The keyword list is displayed. Press a/b to select the keyword you want to edit.
-
Page 27: Program Recording Using Listings Function
Watching TV (TV Guide On Screen) Program recording using LISTINGS function You can set any programs to record on a G-LINK connected recording device (VCR) directly from the LISTINGS for the appropriate day. Set recording Press a/b/c/d to select the program you want to record in the LISTINGS. -
Page 28: Using Schedule Function
Watching TV (TV Guide On Screen) Using SCHEDULE function The SCHEDULE is a list of programs created whenever you set a recording or a reminder to watch a program. You can use this list to edit or delete the reminders and recordings you have set. Highlight “SCHEDULE”... - Page 29 Watching TV (TV Guide On Screen) Delete recording Highlight “SCHEDULE” on the Service Bar. Press a/b to select the program you want to delete. Press MENU to display “Schedule Options”. Press a/b to select “delete recording”, and then press ENTER. •...
-
Page 30: Changing System Settings
Watching TV (TV Guide On Screen) New manual reminder Instead of setting a reminder from the program LISTINGS, you can set a reminder manually for a program that you want to watch or a recording you have set. Highlight “SCHEDULE” on the Service Bar. Press MENU to display the “Schedule Options”. -
Page 31: Changing Channel Display
Watching TV (TV Guide On Screen) Changing channel display This setting lets you edit channel information that appears in LISTINGS. You can set each function as follows: • Re-order the position the channel appears in LISTINGS • Change the channel number •... - Page 32 Watching TV (TV Guide On Screen) Record default options Highlight “SETUP” on the Service Bar and press b to highlight “Change default options” and press ENTER. Press b to select “Record defaults”, and press ENTER. Press ENTER to display “Record Defaults”. Press a/b/c/d to set the following items.
-
Page 33: Changing Channels-Air/Cable
Watching TV Changing channels-Air/Cable You can change channels in several ways by pressing AIR or CABLE to select the antenna and then following one of the methods below. Method 1 Using CHr/s on the remote control unit or on the TV. Method 2 1. -
Page 34: Changing Volume/Sound
Watching TV Changing volume/sound I Changing the volume You can change the volume on the TV or on the remote control unit. I Using VOL k k k k k /l l l l l • To increase the volume, press VOL k k k k k . •... -
Page 35: Setting Mts/Sap Stereo Mode
Watching TV Setting MTS/SAP stereo mode The TV has a feature that allows reception of sound other than the main audio for the program. This feature is called Multi-channel Television Sound (MTS). The TV with MTS can receive mono sound, stereo sound and Secondary Audio Programs (SAP). -
Page 36: Connecting Digital Cable Module
Watching TV Connecting Digital Cable Module Digital Cable Module is called CableCARD™. By attaching the CableCARD security module, you can receive various digital services provided by your Cable Company. To obtain and use a CableCARD security module you need to first submit an application. Please contact your cable company to discuss receiving an application. -
Page 37: Basic Adjustment Settings
Basic adjustment settings AV input mode menu items List of AV menu items to help you with operations Picture OPC ... Page 41 Backlight ... Page 40 Contrast ... Page 40 Brightness ... Page 40 Color ... Page 40 Tint ... Page 40 Sharpness ... -
Page 38: Ez Setup
Basic adjustment settings EZ Setup You can run EZ Setup again, even after setting up the preset channels. Language setting Select from among 3 languages: English, French and Spanish. Press MENU and the MENU screen displays. Press c/d to select “Setup”. Press a/b to select “EZ Setup”, and then press ENTER. -
Page 39: Antenna Setup - Digital - Air
Basic adjustment settings Channel memory setting Press MENU and the MENU screen displays. Press c/d to select “Setup”. Press a/b to select “CH Setup”, and then press ENTER. • If you already set the Secret No., input the 4- digit secret number here. See page 68 for setting a secret number. -
Page 40: Standby Mode
Basic adjustment settings Standby Mode Standby Mode may be set to either start the TV quickly from standby or conserve energy while on standby. Press MENU and the MENU screen displays. Press c/d to select “Setup”. Press a/b to select “Standby Mode”, and then press ENTER. -
Page 41: Picture Adjustments
Basic adjustment settings Picture adjustments Adjusts the picture to your preference with the following picture settings. Adjustments for AV source MENU [ Picture ] Picture Audio Backlight [+16] –16 Contrast [+30] Brightness –30 Color –30 Tint –30 Sharpness –10 Advanced Reset Selected item cbutton... -
Page 42: Opc Setting
Basic adjustment settings OPC setting Automatically adjusts the brightness of the screen. Press MENU and the MENU screen displays. Press c/d to select “Picture”. Press a/b to select “OPC”. Press c/d to select “On” or “On: Display”. Backlight [+16] –16 Contrast [+30] Brightness... -
Page 43: Sharpness Enhancement
Basic adjustment settings Sharpness Enhancement Provides sharper images with more depth by adjusting background sharpness. NOTE • The higher the number of the level, the more sharpness and depth you will get in images. However, this may also add more background noise. Automatic Contrast Adjusts black level and white level in images automatically as appropriate to a particular scene. -
Page 44: Sound Adjustment
Basic adjustment settings Sound adjustment You can adjust the sound quality to your preference with the following settings. Press MENU and the MENU screen displays. Press c/d to select “Audio”. MENU [ Audio ] Audio Treble [ 0] –15 Bass [ 0] –15 Balance... -
Page 45: Power Control
Basic adjustment settings Power Control Power control setting allows you to save energy. Power control for AV source No signal off When set to “Enable”, the power will automatically shut down if no signal inputs for 15 minutes. Press MENU and the MENU screen displays. Press c/d to select “Power Control”. -
Page 46: Digital Setup
Basic adjustment settings Digital Setup This setting allows you to set the image of Digital broadcasting. Video Setup You can adjust the settings for Digital image. Screen Size Set the format of image of Digital broadcasting. Press MENU and the MENU screen displays. Press c/d to select “Digital Setup”. -
Page 47: Using External Equipment
Using external equipment You can connect many types of external equipment to your TV, like a DVD player, VCR, Digital TV tuner, PC, HDMI equipment, game console and camcorder. To view external source images, select the input source with INPUT on the remote control unit or on the TV. Displaying an external equipment image Explanation here is for the setting when connecting DVD to INPUT1 terminal. -
Page 48: Connecting A Dvd Player
Using external equipment Connecting a DVD player You can use the INPUT 1, INPUT 2, INPUT 4 or INPUT 5 terminals when connecting to a DVD player and other audiovisual equipment. When using component cable. When using composite cable. When using DVI cable. (INPUT 5) ø... -
Page 49: Connecting A Vcr
Using external equipment Connecting a VCR You can use the INPUT 3 terminal when connecting a VCR and other audiovisual equipment. NOTE • The S-video terminal has priority over the video terminals. • The G-LINK cable connection is necessary if you want to use the recording features of the TV Guide On Screen system with your VCR. -
Page 50: Connecting A Digital Tv Stb (Air Or Cable)
Using external equipment Connecting a Digital TV STB (Air or Cable) You can use the INPUT 1, INPUT 2, INPUT 4 or INPUT 5 terminals when connecting a Digital TV STB (Air or Cable) and other audiovisual equipment. NOTE • If your cable-TV company has CableCARD security module available, you can also use the CableCARD security module to receive HDTV programs. -
Page 51: Connecting Hdmi Equipment
Using external equipment Connecting HDMI equipment Please use the INPUT 4 terminal when connecting HDMI equipment. HDMI equipment Displaying an image from HDMI equipment To watch an HDMI equipment image, select “INPUT4” from “INPUT SOURCE” menu using INPUT on the remote control unit or on the TV. -
Page 52: Connecting A Pc
Using external equipment Connecting a PC Use the INPUT 5 terminal to connect a PC. NOTE • Refer to page 83 for a list of PC signals compatible with the TV. ø 3.5 mm stereo minijack cable (commercially available) PC with DVI terminal Using Digital Audio Output It is possible to output audio through the DIGITAL AUDIO OUTPUT terminal. -
Page 53: Connecting D-Vhs Decks/Av-Hdd Recorder/Blu-Ray Disc Recorder (I.link Connection)
Using external equipment Connecting D-VHS decks/AV-HDD recorder/Blu-ray Disc recorder (i.LINK connection) About i.LINK i.LINK is an interface connection using a serial transfer system and is able to transfer multimedia data, such as digital images and digital sound, between devices that have i.LINK terminals. i.LINK is a term defined in the IEEE1394 (Institute of Electrical and Electronics Engineers) standard. -
Page 54: Setting The Recording Mode (I.link)
Using external equipment Setting the Recording Mode (i.LINK) • The function for automatically adjusting the recording mode of connected i.LINK devices can be turned on or off. • Since most of the currently available i.LINK devices automatically recognize the transfer rates of the pictures and sound being recorded and control the recording mode accordingly, you should always set this Mode to “Pass through”... -
Page 55: Selecting An I.link Device
Using external equipment Selecting an i.LINK device • In order to control an i.LINK device from the TV, you must first choose the i.LINK device to be controlled. • One i.LINK device can be chosen from up to 16 i.LINK connected decks. •... -
Page 56: Controlling An I.link Device
Using external equipment Controlling an i.LINK device • An i.LINK compatible device can be controlled from the TV using the i.LINK control panel on the screen. • The steps in “i.LINK Setup” on page 53 need to be completed beforehand. •... -
Page 57: Automatic Input Switching To I.link
Using external equipment NOTE • IEEE1394 is the IEEE’s international standard. • i.LINK and the i.LINK logo are registered trademarks of Sony Electronic, Inc. • A copy protection technology is used on i.LINK devices that incorporate copyright protection. This technology has received the approval of the Digital Transmission Licensing Administrator (DTLA), an organization that administers copyright protection technologies. -
Page 58: Recording Digital Programs With Av-Hdd Recorder/Blu-Ray Disc Recorder
Using external equipment Recording digital programs with AV-HDD recorder/Blu-ray Disc recorder • Before commencing this procedure, the steps in “i.LINK Setup” on page 53 need to be completed beforehand. • Please also refer to the operation manual of the AV- HDD recorder/Blu-ray Disc recorder to be used with this TV. -
Page 59: Useful Adjustment Settings
Useful adjustment settings Image position (AV input mode only) For adjusting a picture’s horizontal and vertical position. Press MENU and the MENU screen displays. Press c/d to select “Setup”. Press a/b to select “Position”, and then press ENTER. Press a/b to select “H-Pos.” or “V-Pos.”. H-Pos. -
Page 60: Auto Sync. Adjustment (Pc Input Mode Only)
Useful adjustment settings Auto Sync. adjustment (PC input mode only) For automatically adjusting the PC image. Press MENU and the MENU screen displays. Press c/d to select “Setup”. Press a/b to select “Auto Sync.”, and then press ENTER. Press c/d to select “Yes”, and then press ENTER. -
Page 61: Input Select
Useful adjustment settings Input Select Selecting input source Use this menu to select the input source. Press INPUT. • A list of selectable sources appears. Press INPUT again to select the input source. • An image from the selected source automatically displays. -
Page 62: Input Label
Useful adjustment settings Input Label Lets you set the input terminal displayed using the INPUT SOURCE menu or channel display. Press INPUT to select the desired input mode. Press MENU and the MENU screen displays. Press c/d to select “Setup”. Press a/b to select “Input Label”, and then press ENTER. -
Page 63: Av Mode
Useful adjustment settings AV MODE AV MODE gives you six viewing options to choose from to best match environment of the TV, which can vary due to factors like room brightness, type of program watched or the type of image input from external equipment. -
Page 64: View Mode (For Pc Input Mode)
Useful adjustment settings View Mode Normal Zoom Stretch Dot by Dot Screen size images. Input signal Keeps the original aspect ratio in a full screen display. View mode (for PC input mode) You can select the screen size. NOTE • Connect the PC before making adjustments. (See page 51.) •... -
Page 65: Input Signal (For Pc Input Mode)
Useful adjustment settings Input signal (for PC input mode) • Some input signals may have to be registered manually to display properly. • The pairs of input signals (resolutions) in the list below are not distinguishable when received. In such case, you have to set the correct signal manually. -
Page 66: Output Select
Useful adjustment settings Output Select Allows you to select what controls the audio output. Press MENU and the MENU screen displays. Press c/d to select “Option”. Press a/b to select “Output Select”, and then press ENTER. Press c/d to select “Fixed” or “Variable”, and then press ENTER. -
Page 67: Closed Captions And Digital Closed Captions
Useful adjustment settings Closed Captions and Digital Closed Captions • Your TV is equipped with an internal Closed Caption decoder. It allows you to view conversations, narration and sound effects as subtitles on your TV. Closed Captions are available on some TV programs, and on some VHS home video tapes, at the election of the program provider. -
Page 68: Caption Setup
Useful adjustment settings Caption Setup This function allows you to adjust the closed caption screen appearance to suit your preference. Press MENU and the MENU screen displays. Press c/d to select “Option”. Press a/b to select “Caption Setup”, and then press ENTER. Press a/b to select a specific adjustment item. -
Page 69: Secret Number Setting For Parental Control (Av Input Mode Only)
Useful adjustment settings Secret number setting for parental control (AV input mode only) Allows you to use a secret number to protect certain settings from being accidentally changed. IMPORTANT: Three conditions must be met to enable V-Chip (see pages 68 to 73): 1 Secret No. - Page 70 Useful adjustment settings Changing the secret number Allows you to change your current secret number. Repeat steps 1 to 3 in Setting a secret number. • Secret number setting menu displays. Input the 4-digit secret number by using 0 – Press a/b to select “Secret No.”, and then press ENTER.
-
Page 71: Parental Control (Setting V-Chip Level)
Useful adjustment settings Parental control (setting V-CHIP level) V-CHIP is an electronic filtering device built into your TV. This tool gives parents a great degree of control over broadcasts accessed by their children. It allows parents to select programs judged suitable for child viewing while blocking ones judged not suitable. - Page 72 Useful adjustment settings Voluntary movie rating system (MPAA) Press MENU and the MENU screen displays. Press c/d to select “Setup”. Press a/b to select “Parental CTRL”, and then press ENTER. • Secret number setting menu displays only when “Secret No.” is set. (See page 68.) •...
- Page 73 Useful adjustment settings Canadian Rating Systems • The TV rating systems in Canada are based on the Canadian Radio-Television and Telecommunications Commission (CRTC) policy on violence in television programming. • While violence is the most important content element to be rated, the structure developed takes into consideration other program content like language, nudity, sexuality and mature themes.
-
Page 74: How To Temporarily Release The V-Chip Block
Useful adjustment settings Canadian English ratings Press MENU and the MENU screen displays. Press c/d to select “Setup”. Press a/b to select “Parental CTRL”, and then press ENTER. • Secret number setting menu displays only when “Secret No.” is set. (See page 68.) •... -
Page 75: Other Viewing Options
Other viewing options Viewing information of the program You can view information about a program you are currently watching. Press INFO while watching a broadcast. • Information of the current program will be displayed. WGBH-HD American Family – – – Journey of Dreams 20:00 Sample program information •... - Page 76 05, 08 06, 07, 33, 51 01, 02, 10, 24 Realistic Samsung 23, 31 Sanyo 10, 14, 52 Scott Sears 06, 11, 24 Sharp 01, 02, 03 Shintom 12, 13, 38 Sony Sound Design Sylvania 05, 08 Symphonic Tatung Teac...
- Page 77 Other viewing options Cable control buttons When the FUNCTION is set to CBL/SAT the cable converter connected to the TV can operate using 1 to SOURCE POWER Turns the cable converter power on and off. 0 – 9 Press a button (or buttons) that corresponds to the channel that you wish to watch.
- Page 78 Other viewing options VCR control buttons The remote control unit button will function as follows when the FUNCTION of the remote control unit is set to VCR. • When the input selector button having the same number as the input terminal connecting the VCR is pressed, the VCR can operate using 1 to 8.
- Page 79 Other viewing options Notice I When you change your address • If you change your address, please return the CableCARD security module to your Cable Provider Company. • You will need to request a new CableCARD security module from the cable provider at your new location. I About EAS (Emergency Alert System) •...
-
Page 80: Appendix
Appendix Removing the speaker Take off the speaker terminal cover. Disconnect the cable from the speaker. CAUTION • Do not remove the stand and speaker from the TV unless using an optional bracket to mount it. • Before performing work spread cushioning over the base area to lay the Display on. This will prevent it from being damaged. -
Page 81: Removing The Stand
• Installing the Liquid Crystal Television requires special skill that should only be performed by qualified service personnel. Customers should not attempt to do the work themselves. SHARP bears no responsibility for improper mounting or mounting that results in accident or injury. -
Page 82: Troubleshooting
Appendix Troubleshooting Problem • No power • Unit cannot be operated. • Remote control unit does not operate. • Picture is cut off/with sidebar screen. • Strange color, light color, or color misalignment • Power is suddenly turned off. • No picture •... -
Page 83: Troubleshooting-Tv Guide On Screen
Appendix Troubleshooting-TV Guide On Screen Problem • LISTINGS disappeared after a power failure. • Some channel numbers in the TV Guide On Screen are incorrect. • You have not received any local program listings. • A program you set to record did not record. -
Page 84: Troubleshooting-Digital Broadcasting
Appendix Troubleshooting-Digital broadcasting I The error message about reception of broadcast The example of an error message displayed on a screen • Failed to receive broadcast. • No broadcast now. I The cautions about i.LINK Caution sentence • Record/Playback may fail on the selected model. •... -
Page 85: Rs-232C Port Specifications
Appendix RS-232C port specifications PC Control of the TV • When a program is set, the TV can be controlled from the PC using the RS-232C terminal. The input signal (PC/AV) can be selected, the volume can be adjusted and various other adjustments and settings can be made, enabling automatic programmed playing. -
Page 86: Input Select
Appendix Response code format Normal response Return code (0DH) Problem response (communication error or incorrect command) Return code (0DH) Command table • Commands not indicated here are not guaranteed to operate. CONTROL ITEM COMMAND PARAMETER POWER SETTING P O W R INPUT SELECTION A TOGGLE T G D... -
Page 87: Specifications
Operating temperature • As part of policy of continuous improvement, SHARP reserves the right to make design and specification changes for product improvement without prior notice. The performance specification figures indicated are nominal values of production units. There may be some deviations from these values in individual units. -
Page 88: Dimensional Drawings
Dimensional drawings HOW TO SET THE FACTORY PRESETS Check that the power indicator is not on. Remove the AC cord and switch off the power. Press and hold down RESET at the same time as you re-insert the AC Cord into the outlet and switch on the TV. All setting items (except TV channel) return to the factory presetting. -
Page 89: Calling For Service
Product, and shall constitute full satisfaction of all claims, whether based on contract, negligence, strict liability or otherwise. In no event shall Sharp be liable, or in any way responsible, for any damages or defects in the Product which were caused by repairs or attempted repairs performed by anyone other than an authorized servicer. - Page 90 (b) Any Sharp product tampered with, modified, adjusted or repaired by any party other than Sharp, Sharp’s Authorized Service Centres or Sharp’s Authorized Servicing Dealers. (c) Damage caused or repairs required as a result of the use with items not specified or approved by Sharp, including but not limited to head cleaning tapes and chemical cleaning agents.