Table of Contents
Advertisement
Advertisement
Table of Contents

Summary of Contents for Nemtek Druid LCD
- Page 1 Druid LCD Electric Fence Energizer User Manual...
-
Page 2: Table Of Contents
Table of Contents Introduction & company profile Guarantee NEMTEK Group outlets Foreword Symbol interpretation Symbol to label link Operation without a keypad Operation with a keypad Using your keypad Keypad zone focus IEC Safety Information Document revision history... -
Page 3: Introduction & Company Profile
Introduction & company profile INTRODUCTION Thank you for choosing our product! The NEMTEK Druid LCD Electric Fence Energizer is designed and manufactured to provide many years of reliable use, if installed and maintained correctly. The guidelines provided in this manual will assist you with the basic operation and maintenance of your Druid LCD. -
Page 4: Guarantee
NEMTEK does not guarantee that the operation of the product will be uninterrupted and totally error free. Faulty units must be returned to one of the NEMTEK Group outlets. The buyer shall pay all shipping and other charges for the return of the product to NEMTEK or NEMTEK Security Warehouse. -
Page 5: Nemtek Group Outlets
NEMTEK Group outlets HEAD OFFICE Tel: +27 (0)11 462 8283 Northriding Commercial Park Fax: +27 (0)11 462 7132 Stand 251, Aintree Street, Northriding Randburg, South Africa EXPORTS Tel: +27 (0)11 462 8283 exports@nemtek.com Fax: +27 (0)11 462 7132 EDENVALE Tel: +27 (0)11 453 1970... -
Page 6: Foreword
Foreword The Druid LCD energizer should ideally be operated by means of a remote keypad to obtain access to the many energizer features and receive the greatest protection. It can however be operated by means of a Nemtek tab or remote switch. -
Page 7: Symbol Interpretation
Druid LCD 2x Energizers, when set up to run with and external sync signal, will display S S in the fence condition positions when the sync signal is lost. -
Page 8: Symbol To Label Link
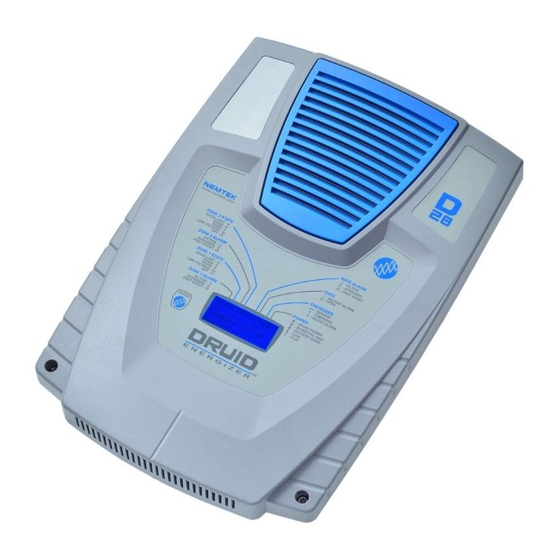
Symbol to descriptive label link A symbol shown on the LCD (Liquid Crystal Display), depending on its position, is linked through one of the eight linking lines above the LCD to one of eight descriptive labels. A brief interpretation of the symbol displayed on the LCD is to be found under the descriptive label it is linked to. -
Page 9: Operation Without A Keypad
Activating and deactivating the energizer Unless this feature has been disabled by the installer, the energizer can be activated or deactivated by presenting the Nemtek plastic tab over the corresponding logo on the fascia of the unit. Remove the tab when the energizer produces a short beep, after which the energizer will toggle its operating state. -
Page 10: Operation With A Keypad
Operation with a keypad The energizer may be operated by up to two keypads. In this case the Nemtek tab becomes optional. (Installer programmable feature). In order to provide different access levels to the energizer and its functions two different types of user are defined. -
Page 11: Using Your Keypad
Using your keypad All keypad codes must end with the # key to enter the code sequence. If you pause for more than five seconds between key presses, the keypad will produce a fast beeping sequence and all earlier keys will be deleted. A correctly entered sequence will be acknowledged with two beeps. - Page 12 Using your keypad MASTER PIN FENCE ALARM BYPASS _ _ _ _ * 2 1 # (alarm bypassed) MASTER PIN _ _ _ _ * 2 0 # (alarm not bypassed) Use this feature to prevent the alarm from sounding when a fence fault occurs. Typically you would not want to bypass the fence alarm, however this feature is available should it be needed.
- Page 13 Using your keypad MASTER PIN GATE ALARM BYPASS _ _ _ _ * 4 1 # (gate alarm bypassed) MASTER PIN _ _ _ _ * 4 0 # (gate alarm not bypassed) Use this feature to prevent the alarm from sounding when the gate is open for longer than the gate delay time.
- Page 14 Using your keypad MASTER PIN SERVICE ALARM BYPASS _ _ _ _ * * 1 # (bypassed) MASTER PIN _ _ _ _ * * 0 # (not bypassed) Use this feature to prevent the alarm from sounding when a service condition exists. A service condition may occur for a short duration after a prolonged mains power failure.
- Page 15 Replace the ? above with a 1 to activate or a 0 to deactivate the OUT1 relay manually. This relay can be used as a keypad controlled switch. See ‘OUT1 RELAY FUNCTION’ in the ‘DRUID LCD 1xx Installer Manual’ for more detail on configuring the OUT1 relay function.
-
Page 16: Keypad Zone Focus
Keypad zone focus The DRUID LCD 2x range of energizers contain two independent output channels or zones. The 2x range is essentially two energizers in a single housing. Rather than having to install a keypad for each zone, a method to focus the keypad onto a specific zone has been programed into the 2x range. -
Page 17: Iec Safety Information
Rev 1.1a, 16 Mar 2010 Reference to “Remote On/Off tool” removed. Rev 1.2, 29 Feb 2012 DRUID LCD 2x details added. “Persons using this appliance”, and “Replacement of supply cord”, clauses added. Rev 1.3, 20 July 2015 Nemtek Connect note added.


