Table of Contents

Related Manuals for Russell Hobbs RHM2016


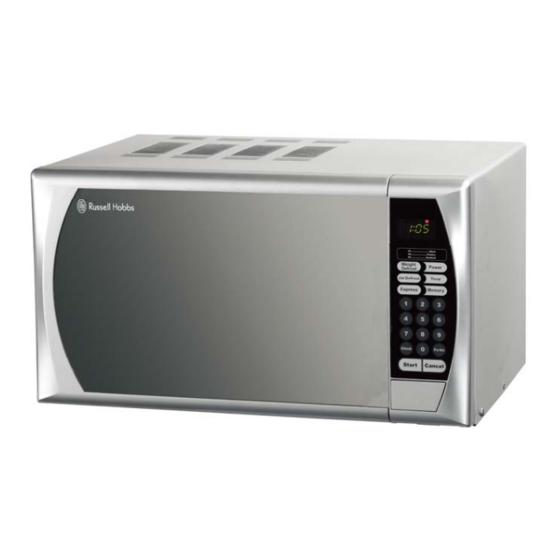
Summary of Contents for Russell Hobbs RHM2016
-
Page 1: Instruction Manual
20 Litre Digital Microwave Oven Instruction Manual Model Number: RHM2016 Please read these instructions carefully and keep them for future reference & Spare Parts please call For Customer Services 0845 209 7461 Opening times: Monday – Friday 8am – 6pm... -
Page 2: Table Of Contents
Contents Page About this microwave oven …………………………………………..……. 3 Safety instructions………………………………………………….………… 4 Microwave oven Installation……………………………………….….……. 5 Feature diagram……………………………………………………….……… 6 Connection to the mains supply…………………………......… 6 Control panel……………………………………………………….……….…. 7 Operating instructions…………………………………………….…….…… 8 Setting the clock……………………………………………………..…..… 8 Setting the timer……………………………………………………..…..… 8 Microwave cooking…………………………………………………..…… 8 Delayed start cooking…………………………...……......………... -
Page 3: About This Microwave Oven
About this microwave oven Microwaves are high-frequency electromagnetic waves similar to radio waves. While radio waves may vary in length from one metre to many kilometres, microwaves are very short (less than 12.5 centimetres). Microwaves do not make any heat themselves but only cause water molecules in food to vibrate. -
Page 4: Safety Instructions
Safety instructions Warning: this oven must be positioned so that the plug is accessible and the plug socket is within easy reach of the power cord. Warning: children should not use this microwave oven. This appliance is not intended for use by persons (including children) with reduced physical, sensory or mental capabilities, or lack of experience and knowledge, unless they have been given supervision or instruction concerning use of the appliance by a person responsible for their safety. -
Page 5: Microwave Oven Installation
Food containing a mixture of fat and water (for example, stock) should stand for 30 to 60 seconds in the oven after it has been turned off. This is to allow the mixture to settle and to prevent it from bubbling when a spoon is placed in it, or a stock cube is added. When heating or cooking food or liquid, remember that there are certain foods (such as Christmas puddings, jam and mincemeat), which heat up very quickly. -
Page 6: Feature Diagram
Feature diagram 1 Door safety lock system 2 Oven window 3 Turntable support 4 Door release button 5 Control panel 6 Wave guide cover (Do not remove) 7 Glass tray Connection to the mains supply WARNING - THIS APPLIANCE MUST BE EARTHED This appliance is designed to operate from a mains supply of AC230V ~ 50HZ. -
Page 7: Control Panel
Control panel DISPLAY Cooking time, power, action indicator and clock time are displayed. NUMBER PADS (0-9) Touch to set times or weights. WEIGHT DEFROST Use to defrost frozen meat, poultry and seafood by DISPLAY weight. The defrosting time and power level are automatically set once the food category and the weight are programmed. -
Page 8: Operating Instructions
Operating instructions Connect the main plug into a suitable 13amp mains socket, make sure the voltage is the same as on the rating label (do not use extension cables or mains adaptors). The microwave oven will beep once and the display will show the clock symbol and ‘1:01’ During any cooking program, To pause cooking press the CANCEL pad. -
Page 9: Delayed Start Cooking
DELAYED START COOKING This function allows the oven start time to programmed up to 12 hours in advance of the time shown on the clock. FOR EXAMPLE: To start cooking at 2 o’clock: Check that the clock is showing the current time. Place the food in a container suitable for use with microwave ovens, put it into the microwave oven and close the door. -
Page 10: Weight Defrost
WEIGHT DEFROST The oven allows the defrosting of meat, poultry, and seafood. The time and the defrosting power are adjusted automatically once the weight is programmed. The maximum weight of frozen foods that can be defrosted is shown in the table below. FOR EXAMPLE: Suppose you want to defrost 600g of shrimp. -
Page 11: Child Safety Lock
CHILD SAFETY LOCK This function is to help prevent small children from using the microwave oven. The CHILD LOCK indicator will show up on display screen, and the oven cannot be operated while the CHILD LOCK is set. To set the CHILD LOCK: Press and hold the CANCEL pad for 3 seconds, a beep sounds and lock indicator lights. -
Page 12: Problem Solving
Problem solving The microwave oven may cause interference to your radio, TV or similar equipment. If it does, you can get rid of the interference by moving the radio, TV or equipment as far away from your microwave oven as possible. If the oven doesn’t work, if the display does not appear or if the display has disappeared Make sure the oven is plugged in securely. - Page 13 Please use this page for your notes and recipes For Customer Services & Spare Parts please call 0845 209 7461 Opening times: Monday – Friday 8am – 6pm...
-
Page 14: Non-Rewireable Mains Plug
Non-rewireable mains plug If your appliance is supplied with a non-rewireable plug fitted to the mains lead you will find that it incorporates a fuse, the value of which is indicated either on the base of the plug or on the fuse carrier. Should the fuse need replacing, you must use an ASTA approved fuse (conforming to BS1362) of the same rating. - Page 15 For Customer Service and Spare Parts please call 0845 209 7461 Opening times: Monday – Friday 8am until 6pm Revision 1 This symbol is known as the 'Crossed-out wheelie bin Symbol'. W hen this symbol is marked on a product/batteries, it means that the product/batteries should not be disposed of with your general household waste.