
Related Manuals for Russell Hobbs RHM2086SS-G


Summary of Contents for Russell Hobbs RHM2086SS-G
- Page 1 Compact Digital Microwave User Guide Model Number: RHM2086SS-G For Customer Services & Spare Parts please call 0345 209 7461 Or visit us at http://mda.russellhobbs.com PLEASE RETAIN FOR FUTURE REFERENCE...
-
Page 2: Table Of Contents
CONTENTS Page(s) SAFETY INSTRUCTIONS ABOUT YOUR MICROWAVE 10-11 PRODUCT INFORMATION UNPACKING THE MICROWAVE PRODUCT OVERVIEW MICROWAVE OVEN INSTALLATION 15-16 TURNTABLE INSTALLATION 17-18 CONTROL PANEL HOW TO USE THE MICROWAVE 20-28 COOKING TIPS CLEANING THE MICROWAVE PROBLEM SOLVING 31-34 GUARANTEE & CUSTOMER SERVICES SPARE PARTS CONNECTION TO THE MAINS SUPPLY 37-38... -
Page 3: Safety Instructions
SAFETY INSTRUCTIONS IMPORTANT SAFETY INSTRUCTIONS READ CAREFULLY AND KEEP FOR FUTURE REFERENCE WARNING: • This appliance is intended to be used in the household and general domestic applications. It is not intended to be used in industrial or commercial applications. •... - Page 4 SAFETY INSTRUCTIONS READ CAREFULLY AND KEEP FOR FUTURE REFERENCE WARNING: • A minimum clearance of 7.5cm is required between the oven and any adjacent walls. Leave a minimum clearance of 30cm above the oven. • Use only cookware and utensils that are approved for use in a microwave oven.
- Page 5 SAFETY INSTRUCTIONS READ CAREFULLY AND KEEP FOR FUTURE REFERENCE WARNING: • The contents of feeding bottles and baby food jars shall be stirred or shaken and the temperature checked before consumption, in order to avoid burns. Do not heat baby bottles with the teat left on. Remove it if replacing the bottle back into the oven.
- Page 6 SAFETY INSTRUCTIONS READ CAREFULLY AND KEEP FOR FUTURE REFERENCE WARNING: • To avoid fire, electric shock, or injury, never immerse the microwave, cord, or plug in water or liquid. • Do not use attachments not recommended by the manufacturer. Only use thermometers approved for use in microwaves.
- Page 7 SAFETY INSTRUCTIONS READ CAREFULLY AND KEEP FOR FUTURE REFERENCE WARNING: • When heating or cooking food or liquid, remember that there are certain foods (such as, jam, Christmas pudding, and mincemeat) which heat up very quickly. • Do not cook any food surrounded by a membrane, such as egg yolks, potatoes, chicken livers, sausages, ready meals and so on without piercing them several times with a fork.
- Page 8 SAFETY INSTRUCTIONS READ CAREFULLY AND KEEP FOR FUTURE REFERENCE WARNING: • When using the grill rack and baking tray, be aware that these will become HOT during cooking as they aren’t heatproof. Please use suitable oven gloves when removing these. •...
- Page 9 SAFETY INSTRUCTIONS READ CAREFULLY AND KEEP FOR FUTURE REFERENCE WARNING: • On the right hand wall of the cavity is the wave guide cover, microwaves are passed through this to enable your food to cook. It is important that this wave guide cover is kept clean at all times.
-
Page 10: About Your Microwave
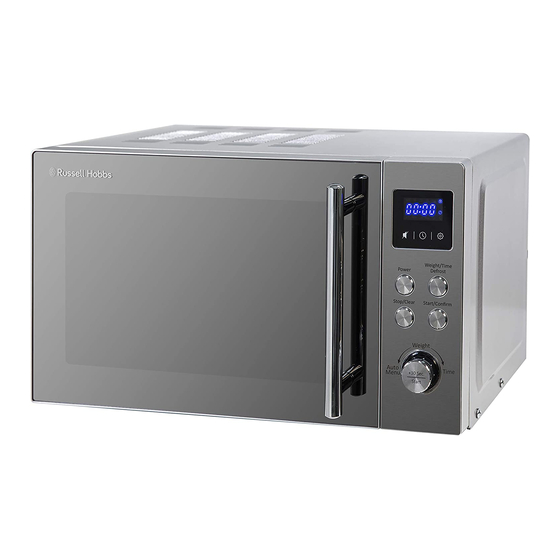
700 watts of microwave power, providing you quick and convenient cooking in your home. The RHM2086SS-G from Russell Hobbs is a 17 litre cavity capacity microwave, comfortably fitting a standard size of dinner plate. It comes with a removable and dishwasher safe glass turn-table for easy cleaning. - Page 11 ABOUT YOUR MICROWAVE How do microwaves work? Microwaves are high-frequency electromagnetic waves similar to radio waves. While radio waves may vary in length from one metre to many kilometres, microwaves are very short (less than 12.5 centimetres.) Microwaves do not make any heat themselves but cause water molecules in food to vibrate.
-
Page 12: Product Information
PRODUCT INFORMATION Rated Voltage 230-240V/50Hz Rated Input Power (Microwave) 1200W Rated Output Power (Microwave) 700W Oven Capacity (litres) *Internal volume is calculated by measuring maximum width, depth and height. Actual capacity for holding food is less. Produced for: G2S Limited Wigan WN2 4AY... -
Page 13: Unpacking The Microwave
UNPACKING THE MICROWAVE Before you use your microwave oven 1. Remove all the packaging. Do not remove the large piece of mica board from the right hand side of the cavity wall (Refer to the below image). This is called a wave-guide cover and allows the microwaves to pass through to cook the food. -
Page 14: Product Overview
PRODUCT OVERVIEW Safety interlock latches Screen display Door assembly and Control panel - buttons window and dial Oven cavity Turntable coupling Wave guide cover (do Roller ring not remove) Glass turntable... -
Page 15: Microwave Oven Installation
MICROWAVE OVEN INSTALLATION • Place the oven as far away from radios and televisions as possible. Using the oven may cause interference with the reception. • Plug the oven into a suitable 13 amp mains socket, make sure the voltage is the same as on the rating label (do not use extension cables or mains socket adaptors.) •... - Page 16 MICROWAVE OVEN INSTALLATION The minimum installation height is 85cm. A minimum clearance of 7.5cm is required between the oven and any adjacent walls. Leave a minimum clearance of 30cm above the oven. WARNING: DO NOT install the oven over a cooker or other heat or steam producing appliance as this will damage the microwave oven.
-
Page 17: Turntable Installation
TURNTABLE INSTALLATION • Before first use, check that any securing tape and all packaging has been removed from the glass tray and turntable ring assembly. • These parts must never be restricted from rotating. • Never place the glass tray upside down. •... - Page 18 TURNTABLE INSTALLATION The glass tray, turntable ring, and turntable coupling assembly must always be used during cooking (as shown below). • Do not place the food directly onto the glass tray, always place on or in suitable microwaveable cookware. Please check that crockery is microwave safe before using. •...
-
Page 19: Control Panel
CONTROL PANEL Screen Display Cooking time, power action indicators, and clock time are displayed. (Clock) Press this button to set the time. (Mute) Press to set mute function. (Pre-set) Press to set a pre-set cooking time. Power Press this button a number of times to set a cooking power level. -
Page 20: How To Use The Microwave
HOW TO USE THE MICROWAVE Setting the clock (24 hour) For example, if you want to set the time to 08:30 (am:) 1. Press the 'Clock' button. The display will show '24H', and the clock symbol will be displayed. 2. Turn the 'Auto Menu/Weight/Time' dial clockwise until the display shows '8:'. - Page 21 HOW TO USE THE MICROWAVE • When pressed twice the screen display will show 80% • When pressed three times the screen display will show 60% • When pressed four times the screen display will show 40% • When pressed five times the screen display will show 20% •...
- Page 22 HOW TO USE THE MICROWAVE Defrost The microwave generally penetrates 4cm into most foods. Therefore you must ensure food is thoroughly defrosted before starting the cooking process. For even defrosting results, ensure you turn the food over during the cycle. Defrosting generally takes longer than the cooking time of food.
- Page 23 HOW TO USE THE MICROWAVE Please note: 'End' will be displayed and 4 beeps will be heard every 2 minutes until the oven door is opened or the 'Stop/Clear' button is pressed. Note: Ensure food is thoroughly defrosted before starting the cooking process Auto cooking function There are 8 auto menus you can use for easy cooking,...
- Page 24 HOW TO USE THE MICROWAVE Auto Food Weights Recommendations menu Place the cup onto the center of the 1-200ml turntable. When the liquid has been Milk/Coffee 2-400ml removed from the oven, leave to stand 3-600ml before adding sugar. 150g 300g Place the rice into a suitable container, Rice 450g...
- Page 25 HOW TO USE THE MICROWAVE Multi Stage cooking For some recipes, results may be better if you wish to cook on different power levels for different times, for one dish. Note: This can be used to set a maximum of two different stages. The auto menu cannot be set as one of the multi-stage cooking functions.
- Page 26 HOW TO USE THE MICROWAVE Pre-set cooking function You can set your microwave to start cooking at a pre-set time, without the need to be present to input the programmes. Make sure your food is in the microwave and prepared when you programme the pre-set function. You will need to set the clock and the cooking menu and time.
- Page 27 HOW TO USE THE MICROWAVE Mute function To set up the mute function, simply press ‘Mute’ once, the oven will beep once to let you know the mute function is switched on. To de-activate the mute function, press ‘Mute’ once, the mute function is switched off.
- Page 28 HOW TO USE THE MICROWAVE Utensil information • Do not use metal pans or dishes with metal handles. • Do not use anything with a metal trim. • Do not use paper-covered wire twist-ties on plastic bags. • Do not use melamine dishes as they contain a material which will absorb microwave energy.
-
Page 29: Cooking Tips
COOKING TIPS Defrosting tips Microwaves penetrate around 4cm into most food. To maximize defrosting effectiveness follow the below guidelines: 1. For thick foods, turn regularly during operation in order to defrost evenly. 2. If food weighs over 500g, it is advised to turn at least 2 times. 3. -
Page 30: Cleaning The Microwave
CLEANING THE MICROWAVE • Before you clean the oven, turn it off and unplug it. • Keep the inside of the oven clean. When food or liquids stick to the oven walls, wipe with a damp cloth. We recommend that you do not use harsh detergent or abrasives. -
Page 31: Problem Solving
PROBLEM SOLVING WARNING: To reduce the risk of personal injury, always unplug the microwave before performing maintenance or trouble shooting checks. The microwave oven may cause interference to your radio, TV or similar equipment. If this happens, you can stop the interference by moving the radio, TV or equipment as far away from your microwave oven as possible. - Page 32 PROBLEM SOLVING Problem Potential reason Potential solution Spillages or splashes can burn and catch fire, all food that is put into the microwave should be appropriately covered. All spillages or splashes must be cleaned, and all areas of microwave cleaned after each use. Burnt on food debris in the microwave, on the wave guide 1.
- Page 33 PROBLEM SOLVING Problem Potential reason Potential solution By the very nature of how a microwave works, it ‘excites’ the water molecules in the food it is heating, causing them to move about and generate heat from within the food. Often when the food heats up it reaches the point where steam is released.
- Page 34 PROBLEM SOLVING Problem Potential reason Potential solution Check that the glass turntable has been placed correctly 1. Glass turntable on the turntable and is not stopping the door from fitted incorrectly shutting correctly. Door not shutting/ If the microwave is within its warranty period, please locking 2.
-
Page 35: Guarantee & Customer Services
GUARANTEE & CUSTOMER SERVICES At Russell Hobbs, we take all our customer feedback seriously. Feel free to contact our Customer Service Team on 0345 209 7461 who will be more than happy to assist you. This product is guaranteed for 12 months from the date of the original purchase. -
Page 36: Spare Parts
SPARE PARTS To check the availability of the following spare parts, simply contact our friendly Customer Service team on 0345 209 7461. Turntable coupling Turntable ring Glass turntable... -
Page 37: Connection To The Mains Supply
CONNECTION TO THE MAINS SUPPLY WARNING- THIS APPLIANCE MUST BE EARTHED This appliance is designed to operate from a mains supply of 230-240V~ 50Hz. Check that the voltage marked on the product corresponds with your supply voltage. This product is fitted with a moulded 13A plug complying with BS1363. - Page 38 CONNECTION TO THE MAINS SUPPLY For UK use only – PLUG • As the colours of the wires in the mains lead of this appliance may not correspond with the coloured markings identifying the terminals in your plug, proceed as follows: •...
-
Page 39: Notes
NOTES... -
Page 40: Disposal
For Customer Services & Spare Parts please call: 0345 209 7461 Or visit us at http://mda.russellhobbs.com Revision 2.1 This symbol is known as the 'Crossed-out wheelie bin Symbol'. When this symbol is marked on a product/batteries, it means that the product/batteries should not be disposed of with your general household waste.