Table of Contents
Advertisement
Downloaded from
www.Manualslib.com
Dear customer,
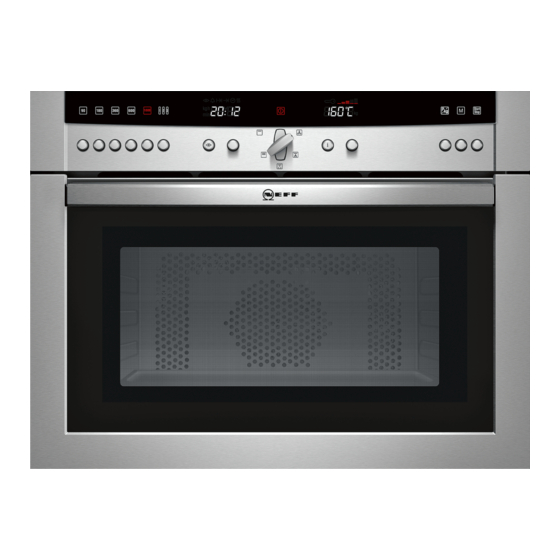
You have decided to purchase a new microwave oven from
Neff. We would like to thank you for your confidence in us and
we hope that you will have many years of enjoyment and
cooking pleasure with your new appliance at the heart of your
kitchen.
Please read the instruction manual to ensure that you make
full use of all the technical benefits your microwave oven has
to offer.
The detailed table of contents guides you quickly to all the
important information:
H
It will provide you with important safety information.
H
You will be familiarised with the individual components of your new
appliance.
H
And we will show you how to make settings step by step.
H
The tables list numerous well known dishes and typical settings.
All these dishes are tested in our cooking studio.
H
In the unlikely event of a malfunction, look here for information on how
to rectify minor faults yourself.
Have fun cooking.
manuals search engine
Advertisement
Table of Contents

Related Manuals for NEFF C57M70N0GB


Summary of Contents for NEFF C57M70N0GB
- Page 1 Dear customer, You have decided to purchase a new microwave oven from Neff. We would like to thank you for your confidence in us and we hope that you will have many years of enjoyment and cooking pleasure with your new appliance at the heart of your kitchen.
-
Page 2: Table Of Contents
Table of contents Safety information ......Before installation ......Information for your safety . - Page 3 Table of contents MicroCombi operation ..... . Setting a combination ......1,2,3 series of operations .
- Page 4 Table of contents Tested for you in our cooking studio ..Tables ........Tips for microwave operation .
-
Page 5: Safety Information
d Safety information Read this instruction manual carefully. Only then will you really be able to operate your appliance safely and correctly. Please keep the instruction and installation manuals in a safe place. Please include these manuals if you pass on the appliance to a new owner. Before installation Damage during transport Check the appliance for damage after unpacking it. - Page 6 Hot cooking compartment There is a risk of burns. Never touch the hot surfaces of heating and cooking appliances. Never touch the internal surfaces of the cooking compartment or the heating elements. Open the cooking compartment door carefully. Hot steam may escape.
-
Page 7: Information On The Microwave
Casing open There is a risk of electric shock. Never remove the casing. The appliance is a high voltage appliance. There is a risk of serious damage to health. Never remove the casing. It prevents microwave energy from escaping. Hot or humid environment There is a risk of short circuiting. - Page 8 There is a risk of burns. Hot food can heat up ovenware. Always use an oven cloth or oven gloves to remove ovenware and accessories from the cooking compartment. There is a risk of fire. Microwave power and time Do not select a microwave power or time setting that is higher than necessary.
-
Page 9: Causes Of Damage
Never overheat alcoholic drinks. Baby food There is a risk of burns. Never heat baby food in closed containers. Always remove the lid or teat. Stir or shake well after the food has been heated. This ensures even heat distribution. Check the temperature of the food before it is given to the child. -
Page 10: Environmentally Friendly Disposal
Technical fault Never use the enamel baking tray when cooking with microwave operation. It will result in a technical fault. Cooling with the appliance Only leave the cooking compartment to cool with the door open door closed. Do not trap anything in the appliance door. -
Page 11: Your New Appliance
Your new appliance In this section, you will find information on the control panel the operating modes the shelf heights the accessories Control panel Temperature display Electronic clock Microwave Series of Rotary selector Info button Control power operations elements settings Clock function Operating mode selector Temperature selector... -
Page 12: Operating Modes
Operating modes Here is an overview of the operating modes of your appliance. Operating modes Application 3 Hot air For baking sponge cakes in tins, flans and cheesecakes and cakes, pizzas and small baked products on a baking tray. 4 Convection grilling For poultry and larger pieces of meat. -
Page 13: Accessories
Accessories Your appliance is equipped with the following accessories: Wire rack For ovenware, cake tins, grilling and frozen meals. You can pull the wire rack two thirds of the way out without it tipping. This allows meals to be removed easily. -
Page 14: Cooking Compartment
Cooking compartment Cooling fan Your appliance has a cooling fan. The cooling fan switches on during operation. The warm air escapes above the door. Caution: do not cover the ventilation slots, otherwise the oven will overheat. The cooling fan continues to run for a certain time after operation. -
Page 15: Before Using The Appliance For The First Time
Switching off Turn the operating mode selector back and push in. The appliance switches off and the time appears in the clock display. Before using the appliance for the first time This section contains information on how to set the time on your appliance after the power is connected how to clean your appliance before using it for the first time... -
Page 16: Heating Up The Cooking Compartment
Note In order to reduce the energy consumption of your appliance in standby, you can switch off the clock display. Refer to the section entitled Electronic clock. Heating up the cooking Heat up the empty cooking compartment with the compartment door closed to remove the new smell. -
Page 17: Setting The Operating Mode And Temperature
The following operating modes are available for your oven. When you make a setting, a default temperature is always displayed. Operating mode Default Temperature temperature range in ºC, in ºC, grill setting grill setting 3 Hot air 40 250 4 Convection grilling 100 250 = Hot air grilling 100 250... -
Page 18: Setting Rapid Heating
3. Press the ƒ button. The operation starts. The temperature control heating up bars appear in the temperature display. Switching off Once the dish is ready, switch off the oven using the mode selector, or make new settings. Opening the oven door Operation is paused. -
Page 19: The Microwave
3. Press the clock function button repeatedly until the KJ uand f symbols light up and Œ appears in the clock display. 4. Turn the rotary selector clockwise. Ž appears in the clock display and the f symbol lights up. Rapid heating is switched on. To obtain an even cooking result, do not place your dish into the oven until rapid heating has finished. -
Page 20: Notes Regarding Ovenware
Notes regarding ovenware Suitable ovenware Suitable dishes are heat resistant ovenware made of glass, glass ceramic, porcelain, ceramic or heat resistant plastic. These materials allow microwaves to pass through. You can also use serving dishes. This saves you having to transfer food from one dish to another. You should only use ovenware with decorative gold or silver trim if the manufacturer guarantees that they are suitable for use in microwaves. -
Page 21: Setting The Microwave
180 watts for defrosting and continued cooking 360 watts for cooking meat and heating delicate foods 600 watts for heating and cooking food 1,000 W for heating liquids When you press a button, the selected power lights up. Note The microwave power can be set to 1,000 watts for a maximum of 30 minutes. -
Page 22: Microcombi Operation
Changing the microwave Press the button for the new microwave power power setting setting. Use the rotary selector to set the cooking time and restart the microwave. Cancelling operation Press the button for the set microwave power setting. Make new settings or switch off the appliance. Notes When you make settings, the highest microwave power setting always appears as the default. -
Page 23: Setting A Combination
Setting a combination Example: Microwave 360 watts, 17 minutes and hot air grilling = 180 ºC. 1. Set the operating mode using the mode selector. 2. Use the temperature selector to set the temperature. 3. Press the button for the microwave power setting you require. -
Page 24: 1,2,3 Series Of Operations
1,2,3 series of operations You can use the series of operations function to set up to three different settings and times and then start. In this section, you can find out how to set the series of operations. Suitable for all operating modes all microwave power settings Ovenware... -
Page 25: Electronic Clock
Opening the appliance Operation is paused. The cooling fan may continue door during operation to run. Press the ƒ button again after closing the door. The operation continues. Changing the setting Changes can only be made before operation starts. Press the °±² button to go to the desired setting, and make the changes. -
Page 26: Clock Display
Clock display Clock function button Rotary selector Clock function Timer You can use the timer as an egg timer or a kitchen timer. The appliance does not switch off automatically. Cooking time The appliance switches off automatically after a set cooking time (e.g.‚:„‹... -
Page 27: Timer
If you wish to cancel a setting, turn the set time down to ‹:‹‹ and switch the appliance off. Switching the clock display 1. Press and hold the clock function button for a off and on few seconds. The clock display switches off. If a function is activated, the corresponding symbol remains lit. -
Page 28: Setting The Clock
2. Press the clock function button repeatedly until the KJ and x symbols are lit. 3. Set the cooking time using the rotary selector (e.g. ‚:„‹ hours). 4. Press the ƒ button. The appliance heats up. The appliance switches off automatically once the cooking time has elapsed. -
Page 29: Automatic Programmes
Automatic programmes The automatic programmes enable you to prepare food very easily. You select the programme and enter the weight of your food. The automatic programme makes the optimum setting. You can select from 15 programmes. Setting the programme If you have selected a programme, set the oven. Prerequisite: the mode selector must not be pressed in. -
Page 30: Notes For The Automatic Program
3. Press the n button again. The temperature display suggests a weight. 4. Set the weight using the temperature selector. 5. Press the ƒ button. The programme starts. You will see the cooking time x counting down in the clock display. A signal sounds. - Page 31 Place the food in the cold oven. You will find a table showing suitable foods, respective weight ranges and the necessary accessories attached to these notes. It is not possible to set a weight outside of the weight range. With lots of dishes, a signal will sound after a certain length of time.
-
Page 32: Programme Table
Rice Do not use boil in the bag rice. Add two to two and a half times the amount of water to the rice. Fish fillet, fresh Add 1 to 3 tablespoons of water or Fish lemon juice. The joint should cover two thirds of the dish base. Meat Add 50 100 ml of liquid. - Page 33 Progr. no. Suitable foodstuffs Weight Ovenware / accessories, range in kg shelf height Whole poultry* Chicken, duck 0.60 2.00 Shallow ovenware without a lid Cooking compartment floor Fish fillet* Fillet of pike, cod, rosefish, 0.20 1.00 Shallow ovenware without pollock, pike perch a lid Cooking compartment floor Observe the turning signals.
-
Page 34: Childproof Lock
Childproof lock The appliance has a childproof lock to prevent children switching it on accidentally. In this section, you will read about How to lock and unlock your appliance Locking the appliance 1. Press the mode selector. Your appliance is ready for use. 2. -
Page 35: Care And Cleaning
Basic setting Options Explanation ™‚ Childproof lock ƒ = on Activates the childproof lock ‚ = off automatically ™ƒ Signal duration ‚ = short = 10 seconds Signal after the cooking time has ƒ = medium = 2 minutes „ = long = 5 minutes elapsed ™„... -
Page 36: Cleaning Agents
Risk of burning. Do not clean the appliance immediately after switching it off. Allow the appliance to cool down. Notes Slight differences in the colours on the front of the appliance are caused by the use of different materials, such as glass, plastic and metal. Shadows on the door panel which look like streaks are light reflections from the oven light. - Page 37 Area Cleaning agents Stainless steel Hot soapy water: Clean using a dish cloth and then dry with a soft cloth. Remove any flecks of limescale, grease, starch and egg white immediately. Corrosion can form under such marks. Special stainless steel cleaning agents can be obtained from the after sales service or from specialist retailers.
-
Page 38: Faults And Repairs
times. Residue left by spices and similar ingredients can be removed with a dry cloth or a soft brush. Important notes Never treat the self cleaning surface with oven cleaner. If oven cleaner is accidentally applied to the rear panel, remove it immediately with a sponge and plenty of water. -
Page 39: Malfunction Table
Malfunction table If one of your dishes does not turn out as you had hoped, please refer to the Tested for you in our cooking studio section. You will find many cooking tips and tricks there. Problem Possible cause Remedial action/notes The plug is not plugged into Plug it in. -
Page 40: Replacing The Oven Light Bulb
Problem Possible cause Remedial action/notes Error message "Er1" or "Er4" The temperature sensor has Call the after sales service. appears in the display. failed. Error message "Er11" appears in The buttons are dirty or the Press all buttons several times, the display. - Page 41 4. Undo the screw from the lamp cover on the left hand side wall and remove the cover. (Fig. A) Pull out the halogen bulb. (Fig. B). 5. Insert the new halogen bulb. (Fig. C) 6. Screw the lamp cover in place. Reassemble the appliance in the reverse order.
-
Page 42: After Sales Service
After sales service Our after sales service is there for you if your appliance should need to be repaired. You will find the address and telephone number of your nearest after sales service point in the phone book. The listed after sales service centres will also be pleased to give you the details of an after sales service point near you. -
Page 43: Tested For You In Our Cooking Studio
Dimensions (HxWxD) appliance 45.9 x 59.6 x 56.3 cm cooking compartment 24.2 x 44.5 x 34.7 cm VDE approved CE mark This appliance complies with standard EN 55011 or CISPR 11. It is a group 2, class B product. Group 2 means that microwaves are produced for the purpose of heating food. -
Page 44: Tables
Do not line the accessory with greaseproof paper until after it has been preheated. The times specified in the tables are only guidelines. They will depend on the quality and consistency of the food. Use the accessories supplied. Additional accessories may be obtained from specialist shops or from the after sales service. - Page 45 Turn or stir the food once or twice during the defrosting time. Large pieces of food should be turned several times. When turning, drain off any liquid produced by defrosting. Leave defrosted items to stand at room temperature for a further 10 to 60 minutes so that the temperature can stabilize.
- Page 46 Amount Microwavesetting (watts), Notes Cooking time in minutes Cakes, dry 500 g 90 watts, 10 15 mins. Separate pieces of cake. Only e.g. sponge cakes 750 g 180 watts, 3 mins. + 90 watts, 10 15 mins. for cakes without icing, cream or crème pâtissière.
-
Page 47: Heating Food
Amount Microwavesetting (watts), Notes Cooking time in minutes Side dishes, 250 g 600 watts, 2 5 mins. covered, add water e.g. rice, noodles 500 g 600 watts, 8 10 mins. Vegetables 300 g 600 watts, 8 10 mins. covered, add 1 tbsp water e.g. -
Page 48: Cooking Food
Amount Microwavesetting in Notes watts, cooking time in minutes Soup 1 bowl approx. 175 g 600 watts, 2 3 2 bowls approx. 175 g 600 watts, 3 4 4 bowls approx. 175 g 600 watts, 6 8 Meat in sauce 500 g 600 watts, 8 11 Covered... -
Page 49: Tips For Microwave Operation
Amount Microwavesettings in watts Notes Time in minutes Sweets e.g. pudding 500 ml 600 W, 6 8 Stir the pudding thoroughly using (instant), an egg whisk 2 to 3 times during the cooking. fruit, compote 500 g 600 W, 9 12 Tips for microwave operation No settings are given for... - Page 50 The temperature and baking time depend on the type and amount of mixture. This is why ranges" are given in the tables. Begin with the lower value and, if necessary, use a higher setting the next time, since this allows more even browning. More information can be found in the Baking tips"...
-
Page 51: Baking Tips
Cake Ovenware Level Microwave Cooking Type of Tempera setting in time in heating ture in ºC watts minutes Fruit or cheese cake with Springform cake 360 watts 40 50 150 160 short pastry* Fruit cake, fine sponge Ring mould or 90 watts 30 45 170 190... -
Page 52: Roasting And Grilling
The cake is too dark. Select a lower temperature and cook the cake for a little longer. The cake is too dry. Use a toothpick to make small holes in the baked cake. Then drizzle fruit juice or alcohol over the top. Next time you should decrease the temperature by around 10 degrees and reduce the baking times. - Page 53 Ovenware You may use any heat resistant ovenware which is suitable for use in a microwave. Metal roasting dishes are not suitable for roasting with microwaves. The ovenware can become very hot. Use oven gloves to take the ovenware out of the oven. Place hot glass dishes on a dry kitchen towel after they have been removed from the oven.
- Page 54 Tips for braising Use ovenware with a lid for braising fish. Add two to three tablespoons of liquid and a little lemon juice or vinegar to the dish. Microwave power Level Type of Tempera Notes setting in watts, heating ture in ºC, cooking time in grill minutes...
- Page 55 Microwave power Level Type of Tempera Notes setting in watts, heating ture in ºC, cooking time in grill minutes setting Fish, scalloped 600 W, 10 15 mins Uncovered dish. Defrost approx. 500 g frozen fish before cooking. Make cuts in the pork rind. Quantity Weight Level...
-
Page 56: Tips For Roasting And Grilling
Quantity Weight Level Type of Grill Cooking time in heating setting minutes Toast with topping 2 4 slices**** 1+3** Depending on topping: 8 10 Grease the wire rack first with oil. ** Slide the wire rack in at level 3 and the baking tray at level 1. *** Place the slices of bread next to each other in the centre of the wire rack. -
Page 57: Pre Prepared Frozen Products
Bakes and gratins should be left to cook in the oven for a further 5 minutes after the oven has been switched off. Meal Quantity Ovenware Level Microwave in Cooking Type of Temp. watts time in heating in ºC minutes Sweet bakes approx. -
Page 58: Test Dishes
Test dishes The quality and function of microwave combination appliances are tested by testing institutes using the following dishes. In accordance with EN 60705, IEC 60705 DIN 44547 and EN 60350 Microwave defrosting Meal Microwave power Notes setting in watts, cooking time in minutes Meat 180 W, 7... - Page 59 Meal Microwave Type of Tempe Notes power setting in heating rature in watts, ºC, grill cooking time in setting minutes Chicken 360 W, 30 35 Place the chicken with the breast side down in a deep dish without a lid and place on the cooking compartment floor.
-
Page 60: Acrylamide In Foodstuffs
Acrylamide in foodstuffs Which foods are affected? Acrylamide is mainly produced in grain and potato products heated at high temperatures, such as potato crisps, chips, toast, rolls, bread, baked goods (biscuits, gingerbread, cookies). Tips for keeping acrylamide to a minimum when preparing food General Keep cooking times to a minimum.