Table of Contents
Advertisement
Look What You Can Do with the TD-17/TD-17-L
Performing
Perform with various sounds ( & p. 8)
A diverse selection of drum sounds is built into this unit.
You can perform using a wide variety of tonal choices.
Supports a variety of performance techniques
( & p. 7)
Just like acoustic drums, this unit responds to a variety of
different performance techniques.
Customizing
Adjust the playing feel ( & p. 21)
By adjusting the sensitivity of the sensors, you can
customize the playing feel to your taste.
Create your very own kits ( & p. 14)
By customizing a kit, you can create an original that's like
no other kit in the world.
Eco-Friendly Power-Save Function
The power automatically turns off when a certain length
of time elapses after you stopped playing or operating the
unit (AUTO OFF function). ( & p. 23)
* If you don't want the power to turn off automatically, set
AUTO OFF to "OFF. "
(this document)
Owner's Manual
Read this first. This explains all the functions of
this unit.
PDF Manual (download from the web)
5
Data List
This explains the parameters and sound of
this unit.
5
MIDI Implementation
This is detailed reference material regarding
MIDI messages.
Before using this unit, carefully read "USING THE UNIT SAFELY" and "IMPORTANT NOTES" (the leaflet "USING THE UNIT SAFELY" and
the Owner's Manual (p. 27)). After reading, keep the document(s) where it will be available for immediate reference.
© 2018 Roland Corporation
Owner's Manual
Practicing
Sounding a click (metronome) ( & p. 9)
You can practice while listening to a click sound.
Practicing along with a song ( & p. 9)
Songs that are ideal for practice are built into this unit. You
can practice along with these songs.
Recording a song that you're practicing ( & p. 10)
You can use the recording function to evaluate your own
performance.
Practicing with Coach mode ( & p. 11)
This unit provides a "Coach mode" that supports your
practicing. This is a great way to improve your speed
control, precision, and endurance.
Perform along with audio from your smartphone
( & p. 5)
This unit is equipped with Bluetooth. You can perform
along with audio from your smartphone
excepted).
To obtain the PDF manual
1.
Enter the following URL in your
computer.
http://www.roland.com/manuals/
I
2.
Choose "TD-17" or "TD-17-L" as the product
name.
(TD-17-L
Advertisement
Table of Contents

Related Manuals for Roland TD-17


Summary of Contents for Roland TD-17
- Page 1 Owner’s Manual Look What You Can Do with the TD-17/TD-17-L Performing Practicing Perform with various sounds ( & p. 8) Sounding a click (metronome) ( & p. 9) A diverse selection of drum sounds is built into this unit. You can practice while listening to a click sound.
-
Page 2: Table Of Contents
Contents Getting Ready Customizing a Kit ........ -
Page 3: Getting Ready
Getting Ready Connect Your Equipment PHONES jack DC IN jack MASTER OUTPUT MIX IN jack (L/MONO, R) jacks Connect headphones Connect the included AC You can connect an (sold separately) here. adaptor here. These jacks output the audio player and play sound. -
Page 4: Mounting This Unit On The Stand
Getting Ready Mounting This Unit on the Stand Making Hi-hat Settings Use the included sound module mount to attach this unit to If you’re using a VH-10 or VH-11 V-hi-hat (subsequently your drum stand. called a “VH”), adjust the offset on this unit. Attach the sound module mount in the orientation that’s This adjustment is required in order to correctly detect appropriate for your drum stand setup. -
Page 5: Using The Bluetooth® Functionality
* If you use the Bluetooth settings of your mobile device This unit is paired with the mobile device. When pairing to connect to “TD-17 MIDI, ” the unit might not operate succeeds, “TD-17 AUDIO” is added to the list of “Paired correctly. -
Page 6: Place The Mobile Device On The Tray And Use It
MIDI” (default value) OFF, 1–99 angle at which this unit is attached, and make sure that Set to “1”: “TD-17 AUDIO 1, ” “TD-17 the mobile device is sufficiently secure before using MIDI 1” it. Roland accepts no responsibility for any damage or problem that might result if your mobile device falls off Press the [F3] (SAVE) button. -
Page 7: About Performance Techniques
(playing the hi-hat with Choke play If you use your hand to choke the pedal completely pressed Roland logo (grasp) the edge sensor after down) and foot splash sound striking the cymbal, the (playing the hi-hat with the pedal Edge sensor sound stops. -
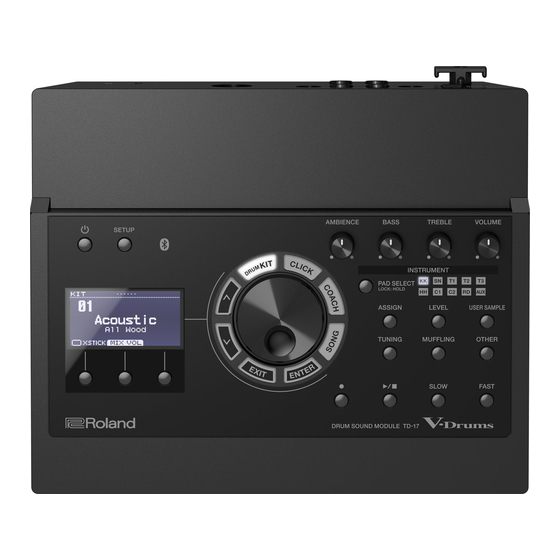
Page 8: Operating Guide (Panel Descriptions)
Tempo: when click is on Speed: when a song is playing back * The illustration shows the TD-17. User sample icon: Confirming an Operation / Editing a Value When using a user sample (p. 15) Confirm an operation /... -
Page 9: Sounding A Click
Operating Guide (Panel Descriptions) Sounding a Click Adjusting the Overall Tonal Character Press the [CLICK] button. Adjust the reverberation Turn the [AMBIENCE] knob. Turn the click on/off Press the [F3] button. Adjust the low- Turn the [BASS] knob. frequency range Turn the dial. -
Page 10: Recording
MIX IN jack or Bluetooth, play back Connect this unit to the computer (p. 3). the song on the connected device while you record as MEMO described in “Recording. ” For details on downloading and installing the USB driver, refer to the Roland website. http://www.roland.com/support/... -
Page 11: Practicing
Practicing Press the [EXIT] button to finish. Practicing in Coach Mode This unit provides practice modes called “Coach Mode” TIME CHECK settings which are designed to make your practicing as effective as possible. In the TIME CHECK screen, These modes provide useful ways to strengthen your speed you can press the [F2] (MENU) control, accuracy, and endurance, and will also improve your button to change the pads... -
Page 12: Warm Ups
Practicing MEMO 5 When the click stops After starting WARM UPS, sounding, the screen you can press the [F3] indication will change (PAUSE) button to pause to “Quiet. ” Continue or resume. striking the pads While paused, you can during this time. press the [F1] (STOP) 5 After the Quiet region, button to stop. -
Page 13: Sounding A Click Along With A Song (Guide Track)
Max Tempo file that you want to play as the guide track. 2: Auto Up/Down. Example) If the song file is “TD-17.wav, ” specify “TD- * You can press the [F2] (CLICK) button to make click 17_Click.wav. ” settings (p. 9). -
Page 14: Customizing A Kit
Customizing a Kit Selecting an Instrument (ASSIGN) Saving the settings Here’s how to select the instrument that’s played by each On this unit, your edits are saved automatically, so pad. you don’t have to perform any operation to save the Press the [ASSIGN] button. -
Page 15: Importing And Playing Audio Files (User Sample)
Customizing a Kit Importing and Playing Audio Files Menu Explanation Optimize Optimizing the user sample area (USER SAMPLE) If you repeatedly import and delete user samples, the user sample area might become fragmented, reducing the Audio files that you created on your computer can be number of user samples that can be loaded. -
Page 16: Assigning A User Sample To An Instrument And Playing It
Customizing a Kit Use the dial to select the “Import,“ and press Assigning a User Sample to an Instrument the [ENTER] button. and Playing It The SAMPLE IMPORT screen appears. Press the [USER SAMPLE] button. Use the dial to select the user sample that you want to assign, and press the [F3] (ASSIGN) button. -
Page 17: Tuning And Muffling Settings (Tuning/Muffling)
Customizing a Kit Use the dial to select the menu, and press Other Settings (OTHER) the [ENTER] button. Here’s how to edit the tonal character of each pad Make settings as appropriate for the menu (pad equalizer) and settings for the overall kit (effects, item that you selected. -
Page 18: Copying A Kit
Customizing a Kit AMBIENCE, MULTI FX, VOLUME Copying a Kit Use the function buttons, [ ] [ ] buttons, and dial Here’s how to copy this unit’s kit settings or return the to edit the settings. factory-set kit settings. PAD EQ, MIDI NOTE NOTE When you execute a copy operation, the contents of Select the pad that you want to edit (p. -
Page 19: Backing Up Or Loading Kits
Customizing a Kit Note when backing up or loading Backing Up or Loading Kits * If you back up user samples as well, it may take several The settings of individual kits stored in this unit can be minutes to save the data depending on the size of the saved (backed up) to an SD card, or read (loaded) back into user samples. -
Page 20: Overall Settings (Setup)
Overall Settings (SETUP) Press the [SETUP] button. Basic Procedure The SETUP MENU screen appears. Here’s how to make settings for the overall tonal character or pads of the entire unit. SETUP menu list Menu Explanation Use the dial to select the menu, and press Bluetooth Makes Bluetooth settings the [ENTER] button. -
Page 21: Editing The Pad Settings
Overall Settings (SETUP) Editing the Pad Settings Backing Up to an SD Card Here’s how to edit the pad settings so that the signal from Here's how to save all settings that are stored in this unit each pad is processed correctly by this unit. (up to 99 sets). -
Page 22: Loading Backup Data From An Sd Card
Overall Settings (SETUP) Turn the dial to select the backup data that Loading Backup Data from an SD Card you want to delete. Here’s how to load backup data from an SD card into [F1] (BACKUP) button this unit. Deletes backup data. Insert an SD card into this unit (p. -
Page 23: Making The Power Automatically Turn Off After A Time (Auto Off)
Use the dial to select the “AUTO OFF,” and press the [ENTER] button. Backup folder The AUTO OFF screen appears. Backup data is saved TD-17 folder here. Kit folder Kit backup data is saved here. Turn the dial to set the AUTO OFF function. -
Page 24: Restoring The Factory Settings
Overall Settings (SETUP) Restoring the Factory Settings The “Factory Reset” operation returns all data and settings stored in this unit to their factory-set condition. NOTE When you execute this operation, all data and settings in this unit will be lost. Before you proceed, you should save any important data and settings to your SD card (p. -
Page 25: Troubleshooting
Troubleshooting Problem Items to check Action Page Problems with sound Are the cables correctly connected to each Check the connections. p. 3 pad and pedal? Could the instrument be “OFF”? Assign an instrument. p. 14 Could the instrument’s “Volume” be lowered? Adjust the instrument’s “Volume. ” p. - Page 26 5 unit to re-establish pairing. Can’t connect to After unpairing the “TD-17 MIDI” that is registered on the mobile device, turn the mobile Bluetooth MIDI device’s Bluetooth function off and then on again, and reconnect it. Can’t connect via You must make the connection not from the mobile device’s Bluetooth setting but from the...
-
Page 27: Using The Unit Safely
Roland accepts no responsibility for some cases, such as when the memory • To prevent damage from static electricity,... -
Page 28: Main Specifications
Maximum length: 60 min (Temporary SD card Recorder recording: 3 min) (*3) *1: Bluetooth function is not available for TD-17-L. File format: WAV (44.1 kHz, 16 bits) *2: Audio files must be saved on an SD card. 128 x 64 dots graphic type LCD...