Advertisement
Quick Links
www.radioshack.com
OWNER'S MANUAL —
Please read before using this equipment.
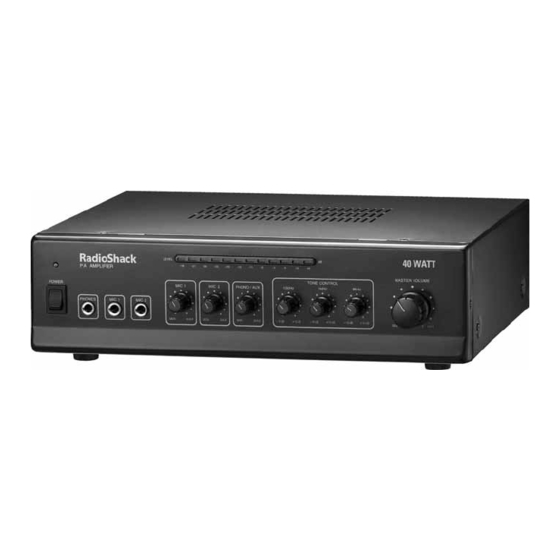
Thank you for purchasing the RadioShack 40W AC/DC PA
Amplifier. It gives you the versatility and power you need in a
professional sound system. Your amplifier's wide frequency
response easily handles amplification of voice and music. Use it in
meeting halls and auditoriums, at sports events, in schools, and in
the office for paging systems - anywhere you need to deliver special
announcements with excellent sound.
If an icon appears at the end of a paragraph, go to the box on that
page with the corresponding icon for pertinent information.
— Caution
SM
±
— Note
32-2054
©
2004 RadioShack Corporation.
All Rights Reserved.
RadioShack and RadioShack.com
are trademarks used by
RadioShack Corporation.
Advertisement

Related Manuals for Radio Shack 32-2054


Summary of Contents for Radio Shack 32-2054
- Page 1 If an icon appears at the end of a paragraph, go to the box on that page with the corresponding icon for pertinent information. — Caution © RadioShack and RadioShack.com ± — Note 32-2054 2004 RadioShack Corporation. All Rights Reserved. are trademarks used by RadioShack Corporation.
- Page 2 Phono/Aux Rotary Volume Control - lets you adjust the volume of the turntable or auxiliary sound source (See Page 15). On/Off Rocker Switch with LED Indicator - lights to indicate power is turned on (See Page 15). Microphone Rotary Volume Controls - lets you adjust the microphone level (see Page 15).
- Page 3 COM/4 /8 /16 70V Speaker Connectors - let you easily connect speaker wires directly to the amplifier after the total speaker impedance is determined (See Page 9). Ground Screw - connect the ground wire (black or green) to this screw to avoid low-frequency hum.
-
Page 4: Table Of Contents
Preparation ... 4 Placing the Amplifier ... 4 Placing the Speakers ... 4 Presetting the Controls ... 4 Connections ... 5 Connecting Input Sources... 5 Connecting the Speakers... 7 One Speaker ... 9 Two Speakers in Series .. 9 Two Speakers in Parallel ... - Page 5 Set the audio input sources’ controls to these levels. Audio Device Control Turntable Power Tape Deck Power CD Player Power Amplifier Power Receiver Tone Warning: To prevent possible hearing loss, set the amplifier’s controls to the settings shown below. Control Power MIC 1, MIC 2, PHONO/AUX 100 Hz, 1 kHz, 8 kHz...
- Page 6 You can connect one dynamic microphone (not supplied) to MIC 1 and another to MIC 2 using a 1/4” (6.35 mm) plug. MIC 1 MIC 2 You can connect a low level audio input source, such as a magnetic cartridge turntable, to the amplifier’s L and R PHONO jacks.
- Page 7 You can connect another MP-40 amplifier to this jack (shown on page 3) to double the size of your PA system. This lets you use up to four microphones and two turntables (or two auxiliaries) sound sources. Use a shielded cable with phono plugs at each end to connect the amplifier.
-
Page 8: Placing The Speakers
± ± For the best results when connecting speakers (in series or parallel), only use speakers having the same impedance. ± ± If you connect speakers without transformers, the speaker wire should be no longer than 50 feet (See “Connecting Speakers with Transformers”... - Page 9 Connect the speaker’s negative (-) terminal to the amplifier’s COM terminal. Then, connect the speaker’s positive (+) terminal to the speaker terminal (4 , or 16 speaker’s impedance. Speakers are connected in series when the first speaker’s positive terminal is connected to the next speaker’s negative terminal.
-
Page 10: One Speaker
Follow these steps to connect speakers in series. 1. Connect the first speaker’s positive terminal to the other speaker’s negative terminal. 2. Connect the first speaker’s negative terminal to the amplifier’s COM terminal. 3. Connect the other speaker’s positive terminal to the amplifier’s terminal (4 that matches the total speaker impedance. -
Page 11: Two Speakers In Parallel
Follow these steps to connect two speakers in parallel. 1. Connect both speaker’s negative (-) terminals to each other. Then, connect both wires to the amplifier’s COM terminal. 2. Connect both speakers’ positive (+) terminals to each other. Then, connect both wires to the amplifier’s speaker terminal (4 , 8 , or 16 that matches the total speaker impedance. - Page 12 3. Connect each pair of speakers in parallel. If you connected 8-ohm speakers, the total impedance of both pairs is 8 ohms (16/2 = 8). 4. Connect the speakers’ negative (-) terminals to the amplifier’s COM terminal. 5. Connect the speakers’ positive (+) terminals to the amplifier’s (4 matches the total speaker impedance, as calculated in Step 3.
- Page 13 Transformers allow you to: • connect speakers with different impedances without causing output differences between the speakers. • add or remove a speaker from the system without having to recalculate the entire system’s impedance. • reduce signal loss when you use speaker wire over 50 feet (15.24 meters) long.
- Page 14 Amplifier Note: The wires labeled with an A are connected to each other. To connect the amplifier to power, plug the female end of the supplied AC power cord into the amplifier’s AC IN jack and the other end to any standard AC outlet.
- Page 15 To power the amplifier from your vehicle’s 12V battery, plug the supplied DC power cable’s barrel plug to the DC 12V IN jack, and then connect the other end to your vehicle’s 12V accessory socket, such as a cigarette-lighter socket. If the amplifier does not operate from a 12V battery source, check the fuse in the cigarette lighter plug.
- Page 16 „hxqy No power. No sound. Feedback. • Put the headphones on, and then gradually increase the volume to your desired listening level. • Do not listen at extremely high volume levels. Extended high-volume listening can lead to permanent hearing loss. •...
- Page 17 • Keep the amplifier dry; if it gets wet, wipe it dry immediately. • Use and store the amplifier only in room temperature environments. • Handle the amplifier carefully; do not drop it. • Keep the amplifier away from dust and dirt, and wipe it with a damp cloth occasionally to keep it looking new.
-
Page 18: Specifications
Output Power at THD 10%, 4-Ohm Load 1 kHz ... 40W Total Harmonic Distortion (at 5 Watts, 4 ohms, 1 kHz, with Band Pass Filter) MIC... 0.50% AUX... 0.10% PHONO ... 0.30% Input Sensitivity (at 10%, THD, 1kHz) MIC...2.5 mV AUX...150 mV PHONO ...3.5mV Signal to Noise Ratio with A-WTD... -
Page 19: Accessories
The following accessories are available at your local RadioShack store. To locate your nearest RadioShack, use the store locator feature on RadioShack’s website (www.radioshack.com), or call 1-800-The Shack (843-7422) and follow the menu options. Speaker Wire Transformer Unidirectional Dynamic Microphones Wire Wire Stripper Headphones... - Page 20 This warranty gives you specific legal rights, and you may also have other rights which vary from state to state. RadioShack Customer Relations, 200 Taylor Street, 6th Floor, Fort Worth, TX 76102 01A04 Printed in China Limited One-Year Warranty 12/99 32-2054...