Radio Shack 32-2055 User Manual
250-watt stereo pa amplifier
Hide thumbs
Also See for 32-2055:
- Quick start manual (1 page) ,
- User manual (15 pages) ,
- Quick start manual (2 pages)
Table of Contents
Advertisement
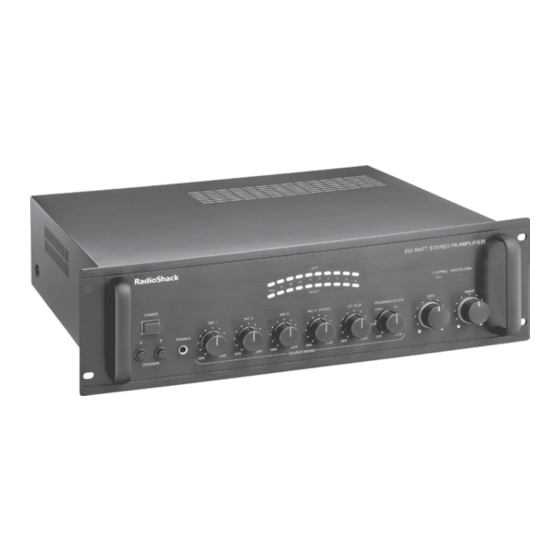
32-2055
250-Watt • Stereo
PA Amplifier
Thank you for purchasing your 250-Watt
Stereo PA Amplifier from
•
RadioShack. This PA gives you the versatility and power you need in a
professional sound system. Its wide frequency response easily handles
amplification of voice and music. Use it anywhere you need to deliver
special announcements with excellent sound. It is perfect for meeting halls,
auditoriums, sporting events, schools, or in the office for paging systems.
With a bridged speaker connection, the amplifier can produce up to 350
watts of clean, powerful sound with minimum distortion.
What's Included
PA Amplifier
User's Guide
Quick Start Guide
www.radioshack.com
Advertisement
Table of Contents

Related Manuals for Radio Shack 32-2055


Summary of Contents for Radio Shack 32-2055
- Page 1 32-2055 250-Watt • Stereo PA Amplifier Thank you for purchasing your 250-Watt Stereo PA Amplifier from • RadioShack. This PA gives you the versatility and power you need in a professional sound system. Its wide frequency response easily handles amplification of voice and music. Use it anywhere you need to deliver special announcements with excellent sound.
-
Page 2: Table Of Contents
ontents Important Safety Instructions ................3 About Your Amplifier ................. 6 Amplifier Features....................6 Amplifier Setup.................... 10 Getting Started ....................10 Select a Location....................10 Preset the Controls ....................10 Preset the Audio Input Source................10 Presetting the Amplifier ..................10 Connecting Your Amplifier................ -
Page 3: Important Safety Instructions
Important Safety Instructions 1. Read all safety and operating instructions before the appliance is used. 2. Keep all safety and operating instructions for future reference. 3. Follow all warnings on the appliance and in the operating instructions. 4. Unplug this appliance from the wall outlet before cleaning. Use only a damp cloth for cleaning. - Page 4 12. Clean only as recommended by the manufacturer. 13. An outside antenna system should not be located in the vicinity of overhead power lines or other electric light or power circuits, or where it can fall into such power lines or circuits. When installing an outside antenna system, extreme care should be taken to keep from touching such power lines or circuits as contact with them might be fatal.
- Page 5 21. Upon completion of any service or repairs to this appliance, ask the service technician to perform safety checks to determine that the appliance is in proper operating condition. 22. For added protection for this product during a lightning storm, unplug it from the wall outlet.
-
Page 6: About Your Amplifier
About Your Amplifier Amplifier Features Output Power Illuminated Power PHONES Jack Level Indicators Switch Connect Indicates the total Lights up when you headphones stereo output turn on the switch. here. power level. A/B Speaker Switch MIC 1, MIC 2, MIC 3 Select the speakers you want Adjust volume for the to use with the amplifier in... - Page 7 About Your Amplifier PROTECTION Indicator Lights up when the amplifier overheats or if a shorted load occurs CLIPPING Indicator on the amplifier output. Lights up to remind CD/AUX The amplifier resets itself you to reduce volume Adjust volume of when the problem is when the amplifier CD or auxiliary corrected.
- Page 8 About Your Amplifier Cooling Fan ¼” Stereo Input Jacks Automatically activated XLR Balanced whenever the amplifier Connect stereo Microphone Inputs is turned on. This air input sources (CD Connect up to four cooling system rapidly or DVD player, TV, high impedance disperses interior heat etc.) here using a microphones to your...
- Page 9 About Your Amplifier Audio Input Jacks Connect input sources (CD or DVD player, TV, etc.) here using an STEREO/MONO Selector unbalanced audio cable. Select bridged mono input Match the colors on your mode in combination with a cable connections with mono signal source plugged the colors on the jacks.
-
Page 10: Amplifier Setup
Amplifier Setup Getting Started Select a Location Before you use your amplifier, be sure to place it on a surface with adequate ventilation. Do not put it on thick carpeting, which can restrict air flow, or near a heat source such as a heat vent or radiator, which can cause it to overheat. Preset the Controls Before you begin connecting or using your amplifier, preset the controls on the audio input source and amplifier to avoid overdriving a channel or producing... -
Page 11: Connecting Your Amplifier
Connecting Your Amplifier Connecting Your Amplifier Connecting Input Sources You can connect optional components, such as microphones, tuner, turntable, audio mixer, preamplifier, or CD player to your amplifier to expand your system. To prevent hum and other noise, use low-capacitance shielded cable (not supplied, available at your local RadioShack store or at www.radioshack.com). -
Page 12: Connecting A Turntable
Connecting Your Amplifier Connecting a Turntable Connect your low-level audio input source (turntable) to the L PHONO and R PHONO jacks on the back of the amplifier. If you connect a low-level audio input source to the PHONO jacks, set the MIC4/PHONO switch to PHONO. To avoid a low-level hum, connect your turntable’s ground wire (usually black or green) to the GND terminal on the amplifier. -
Page 13: Connecting An Equalizer
Connecting Your Amplifier Connecting an Equalizer Connect an equalizer or other external signal processor to the EQ IN and EQ OUT jacks on the back of the amplifier. EQ IN/OUT Jacks Notes: • You can also connect a tape deck to the EQ OUT jack for recording. •... -
Page 14: Determining Total Speaker Impedance
Connecting Your Amplifier Determining Total Speaker Impedance Before you connect speakers to the amplifier, you must determine the total speaker impedance. To determine total speaker impedance, you must first decide if you are going to connect the speakers in series, parallel, or a series/ parallel combination. -
Page 15: Connecting Two Speakers In Series
Connecting Your Amplifier Connecting Two Speakers in Series Speakers are connected in series when the first speaker’s positive terminal is connected to the next speaker’s negative terminal. Note: Determine the total speaker impedance of speakers you want to connect in series by adding up the individual impedances of all connected speakers. -
Page 16: Unbridged Connection
Connecting Your Amplifier Unbridged Connection Use this connection if you are connecting more than one speaker on the same channel or if you do not have high power speakers. 1. Connect the speaker wires to the corresponding left and right positive (+) and negative (–) speaker terminals. -
Page 17: Connecting Power
Connecting Your Amplifier 2. Connect the other end of the speaker’s positive (+) and negative (–) wires to the amplifier’s red SPEAKER LEFT and SPEAKER RIGHT terminals. Note: SPEAKER RIGHT (+) on the amplifier is used as a negative (–) terminal for a bridged connection. -
Page 18: Operating Your Amplifier
Operating Your Amplifier Beginning Steps 1. Start the input sound source. 2. Make sure the LEFT and RIGHT volume controls on the front of the amplifier are set to MIN. 3. Press POWER to turn on the amplifier. The blue light around the power switch and LEFT and RIGHT volume controls will light. -
Page 19: Using The Feedback Filter
Operating Your Amplifier Using the Feedback Filter The FEEDBACK FILTER control lets you reduce or eliminate squeal and other noise caused by feedback. After you adjust LEFT and RIGHT volume, MIC1, MIC2, MIC3, MIC4/PHONO, and CD/AUX , turn on the amplifier and any connected sound sources. -
Page 20: Additional Information
Additional Information Care and Service Keep the amplifier dry. If it gets wet, wipe it dry immediately. Use and store the amplifier only in normal temperature environments. Handle the amplifier carefully; do not drop it. Keep the amplifier away from dust and dirt, and wipe it with a damp cloth occasionally to keep it looking new. -
Page 21: Troubleshooting
Additional Information Troubleshooting Problem Cause Solution Why isn’t my The device may have Turn your amplifier off. Wait until it amplifier powering overheated. cools down and try again. up, even though I The fuse might be blown. Check the amplifier’s fuse and have tried turning replace it if necessary. -
Page 22: Specifications
Additional Information Specifications Input Impedance ......................20k Ohms Continuous Output Power Stereo at 1 kHz ..................125 Watts × 2 (8 Ohms) Stereo at 1 kHz..................175 Watts × 2 (4 Ohms) Bridged at 20 Hz to 20 kHz ................250 Watts (8 Ohms) Bridged at 1 kHz ..................... -
Page 23: Do More With Your Amplifier
Additional Information Do More with Your Amplifier Visit your local RadioShack store or www.radioshack.com to purchase these and other useful products. Audio Mixer Two-way PA Speaker • Separate master and record • 3 tweeters – 3x7” piezo horn outputs tweeter plus two 3x3” piezo tweeters for sparkling highs •... -
Page 24: Limited Warranty
Limited Warranty This product is warranted by RadioShack against manufacturing defects in material and workmanship under normal use for one (1) year from the date of purchase from RadioShack company-owned stores and authorized RadioShack franchisees and dealers. EXCEPT AS PROVIDED HEREIN, RadioShack MAKES NO EXPRESS WARRANTIES AND ANY IMPLIED WARRANTIES, INCLUDING THOSE OF MERCHANTABILITY AND FITNESS FOR A PARTICULAR PURPOSE, ARE LIMITED IN DURATION TO THE DURATION OF THE WRITTEN LIMITED WARRANTIES CONTAINED HEREIN.