
Related Manuals for Agilent Technologies 5973N


Summary of Contents for Agilent Technologies 5973N
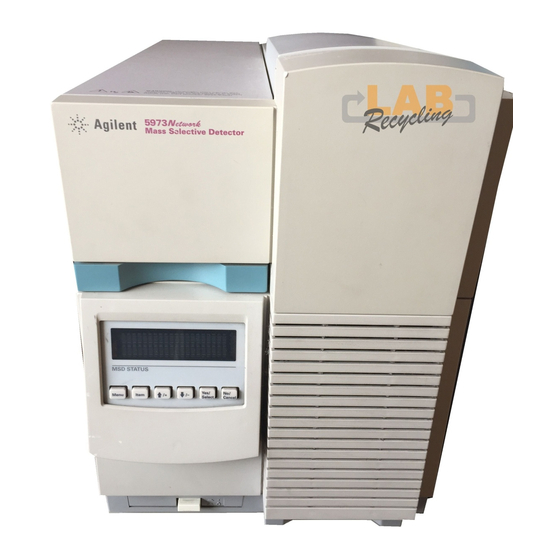
- Page 1 5973N and 5973 inert Mass Selective Detector Hardware Installation Agilent Technologies...
- Page 2 Notices © Agilent Technologies, Inc. 2003 Warranty Safety Notices No part of this manual may be reproduced in The material contained in this docu- any form or by any means (including elec- ment is provided “as is,” and is sub-...
-
Page 3: Table Of Contents
Contents General Information Introduction Important Safety Warnings Many internal parts of the MSD carry dangerous voltages Electrostatic discharge is a threat to MSD electronics Many parts are dangerously hot Hydrogen Safety and Regulatory Certifications Information Symbols Electromagnetic compatibility Sound emission certification for Federal Republic of Germany Cleaning Recycling the Product... - Page 4 Configuring the GC Conditioning the Column Preparing the MSD for Installation Preparing the Vacuum System Plumbing the Methane Line to the CI MSD Flow Module Connecting the MSD and the GC Installing the ChemStation PC Verifying EI System Performance Verify the tune performance Verify the sensitivity performance Switching from EI to CI Operating Mode Verifying CI System Performance...
- Page 5 MSD ChemStation software overview MSD ChemStation software autotune descriptions Methods Data Acquisition Data analysis Sequence MSD ChemStation maintenance EI Instrument user maintenance Troubleshooting (Diagnostics) Remote operation/modem setup (if applicable) Tune charts Additional support information Hardware Installation...
- Page 6 Hardware Installation...
- Page 7 5973N and 5973 inert Mass Selective Detector Hardware Installation General Information Introduction Important Safety Warnings Safety and Regulatory Certifications Cleaning Recycling the Product Customer Responsibilities Before You Start Other Documentation This section provides information on how to identify specifically what type of MSD you are working with as well as how to properly clean and dispose of the instrument.
-
Page 8: General Information
MSD while the 5973 inert Mass Selective Detectors (MSDs) are turbo pump MSDs. This document will refer to the 5973N MSD or 5973 inert MSD as 5973 Series MSD unless otherwise noted. The 5973 Series MSD system consists of: •... - Page 9 General Information Table 1 Possible configurations G2577A G2578A G2579A G2589A High vac Diffusion Standard turbo Performance Performance pump Pump pump turbo pump turbo pump PCI/NCI 59864B Recommended Recommended Recommended Required gauge controller compatible (3rd party) 6890 Series ALS tower 6890 Series ALS tray 59864B high vacuum Gauge Controller...
-
Page 10: Important Safety Warnings
General Information Important Safety Warnings Before moving on, there are several important safety notices that you should always keep in mind when using the 5973 Series MSD. Many internal parts of the MSD carry dangerous voltages If the MSD is connected to a power source, even if the power switch is off, potentially dangerous voltages exist on the wiring between the MSD power cord and the AC power supply, the AC power supply itself, and the wiring from the AC power supply to... -
Page 11: Many Parts Are Dangerously Hot
General Information Many parts are dangerously hot Many parts of the MSD operate at temperatures high enough to cause serious burns. These parts include but are not limited to: • The inlets • The oven and its contents • The detectors •... - Page 12 General Information When using hydrogen (H ) as the carrier gas or fuel gas, be aware WA R N I N G that hydrogen gas can flow into the oven and create an explosion hazard. Therefore, be sure that the supply is off until all connections are made, and ensure that the inlet and detector column fittings are either connected to a column or capped at all times when hydrogen gas is supplied to the instrument.
-
Page 13: Safety And Regulatory Certifications
The 5973 Series Mass Selective Detector is designed and manufactured under a quality system registered to ISO 9001. Information The Agilent Technologies 5973 inert Mass Selective Detector meets the following IEC (International Electro-technical Commission) classifications: Safety Class I, Transient Overvoltage Category II, Pollution Degree 2. -
Page 14: Symbols
Failure to comply with these precautions violates safety standards of design and the intended use of the instrument. Agilent Technologies assumes no liability for the customer’s failure to comply with these requirements. See accompanying instructions for more information. -
Page 15: Electromagnetic Compatibility
4 Make sure that all peripheral devices are also certified. 5 Make sure that appropriate cables are used to connect the device to peripheral equipment. 6 Consult your equipment dealer, Agilent Technologies, or an experienced technician for assistance. 7 Changes or modifications not expressly approved by Agilent Technologies could void the user’s authority to operate the... -
Page 16: Cleaning
General Information Cleaning To clean the unit, disconnect the power and wipe down with a damp, lint-free cloth. Recycling the Product For recycling, contact your local Agilent sales office. Hardware Installation... -
Page 17: Customer Responsibilities
• Preparation of all site facilities including the provision of adequate space, supporting bench, and power to match the unit(s) purchased. See the 5973N and 5973 inert MSD Site Preparation Guide for details • Operating supplies: high-purity carrier and reagent gas(es), syringes, pipettes, vials, and solvents. -
Page 18: Before You Start
General Information Before You Start Verify that all the conditions specified in the 5973N and 5973 inert MSD Site Preparation Guide have been met: • Adequate space is available for the MSD system • Suitable supporting bench • Adequate electrical power is available at the correct voltages and frequencies •... -
Page 19: Other Documentation
Other Documentation Additional information is contained in the following documentation: • 5973N and the 5973 inert Mass Selective Detector Hardware Manuals, which are located on the 5973N and 5973 inert Mass Selective Detector User Information CD-ROM • 5973N and 5973 inert Mass Selective Detector Site Preparation Guide •... - Page 20 General Information Hardware Installation...
-
Page 21: Installation
5973N and 5973 inert Mass Selective Detector Hardware Installation Installation Overview Unpacking and Inspecting the Materials Installing the GC Connecting the Helium Lines to the GC Configuring the GC Conditioning the Column Preparing the MSD for Installation Preparing the Vacuum System... -
Page 22: Overview
Installation Overview Installing the MSD system includes the following steps: • Unpacking and inspecting shipped materials • Installing the GC • Installing the MSD • Installing the computer and peripherals • Integrating the GC and MSD • Evaluating performance • Familiarizing the customer with the system Installing CI MSD systems requires additional steps: •... -
Page 23: Unpacking And Inspecting The Materials
Technologies representative is present to verify the contents of each container. Warranty claims for missing items will not be honored unless an Agilent Technologies representative verifies the contents of each shipping container as it is unpacked. 1 Unpack the GC, MSD, and PC boxes. -
Page 24: Installing The Gc
Installation Installing the GC Materials needed: Column cutter (5181-8836) Flat-blade screwdriver Wrenches, 7/16 inch, open-ended (2 needed) 6890 Series GC shipping kit Please refer to the GC/MS application note, Optimizing splitless injections on your GC for high-performance MS analysis (5988-9944EN) before installing the GC. 1 Place the GC on the bench. - Page 25 Installation Metal knockout Plastic knockouts GC/MSD interface heater cable (GC end) Figure 3 Removing the knockouts Hardware Installation...
-
Page 26: Connecting The Helium Lines To The Gc
Installation Connecting the Helium Lines to the GC 1 Connect the 6-foot copper tubing (or a custom length) to the carrier gas supply line (Figure Copper supply tubing On/Off valve Two-stage regulator Main supply On/Off valve Helium carrier gas supply Helium gas purifier (be sure the arrow points in the direction of gas flow) Copper supply tubing... - Page 27 Installation 7 Connect the other end of the tubing to the input of the EPC controller. Purge the flow system for 20 minutes. You can continue with the next step while you wait. Hardware Installation...
-
Page 28: Configuring The Gc
Installation Configuring the GC 1 If there is an ALS, install it now. Follow the instructions provided with the ALS. 2 Install the Merlin Microseal (optional). Follow the instructions provided with the Merlin Microseal. Do not use syringes with tapered needles with a Microseal. C A U T I O N 3 Connect the GC power cord to the appropriate electrical outlet. -
Page 29: Conditioning The Column
Installation Conditioning the Column 1 Remove the septum covering the free end of the GC column and cut about 1 cm off the end of the column. 2 Place the free end of the column into a beaker of solvent and check for bubbles to verify helium flow. -
Page 30: Preparing The Msd For Installation
To prevent injury, get lifting assistance WA R N I N G 2 Remove the analyzer cover of the MSD. See the 5973N or 5973 inert MSD Hardware Manual for more information. 3 Equalize the pressure in the MSD by turning the vent valve knob counterclockwise 1/2 turn. - Page 31 Installation Special procedure for CI MSD 5 Add PFDTD (8500-8130) to the vial on the CI calibration valve. See the 5973N or 5973 inert MSD Hardware Manual for more information. Hardware Installation...
-
Page 32: Preparing The Vacuum System
Installation Preparing the Vacuum System Materials needed: 5973N or 5973 inert MSD Hardware Manual Diagonal cutters Plastic gloves 1 Remove the plugs from the inlet and the outlet of the pump. 2 Verify that the available ac power matches the voltage rating of the foreline pump. - Page 33 Installation 8 Remove the cap from the diffusion pump (diffusion pump MSDs only.) Turning on the power to the MSD with the diffusion pump cap installed C A U T I O N will result in serious damage to the instrument. See the instructions taped to the MSD.
- Page 34 Installation 10 Install the optional 59864B gauge controller (required for CI MSDs). Be sure not to stress the cable or the tube may crack. The gauge controller must be properly grounded. See the WA R N I N G manufacturer’s manual supplied with the gauge controller. Hardware Installation...
-
Page 35: Plumbing The Methane Line To The Ci Msd Flow Module
Installation Plumbing the Methane Line to the CI MSD Flow Module Special procedure for CI MSD Refer to the 5973 inert MSD Hardware Manual. Materials needed: Methane supply with regulator Methane/isobutane gas purifier (G1999-80410) Stainless-steel tubing, 1/8-inch Swagelok fittings and ferrules for 1/8-inch tubing Wrench, 7/16-inch open-end, two needed Only remove the caps in the gas stream, or the gas purifier will be C A U T I O N... - Page 36 Installation 6 Connect the second piece of stainless-steel tubing to the outlet of the gas purifier. 7 Let the lines purge into a fume hood for 5 to 10 minutes. 8 Connect the other end of the tubing to the Gas A fitting on the flow module as shown in Figure 9 If another reagent gas is to be used, use more stainless steel...
-
Page 37: Connecting The Msd And The Gc
Installation Connecting the MSD and the GC 1 Verify that the GC power is turned off. 2 Connect the two ends of the GC/MSD interface cable. 6890 Series GC 5973 Series MSD GC/MSD interface cover GC/MSD interface cable (MSD end) GC/MSD interface cable (GC end) Figure 7 Connecting the MSD and the GC... - Page 38 8) and open the analyzer. 7 Remove the interface column nut and blank ferrule from the end of the GC/MSD interface. 8 Install the column in the GC/MSD interface. See the 5973N or 5973 inert MSD Hardware Manual for more information. Rear sideplate thumbscrew...
- Page 39 Installation Remote start cable Transmit (Tx) and receive (Rx) LEDs Power cord receptacle LAN cable Foreline pump power cord Power (PWR) and heartbeat (heart) LEDs Figure 9 Rear panel view 9 Turn the GC on. 10 Set the GC column flow to 1.0 mL/min with constant flow enabled.
-
Page 40: Installing The Chemstation Pc
Installation Installing the ChemStation PC 1 Unpack the PC, monitor, printer, and the modem (if present). 2 Position the PC components on the bench. 3 Install the PC. See the PC installation documentation. Please pay attention to the voltage requirements in the PC documentation. 4 Position the network hub on the bench, and plug in its power supply. -
Page 41: Verifying Ei System Performance
Installation Verifying EI System Performance Material needed: 1 pg/µL (0.001 ppm) OFN sample (8500-5441) Verify the tune performance 1 Verify that the system has been pumping down for at least 60 minutes. 2 Set the GC oven temperature to 150°C, and the column flow to 1.0 mL/min. -
Page 42: Switching From Ei To Ci Operating Mode
Installation Switching from EI to CI Operating Mode Special procedure for CI MSD Refer to the 5973 inert MSD Hardware Manual. 1 Vent the MSD. 2 Open the analyzer. 3 Remove the EI ion source. Electrostatic discharges to analyzer components are conducted to the C A U T I O N side board where they can damage sensitive components. -
Page 43: Verifying Ci System Performance
Installation Verifying CI System Performance Special procedure for CI MSD Refer to the 5973 inert MSD Hardware Manual. Verify PCI performance 1 Perform a positive CI autotune. See the 5973 inert MSD Hardware Manual. 2 Verify positive CI performance. See the 5973 inert MSD Hardware Manual. -
Page 44: Familiarizing The Customer
• The gas purifier can not be used with ammonia. • Must ballast foreline pump daily if running ammonia. Refer to the maintenance chapter of the 5973 inert MSD Hardware Manual. • For updated information, see the Agilent Technologies web site at http://www.agilent.com/chem. Hardware Installation... -
Page 45: Checklists
5973N and 5973 inert Mass Selective Detector Hardware Installation Checklists Installation Checklist Customer Familiarization Checklist This section provides a series of checklists which will help you verify your completion of the various steps of the installation process. Also included are checklists which are intended to aid you in becoming familiar with the system. -
Page 46: Installation Checklist
Checklists Installation Checklist Verifying that site preparation is complete ❏ Adequate space is available for the MSD system. ❏ Suitable supporting bench. ❏ Adequate electrical power is available at the correct voltages and frequencies. ❏ Environmental control systems are adequate to maintain a correct, stable operating environment. -
Page 47: Gc Installation
Checklists ❏ Shipment damaged or incomplete: Distribution center notified (date): Person contacted: DM notified (date): Damaged or missing material: GC installation ❏ GC placed on an appropriate bench ❏ Upper front knockout in the interior oven wall removed ❏ The two large plastic knockouts removed from the left side panel. -
Page 48: Msd Installation
Checklists ❏ Gas purifier plumbed and purged ❏ GC plumbed Configuring the GC ❏ ALS installed (optional) ❏ Merlin Microseal installed (optional) ❏ GC plugged in and turned on ❏ GC passes self-test ❏ Column parameters configured ❏ Carrier gas line pressure set to approximately 60 psi (414 KPa) ❏... - Page 49 Checklists ❏ PFTBA vial for EI cal valve filled ❏ PFDTD vial for CI cal valve filled Preparing the vacuum system ❏ Plugs removed from the foreline pump ❏ Foreline pump line voltage verified to match available AC power ❏ Line voltage identification sticker installed on MSD ❏...
-
Page 50: Msd Chemstation Pc Installation
Checklists ❏ Foreline pump and AC supply power cords connected to the MSD. ❏ MSD plugged in ❏ MSD power on (press on the sideplate) ❏ Foreline pump and the front fan operation verified ❏ Foreline pump stops gurgling within 60 seconds verified ❏... -
Page 51: Instrument Log Book Updated
Checklists ❏ Checkout Tune performed ❏ Tune Verification performed ❏ Sensitivity Check verification of EI Sensitivity performance Switch CI MSD to CI operating mode (if applicable) ❏ MSD vented ❏ EI ion source removed ❏ CI ion source installed ❏ CI interface tip seal installed ❏... - Page 52 Checklists ❏ S/N Report(s) and Tune Report(s) faxed to GCMS LSCA Technical Marketing at (USA) 408-553-3188 or your region’s local Technical Marketing Support Provider 5973 Series MSD serial number/product number: EI serial number (rms): PCI serial number (rms): NCI serial number (rms): Hardware Installation...
-
Page 53: Customer Familiarization Checklist
Checklists Customer Familiarization Checklist The purpose of customer familiarization is to demonstrate the steps required to: • Perform a basic analysis using an Agilent standard sample or an internal data file • Evaluate the acquired data • Perform routine maintenance Much of the familiarization is accomplished while the hardware is being installed and checked out. -
Page 54: Hardware Overview
Checklists • Any US EPA quantitation functions • Aromatic gasoline quantitation functions • Intelligent sequencing — Drug Analysis Acquisition • Any Drug Analysis quantitation functions Hardware overview ❏ ❏ CI MSD (if applicable) ❏ Gas Chromatograph ❏ ALS (if applicable) ❏... -
Page 55: Msd Chemstation Software Autotune Descriptions
Checklists MSD ChemStation software autotune descriptions ❏ Various autotunes described ❏ Importance of retaining tuning records emphasized ❏ Ion source contamination, diagnosis of contamination, and use of control charts discussed ❏ EI autotune demonstrated and tune report explained ❏ Manual tune explained ❏... -
Page 56: Data Analysis
Checklists ❏ Use Scan/SIM (amu range 50:300/amu ion 272) on OFN for acquisition ❏ Snapshot demonstrated Data analysis ❏ Screen layout explained (TIC, spectral windows, command line, title bar, etc.) ❏ Loading data files demonstrated ❏ TIC, spectra, and extracted ion profiles demonstrated ❏... -
Page 57: Troubleshooting (Diagnostics)
Checklists ❏ MSD vent and pumpdown procedures performed and described using the ChemStation software ❏ Maintenance section of Hardware manual demonstrated ❏ Ion source cleaning demonstrated ❏ Electron multiplier horn replacement demonstrated ❏ Vacuum system preventive maintenance demonstrated ❏ EI Instrument User Maintenance ❏... -
Page 58: Tune Charts
❏ Mass Filter parameters explained Additional support information ❏ Use of manuals and online help explained ❏ Warranty and warranty enhancements explained ❏ Agilent Technologies Support services and how to obtain help explained • Hardware • Software • Assist Packages •... - Page 60 Agilent Technologies © Agilent Technologies, Inc. Printed in USA, August 2003 G2589-90073...