Table of Contents
Advertisement
Quick Links
This .pdf document is bookmarked
Assembly Instructions and Parts Manual
™
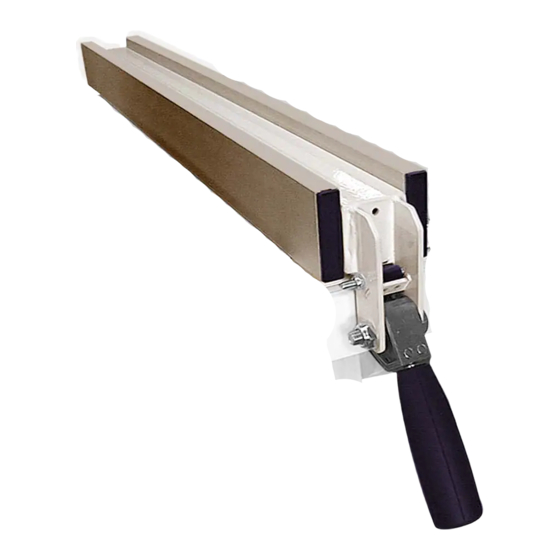
Fence and Rail Set for ProShop II
Saw
Fits all JET ProShop, ProShop II, and JTAS-10 Table Saws
JET
427 New Sanford Road
LaVergne, Tennessee 37086
Part No. M-725005
Ph.: 800-274-6848
Edition 1 09/2017
www.jettools.com
Copyright © 2017 JET
Advertisement
Table of Contents

Related Manuals for Jet 725005


Summary of Contents for Jet 725005
- Page 1 This .pdf document is bookmarked Assembly Instructions and Parts Manual ™ Fence and Rail Set for ProShop II Fits all JET ProShop, ProShop II, and JTAS-10 Table Saws 427 New Sanford Road LaVergne, Tennessee 37086 Part No. M-725005 Ph.: 800-274-6848 Edition 1 09/2017 www.jettools.com...
-
Page 2: Important Safety Instructions
17. Check damaged parts. Before further use of intended use. If used for other purposes, the machine, a guard or other part that is JET disclaims any real or implied warranty damaged should be carefully checked to and holds itself harmless from any injury that determine that it will operate properly and may result from that use. -
Page 3: Kickback
or other moving parts. Do not overreach or 35. Never leave machine running use excessive force to perform any machine unattended. Turn the power off and do not operation. leave the machine until it comes to a complete stop. 24. Use the right tool at the correct speed and feed rate. - Page 4 • • Wear safety glasses or a face shield. Your Use a push stick to keep your hands farther eyes and face are the most vulnerable part away from the moving blade. If a kickback of your body. occurs, the push stick will most likely take the damage that your hand would have •...
-
Page 5: Table Of Contents
The Fence has been designed and constructed to provide consistent, long-term operation if used in accordance with the instructions set forth in this document. If there are questions or comments, please contact your local supplier or JET. JET can also be reached at our web site: www.jettools.com. -
Page 6: Specifications
81-3/4 in. (208 cm) Table 1 The specifications in this manual were current at time of publication, but because of our policy of continuous improvement, JET reserves the right to change specifications at any time and without prior notice, without incurring obligations. -
Page 7: Unpacking
5.0 Unpacking Open shipping container and check for shipping damage. Report any damage immediately to your distributor and shipping agent. Do not discard any shipping material until Fence and Rails are assembled and working properly. Compare the contents of your container with the following parts list to make sure all parts are intact. -
Page 8: Wood Extension Table (Optional)
inner screws). NOTE: On the JTAS-10 table saw, use 5/16 x 1-1/4 socket head cap screws for the two inner screws. 3. Secure the two outer screws with a flat washer, lock washer and hex nut behind the lip of the saw table. Only finger tighten all nuts and screws. - Page 9 The extension table is not bolted to the saw table; it is bolted only to the rails. The extension table and saw table must be aligned properly so the fence will slide smoothly from one to the other. The wood extension table may be provided with fasteners –...
-
Page 10: Installing Fence
7. Install M8 x 35 socket flat head screws through front rail and secure each with flat washer, lock washer, and hex nut behind lip of wood table (Figure 9). Finger tighten only. 8. Install M8 x 35 socket head cap screws and flat washers in rear rail, and secure with flat washer, lock washer and hex nut behind lip of wood table (Figure 10). -
Page 11: Attaching Scale
6.4.2 Square to Table 8. Place a square on table and against side of fence, as shown in Figure 13. Lock fence down with handle. The fence should be 90° to table. 9. If fence is not 90° to table, unlock the fence and rotate one of two nylon adjustment screws (clockwise will raise that side of the fence... - Page 12 4. Remove the fence, and clean the guide tube surface with alcohol. Peel off some of the scale backing, and align the zero point of the scale with your mark on the guide tube. See Figure 17. Position the scale far enough from the edge so that it can be read easily through the cursor lens.
-
Page 13: Replacement Parts
Model Number and Serial Number of your machine available when you call will allow us to serve you quickly and accurately. Non-proprietary parts, such as fasteners, can be found at local hardware stores, or may be ordered from JET. Some parts are shown for reference only, and may not be available individually. -
Page 14: 52" And 30" Proshop Rail Set - Exploded View
7.1.1 52” and 30” ProShop Rail Set – Exploded View... -
Page 15: 52" And 30" Proshop Rail Set - Parts List
7.1.2 52” and 30” ProShop Rail Set – Parts List Index No. Part No. Description Size ....708484 ..... JPSR-52: 52” Pro Shop Rail Set ................. 708483 ..... JPSR-30: 30” Pro Shop Rail Set ..............1 ....JPSR52-101 ..... 52” Guide Tube ..................1 .... -
Page 16: Proshop Fence Assembly - Exploded View
7.2.1 ProShop II Fence Assembly – Exploded View... -
Page 17: Proshop Fence Assembly - Parts List
23 ..... JPSF1-123 ....Stop Pad ....................1 24 ..... TS-1541021 ..... Nylon Insert Lock Nut ........... M6-1.0 ......1 25 ..... JPSF1-25 ....JET Logo (not shown) ................1 26 ..... JPSF1-26A ....ProShop II Label (not shown) ..............1... -
Page 18: Warranty And Service
JET sells through distributors only. The specifications listed in JET printed materials and on official JET website are given as general information and are not binding. JET reserves the right to effect at any time, without prior notice, those alterations to parts, fittings, and accessory equipment which they may deem necessary for any reason ®... - Page 20 427 New Sanford Road LaVergne, Tennessee 37086 Phone: 800-274-6848 www.jettools.com...