Table of Contents
Advertisement
Advertisement
Table of Contents

Related Manuals for Radio Shack 15-2138


Summary of Contents for Radio Shack 15-2138
-
Page 2: Table Of Contents
TABLE OF CONTENTS Introduction ..............3 How Kameleon™... -
Page 3: Introduction
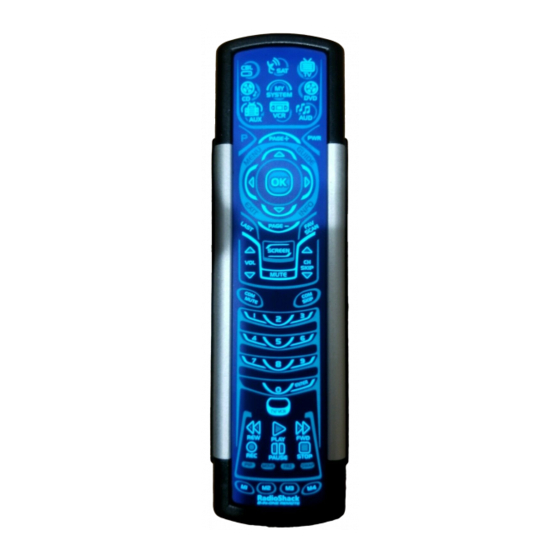
Setup Codes For Video Accessories ......... . . 132 INTRODUCTION The RadioShack 8-in-One Remote powered by Kameleon™ is a revolutionary universal remote control that uses Universal Electronics’ Kameleon Technology. It is designed to control up to eight home entertainment devices, including TV, video, and audio components. -
Page 4: Installing Batteries
HOW KAMELEON™ WORKS (Continued) Several devices have a second menu that can be accessed using SCREEN (see Device Menu Screens, starting on page 45). For example, TV has two menus: a main menu with extra feature keys for COM MUTE, +100, ENTER, SLEEP, TV/VCR, and PIP functions, and a second menu screen that adds navigation keys but removes the extra feature keys. -
Page 5: About The Finder Transmitter
❶ 1. Push forward on the battery compartment cover (on the back of the remote) and lift it off. 2. Slide the AAA batteries into the compartment as indicated by the polarity symbols (+ and –) shown above. 3. Align the cover with the compartment opening and slide it back into place. -
Page 6: A Quick Look At The Controls
INSTALLING BATTERIES BOUT INDER RANSMITTER NSTALLING ATTERY ❶ 1. Press down on the battery compartment cover (on the front of the Finder Transmitter) and slide it off. 2. Locate the snap harness and connect the 9-volt battery to mating terminals. Then insert the battery and harness into the compartment. 3. - Page 7 ’ WNER ANUAL To find out what keys appear when the program mode is activated or when a device is selected, see the Device Menu Screens section starting on page 45. Included are brief descriptions of how the keys work for each displayed screen.
-
Page 8: Key Functions
A QUICK LOOK AT THE CONTROLS (Continued) UNCTIONS 8 A Quick Look At The Controls EMOTE When a key is pressed, the IR segments will animate. Outgoing animation (see arrow) indicates the remote is sending IR signals to a selected device. Incoming animation indicates the remote is receiving IR signals from a device being learned (see Using Learning on page 19). - Page 9 ’ WNER ANUAL ▲ ▼ In the CD mode, use ) to select the next (or previous) disc. ▲ ▼ In the AUD mode, use ) to raise (or lower) rear channel volume and use (or ) to balance audio left (or right). Use OK to choose options from your device’s menu or guide.
- Page 10 A QUICK LOOK AT THE CONTROLS UNCTIONS ONTINUED NOTE: Press above the title to activate a desired program. For OTHER, press below the title. 10 A Quick Look At The Controls EMOTE In all modes except AUD, use the number keys (1 ~ 9 and 0) to directly select channels (e.g., 009 or 031) or enter numbers.
- Page 11 NOTE: Press above the title to activate a desired program. For OTHER, press below the title. Use MODE to reassign an unused device key to control a second device. See Reassigning Device Keys on page 35. Use OTHER to program other functions. See Table of Contents on page 2 for sections on Checking The Codes, Programming Favorite Channel Scan, Using Keymover, Programming...
-
Page 12: Device Table
A QUICK LOOK AT THE CONTROLS UNCTIONS ONTINUED EVICE ABLE NOTE: Please refer to the table below when performing the instructions in “Programming A Device” on page 14. After programming, the RadioShack 8-in-One Remote will be able to control the following types of devices: DEVICE KEY 12 A Quick Look At The Controls EMOTE... -
Page 13: Adjusting Brightness
ADJUSTING BRIGHTNESS The RadioShack 8-in-One Remote has five levels of brightness adjustment and is set to the fourth one at the factory. To increase or decrease the brightness, perform the following steps: 1. Press and hold P until the bottom IR segment flashes twice. The program keys will appear: NOTE: If the display turns off because of inactivity, you will need to start the programming sequence again by repeating this step. -
Page 14: Programming A Device
PROGRAMMING A DEVICE The RadioShack 8-in-One Remote is preset at the factory to operate the following devices: • Motorola Cable Box • RCA TV, VCR, DVD Player, Satellite Receiver, CD Player, and Audio Receiver • ReplayTV PVR (DVR) using the AUX key To control devices other than the default brands, perform the following steps;... -
Page 15: Searching For Your Code
4. Press a device key once (i.e., CBL, SAT, TV, DVD, AUD, VCR, AUX, or CD). The selected device key will animate. NOTE: Refer to the “Device Table” on page 12 when choosing a device key for programming. 5. Use the Manufacturer’s Codes (starting on page 118) to locate the type of device and brand name and then use the number keys to enter the first four-digit code for your device. -
Page 16: Programming A Dvd Player/Vcr Combo
PROGRAMMING A DVD PLAYER/VCR COMBO NOTE: If you own a Sylvania TV/DVD Player Combo with a separate TV code (see page 129), use the below steps to program it with these changes: in step 5 (on the next page), enter 0675 as the DVD code; in step 8a, substitute TV for VCR; and in step 8b enter 0171 as the TV code. -
Page 17: Searching For Your Code
a. Press VCR once. b. Using the number keys, enter the four-digit VCR code for your DVD Player/VCR Combo. If performed correctly, the bottom IR segment will flash twice. c. Press OK once. The bottom IR segment displays one long flash. NOTE: If a VCR setup code is not listed, you can use the VCR key to program a separate VCR or another device (see “Reassigning Device Keys”... - Page 18 SEARCHING FOR YOUR CODE (Continued) 3. Press a device key once (e.g., TV). The selected device key will animate. The device’s Main Menu screen will appear with 4. Press PWR once to select it as the search test function. The Search Programming screen will appear again.
-
Page 19: Checking The Codes/Using Learning 19
3. Using the number keys, enter 9 9 0. The bottom IR segment will flash twice and the Code Verification screen will appear. 4. Press a desired device key once (i.e., CBL, SAT, TV, DVD, AUD, VCR, AUX, or CD). The selected device key will animate. 5. -
Page 20: Programminga Learning Key
USING LEARNING EARNING RECAUTIONS • Learned keys can be used in macros (see Using Macros on page 25). Do not use the following keys for learning: P, SCREEN, M1~ M4, • FAV SCAN, COM SKIP, COM MUTE, or any device key. •... -
Page 21: Deletinga Single Learned Key
5. On the RadioShack 8-in-One Remote, select and press a desired key where the learned function will be stored. The IR segments will display an incoming animation, continue for three revolutions, and then the entire display will turn off. After the display is off, press and hold the teaching key (on your orig- inal remote control) until the display (on the RadioShack 8-in-One Remote) turns on again.The bottom IR segment will flash twice when the code is successfully captured. -
Page 22: Deleting All Learned Keys In A Specific Mode
USING LEARNING ELETING INGLE 5. If desired, repeat steps 2 through 4 to delete another learned key. 6. Exit programming by pressing last-selected device menu screen. ELETING EARNED 1. Press and hold P until the bottom IR segment flashes twice. The program keys will appear: 2. -
Page 23: Locking Volume Control To One Mode
OCKING OLUME ONTROL 1. Press and hold P until the bottom IR segment flashes twice. The program keys will appear: 2. Press above VOL once. The Volume Lock programming screen will appear: 3. Press a device key once (i.e., CBL, SAT, TV, DVD, AUD, VCR, AUX, or CD) where you want the volume controls locked to. -
Page 24: Unlocking All Volume Control
CHANGING VOLUME LOCK NLOCKING OLUME ), C NLOCK ONTINUED ▼ 3. Press VOL once. Then press a device key once (i.e., CBL, SAT, TV, DVD, AUD, VCR, AUX, or CD) where you want the volume controls unlocked. The bottom IR segment will flash four times and the program keys will appear again. -
Page 25: Using Macros
USING MACROS The RadioShack 8-in-One Remote includes six macro keys: M1 through M4, COM MUTE, and PWR. Each one can be set up to perform a repetitive, time-consuming operation with the press of a single key. NOTES: A macro programmed onto the PWR key can only be accessed in the MY SYSTEM mode. -
Page 26: Programming A Master Power Macro In My System Mode
USING MACROS ROGRAMMING AVORITE NOTE: If there are more than 15 key presses in the sequence, the bottom IR seg- ment will display a long flash, denoting an error. The display will return to the last-selected device menu screen. To program the macro, start again with step 3. 5. -
Page 27: Programming The Com Mute Key
6. Exit programming by pressing last-selected device menu screen. 7. To test the power macro, first make sure all home theater devices selected in step 4 are turned on.Aim the remote control at the devices and press MY SYSTEM once, followed by PWR once. The devices should turn off in this order: Satellite Receiver, DVD Player, Audio Receiver, and TV. -
Page 28: Clearinga Macro
USING MACROS (Continued) LEARING ACRO 1. Press and hold P until the bottom IR segment flashes twice. The program keys will appear: 2. Press above MACRO once. The Macro programming screen will appear: 3. Select the macro key to be cleared and press it once. The last-selected device menu screen will be displayed. -
Page 29: Restoringa Single Keymoved Key
2. Press below OTHER once. The Other programming screen will appear: 3. Using the number keys, enter 9 9 4. The bottom IR segment will flash twice. 4. For the source mode, press a desired device key once (i.e., CBL, SAT, TV, DVD, AUD, VCR, AUX, or CD). -
Page 30: Restoring All Keymoved Keys In A Single Mode
USING KEYMOVER ESTORING INGLE 2. Press below OTHER once. The Other programming screen will appear: 3. Using the number keys, enter 9 9 4. The bottom IR segment will flash twice. 4. Press the destination mode once where the keymoved key is stored. Then press the destination key twice. - Page 31 1. Press and hold P until the bottom IR segment flashes twice. The program keys will appear: 2. Select a Favorite Channel Mode by pressing CBL, SAT, TV, VCR, or AUX once. The bottom IR segment flashes once as the selected device key animates.
-
Page 32: Using Channel Scan
USING CHANNEL SCAN In the CBL, SAT, TV, VCR, or AUX mode, use FAV SCAN to start a 3-second scan of all favorite channels (if programmed – see Programming Favorite Channel Scan on page 30) and/or all channels for the selected mode. 1. -
Page 33: Programming My System Mode
Channel Controls Group: Menu Controls Group: ACTORY EFAULT ETTINGS At the factory, the Control Groups are assigned the following modes as default settings: Video Playback Group: Volume Controls Group: Channel Controls Group: Menu Controls Group: If the default settings fit your needs, you can skip programming this mode. - Page 34 USING MY SYSTEM MODE ROGRAMMING 4. To assign a mode to the Video Playback group, press a device key once (i.e., CBL, SAT, TV, DVD, AUD, VCR, AUX, or CD). Then the Volume Controls programming screen will appear: 5. To assign a mode to the Volume Controls group, press a device key once.
-
Page 35: Reassigning Device Keys
REASSIGNING DEVICE KEYS The RadioShack 8-in-One Remote can be set to control a second device. For example, to control a TV, a Cable Box, and two DVD Players, you can reassign the unused AUX key to operate the second DVD Player as follows: 1. -
Page 36: Using Commercial Skip
USING COMMERCIAL SKIP The RadioShack 8-in-One Remote includes a unique feature for skip- ping past commercials on recorded programs when using a PVR (DVR) or VCR. This features works in the CBL, SAT, VCR, or AUX mode and you can use the default settings or program custom ones. SING EFAULT The COM SKIP key is preprogrammed to perform the Commercial Skip... - Page 37 5. Using the number keys, enter 9 7 4. The The bottom IR segment will flash twice and the Commercial Skip programming screen will appear: 6. Select a Commercial Skip mode by pressing CBL, SAT, VCR, or AUX once. 7. Press FFWD once and watch for the end of a commercial sequence that typically may have four to six commercials and last 2 to 3 minutes in real time.As it ends, press PLAY once.
-
Page 38: Setting The Tilt Switch
SETTING THE TILT SWITCH The RadioShack 8-in-One Remote contains a Tilt Switch that activates the display when the unit is moved. If desired, you can disable it so only pressing a key will turn on the display. NOTE: Disabling the Tilt Switch can help conserve battery life. ISABLING 1. -
Page 39: Setting The Finder Receiver
SETTING THE FINDER RECEIVER The RadioShack 8-in-One Remote comes with a Finder Transmitter that can be used to quickly locate the main remote if it is accidentally lost or misplaced. At the factory, the Finder Receiver (inside the remote) is set to wake up every few seconds, listen for a signal from the Finder Transmitter, and then emit an audible alert to pinpoint the location of the main remote. -
Page 40: Restoring Factory Default Settings
RESTORING FACTORY DEFAULT SETTINGS The RadioShack 8-in-One Remote includes a Setup Code Reset program. You can use it to restore all your programmed codes to factory settings and delete all custom programming. IMPORTANT: Executing this program will erase all code settings (except upgraded codes) and all custom settings for My System, Macros, Learned Keys, Reassigned Device Keys, Keymoved Keys, Favorite Channels, and all device settings. -
Page 41: Specifications
1. Press and hold P until the bottom IR segment flashes twice. The program keys will appear: 2. Press below OTHER once. The Other programming screen will appear: 3. Using the number keys, enter 9 8 0. The bottom IR segment will flash twice, pause and flash twice again to confirm restoration. -
Page 42: About Upgrading
ABOUT UPGRADING Your RadioShack 8-in-One Remote has the largest infrared code library available and contains a unique feature that allows new codes to be added to its memory over the phone. In a matter of seconds, your remote will quickly and reliably record the new information without complex plugs, adapters, or attachments. -
Page 43: Troubleshooting
• Broken or defective product. • Products that operate over 100 kHz. • Infrared keyboards a nd infrared pointing devices (such as mouse substitutes). • All products for sale and/or use outside the continental United States, Hawaii, Alaska, or Canada. TROUBLESHOOTING PROBLEM: No display at all times. - Page 44 TROUBLESHOOTING (Continued) PROBLEM: Power macro does not work. First press MY SYSTEM once, then press PWR once. SOLUTION: PROBLEM: Favorite channel function does not work properly. SOLUTION: Some devices (e.g.,Cable Boxes or Satellite Receivers) use two-digit channel numbers.During programming, press ENTER or OK once after entering a channel number (e.g., 0 2 ENTER for channel 2).See Programming Favorite Channel Scan on page 30.
-
Page 45: Device Menu Screens
’ WNER ANUAL DEVICE MENU SCREENS ROGRAMMING Pressing and holding P displays the Programming Main Menu screen. Use the program keys to program device control (DEV SET), code search (SEARCH), home theater mode (MY SYSTEM), volume lock (VOL macros (MACRO), display brightness ( ), function learning (IR LEARN and IR DELETE), device key reassignment (MODE ), or other functions (OTHER). - Page 46 EMOTE OWERED AMELEON DEVICE MENU SCREENS (Continued) AUD M Pressing AUD once displays the AUD Main Menu screen. After device programming, use these keys to remotely control your Audio Receiver’s or Amplifier’s volume and stations, select source inputs, operate trans- port functions on a built-in CD player (or DVD player, if HTiB device), and access menu or preset functions.
- Page 47 ’ WNER ANUAL AUD M Pressing SCREEN once (on the AUD Main Menu, as shown on the previous page) displays a secondary AUD Menu screen. Use these keys to remotely control your Audio Receiver’s or Amplifier’s volume, stations, and surround functions. Pressing SCREEN once more returns the display to the AUD Main Menu screen.
- Page 48 EMOTE OWERED AMELEON DEVICE MENU SCREENS (Continued) AUX M Pressing AUX once displays the AUX Main Menu screen. After device programming, use these keys to remotely control all your device’s common features, such as volume and channels, and menu, guide, and navigation functions.
- Page 49 ’ WNER ANUAL CBL M Pressing CBL once displays the CBL Main Menu screen. After Cable Box programming, use these keys to remotely control all your device’s common features, such as volume and channels, and menu, guide, and navigation functions. Device Menu Screens 49...
- Page 50 EMOTE OWERED AMELEON DEVICE MENU SCREENS (Continued) CD M Pressing CD once displays the CD Main Menu screen. After device programming, use these keys to remotely control your CD player’s common features, such as transport keys and skip, menu, and random functions.
- Page 51 ’ WNER ANUAL CD M Pressing SCREEN once (on the CD Main Menu, as shown on the previous page) displays a secondary CD Menu screen. Use these keys to remotely control your CD player’s navigation functions. Pressing SCREEN once more returns the display to the CD Main Menu screen.
- Page 52 EMOTE OWERED AMELEON DEVICE MENU SCREENS (Continued) DVD M Pressing DVD once displays the DVD Main Menu screen. After device programming, use these keys to remotely control all your DVD player’s common features, such as transport keys and menu, navigation, subtitle, and audio functions.
- Page 53 ’ WNER ANUAL MY SYSTEM M After mode programming, pressing MY SYSTEM once displays the My System Main Menu screen. Use these keys to remotely access all common features and functions of your home theater system. For details, see Using My System Mode on page 32. Device Menu Screens 53...
- Page 54 EMOTE OWERED AMELEON DEVICE MENU SCREENS (Continued) TV M Pressing TV once displays the TV Main Menu screen. After device programming, use these keys to remotely control all your TV’s com- mon features, such as volume and channels, and last channel, menu, and information/display functions.
- Page 55 ’ WNER ANUAL TV M Pressing SCREEN once (on the TV Main Menu, as shown on previous page) displays a secondary TV Menu screen. Use these keys to remotely control all your TV’s common menu features. Pressing SCREEN once more returns the display to the TV Main Menu screen.
- Page 56 EMOTE OWERED AMELEON DEVICE MENU SCREENS (Continued) VCR M Pressing VCR once displays the VCR Main Menu screen. After device programming, use these keys to remotely control all your TV’s common features, such as volume and channels, and last channel, menu, and information/display functions, and VCR transport controls.
-
Page 57: Care
CARE • Keep the remote dry. If the remote gets wet, wipe it dry immediately. • Handle the remote gently and carefully. Don’t drop it. • Use and store the remote only in normal temperature environments. • Keep the remote away from dust and dirt. •... -
Page 58: Instruction To The User
INSTRUCTION TO THE USER This equipment has been tested and found to comply with the limits for a class B digital device, pursuant to part 15 of the FCC Rules. These limits are designed to provide reasonable protection against harmful interference in a residential installation.This equipment generates, uses and can radiate radio frequency energy and if not installed and used in accordance with the instructions, may cause harmful interference to... - Page 59 This warranty gives you specific legal rights, and you may also have other rights which vary from state to state. RadioShack Customer Relations, Cat. No. 15-2138 200 Taylor Street, 6th Floor, Fort Worth, TX 76102 Fort Worth, Texas 76102 ’...