
Related Manuals for AudioCodes 405


Summary of Contents for AudioCodes 405
- Page 1 AudioCodes 400 IP Phone Series VoIP 405 and 405HD IP Phone User’s Manual 405 and 405HD IP Phone Version 2.2.12...
-
Page 3: Table Of Contents
User's Manual Contents Table of Contents Introducing the 405 / 405G IP Phone ................. 9 About AudioCodes' 400HD Series of IP Phones ............... 9 Features Common to All AudioCodes IP Phones .............. 9 Unified Communications ....................9 Enterprise IP Telephony ....................9 IP Contact Centers ...................... - Page 4 405 and 405HD IP Phone 4.13 Editing a Speed Dial ......................38 4.13.1 Deleting a Speed Dial ......................38 4.13.2 Configuring Softkeys ......................39 4.13.3 Deleting a Configured Softkey ................... 40 4.13.4 Configuring a Softkey as a Speed Dial ................40 4.13.5 Configuring a Softkey as a Speed Dial + BLF ..............
- Page 5 Logging Out ........................71 A.2.5 Configuring Do Not Disturb (DnD) ..................71 A.2.6 Configuring Automatic Forwarding ..................71 A.2.7 Listening in Capability for Call Center Supervisors ............72 A.2.8 Recording an Agent's Welcome Greeting ................73 Version 2.2.12 405 and 405HD IP Phone...
- Page 6 405 and 405HD IP Phone List of Figures Figure 2-1: Front View ............................12 Figure 2-2: Rear View ............................14 Figure 2-3: Desktop Mounting .......................... 15 Figure 2-4: Wall Mounting ..........................16 Figure 3-1: LCD in Idle State ..........................17 Figure 3-2: Menus .............................
-
Page 7: Customer Support
Please contact your local recycling authority for disposal of this product. Customer Support Customer technical support and services are provided by AudioCodes or by an authorized AudioCodes Service Partner. For more information on how to buy technical support for... -
Page 8: Related Documentation
405 and 405HD IP Phone Related Documentation Document Name IP Phone Release Notes IP Phone Administrator's Manual IP Phone Quick Guide Document Revision Record LTRT Description 12040 First release. August 2015. 12041 2.2.8. February 2016. 12045 2.2.12. September 2017. User's Manual... -
Page 9: Introducing The 405 / 405G Ip Phone
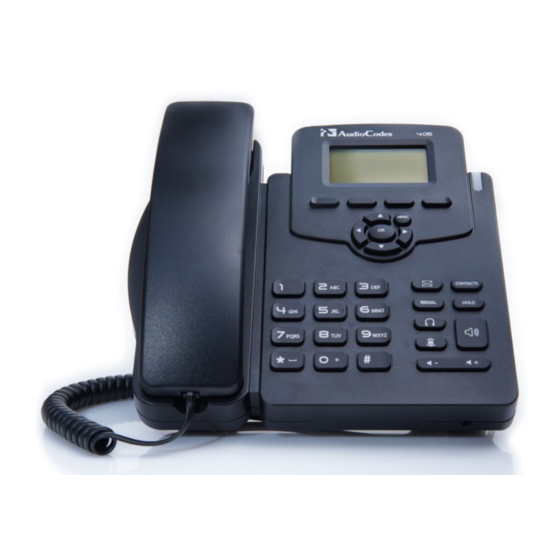
1. Introducing the 405 / 405HD IP Phone Introducing the 405 / 405HD IP Phone The 405 / 405HD SIP IP Phone is a low-cost, entry-level IP phone designed to offer the essential everyday features that the modern business environment demands. -
Page 10: Ip Contact Centers
405 and 405HD IP Phone IP Contact Centers AudioCodes’ IP phones provide the perfect solution for IP contact center agents. Combining excellent voice quality for contact center agents, with a compact and robust enclosure design and headset integration, AudioCodes’ IP Phones offer several essential features required in the growing contact center market including fully certified VoIP interoperability with leading contact center solution providers. -
Page 11: Setting Up The Phone
2. Setting up the Phone Setting up the Phone Unpacking When unpacking, ensure that the following items are present and undamaged: 405 and 405HD IP Phone / Stand Handset / Cord Cat 5e Ethernet Cable AC Power Adapter (Optional) If anything appears to be missing or broken, contact the distributor from whom you purchased the phone for assistance. -
Page 12: Figure 2-1: Front View
405 and 405HD IP Phone Figure 2-1: Front View Table 2-1: Font View Description Item # Label/Name Description Liquid Crystal Display - interactive screen displaying calling information, enabling you to set up phone features. Ring LED Flashing green light indicates an incoming call. -
Page 13: Rear View
▼ Alphanumerical Keys for entering numbers, letters and symbols (e.g., colons). Keypad 2.2.2 Rear View The rear view of the phone is shown in the figure below and described in the table below. Version 2.2.12 405 and 405HD IP Phone... -
Page 14: Figure 2-2: Rear View
405 and 405HD IP Phone Figure 2-2: Rear View Table 2-2: Rear View Description (from L-R) Label Description 12V DC power jack that connects to the AC power adapter. RJ-45 port for connecting the phone to a PC (10/100 Mbps downlink). -
Page 15: Cabling
To mount the phone on a desk (or flat surface): Slide the short edges of the L-shaped stand (the prongs) into the phone's two rear slots (see A below). Slide the prongs in until they lock. Figure 2-3: Desktop Mounting Version 2.2.12 405 and 405HD IP Phone... -
Page 16: Mounting On A Wall
405 and 405HD IP Phone 2.4.2 Mounting on a Wall To mount the phone on a wall: Hook the phone's two rear notches (see B below) onto wall mounting screws. Pull out the handset's cradle clip, which is by default in desktop mounting position, invert it, and then push it back in. -
Page 17: Getting Started
Web interface. See the Administrator's Manual for details on how to configure a line. Softkeys. To activate a softkey, press the key below it on the device. Day, Date and Time. Version 2.2.12 405 and 405HD IP Phone... -
Page 18: Softkeys
405 and 405HD IP Phone Softkeys The table below describes the softkeys displayed in the LCD according to menu level currently accessed. To use a softkey, press the key located on the device directly below it. Table 3-2: Softkeys Softkey Description Opens the phone's directory. -
Page 19: Accessing Menus
If you define a second extension line, the Call Log menu displays menu items per extension. • The Soft Keys item under the Keys Configuration menu is not displayed on IP phones in a Genesys or Broadsoft environment when the Automatic Call Distribution (ACD) feature is enabled. Version 2.2.12 405 and 405HD IP Phone... -
Page 20: Entering Numbers, Alphabetical Letters And Symbols
405 and 405HD IP Phone To access the menus: Press the MENU key located on the device. To navigate to menus and items: Press the navigating control's upper and lower rim -OR- press the listed item's number on the keypad, e.g., press 3 to navigate to Keys Configuration. - Page 21 (single apostrophe) • (vertical bar) • (open parentheses) • (close parentheses) • (open parentheses) • (close parentheses) • (open parentheses) • (close parentheses) • " (apostrophe marks) • (single apostrophe) • < (less than) Version 2.2.12 405 and 405HD IP Phone...
-
Page 22: Displayed Messages
405 and 405HD IP Phone • > (greater than) • (comma) • (forward slash) Note that you can also use the star key to enter a fullstop, asterisk (*) symbol, and @ symbol. Displayed Messages Messages indicating processes in progress, displayed in the LCD, include:... -
Page 23: Customizing Your Phone
To change the default language: Access the Languages screen (MENU key > Settings > Language). Navigate to the language you require. Press the Select softkey. Press the Save softkey to apply your setting. Version 2.2.12 405 and 405HD IP Phone... -
Page 24: Selecting Ring Tone
405 and 405HD IP Phone Selecting Ring Tone The phone provides a selection of ring tones that you can choose from to indicate incoming calls. If line extensions are defined on your phone, you can assign a ring tone per line extension. -
Page 25: Enabling Call Waiting
Access the Call Waiting screen (MENU key > Settings > Call Waiting). Navigate to one of the following: Disabled (disables call waiting) • • Enabled (enables call waiting) Press the Select softkey. Press the Save softkey to apply your setting. Version 2.2.12 405 and 405HD IP Phone... -
Page 26: Setting Date And Time
405 and 405HD IP Phone Setting Date and Time You can manually set date and time displayed on the phone. If a Network Time Protocol (NTP) server is deployed and enabled by your administrator, however, then date and time are automatically retrieved over the Internet from the server and manually setting them will not be possible. -
Page 27: Changing Lcd Contrast Level
Access the LCD Contrast submenu (MENU key > Settings > LCD Contrast). Press the navigation control's left or right rim to navigate to the contrast level that suits you best. Press the Save softkey to apply your setting. Version 2.2.12 405 and 405HD IP Phone... -
Page 28: Setting The Lcd Backlight Timeout
405 and 405HD IP Phone Setting the LCD Backlight Timeout You can set the duration, in seconds, for which the phone’s backlight is lit when the phone is not being used (idle). After the duration expires, the backlight turns off. You can opt to have the backlight on all the time by selecting the Always on option. -
Page 29: Changing The Default Answer Device
To restart the phone: Access the Restart screen (MENU key > Settings > Restart). Select Restart and then in the warning prompt that is displayed, press the Yes softkey. Version 2.2.12 405 and 405HD IP Phone... -
Page 30: Adjusting Volume
405 and 405HD IP Phone Adjusting Volume You can adjust the volume of the phone's Ring Tones (e.g., dial tone) Handset Speakerphone Headset 4.9.1 Adjusting Ring Volume You can adjust the volume of the ring indicating an incoming call. -
Page 31: Adjusting Handset Volume
To adjust the headset volume: During a call, press the HEADSET key. Press the - or + key: After adjusting the volume, the Headset Volume bar disappears from the screen. Version 2.2.12 405 and 405HD IP Phone... -
Page 32: Defining Call Forwarding
405 and 405HD IP Phone 4.10 Defining Call Forwarding This feature allows an incoming call to be automatically redirected to another phone number if a user-defined condition is met, e.g., if the line is busy. You can also define call forwarding per extension or for all extensions - if you've defined extensions. -
Page 33: Managing Your Personal Directory
You can assign them to a speed dial key that will let you dial that contact at the press of a single digit on the phone (1-9). To add a contact to the phone directory: Access the Personal directory. Select New contact… Version 2.2.12 405 and 405HD IP Phone... - Page 34 405 and 405HD IP Phone In the 'Modify contact' screen that opens (shown above), enter the ‘Name’ of the new contact (see Section on page for information on alphanumeric modes). Navigate down and key in the new contact's ‘Office’ number (see Section...
-
Page 35: Editing A Contact
Access the Personal directory and navigate to the name of the contact to edit: Press the Detail softkey: Press the Edit softkey: Modify the contact’s details (use the Clear softkey) and press the Save softkey. Note: Corporate directory contacts cannot be modified. Version 2.2.12 405 and 405HD IP Phone... -
Page 36: Deleting A Contact
405 and 405HD IP Phone 4.11.4 Deleting a Contact You can delete a contact from your personal directory. To delete a contact: Access the Personal directory and navigate to the contact to delete: Press the Detail softkey; the contact details are shown. -
Page 37: Configuring Keys
If the contact is configured in the directory, their name will display as you enter the last digit of their number. Press the Save softkey; the new Speed Dial is created and shown in the Speed Dial screen: -OR- Version 2.2.12 405 and 405HD IP Phone... -
Page 38: Editing A Speed Dial
405 and 405HD IP Phone • Select from Directory: Instead of entering the phone number in the 'Type Number' field, navigate down and select Select from Directory > Personal directory and then navigate to the defined contact in the directory: Select the contact and then press the Save softkey;... -
Page 39: Configuring Softkeys
Press the key on the phone, configured as a speed dial, to call the required party. Speed Dial + BLF Press the softkey, configured as a speed dial, to call the required party. Version 2.2.12 405 and 405HD IP Phone... -
Page 40: Deleting A Configured Softkey
405 and 405HD IP Phone 4.13.3 Deleting a Configured Softkey This section shows how to delete a configured softkey. To delete a configured softkey: Long-press the softkey, e.g., the Missed softkey, until this screen is displayed: Press the navigation control’s left or right rim to navigate to and select Empty; you're returned to the idle LCD;... -
Page 41: Configuring A Navigation Key Position Function
Navigate to and select the next function you want to configure, e.g., Received Calls. The user will be able to press the lower rim of the navigation control button on their phone in order to display Received Calls on the phone's LCD screen. Version 2.2.12 405 and 405HD IP Phone... -
Page 42: Removing A Configured Function
405 and 405HD IP Phone 4.13.6.1 Removing a Configured Function To remove a configured navigation control position function: Navigate to and select the configured navigation control position function you want to delete (Missed Calls, Received Calls, Dialed Calls, All Calls, or Directory). -
Page 43: Performing Basic Operations
Press the End softkey or the speaker key. Note: • For advanced dialing using the phone directory, see Section 4.11. • For defining a speed dial key, see Section 4.12. • For using multiple lines, see Section 6.11. Version 2.2.12 405 and 405HD IP Phone... -
Page 44: Dialing
405 and 405HD IP Phone 5.2.1 Dialing You can dial in multiple ways. Either (1) key-in the number on the keypad or (2) press the speaker key and enter the number or (3) press the speaker key or lift the handset and press the URL softkey and enter host and domain name or IP address or alphabetical letters (e.g.,... -
Page 45: Dialing A Missed Call
Or press the headset key: Or press the speaker key: If you press the Accept softkey, the configured Answer Device (MENU key > Settings > Speaker / Headset) is activated. Version 2.2.12 405 and 405HD IP Phone... -
Page 46: Rejecting Incoming Calls
405 and 405HD IP Phone Rejecting Incoming Calls You can reject an incoming call; the caller hears a busy tone from your phone if you do. To reject an incoming call: Press the Reject softkey. Silencing Incoming Calls You can silence an incoming call's ringing. -
Page 47: Viewing Missed, Received And Dialed Calls
Dial = dials the number of the selected logged entry. Save = saves the related information about the call entry in the personal directory (for adding a contact in the directory, see Section 4.11 on page 33). Version 2.2.12 405 and 405HD IP Phone... - Page 48 405 and 405HD IP Phone Detail = accesses the Call Details screen, which displays details of the call entry: The Call Details screen displays the following logged call information: Number = phone number logged Time = the time the call was logged...
-
Page 49: Performing Advanced Operations
A is put on hold: To toggle between the calls, press the navigation control's upper or lower rim. Note: To enable / disable the call waiting feature, see Section on page 25. Version 2.2.12 405 and 405HD IP Phone... -
Page 50: Placing Calls On Hold
405 and 405HD IP Phone Placing Calls On Hold You can place a call on hold in order to answer a second incoming call (see Section on page 49) or to make another call. To place a call on hold: Accept an incoming call and then press the Hold softkey or HOLD key on the phone;... - Page 51 To change the redial interval: Open the 'Automatic redial' screen in the phone LCD (MENU > Settings > Automatic Redial). Enter the interval you require and then press the Apply softkey. Version 2.2.12 405 and 405HD IP Phone...
-
Page 52: Pressing A Speed Dial Key To Make A Call
405 and 405HD IP Phone Pressing a Speed Dial Key to Make a Call You can press a Speed Dial key (1-9 on the phone's keypad) to make a call. See Section 4.12 details on how to define a Speed Dial key. -
Page 53: Semi- Attended Transfer
To perform a blind transfer: In a call with John he asks you to connect him to Sue. Press the BXfer softkey: In the 'TRANSFER TO' field enter Sue's number, and then press the Trans softkey. Version 2.2.12 405 and 405HD IP Phone... -
Page 54: Hosting 3-Way Conference Calls
405 and 405HD IP Phone Hosting 3‐Way Conference Calls You can make a 3-way conference call with two other parties. To make a 3‐way conference call: Call the first participant; the call is established: Press the Conf softkey; the CONFERENCE WITH…screen is displayed. -
Page 55: Activating Do Not Disturb
If the voicemail number has not been configured by your administrator then after pressing the voicemail key, enter it and press the Save softkey. Press the voicemail key again to listen to voice messages. Version 2.2.12 405 and 405HD IP Phone... -
Page 56: Using Two Lines
405 and 405HD IP Phone 6.11 Using Two Lines Your phone supports up to two lines. Each is configured with its own extension number. The figure below shows the idle screen of a phone set up with two lines whose extension numbers are Peter and Front Desk. -
Page 57: Making Up To Eight Calls Per Extension Line
You can only end calls that are active, i.e., not on hold. To end an active call: Ensure that the call is active and not on hold. Press the End softkey or the SPEAKER key. Version 2.2.12 405 and 405HD IP Phone... -
Page 58: Logging Into A Remote Http/S Server
405 and 405HD IP Phone 6.12 Logging into a Remote HTTP/S Server When downloading a new configuration file from the provisioning server you can be prompted to enter the provisioning server login credentials (username and password). You can configure this feature. -
Page 59: Troubleshooting
-OR- DHCP network if Exclude the static IP address from the DHCP scope you defined a on the DHCP server static IP address for a network device Version 2.2.12 405 and 405HD IP Phone... - Page 60 405 and 405HD IP Phone This page is intentionally left blank. User's Manual Document #: LTRT-12045...
-
Page 61: A Specific Third-Party Features
A.1.2 Support for SCA (Participant Only) The 405/405HD phone supports Shared Calls Appearance (SCA) as participant only. The feature enables multiple phones (the 440HD model) in a Broadsoft environment to be associated in an SCA group so that calls can be made or received on any phone in the group. If a call comes in on a phone in the group, all phones in the group ring simultaneously. -
Page 62: Softkey Display And Command Menu Options
405 and 405HD IP Phone A.1.3 Softkey Display and Command Menu Options The following tables show the different softkey display states and command menu options that are available according to your login state and the configured SIP server. Table A-1: Broadsoft-Softkey Display States and Command Menu Options... -
Page 63: Setting Unavailability Status
'Ready' and resume work. To restore your status to 'Ready': In the idle screen, press the Ready softkey; the 'Not Ready' indication changes to 'Ready'. Version 2.2.12 405 and 405HD IP Phone... -
Page 64: Logging Out
405 and 405HD IP Phone Logging Out A.1.3.4 At the end of your shift, log out of the phone. To log out of the phone: In the idle screen, press the Logout softkey; the Logged Out indication is displayed: ... -
Page 65: Configuring Automatic Forwarding
Manual). When configured, users must press the 9 key, for example, to get a line to outside the enterprise; after pressing the key, they hear a secondary tone. They only then can dial the number of the party they need. Version 2.2.12 405 and 405HD IP Phone... -
Page 66: Viewing Voicemail Indications Per Line
405 and 405HD IP Phone A.1.9 Viewing VOICEMAIL Indications Per Line When a phone is in a Multi Line configuration, VOICEMAIL is indicated per line. The screenshot below shows multiple lines configured. The shot below shows the screen displayed when you press the VOICEMAIL key on the phone. -
Page 67: Entering Broadworks User Credentials For Xsi Access
BroadWorks user ID to the Xtended Services Platform (Xsp) to identify the user, along with the SIP authentication user name and password to authenticate access to the Xsi. Note: Consult your network administrator about this capability. For more information, see the Administrator's Manual. Version 2.2.12 405 and 405HD IP Phone... -
Page 68: Setting Up A Remote Conference
405 and 405HD IP Phone A.1.1 Setting up a Remote Conference This section shows how to set up a remote conference to which more than three participants can be added. A 'local' conference only supports a maximum of three participants (see Section information about a 'local' conference). -
Page 69: Genesys' Contact Centers
User's Manual A. Specific Third-Party Features Genesys' Contact Centers This section shows how to use AudioCodes IP phones in Genesys contact centers. Note: The section is intended mainly for agents / hotline operators. A.2.1 Using the BroadSoft ACD Genesys Contact Center phones support the BroadSoft ACD. The table below shows how to use the functionalities. -
Page 70: Setting Availability Status
405 and 405HD IP Phone on the phone's LCD. Setting Availability Status A.2.1.2 When you return to your desk after taking a break or after attending to an external issue, it's important to restore your status to 'Ready' and resume work. -
Page 71: Logging Out
Select the Always option or scroll down and select the Busy or No Reply option. Enter the Number to Forward to, or scroll down and select Select from Directory in which you can choose a contact number to which to forward calls. Version 2.2.12 405 and 405HD IP Phone... -
Page 72: Listening In Capability For Call Center Supervisors
405 and 405HD IP Phone In the idle screen to which you're returned, view the 'Forward' indication. A.2.7 Listening in Capability for Call Center Supervisors Call center supervisors can pick up an operator's phone and listen in on the conversation that the operator is conducting on headphones with the customer, without the customer at the other end sensing that the supervisor is listening in (because the supervisor is in effect muted). -
Page 73: Recording An Agent's Welcome Greeting
(max length: 10 seconds) When you finish recording, press the stop softkey Press the softkey to play back your recording. Press the Save softkey to save the recording. To delete it, select the Delete softkey. Version 2.2.12 405 and 405HD IP Phone... -
Page 74: User's Manual
AudioCodes 400 IP Phone Series VoIP 405 and 405HD IP Phone User’s Manual 405 and 405HD IP Phone Version 2.2.12 www.audiocodes.com...