Table of Contents
Advertisement
Quick Links
The lightning flash with an arrowhead symbol, within an equilateral
triangle is intended to alert the user to the presence of uninsulated
dangerous voltage within the product's enclosure that may be of
sufficient magnitude to constitute a risk of electric shock to persons.
The exclamation point within an equilateral triangle is intended to alert
the user to the presence of important operating and maintenance
(servicing) instructions in the literature accompanying the appliance.
INFORMATION - This equipment has been tested and found to comply with
limits for a Class A digital device, pursuant to part 15 of the FCC Rules & CE Rules.
These limits are designed to provide reasonable protection against harmful
interference when the equipment is operated in a commercial environment.
This equipment generates, uses, and can radiate radio frequency energy and, if
not installed and used in accordance with the instruction manual, may cause
harmful interference to radio communications.
Operation of this equipment in a residential area is likely to cause harmful
interference in which case the user will be required to correct the interference at
his own expense.
WARNING - Changes or modifications not expressly approved by the
manufacturer could void the user's authority to operate the equipment.
CAUTION : To prevent electric shock and risk of fire hazards:
◆ Do NOT use power sources other than those specified.
This installation should be made by a qualified service person and
should conform to all local codes.
1
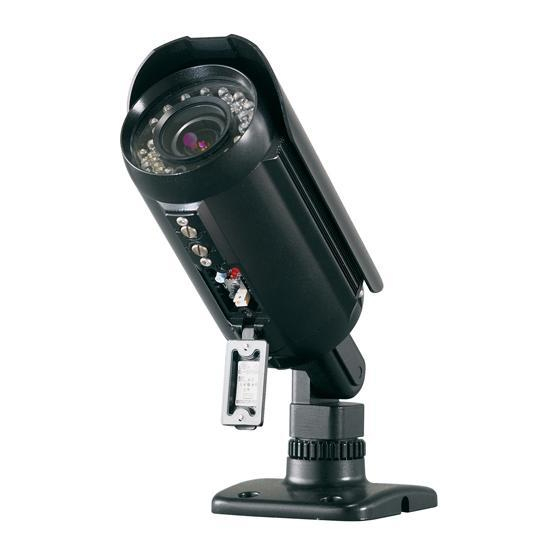
PIXIM True Day/Night IR Bullet Camera
Advertisement
Table of Contents

Related Manuals for Genie GB83TSPXIR


Summary of Contents for Genie GB83TSPXIR
- Page 1 The lightning flash with an arrowhead symbol, within an equilateral triangle is intended to alert the user to the presence of uninsulated dangerous voltage within the product's enclosure that may be of sufficient magnitude to constitute a risk of electric shock to persons. The exclamation point within an equilateral triangle is intended to alert the user to the presence of important operating and maintenance (servicing) instructions in the literature accompanying the appliance.
-
Page 2: Table Of Contents
■ Contents Features How to Use the Camera ■ Menu Warnings and Precautions ■ Settings ㆍ PRESETS Components ㆍ EXPOSURE ㆍ WDR Names and Functions of Parts ㆍ WHITE BALANCE ㆍ DAY&NIGHT ■ SUN SHIELD ㆍ IMAGE ADJ. ■ LENS : Vari Focal Auto Iris Lens ㆍ... -
Page 3: Features
■ Features Warning ■ The camera requires periodic inspection. High Resolution Colour for Crisp, Motion Detection Contact an authorised technician to carry out the inspection. Clear Video Since the camera detects motion without any ㆍ690TVL Effective (Colour) additional external sensor, you can monitor ㆍ800TVL Effective (B/W) activity more efficient. - Page 4 ■ Precautions Do not install the camera in Do not install or use the camera in an Do not drop the camera and protect Never keep the camera pointed extreme temperature conditions. environment where the humidity is high. it from physical shocks. directly at strong light.
-
Page 5: Components
■ Components Names and Functions of Parts ■ ① 1. DAY & NIGHT IR BULLET CAMERA ② 2. SCREWS ③ 2. ALLEN HEAD BOLT ⑥ 3. WRENCH ⑤ ④ ① SUN SHIELD 4. INSTRUCTION GUIDE ② LENS : Vari Focal Auto Iris Lens ③... -
Page 6: Dimensions
■ Names and Functions of Parts Names and Functions of Parts ■ ⑥ Jog Shuttle Switch Service connector for easy installation of the camera. - A service monitor can be connected to the camera, allowing the operator to easily adjust camera angles and settings locally during installation. Dimensions ■... -
Page 7: Installation
■ Installation ■ Installation 1. Bracket & Camera Mounting - Affix the bracket to the mounting surface. - Use the supplied screws to attach to the mounting surface using the pre-drilled holes in the bracket. 2. Power Connector & Monitor Impedance Flange adaptor - Use a DC12V/1A regulated PSU or AC24V 1A. -
Page 8: How To Operate The Bracket
■ How to Operate the Bracket Communication Control Connector ■ The camera can be controlled by using external controllers. (RS-485 Communication) VIDEO(COAX) RS-485 ③ POWER Keyboard ② Control via RS-485 Interface ① The camera can be controlled by using an external controller equipped with RS-485 communications. -
Page 9: How To Use The Camera
■ How to Use the Camera ■ Menu ■ Settings Settings can be made using the 5 buttons located in the camera. SETUP menu ㆍNORMAL ㆍINDOOR ㆍOUTDOOR PRESETS ㆍBACKLIGHT ㆍLENS SELECT ㆍBLC ㆍEXPOSURE MODE ㆍAGC EXPOSURE ㆍDNR ㆍHIGHLIGHT ㆍCOLOR ROLL ㆍSENS-UP ㆍMIDDLE ㆍHIGH... -
Page 10: ㆍ Presets ㆍ Exposure ㆍ Wdr
■ How to Use the Camera SETUP EXPOSURE Select the function using Change the status using PRESETS NORMAL the UP or DOWN button. the LEFT or RIGHT button. EXPOSURE.. MIDDLE SETUP WHITE BALANCE PRESETS NORMAL DAY&NIGHT AUTO.. EXPOSURE.. IMAGE ADJ.. SPECIAL.. - Page 11 ■ How to Use the Camera ● BLC : To optimize the scene when there is a strong backlight behind SETUP the object. PRESETS NORMAL - ON / OFF selectable EXPOSURE.. MIDDLE ADVANCED BLC SETUP WHITE BALANCE PERCENTILE DAY&NIGHT AUTO.. IMAGE ADJ..
-
Page 12: ㆍ White Balance ㆍ Day&Night ㆍ Image Adj
■ How to Use the Camera WHITE BALANCE Use the White Balance function to adjust the screen colours. Note 1. Position the cursor to point to WHITE BAL on the SETUP menu screen, select using the Up and Down buttons. •... - Page 13 ■ How to Use the Camera IMAGE DAY&NIGHT SETUP FREEZE NIGHT MODE BW+burst FLIP COLOR SHARPNESS TIME DELAY COLOR GAIN GAMMA PREVIOUS PAGE.. FOCUS.. PREVIOUS PAGE.. ● COLOR : The picture is displayed in colour. ● B/W : The picture is always displayed in black and white. ●...
-
Page 14: Camera Id
■ How to Use the Camera ● FOCUS : To adjust the lens focus. SPECIAL CAMERA ID FOCUS DETECTOR VIDEO OUT.. FOCUS METER DZOOM MOTION SET FOCUS REGION.. PRIVACY MASK.. PREVIOUS PAGE.. SYNC RS485 SETUP.. RESET SET FOCUS REGION PREVIOUS PAGE.. ●... - Page 15 ■ How to Use the Camera ① Select the position where the ID is to be displayed by using the MOTION DETECTION LEFT and RIGHT buttons. ACTIVITY THR. ● VIDEO OUT : Move the cursor to select the video system MESSAGE TIME - VIDEO STANDARD : You can control NTSC / PAL, Video level, SETUP MOTION ZONE..
-
Page 16: Rs485 Setup
■ How to Use the Camera ● RS485 SETUP : This function sets up the camera communication ENABLE MASKS (1 to 6) ENABLE MASKS (7 to 12) status when controlling the camera through an external control device. MASK 1 MASK 7 MASK 2 MASK 8 RS485 SETUP... -
Page 17: Troubleshooting
■ Troubleshooting If you have trouble operating your camera, refer to the following table. If the guidelines do not enable you to solve the problem, contact an Problem Solution authorised technician. Problem Solution Colour is not correct. • Check the WHITE BAL settings in the SETUP menu. Nothing appears on The screen flickers •... -
Page 18: Specifications
MEMO ■ ■ MEMO ■ Specifications ITEM SPEC. 400mA (AC24V) / 650mA (DC12V) Power Consumption 500mA (DC12V Only) Image Sensor PIXIM 1/3" High Sensitivity Digital Sensor Signal processing 17-bit Digital Signal Processing Transfer Format Progressive with Segmented Frames Sync. System Internal / Line Lock Effective Pixels 758(H) x 540(V) - Page 19 ■ MEMO...
- Page 20 Model : GB83TSPXIR PIXIM True Day/Night IR Bullet Camera Instruction Guide GENIE CCTV LTD. CCTV House, City Park, Watchmead, Welwyn Garden City, Hertfordshire, AL7 ILT Tel : +44 (0) 1707 330541 Fax : +44 (0) 1707 330543 www.geniecctv.com Edition. GN-OCTOBER 2011...