Table of Contents
Advertisement
Advertisement
Table of Contents

Related Manuals for Ariston VLS Flat 50


Summary of Contents for Ariston VLS Flat 50
- Page 1 Technical Manual Storage Electric Water Heaters - VLS Date of issue: 29 July 2011 Updating date: 10 November 2011 Version: v_2-1 Because of continuing product improvements, Ariston Thermo reserves the right to change specifications without prior notice.
-
Page 2: Table Of Contents
Table of contents 1. General information Main features by version Differences among versions Technical drawings Product dimensions Technical stickers 2. Components Packaging content Tanks Heating elements Mg anode Power board, connections and probes 3. Working modes and additional functions Main features by version Programming ECO PLUS Anti-bacteria... -
Page 3: General Information
1. General information 1.1 Main features by version The most common version: half size, double comfort. Characterized by the “SHOWER READY” icon on the button HMI, this appliance is able to ensure hot water for the first shower in the fastest way, half time versus traditional water heater. The ECO function, learning by end user habits, allows to save energy consumption and money expenses …... -
Page 4: Differences Among Versions
1.2 Differences among versions VLS PREMIUM Capacities 50 litres 80 litres 100 litres Design Button HMI Soft touch HMI Front panel 7 colours available Electronic control Power board HMI board with LCD display Heating element HE1 (1’500 W, 230 V) HE2 (1’000 W, 230 V) Protection Mg anode (30 - 50 l) -
Page 5: Technical Drawings
1.3 Technical drawings VLS PREMIUM 1.4 Product dimensions All the dimensions are measured in mm. -
Page 6: Technical Stickers
1.5 Technical stickers Multi-position installation sticker The product may be installed either vertically or horizontally. Warning: In the horizontal installation, rotate the appliance clockwise so that the water pipes are on the left (cold inlet water pipe at the bottom). Front panel assembly explanation sticker The PREMIUM versions could be personalized with seven different colours front panel. -
Page 7: Components
2. Components 2.1 Packaging content Into the packaging, the following items are included: FLAT Water Heater version choosen (power cable is already installed); Only in PREMIUM versions, basic front panel to be mounted; Safety valve (8 bar) to be installed on cold water inlet pipe (note: this component must be replaced with a device in compliance with the EN 1487:2002, if this standard is mandatory in your Country);... -
Page 8: Power Board, Connections And Probes
2.5 Power board, connections and probes main power board (PCB) power cable (PCB - HE1: red; PCB - HE2: blue) HE1 probe with cable (width = 8 mm) HE2 probe with connector (width = 6,5 mm) HE2 probe cable Sensor Test Table (ohmic resistance values as a function of temperature) T [°C] R [kΩ] T [°C]... -
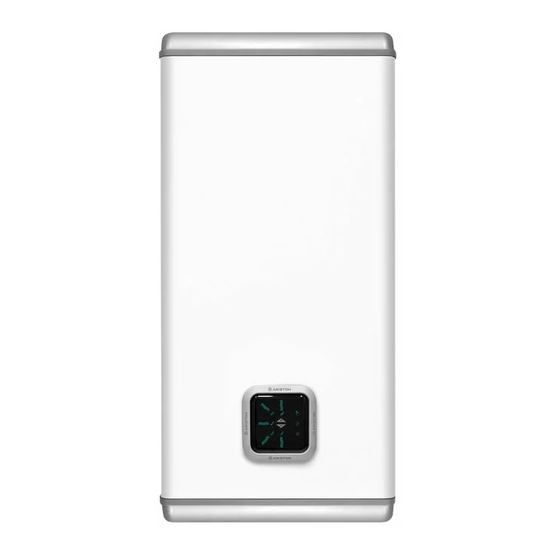
Page 9: Hmi
If the PCB has to be replaced, it’s mandatory to set the jumpers present on the geniune spare part as a function of the product capacity, following logical schemes below: FLAT 50 litres FLAT 80 litres FLAT 100 litres 2.6 HMI Buttons: ON/OFF, “ECO”, +/- Icons: “WAVES”... -
Page 10: Working Modes And Additional Functions
3. Working modes and additional functions 3.1 Main features by version Press the ON/OFF button to switch on/off the appliance. During the heating phase, the “WAVES” icon corresponding to the temperature reached by the water so far remain light in a fixed manner; all Working subsequent “WAVES”... -
Page 11: Eco
The first time the product is switched on, it automatically prompts you to set the correct time; on subsequent occasions you need to press and hold the "SET" How to set/adjust knob for 3 seconds. the local time Adjust the current hour setting by turning the “SET” knob, then confirm the value by pressing the knob. -
Page 12: Eco Plus
3.4 ECO PLUS Only for VLS PREMIUM version. If one of the programming modes (“P1” or “P2” or “P1 and P2”) is used in conjunction with the “ECO” function, the temperature is set automatically by the appliance and the desired time band for hot water availability is set manually by the end user. -
Page 13: Troubleshooting And Maintenance
4. Troubleshooting and maintenance 4.1 Displayed faults How the appliance All WAVES, corresponding temperature icons, “SHOWER READY” icon and “ECO” shows errors button flash simultaneously. Reset the appliance switching the product off and on again using the ON/OFF How to do button. - Page 14 50 °C, 70 °C, 80 °C and HE2 functional relay stuck due to: corresponding “WAVES” - faulty component if a short circuit occurs between volatile errors (the appliance is icons switched on the HE2 power terminals on the PCB, replace the PCB. unable to work until Internal fault Replace the PCB.
- Page 15 VLS PREMIUM How the appliance Error code flashes on the LCD display. shows error Reset the appliance switching the product off and on again using the ON/OFF button. If the cause of the error disappears immediately following the reset How to do process, the appliance resumes normal operation.
-
Page 16: Malfunctioning
installation; - bad placed or damaged wiring if the red power cable is disconnected/damaged, connect/replace it; HE2 probe short/open circuit due to: - bad placed or damaged wiring/faulty component if the component is disconnected or faulty (sensor/s values not in compliance with “Sensor Test Table”), connect/replace it. - Page 17 - drainage hole obstructed if the hole is obstructed, clean it and, if necessary, install upriver the safety valve a proper softener to reduce water hardness or a filter to avoid dirt and dust coming from the network; - damaged drainage pipe if the pipe is broken, replace it;...
-
Page 18: Routine Maintenance
Insufficient softener upriver the safety valve to reduce water hardness; water flow - dirt and dust if dirt or dust is present, clean the filter. Incorrect appliance working mode settings: - high water temperature set-point (could be check by the end user, too) if the set- point is not able to satisfy the end user comfort request, adjust the set-point.