
Related Manuals for JVC UX-G290D


Summary of Contents for JVC UX-G290D
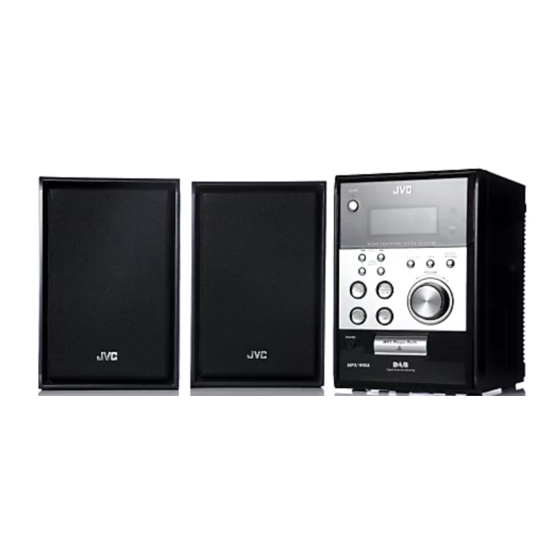
- Page 1 MICRO COMPONENT SYSTEM UX-G290D —Consists of CA-UXG290D and SP-UXG28 UX-G250D —Consists of CA-UXG250D and SP-UXG28 INSTRUCTIONS LVT1892-001A...
- Page 2 Warnings, Cautions and Others CAUTION CAUTION To reduce the risk of electrical shocks, fire, etc.: • Do not block the ventilation openings or holes. 1. Do not remove screws, covers or cabinet. (If the ventilation openings or holes are blocked by a 2.
- Page 3 Penalties may be applicable for incorrect disposal of this waste, in accordance with national legislation. [Business users] If you wish to dispose of this product, please visit our web page www.jvc-europe.com to obtain information about the take-back of the product. Battery...
-
Page 4: Introduction
Introduction Others Thank you for purchasing a JVC product. Please read all instructions carefully before operation, to • Should any metallic object or liquid fall into the System, ensure your complete understanding and to obtain the best unplug the AC power cord and consult your dealer before possible performance from the unit. -
Page 5: Table Of Contents
How to Read This Manual Contents To make this manual as simple and easy-to-understand as Introduction ........... 1 possible, we have adapted the following methods: Precautions ..............1 • Button and control operations are explained as listed in the How to Read This Manual ..........2 table below. -
Page 6: Getting Started
Getting Started Step 1 Step : Unpack :Unpack the package and check the accessories. After unpacking, check to be sure that you have all the following items. The number in parentheses indicates the quantity of each piece supplied. • DAB antenna (1) •... -
Page 7: Step 3: Connections
Step : Connections Do not turn on the power until the connection is complete. • AM broadcast cannot be received on this System. DAB antenna (supplied) Extend the wire so that you can receive your FM antenna desired ensembles. Extend it to obtain the best reception. Black Black To a wall outlet... -
Page 8: Before Operating The System
Before Operating the System The indications on the display show you a lot of things while you are operating the System. Before operating the System, be familiar with when and how the indicator illuminates on the display. 1 TRACK indicator •... -
Page 9: Daily Operations-Playback
Daily Operations —Playback Turn on the power. The STANDBY lamp on the main unit turns off. Select the source. Playback automatically starts if the selected source is ready to start. Number buttons • When using DAB/FM/AUDIO IN, press it repeatedly until the source you want is selected. •... -
Page 10: Listening To The Fm Radio
To preset the stations Listening to the FM Radio You can preset 20 FM stations. • AM broadcast cannot be received on this System. Tune in to an FM station you want to preset. • For DAB operations, see pages 12 to 14. Activate the preset number entry mode. -
Page 11: Playing Back A Disc/Usb Mass Storage
To connect the USB mass storage class device Playing Back a Disc/USB Mass Storage Class • Make sure to turn off the power before connecting a USB Device mass storage class device. • When connecting a USB mass storage class device, refer also to its manual. -
Page 12: Playing Back Other Equipment
To select a track/group To display ID3/WMA tag To select a track: ID3 ON To the next tracks. ID3 OFF ID3/WMA tag is displayed at the beginning of playback of To the beginning of the current track, then previous tracks. each track. -
Page 13: Adjustments
Daily Operations —Sound & Other Adjustments Adjusting the Volume Remote control You can adjust the volume level from level 0 (“VOL MIN”) to level 31 (“VOL MAX”). Remote control: Main unit: CLOCK/ SLEEP Remote To drop the volume in a moment ONLY To restore the volume, press again, or adjust the volume level. -
Page 14: Setting The Clock
Setting the Clock Turning Off the Power Automatically— Set the clock before using the Daily Timer (see pages 18 Sleep Timer and 19) and the Sleep Timer (see the next column). • This function is available only when the System is turned You can set the unit to turn off after a certain period of time. -
Page 15: Dab Operations
DAB Operations Caution Remote control Electrostatic discharge from your body may cause noise from the speakers and you cannot hear the broadcast. If this happens, turn off the System (on standby), then turn it on again. Listening to a Service Number Select DAB. -
Page 16: Presetting Services
To scan ensembles Presetting Services Remote ONLY With the ensemble scanning function, the System scans the You can preset 30 services in memory. band III to pick out receivable ensembles. • When you change the source to DAB for the first time after Tune in to an ensemble, then select a service you want plugging in the System, it automatically performs the to preset. -
Page 17: Searching For A Service By Pty Codes
Searching for a Service by PTY Codes Changing the Display Mode Remote ONLY Remote While listening to the DAB radio... ONLY You can locate a particular kind of program from among all Service label Ensemble ID services you can receive by specifying PTY codes. While listening to the DAB radio... -
Page 18: Advanced Playback Operations
Advanced Playback Operations Programming the Playing Order— Remote control Program Play You can arrange the playing order of the tracks (up to 32) before you start playback. • You can repeat the programmed tracks by pressing REPEAT/ RANDOM during Program Play (see page 17). Select the source, then stop playback. - Page 19 Next program step is indicated. To check the programmed contents While the PROGRAM indicator is lit on the display and PROGRAM playback is stopped... For MP3/WMA disc and USB mass storage class device 1 Select a group. Program step To modify the program PROGRAM While the PROGRAM indicator is lit on the display and playback is stopped...
-
Page 20: Playing At Random-Random Play
Remote Remote Playing at Random—Random Play Playing Repeatedly—Repeat Play ONLY ONLY You can play back all the tracks on a disc or USB mass You can play back tracks repeatedly. storage class device at random. • You cannot use Random Play while Program Play is While playing back... -
Page 21: Daily Timer Operations
Daily Timer Operations Setting the Daily Timer Remote control Using the Daily Timer, you can wake up with music, etc. • Set the clock before setting the Daily Timer (see page 11). • To cancel timer setting, press STOP TIMER •... - Page 22 Set the Off Time. Activate the Daily Timer. 1 Set the hours. The On Time and Off Time cannot have the same time settings. (Timer) indicator on the display and the TIMER lamp on the System light. Turn off the System. 2 Set the minutes as the hour setting above.
-
Page 23: Additional Information
– This System cannot recognize a USB mass storage class Learning More about This System device whose rating exceeds 5 V/500 mA. – JVC bears no responsibility for any loss of data in the USB Daily Operations—Playback (see pages 6 to 9) mass storage class device while using this System. - Page 24 DAB Operations Advanced Playback Operations (see pages 12 to 14) (see pages 15 Listening to a Service: to 17) • The time shown on the display is based on the built-in Programming the Playing Order— Program Play: clock of the System, not on the information sent through •...
-
Page 25: Troubleshooting
The USB mass storage class device does not play. Troubleshooting The USB mass storage class device is not connected properly. If you are having a problem with your System, check this list No playable track is recorded on the USB mass storage for a possible solution before calling for service. -
Page 26: Maintenance
Maintenance Specifications To get the best performance from the System, keep your Amplifier section discs and mechanism clean. Output Power: 8 W per channel, min. RMS, driven into 4 Ω at 1 kHz with no Handling discs more than 10% total harmonic •... -
Page 27: Parts Index
Parts Index Refer to the pages to see how to use the buttons and controls. Remote control 18, 19 6, 11, 19 7, 9, 13, 15 15, 17 8, 16, 17, 18 6, 8, 16, 17, 19 6, 8, 16, 17, 19 6, 7, 9, 12, 19 7, 9, 11, 13, 15, 16, 17, 18, 19 7, 9, 12, 13, 14, 16... -
Page 28: Safety Instructions
SAFETY INSTRUCTIONS “SOME DOS AND DON’TS ON THE SAFE USE OF EQUIPMENT” This equipment has been designed and manufactured to meet international safety standards but, like any electrical equipment, care must be taken if you are to obtain the best results and safety is to be assured. ✮✮✮✮✮✮✮✮✮✮✮✮✮✮✮✮✮✮✮✮✮✮✮✮✮✮✮✮✮✮✮✮✮✮✮✮✮✮✮✮✮✮✮✮✮✮✮...