Kyocera Dura Force PRO User Manual
Hide thumbs
Also See for Dura Force PRO:
- User manual (168 pages) ,
- User manual (178 pages) ,
- User manual (180 pages)

Related Manuals for Kyocera Dura Force PRO


Summary of Contents for Kyocera Dura Force PRO
-
Page 1: User Guide
DuraForce PRO User Guide [UG template version 16a] Kyocera_DuraForce PRO_ug_en_160905_d1]... - Page 2 Table of Contents Getting Started .............................. 1 Introduction ............................2 About the User Guide ........................2 Set Up Your Phone ..........................3 Parts and Functions ........................3 Charge the Battery ........................5 SIM Card ............................7 SD Card ............................10 Insert an SD Card .......................
- Page 3 Get Help with Google Play ....................34 Lock and Unlock Your Screen ....................34 Update Your Phone ........................35 Update Your Phone Software ..................... 36 Update Kyocera Software ....................37 Update Your Profile ......................38 Update Your PRL ........................ 38 UICC Unlock ........................38 Your Phone's Home Screen ........................
- Page 4 Answer Phone Calls ......................53 In-Call Screen Layout and Operations................54 Place a Call from Contacts ....................55 Place a Call from Recent Calls ................... 55 Call a Number with Pauses ....................56 Call Using a Speed Dial Number ..................56 Voicemail .............................
- Page 5 Back Up Contacts ........................82 Messaging ............................83 Text and Multimedia Messaging ....................83 Send a Text or Multimedia Message .................. 83 Save and Resume a Draft Message ................... 84 New Messages Notification ....................84 Manage Message Conversations ..................85 Text and MMS Options .......................
- Page 6 Make and Receive Worldwide Calls ..................107 International Voicemail Service ..................108 Set Up Your Voicemail Access Number for International Use.......... 109 Access Your Voicemail Internationally ................109 International Data Roaming ...................... 110 Access Email and Data Services Internationally .............. 110 Contact for Assistance with International Service ............
- Page 7 Share Videos on YouTube ....................136 Camera Settings ........................137 Set Camera Functions ...................... 137 Underwater Mode ......................138 Productivity ............................140 Calendar ............................ 140 Add an Event to the Calendar ................... 140 View Calendar Events....................... 142 Sync Calendars ......................... 143 Synchronize an Exchange ActiveSync Calendar .............
- Page 8 Wireless & Networks Settings ......................166 Basic Settings ........................... 166 Wi-Fi Settings Menu ........................168 Hotspot Settings ........................170 Bluetooth Settings ........................171 Data Usage Settings ......................... 172 More Settings ..........................174 Virtual Private Networks (VPN) ....................175 Prepare Your Phone for VPN Connection ................ 175 Set Up Secure Credential Storage ...................
- Page 9 Cleaning the Phone ........................216 Cleaning Your Phone ......................216 Alternate Cleaning Procedure ................... 220 Drying Your Phone ........................221 Kyocera Tested Products ......................223 Mild Dish Detergents ......................223 Alcohol ..........................223 Sanitizer Wipes ......................... 223 For Assistance ..........................225 Troubleshooting ........................
-
Page 10: Getting Started
Getting Started The following set of topics will introduce you to your phone, help you get set up with service, provide an overview of the phone screen, and get you started with basic phone operations. -
Page 11: Introduction
Introduction The following topics describe the basics of using this guide and your new phone. About the User Guide Thank you for purchasing your new DuraForce PRO. The following topics explain how best to use this guide to get the most out of your phone. Before Using Your Phone Read the Get Started guide and Important Information booklet that were packaged with your phone thoroughly for proper usage. -
Page 12: Set Up Your Phone
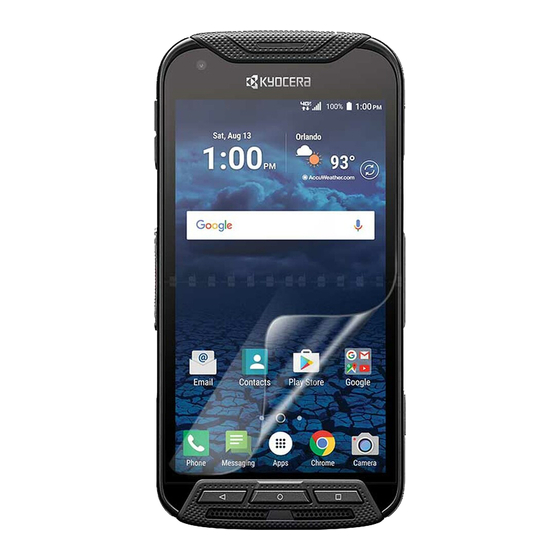
Set Up Your Phone The following topics give you all the information you need to set up your phone and wireless service the first time. Parts and Functions These topics illustrate your phone’s primary parts and key functions. Note: Your phone's screens and apps layouts are subject to change. This user guide uses sample images only. - Page 13 Part Description LED indicator Displays a phone notification, charging status, or alert. Detects how close an object is to the surface of the screen. This is typically used to detect when your face is pressed up against the screen, such as during a phone call. Proximity/Light sensor While talking on the phone, the sensor detects talk activity and locks the keypad to prevent accidental keypresses.
-
Page 14: Charge The Battery
Allows you to adjust the ringtone or media volume when you are not Volume key on a call, or adjust the voice volume during a call. Allows you to assign a frequently used function for quick access. By PTT/Programmable key installing PTT application, this key can also act as a PTT key. -
Page 15: Charge The Battery Wirelessly
2. Plug the smaller end of the USB cable into the phone’s Charger/USB port. 3. Plug the other end of the USB cable into the AC adapter, and then plug the adapter into an electrical outlet. Be sure to use the AC adapter that came with your phone. 4. -
Page 16: Sim Card
1. Locate the charging area on your wireless charger by referring to the charger documentation. 2. Place your phone in contact with the charger, ensuring that the charging area of your phone touches the charging area of your wireless charger. Before starting wireless charging, please note the following: ●... -
Page 17: Insert Sim Card
● See instructions included with SIM card for handling. ● The SIM card is the property of ● The SIM card is replaceable (at cost) in case of loss/damage. ● Return the SIM card to when canceling subscription. ● Returned SIM cards are recycled for environmental purposes. ●... - Page 18 4. Carefully insert the new SIM card into the SIM card slot on the left, with the gold contacts facing down and the cut off corner on the top left. 5. Securely close the SIM/microSD slot cover. Press down the edges of the cover to make sure it is sealed properly.
-
Page 19: Insert An Sd Card
SD Card Your phone supports the use of an optional SD card (not included) to expand its storage capacity. It supports cards up to 256 GB. Some cards may not operate properly with your phone. Note: You can easily damage the microSD card by improper operation. Please be careful when inserting, removing, or handling it. -
Page 20: Unmount An Sd Card
Insert SD Card all the way gently without bending. Insert only SD Cards. 4. Securely close the SIM/microSD slot cover. Warning: Be sure the SIM/microSD slot cover is properly sealed to maintain the phone's waterproof capability. 5. Replace the back cover. Press around the edges to ensure a proper fit. Unmount an SD Card Always unmount the SD card before removing it from your phone. -
Page 21: Format Sd Card
5. Securely close the SIM/microSD slot cover. Warning: Be sure the SIM/microSD slot cover is properly sealed to maintain the phone's waterproof capability. 6. Replace the back cover. Press around the edges to ensure a proper fit. Format SD Card When you insert an optional SD card for the first time, it is recommended that you format it on your phone. -
Page 22: Use The Touchscreen
Your screen remains blank while your phone is off (unless the battery is charging). Use the Touchscreen Your phone’s touchscreen lets you control actions through a variety of touch gestures. When you want to type using the onscreen keyboard, select items onscreen such as application and settings icons, or press onscreen buttons, simply tap or touch them with your finger. -
Page 23: Touch And Hold
Touch and Hold To open the available options for an item (for example, a contact or link in a Web page), touch and hold the item. Swipe or Slide To swipe or slide means to quickly drag your finger vertically or horizontally across the screen. Set Up Your Phone... - Page 24 Drag To drag, touch and hold your finger with some pressure before you start to move your finger. While dragging, do not release your finger until you have reached the target position. Flick Flicking the screen is similar to swiping, except that you need to swipe your finger in light, quick strokes. This finger gesture is always in a vertical direction, such as when flicking the contacts or message list.
-
Page 25: Pinch And Spread
Note: Rotate the contents of the screen needs to be selected for the screen orientation to automatically change. From home, tap Apps > Settings > Display > When device is rotated. Tip: You can also access the screen rotation setting from the notification panel. Pull down the status bar and tap Rotation to turn the option on or off. -
Page 26: Activate Your Phone
Activate Your Phone Follow the instructions below to activate your phone if it has not already been activated. Depending on your account or how and where you purchased your phone, it may be ready to use or you may need to activate it on your account. -
Page 27: Complete The Setup Screens
Complete the Setup Screens The setup screens help you set up certain features and preferences on your phone. Once your phone has been turned on, you will see an Accessibility message. You can then complete the setup process. Note: You may be able to complete the setup screens before your phone has been activated on your account. - Page 28 Protect your phone – Prevent others from using this phone without your permissions by activating device protection features. Google Services – Read all of the information for the available Google Services and, if you agree, tap NEXT. Otherwise, uncheck the options and tap NEXT. •...
-
Page 29: Basic Operations
Basic Operations The following topics outline basic features and operations of your phone. Basics The following topics offer an overview of your phone’s basic operations. Home Screen and Applications (Apps) List Most of your phone’s operations originate From home, or the apps list. 1. -
Page 30: Portrait And Landscape Screen Orientation
Portrait and Landscape Screen Orientation The default orientation for your phone’s screen is portrait (vertical), but many apps will change to landscape orientation (widescreen) when you rotate the phone sideways. Note: Not all screens will adjust for landscape orientation. Turn Screen Rotation On or Off 1. -
Page 31: Applications
Applications The following topics describe how to access the applications (apps) list and launch apps on your phone. Launch Applications All installed apps can be accessed and launched from the apps list. 1. From home, tap Apps The apps list opens. 2. - Page 32 Perform basic and advanced mathematical calculations. Calculator Use Calendar to create and manage events, meetings, and appointments, Calendar organize your time, and be reminded of important events. Take pictures and record videos using the front and rear cameras. Camera Browse the Internet using Google’s Chrome Web browser. Located also in Chrome the Google folder on the home screen.
- Page 33 Instant message with your friends and family using Google Hangouts. Hangouts Located also in the Google folder on the home screen. Capture and share photos and videos with your friends. Customize what you Instagram capture, then share it on your feed or post it directly to your friends. Take notes, set reminders, create voice memos, snap photos, etc.
- Page 34 Show Safety & Warranty Information for your phone. Safety & Warranty Configure settings and options on your phone. Settings Record voice memos and share them with others. Sound Recorder Fun & Download new apps and games from Games Obtain information about global roaming service of your phone. Worldwide Access your account, get device information and help, find...
-
Page 35: Phone Number
Phone Number Follow the instructions below to display your phone’s wireless phone number. 1. From home, tap Apps > Settings > About phone 2. Tap Status. You will see the number listed under My phone number. Airplane Mode Airplane mode turns off all functions that emit or receive signals, while leaving your phone on so you can use apps that don’t require a signal or data. - Page 36 Google Keyboard Overview Note: Keyboard layouts and options may change depending on where you’re using them. For example, if you’re entering text to do a Web search, a search icon may be available instead of an enter key. Tip: To close the keyboard, tap Text Mode ABC mode is primarily used for entering letters while Number &...
-
Page 37: Gesture Typing
call up a list of all the characters available on that key, and slide your finger to the character you want to enter on the list. Tip: For more information about the Google Keyboard settings, see Google Keyboard Settings. Gesture Typing The gesture typing lets you enter words by drawing a path from letter to letter in one continuous motion. -
Page 38: Tips For Editing Text
2. If you see Speak now, say the text you want to enter into the microphone. If you see Tap to pause, Google Voice Typing recognizes your voice. 3. Confirm the text you want to enter is displayed. Tap again to continue entering. Tip: For more information about the settings of Google voice typing, see Google Voice Typing Settings. -
Page 39: Google Account
Google Account You will need a Google Account to access several phone features such as Gmail, Google Maps, Hangouts, and the Google Play applications. Before you are able to access Google applications, you must enter your account information. These applications sync between your phone and your online Google Account. -
Page 40: Sign In To Your Google Account
Sign In to Your Google Account If you have a Google Account but have not yet signed in with your phone, follow these instructions to sign in to your Google Account. 1. From home, tap Apps > Settings > Accounts >... - Page 41 1. From home, tap Apps > Play Store 2. Browse for an application. Once you have decided on one, tap it to view its details. Read the application descriptions and comments. 3. Tap INSTALL (for free applications) or the price button (for paid applications). Warning: Use caution with applications which request access to any personal data, functions, or significant amounts of data usage times.
-
Page 42: Request A Refund For A Paid App
Purchasing Applications Purchase apps at your own risk. is not responsible for any harm to you or third parties resulting from the use of purchased applications. Request a Refund for a Paid App If you are not satisfied with an app, you can ask for a refund within 15 minutes of the purchase. Your credit card is not charged and the app is uninstalled from your phone. -
Page 43: Get Help With Google Play
1. From home, tap Apps > Play Store 2. Swipe right or tap Menu on the top left of the screen and then tap My apps & games. 3. On the Installed screen, tap the app you want to uninstall, and then tap UNINSTALL > OK. –... -
Page 44: Update Your Phone
The below screen appears by default. Note: To set up a screen lock for security, see Screen Lock. 2. On the screen, swipe toward: The screen is unlocked. to access the Home screen or the screen displayed before it was turned off. ... -
Page 45: Update Your Phone Software
Update Your Phone Software You can update your phone's software using the System update option. Before Updating Your Phone Updating your phone may result in a loss of saved data depending on the condition of your phone (malfunctioning, damaged, water seepage, etc.). You must back up all critical information before updating your phone firmware. -
Page 46: Update Kyocera Software
1. From home, tap Apps > Settings > System update > Update Kyocera software. 2. Follow the onscreen instructions. As an added precaution, to preserve any data on your SD card, please unmount it from your phone prior to starting the update process. From home, tap Apps >... -
Page 47: Update Your Profile
Update Your Profile This option allows you to automatically update your online user profile information. If you choose to change your user name and select a new one online, you must then update the user name on your phone. 1. From home, tap Apps >... -
Page 48: Home Screen Basics
Your Phone's Home Screen The following topics describe how to use and customize your phone’s home screen, understand the status bar, and use the notification panel. Home Screen Basics The home screen is the starting point for your phone’s applications, functions, and menus. You can customize your home screen by adding application icons, shortcuts, folders, widgets, and more. -
Page 49: Extended Home Screens
The status area of the status bar (on the right) displays phone and service Status area status information such as signal strength, battery status, Wi-Fi and data connectivity, ringer status, and time. Widgets are self-contained onscreen apps that reside on your phone’s home Widget screen. -
Page 50: Dura Grid
■ If you are not already using the maximum number of screens for your phone, you can add more screens by Swiping to the rightmost Home screen and drag an app or widget to the right edge. – or – Touch and hold the background of any Home screen. -
Page 51: Launcher Screens
4. Tap DONE Add a Nine-position Dura Grid Widget to the Home Screen 1. Touch and hold the empty area on the Home screen. 2. Tap WIDGETS and slide the Widgets screen to find the nine-position Dura Grid widget. 3. Touch and hold the nine-position Dura Grid widget and move your finger to one of the Home screen thumbnails displayed at the top of the screen. - Page 52 Main Status Icons Icon Status ® Bluetooth enabled ® Wi-Fi active(full signal) Vibrate Alarms only Total silence Priority only Network(full signal) Network (Roaming) 3G (data service) 4G LTE (data service) Airplane mode Battery (charging) Battery (full charge) Battery (discharged) Alarm set GPS is active Your Phone's Home Screen...
-
Page 53: Notification Panel
Main Notification Icons Icon Notification Missed call New Gmail New message New voicemail message Event Music application is running in the background Downloading Mobile Hotspot active Note: Additional notification icons may appear. All notifications may be accessed through the notification panel. - Page 54 Open the Notification Panel ■ Pull down the status bar. (Slide your finger down from the top of the screen.) The notification panel opens. To check notifications, tap an item in the list. Close the Notification Panel ■ Slide the notification panel up. (Slide your finger up from the bottom of the screen.) –...
-
Page 55: Customize The Home Screen
The following options are available: ● Drag the knob on the brightness slider left or right to adjust the screen brightness. ● Wi-Fi to turn Wi-Fi on or off. ● Location to enable or disable the location feature. ● Do not disturb to enable or disable the notification function. You can select from Vibrate, Alarms only, Total silence, and Priority only. -
Page 56: Add Shortcuts To The Home Screen
1. From home, touch and hold an empty space, and then tap WALLPAPERS You can also access the wallpaper menu through settings. From home, tap Apps > Settings > Display > Wallpaper. 2. Tap Pick image to use your own image, or browse through the choices. 3. -
Page 57: Add Widgets To The Home Screen
3. Touch and hold the app and drag it to a home screen thumbnail where you want to add it. 4. Release your finger. The shortcut is added to the home screen. Add Widgets to the Home Screen You can add widgets to your phone’s home screen. Widgets are self-contained apps that display on a home screen. -
Page 58: Manage Folders
Manage Folders Once you have added folders, you can manage them from the folder display. 1. From home, tap the folder you want to manage. 2. The following options are available: If this is a new folder, tap the Unnamed Folder field. The keyboard opens and you can name ... -
Page 59: Making Connections
Making Connections The following set of topics will cover your phone’s ability to help you make connections, from phone calls and maintaining contacts, to text messages, email, Internet, and international services. -
Page 60: Place And Answer Calls
Phone Calls and Voicemail The following topics outline the use of your device’s phone app to place and receive calls, use voicemail, set up and manage contacts, and more. Place and Answer Calls The following topics describe how to directly dial calls, how to answer incoming calls, and how to use the in-call screen options. -
Page 61: Troubleshooting
1. From home, tap Apps > Phone > DIALPAD tab to display the phone dialpad. 2. Tap the number keys on the dialpad to enter the phone number. As you enter digits, Smart Dial searches for contacts that match. If you see the number you ... -
Page 62: Call Emergency Numbers
Call Emergency Numbers You can place calls to 9-1-1 even if the phone’s screen is locked or your account is restricted. To call the 9-1-1 emergency number when the phone’s screen is locked with a screen lock: 1. From the lock screen, tap EMERGENCY CALL. 2. -
Page 63: In-Call Screen Layout And Operations
2. To end the call, tap The call ends. Mute the Ringing Sound To mute the ringer without rejecting the call: ■ Press the Volume key down. Reject an Incoming Call ■ When a call arrives, swipe to reject it. ... -
Page 64: Place A Call From Contacts
When the call is routed to a Bluetooth headset, the current call area shows the Bluetooth call icon ( ● Merge calls: Join two currently active calls (conference). Place a Call from Contacts You can place phone calls directly from entries in your Contacts list. 1. -
Page 65: Call A Number With Pauses
2. Tap the RECENTS tab to display the recent calls list. 3. Tap the Phone icon next to the name or number you want to place a call. Call a Number with Pauses You can dial phone numbers with pauses for use with automated systems, such as voicemail or credit card billing numbers. -
Page 66: Voicemail
Set Up Speed Dialing 1. From home, tap Phone > DIALPAD tab. > Speed dial setup. 2. Tap 3. Tap Add speed dial next to the location number you want to assign a number to. 4. Select a contact and, if the contact has more than one number, select a number. Remove a number from a speed dial location 1. -
Page 67: Visual Voicemail Setup
1. From home, tap Phone > DIALPAD tab. 2. Touch and hold to dial your voicemail number. Your phone dials the voicemail access number. 3. Follow the system prompts to: Create your password. Record your name announcement. Record your greeting. -
Page 68: Review Visual Voicemail
Set Up Visual Voicemail Setting up Visual Voicemail follows many of the same procedures as setting up traditional voicemail. You should set up your voicemail and personal greeting as soon as your phone is activated. Your phone automatically transfers all unanswered calls to your voicemail, even if your phone is in use or turned off. Note: To set up your traditional voicemail box, see Voicemail Setup. -
Page 69: Visual Voicemail Options
1. From home, tap Apps > Voicemail You will see the voicemail inbox. Tip: For an explanation of the voicemail inbox, tap Menu > Help > Visual Voicemail Menu > Inbox. 2. Tap the voicemail that you would like to view or listen to. ... -
Page 70: Configure Visual Voicemail Settings
Configure Visual Voicemail Settings The Visual Voicemail settings menu lets you access settings for notifications, pictures, greetings, and more. 1. From home, tap Apps > Voicemail 2. Tap Menu > Settings. You will see the voicemail settings menu. 3. Select an option to change its settings. Avatar to configure your Avatar settings. -
Page 71: Optional Calling Services
Optional Calling Services The following topics outline additional voice-related services available with your phone, including call services, voicemail, and more. Caller ID Blocking Caller ID identifies a caller before you answer the phone by displaying the number of the incoming call. If you do not want your number displayed when you make a call, follow these steps. -
Page 72: Call Forwarding
2. Once you have established the connection, tap Add call, and dial the second number (or place a call from RECENTS tab or CONTACTS tab). This puts the first caller on hold and dials the second number. 3. When you’re connected to the second party, tap Merge calls. ... -
Page 73: View Recent Calls
View Recent Calls 1. From home, tap Phone 2. Tap the RECENTS tab to display the recent calls list. : Incoming calls : Outgoing calls : Missed calls Recent Calls Options 1. From home, tap Phone 2. Tap the RECENTS tab to display the recent calls list. 3. -
Page 74: Call Settings
2. Tap the RECENTS tab to display the recent calls list. 3. Tap Menu > Delete recent calls. 4. Tap the check box next to the contact you want to delete or tap SELECT ALL. 5. Tap OK > OK. Call Settings Your phone’s Call Settings menu lets you configure your voicemail options and a number of other settings for the phone application. - Page 75 DTMF tones Allow you to change the DTMF tones. Use the Call Settings Menu 1. From home, tap Phone The phone app opens. 2. Tap Menu > Call settings. The call settings menu appears. 3. Configure your options. Tap a menu item to display its options.
-
Page 76: Tty Mode
Vibrate to select whether the phone responds with vibration to a new Voice Mail message. TTY Mode A TTY (teletypewriter, also known as a TDD or Text Telephone) is a telecommunications device that allows people who are deaf, hard of hearing, or who have speech or language disabilities, to communicate by telephone. -
Page 77: Eschat(Push To Talk)
unintelligible. The problem encountered appears related to TTY equipment or software used by PSAPs. This matter has been brought to the attention of the FCC, and the wireless industry and the PSAP community are currently working to resolve this. ESChat(Push To Talk) With ESChat(Push To Talk), you can quickly and reliably connect to an individual or group instantly with a push of a button. - Page 78 5. Tap End Call button to end the conversation. - or - The call will end automatically if no one takes the floor for a period of time. ● For more information on PTT+, visit business.verizonwireless.com/content/b2b/en/solutions/mobility/push-to-talk-plus.html. Phone Calls and Voicemail...
-
Page 79: Contacts
Contacts The Contacts application lets you store and manage contacts from a variety of sources, including contacts you enter and save directly in your phone as well as contacts synchronized with your Google Account, your PC, compatible email programs (including Exchange Server), and your Facebook friends. Contacts Cautions Information saved in Contacts may be lost or changed if the battery is removed for a long period or left uncharged. -
Page 80: Save A Phone Number
Tap the location/account above name and select an option to change where to save the contact to. Tap CHANGE to assign a picture to the contact. See Assign a Stored Picture to a Contact Assign a New Picture to a Contact. -
Page 81: View Contacts
To add the number to a new entry, tap Create new contact and select an account to use. Then, enter the name and any additional information and tap SAVE. The contact is added. View Contacts View a contact’s details by displaying a contact entry. 1. -
Page 82: Contacts Screen Layout
Contacts Screen Layout The following illustration show’s your Contacts app layout and describes the various features. Item Description FAVORITES tab Show favorite contacts. CONTACTS tab Show all contacts. GROUPS tab Show contact groups. Search contacts. (Search) Show the contact list options. (Menu) Index Browse contacts by letter. -
Page 83: Edit A Contact
Clear frequents: Clears frequently contacted list in the contacts and phone apps. Delete: Allows you to select and delete the contacts. Import/export: Imports/exports contacts from/to the SIM card or SD card, or shares your visible contacts. Contacts to display: Selects contacts to be displayed on Contacts. See Display Options ... -
Page 84: Assign A Stored Picture To A Contact
2. Tap a contact to view its details. The contact’s detailed listing appears. 3. Tap 4. Tap any field you want to change or add. See Add a Contact. 5. Add or change the information, and then tap SAVE. ... -
Page 85: Assign A Vibration To A Contact
6. Tap SAVE to save the contact. Assign a Phone Ringtone to a Contact Know who’s calling without looking at your phone by assigning a specific ringtone to a contact. 1. From home, tap Apps > Contacts > CONTACTS tab. 2. -
Page 86: Delete Single Or Multiple Contacts
Merge Contacts You can merge two or more contact entries into one. 1. From home, tap Apps > Contacts > CONTACTS tab. 2. Select the contact you want to appear as the primary listing. > Merge. 3. Tap 4. Choose the contact you wish to merge with the primary listing. Tip: Tap >... -
Page 87: Add A Group Contact
2. Tap > Delete, select the check box next to the contact(s) you want to delete, or tap SELECT ALL. 3. Tap DONE and then tap OK to confirm the deletion. ‐ or - Tap a contact to display it, and tap >... -
Page 88: Ice (In Case Of Emergency)
Delete Single or Multiple Group Contacts 1. From home, tap Apps > Contacts > GROUPS tab. > Delete, select the check box next to the group contact(s) you want to delete, or tap 2. Tap SELECT ALL. 3. Tap DONE and then tap OK to confirm the deletion. ... -
Page 89: Synchronize Contacts
2. The following options are available: Tap My emergency information to display the registered information. next to the ICE contact to place a call to the contact. Synchronize Contacts Syncing data from your managed accounts lets you add and manage new or existing contacts from your online or remote accounts to your phone. -
Page 90: Import Contacts
3. In the Share with menu, select a method: Gmail to send the information as a Gmail attachment. Address the message, add a subject and a message, and then tap Send. See Create and Send a Gmail message for details. Messenger to send the information in a text message. -
Page 91: Back Up Contacts
You will see the Contacts list. > Import/export. 2. Tap You will see the Import/export contacts menu. 3. Tap Import from SD card. 4. Select a destination for the imported contacts. 5. Follow the onscreen instructions to complete the import. ... -
Page 92: Messaging
Messaging With wireless service and your phone’s messaging capabilities, you have the opportunity to share information through many different channels and accounts, including Gmail (Google), personal and corporate email, and text and multimedia messaging. Text and Multimedia Messaging With text messaging (SMS), you can send and receive instant text messages between your wireless phone and another messaging-ready phone. -
Page 93: Save And Resume A Draft Message
enter information, any matching phone numbers from your contacts list are displayed. Tap a match to enter that number or address directly. You can type a name saved in your Contacts to call up the phone number, or tap FREQUENTS or ALL CONTACTS tab, and then select the contacts to whom you want to send the message. -
Page 94: Manage Message Conversations
Manage Message Conversations Text and multimedia messages that are sent to and received from a contact (or a number) are grouped into conversations or message threads in the Messenger screen. Text or MMS conversations let you see exchanged messages (similar to a chat program) with a contact on the screen. Read a Text Message ■... -
Page 95: Text And Mms Options
Reply to a Message 1. From home, tap Apps > Messenger 2. On the Messenger screen, tap a text or multimedia message thread to open it. 3. Tap the text box at the bottom of the screen, enter your reply message, attach files if desired and then tap Note: To reply to a text message with a multimedia message, open the text message and tap . -
Page 96: Gmail
Notifications: Select this option if you want to receive a notification in the status bar when a new text or multimedia message arrives. Sound: Select a ringtone that is specific to new text and multimedia messages. Note that the ... - Page 97 1. From home, tap Apps > Gmail The Gmail inbox opens. 2. In any folder, tap The Gmail composition window opens. 3. Enter the message recipient’s email address in the To field. 4. If you want to send a carbon copy (Cc) or a blind carbon copy (Bcc) of the email to other recipients, tap to the right of the To field.
-
Page 98: Check Received Gmail Messages
Check Received Gmail Messages Your phone allows you to access, read, and reply to all your Gmail messages. Open Gmail Messages from Notifications When new Gmail arrives, you will see in the status bar. 1. Pull down the status bar to display the notification panel. 2. -
Page 99: Use Gmail Labels
● Forwarding Gmail Messages: With the Gmail message open, tap > Forward, enter a recipient and an additional message, and tap Tip: You can also select from the reply options displayed below the email. Use Gmail Labels Gmail saves all mail in one box, but you can add labels that allow you to sort your Gmail conversation threads. -
Page 100: Mute Gmail Threads
2. Touch and hold a conversation thread to add a checkmark to it, and then tap Archive The thread is now archived. Mute Gmail Threads If registered on a mailing list, there will be threads with always-continuing conversations. For long threads that are not important, mute the threads and they will no longer appear in the inbox. -
Page 101: Delete Gmail Threads
Delete Gmail Threads If you no longer wish to keep a Gmail conversation thread, you can simply delete it from the inbox. 1. From home, tap Apps > Gmail The inbox opens. 2. Touch and hold a conversation thread to add a checkmark to it, and then tap ... -
Page 102: Report Spam
1. From home, tap Apps > Gmail The inbox opens. 2. Tap 3. Enter your search text. The search results appear. Tap a message or thread from the list to display it. Report Spam You can report spam or phishing Gmail messages from your phone’s Gmail inbox. 1. -
Page 103: Switching Between Gmail Accounts
2. Tap Google, and then tap Enter your email. 3. Enter your Gmail username and password, and then tap NEXT. 4. Follow the prompts to review and agree to the Terms of Service and Privacy Policy, and then tap ACCEPT. ... -
Page 104: Gmail Settings
The Primary inbox opens. 2. Tap 3. Tap the account you want to view from the list at the top of the menu. The selected account inbox is displayed. Gmail Settings You can access settings for the Gmail app and for your individual Gmail accounts from the Gmail Settings menu. -
Page 105: Add A Corporate Account
2. Tap Menu on the top left of the screen to display menu. 3. Tap Settings. 4. Tap General settings to access settings for all accounts, or tap an account name to configure settings for a specific Gmail account. General settings: Gmail default action, Conversation view, Swipe actions, Sender image, ... -
Page 106: Exchange Activesync Email Features
1. From home, tap Apps > Settings > Accounts > Add account. 2. Select the type of account you want to add. 3. Enter the Email address for the email account and then tap MANUAL SETUP. 4. Enter the required information: Username: Enter your network login username. -
Page 107: Send A Meeting Request
Flag Email Messages For an Exchange ActiveSync account, you can flag email messages to help you keep track of them. Set Out of Office Status You can set your Out of Office status and auto-reply message right from your phone. Send a Meeting Request You can make a meeting invitation and send it. -
Page 108: Internet And Social Networking
Internet and Social Networking The following topics describe how to connect to and use the Internet on your phone, and how to access popular social networking sites such as Facebook, Twitter, Hangouts, LinkedIn, and more. Data Services General Information (4G LTE and 3G Networks) The following topics will help you learn the basics of using your data services, including managing your user name, launching a data connection, and navigating the Web with your phone. -
Page 109: Your User Name
2. Select the desired option. By default, the phone will scan for the best available network and will automatically connect to it. When your phone is connected via 4G LTE, the LTE icon appears above the signal strength indicator in the status bar. -
Page 110: Data Connection Status And Indicators
2. Tap Status. You will see your user name under the "Username" heading. Update Your User Name If you choose to change your user name and select a new one online, or make any changes to your services, you must then update the profile on your phone. 1. -
Page 111: Chrome Browser
Chrome Browser Your phone supports the Chrome mobile Web browser. If you are signed in with a Google Account, the Chrome browser will import all your bookmarks and other Web preferences for use on your phone. SSL/TLS SSL (Secure Sockets Layer) and TLS (Transport Layer Security) are protocols for encrypting sent/received data. -
Page 112: Hangouts
Tip: For more information, from your computer, visit: google.com/intl/en/chrome/browser/mobile/. Hangouts Hangouts is Google's instant messaging service. Use to communicate with other Hangout users, and also use video calling. Log in to a Google account beforehand (see Google Account). Using Hangouts 1. - Page 113 4. Type a name, email, number, or circle, or select a contact from the list. 5. Type a message or tap to start a video chat. A chat window or a video chat window opens. Each time text is entered, the corresponding friend appears. ...
-
Page 114: Global Services
Global Services With your phone and global roaming service from Worldwide Wireless Service, you can make phone calls and use wireless data services around the globe on compatible CDMA and GSM/UMTS networks. For a country-specific travel guide, select your phone and destination from com/traveltips. -
Page 115: Enable Global Roaming Mode
3. Insert the SIM card. Insert gently with gold IC chip facing downward. 4. Securely close the SIM/microSD slot cover. Press down the edges of the cover to make sure it is sealed properly. Warning: Be sure the SIM/microSD slot cover is properly sealed to maintain the phone's waterproof capability. -
Page 116: Set The Communications Method For Global Use
The selected options are set. 7. Tap Roaming guard. 8. Select roaming guard options for each category. The selected options are set. Set the Communications Method for Global Use Select a communications method for an overseas carrier as needed. 1. -
Page 117: International Voicemail Service
call. Some features and services are not available in all countries. For more information on services that are available while roaming, visit com/sww. Make Calls Using Plus (+) Code Dialing Placing calls from one country to another country is simple with the Plus (+) Code Dialing feature. When placing international calls, you can use Plus Code Dialing to enter the appropriate international access code for your location (for example, 011 for international calls placed from the United States). -
Page 118: Set Up Your Voicemail Access Number For International Use
Set Up Your Voicemail Access Number for International Use To simplify accessing your Voicemail while traveling, you can set up your voicemail access number as a Contacts entry. This will make it faster and easier to access your messages while roaming internationally. -
Page 119: International Data Roaming
3. When your voicemail answers, tap , enter the passcode, and then tap to access your voicemail. Your voicemail box is accessed. International Data Roaming Worldwide Wireless Service can also keep you connected via email and Web browsing when traveling in countries in which offers data service. - Page 120 providers on the GSM network. If your phone has automatically selected a GSM network while traveling, then you will need to set the phone to CDMA to access CDMA data services. (See Enable Global Roaming Mode.) Visit com/sww for a list of services available in each country. Contact for Assistance with International Service...
- Page 121 Caribbean (Anguilla, Barbados, 1-888-226-7212 Cayman Islands, and Dominica) France 0800-903200 Germany 0800-180-0951 Italy 800-787-986 Mexico 001-877-294-9003 Trinidad and Tobago 1-800-201-7545 United Kingdom 0808-234-6616 Note: This toll free service is available on ordinary landline phones and some public pay phones. This service does not cover any hotel access charges.
-
Page 122: Connectivity
Connectivity The following topics address your phone’s connectivity options, including USB file transfer and tethering, Wi-Fi, Bluetooth, and more. Transfer Files between Your Phone and a Computer You can use the supplied USB cable to connect your phone directly to your computer and transfer music, pictures, and other content files. -
Page 123: Wi-Fi
6. When you are done, disconnect your phone from your computer. The transferred files are now saved to your phone or SD card. Wi-Fi Wi-Fi provides wireless Internet access over distances of up to 300 feet. To use your phone’s Wi-Fi, you need access to a wireless access point or “hotspot.”... - Page 124 3. Tap the ON/OFF switch to turn Wi-Fi on Wi-Fi is enabled. You will see the names and security settings of in-range Wi-Fi networks. To disable Wi-Fi, tap the switch again 4. Tap a Wi-Fi network to connect, enter the password (if it’s not an open network), and then tap CONNECT.
-
Page 125: Wi-Fi Settings
Depending on the network type and its security settings, you may also need to enter more information or choose a security certificate. When your phone is connected to a wireless network, the Wi-Fi icon appears in the status bar ... - Page 126 2. Tap Wi-Fi The Wi-Fi settings menu appears. 3. If necessary, tap the ON/OFF switch to turn Wi-Fi on Wi-Fi is enabled. You will see the names and security settings of in-range Wi-Fi networks. To disable Wi-Fi, tap the switch again ...
-
Page 127: Disconnect Wi-Fi
• WPS Pin Entry to set up a Wi-Fi Protected Setup connection by entering the PIN on your router. 5. Configure your Wi-Fi settings. Your Wi-Fi settings changes are saved. Disconnect Wi-Fi You may wish to disconnect from a connected Wi-Fi network without turning Wi-Fi off. 1. -
Page 128: Hotspot
2. Tap Wi-Fi The Wi-Fi settings menu appears. 3. Tap the Wi-Fi slider to turn Wi-Fi on Wi-Fi is enabled. You will see the names and security settings of in-range Wi-Fi networks. > Advanced > Wi-Fi Direct. 4. Tap ... -
Page 129: Tethering
Important: Use of the Hotspot feature requires an additional subscription. Sign on to your account at com/ or access your account via Zone (tap Apps > Zone ) to learn more. Note: Turning on Hotspot on will disable your phone's connection to other Wi-Fi networks. Set Up Hotspot 1. -
Page 130: Bluetooth
3. Select a tethering option: USB tethering or Bluetooth tethering. Tethering is turned on, and your phone’s Internet connection can be shared with a connected device. For USB tethering, connect your phone to the target device with the supplied USB cable. ... -
Page 131: Pair Bluetooth Devices
1. From home, tap Apps > Settings 2. Tap Bluetooth The Bluetooth settings open. 3. Tap the slider to turn Bluetooth on Bluetooth is enabled. To disable Bluetooth, tap the slider again Tip: You can also turn Bluetooth on or off with the toggle menu in the notification panel. Pull down the status bar to display the notification panel and then tap Bluetooth to turn Bluetooth on or off. -
Page 132: Connect To A Paired Bluetooth Device
2. Tap Bluetooth The Bluetooth settings open. Nearby devices appear in the “Available devices” list. If a target device is not detected, tap > Refresh to search again. 3. Tap a device from the “Available devices” list, and follow the onscreen instructions to pair with the device. - Page 133 Important: It is recommended to use a passcode of at least eight digits for pairing with a device without a pre-defined PIN. 1. From home, tap Apps > Settings 2. Tap Bluetooth The Bluetooth settings open. Paired Bluetooth devices appear in the “Paired devices” list. ...
-
Page 134: Send Information Using Bluetooth
Send Information Using Bluetooth You can use Bluetooth to transfer information between your phone and another Bluetooth-enabled device such as a phone or notebook computer. Types of Data You Can Send via Bluetooth You can send the following types of information, depending on the device you are sending to: ●... -
Page 135: Receive Data Via Bluetooth
Receive Data via Bluetooth Your phone is capable of receiving a wide variety of file types with Bluetooth, including pictures, music tracks, and documents such as PDFs. 1. When another device attempts to send a file to your phone via Bluetooth, you will see a request to accept the file. -
Page 136: Apps And Entertainment
Apps and Entertainment The following set of topics will explore the features that make your phone so much more than a phone, from the camera and productivity apps to music, entertainment, and more. -
Page 137: Camera And Video
Camera and Video You can use the camera or camcorder to take and share pictures and videos. Your phone comes with an 13.0 megapixel back camera with an autofocus feature and 5.0 megapixel front camera that let you take sharp pictures and videos and also has the Super Wide-View FHD Action Camera that allows you to take wide angle shots. -
Page 138: Take A Picture Or Record A Video
Capturing Pictures/Videos ● File Format for Pictures: File format for pictures is JPEG. ● File Format for Videos: File format for videos is MPEG4. Camera Cautions If Lens Becomes Dirty: Fingerprints/smudges on lens prevent capturing of clear still images/videos. Wipe lens with a soft cloth beforehand. Avoid Exposure to Direct Sunlight: Be careful not to expose lens to direct sunlight for long periods. -
Page 139: Review Screen
to switch between the front camera and the back camera. Tap MENU to change the camera and camcorder settings as desired. See Camera Settings. Pinch or spread to display the slider and zoom in or out on the slider, to zoom in or out on ... -
Page 140: View Pictures And Videos Using Photos
■ Tap the image to display available options. ■ Menu: Displays available menus for the image. Available menus may vary: Slideshow: Starts the slideshow of the pictures stored in the Photos application. Use as: Sets the picture as the contact photo or wallpaper. ... -
Page 141: Edit Pictures
From home, tap Apps > Photos ■ The album list opens. To view pictures and videos organized by category (Photos, Albums, etc.) or other applications, tap and select an item. When viewing pictures in Photos, scroll left or right to view more albums. Simply tap an album to view the pictures or videos in that album. - Page 142 2. Tap the picture you want to edit and tap 3. Tap a thumbnail for the labeled effect. Effect: Displays options to Auto, Light, Color, Pop, or Vignette. • Auto: Optimizes the picture quality automatically. • Light: Displays the brightness slider. •...
-
Page 143: Share Pictures And Videos
3. To adjust the crop box size, touch and hold the edge of the box, and drag your finger inward or outward to resize the crop box. 4. To move the crop box to the part of the picture that you want to crop, drag the crop box to the desired position. -
Page 144: Send Pictures Or Videos Using Bluetooth
1. From home, tap Apps > Photos 2. Touch and hold the picture or video to place a check mark on it. Tap multiple pictures and videos to select them. 3. Tap > Messenger. Follow the onscreen prompts to complete and send the message. For more information about sending multimedia messages, see Send a Text or Multimedia Message. -
Page 145: Share Pictures Or Videos Via Additional Apps Or Social Media
For more information, see Bluetooth. Share Pictures or Videos via Additional Apps or Social Media From Photos, you can share your pictures and videos from a variety of apps and social media sites, such as Facebook, Google+, Hangouts, Instagram, Flickr, Picasa, and more. Available apps will vary depending on what you have installed on your phone. -
Page 146: Camera Settings
> YouTube. 3. Tap 4. Enter the prompted information, such as title, description and tags, and select a privacy option. 5. Tap The upload is completed. Camera Settings You can adjust the settings of your camera and camcorder by tapping MENU on the viewfinder screen. Some options are available for the back camera or camcorder only. -
Page 147: Underwater Mode
Effect: Adds an effect to the picture. Panorama: Takes a panorama picture. Underwater: Allows you to take a picture under water. Slow motion: Records a video or view in slow motion. Time lapse: Selects the time lapse recording setting from Off, 1s, 2s, 3s, 5s, or 10s. ... - Page 148 Tip: When “Underwater detection” is set to on and the phone is submerged in water, your Camera will change automatically to Underwater Mode. 2. In Underwater Mode, the following physical keys are used instead of touch screen icons. Camera key to take a picture. ...
-
Page 149: Productivity
Productivity Use your phone to stay ahead of the game with calendar, navigation, alarm, office, and more productivity apps. Calendar Use Calendar to create and manage events, meetings, and appointments. Your Calendar helps organize your time and reminds you of important events. Depending on your synchronization settings, your phone’s Calendar stays in sync with your Calendar on the Web, Exchange ActiveSync calendar, Google Calendar, and Outlook calendar. - Page 150 1. From home, tap Apps > Calendar The Calendar app opens. 2. Tap The add event window opens. Note: If you have more than one calendar, select a calendar in which to add events. Note: You can create multiple Google Calendars only in Google Calendar on the Web. After creating them in Google Calendar on the Web, you’ll be able to see them in the Calendar application on your phone.
-
Page 151: View Calendar Events
To change the time zone, tap more options, tap the time zone field, and then type a country name. 7. If the event occurs on a regular basis, tap the Does not repeat field and set the frequency. 8. Set the event reminder time. Tap the default option to change or tap Add reminder to add another reminder. -
Page 152: Sync Calendars
In event details, tap to edit the event. In event details, tap > Delete > OK to delete the event. Sync Calendars You can select which calendars you’d like to sync on your phone, along with what types of information you want to sync. -
Page 153: Google Maps
Google Maps Use the Google Maps app to determine your location, find directions, browse local businesses and attractions, rate and review places, and more. View Maps of Specified Places Use Google Maps to locate and map a specific address or destination. 1. -
Page 154: Google Search
Google Maps Operations ● Viewing Current Location: From the Maps app, tap . A blinking blue arrow indicates your current location on the map. This feature is available when the location setting is enabled. See Location Settings. ● Obtain Useful Area Information for Current Location: From the Maps app, tap the Search field, enter the information you are looking for, and then tap a result to view it. -
Page 155: Calculator
From home, tap Apps > Voice Search The Voice Search window opens. 2. Speak your search terms. Search results appear. Calculator Your phone’s convenient built-in calculator lets you perform basic mathematical equations. 1. From home, tap Apps > Calculator ... -
Page 156: Clock
Calculation results appear. Clock Your phone has a clock app that lets you set alarms, view time in time zones around the world, use a stopwatch, set a timer, and use your phone as a desk clock. Check the Time You can check the phone any time on your phone. -
Page 157: Set Alarms
7. Tap the Use 24-hour format option to switch between 24-hour format and 12- hour format. Set Alarms Set multiple alarms using your phone’s Clock app. 1. From home, tap Apps > Clock > ALARM tab. The Clock appears. Note: When you first open the tab, three alarms are set up by default and ready for you to customize. -
Page 158: Additional Clock Features
Phone at Alarm Time ● At the set alarm time, the phone sounds the alarm and/or vibrates. ● Stopping an alarm: When the alarm sounds, tap DISMISS or tap DISMISS to dismiss it. Swipe SNOOZE or tap SNOOZE to postpone the alarm for the set duration. Delete an Alarm 1. - Page 159 3. Tap the check box next to the city you want to display on the world clock screen. 4. Press Back or tap in the top-left corner of the screen to confirm. The selected cities will be displayed at the top of the city list. World Clock Settings 1.
-
Page 160: Flashlight
Add label to add a description to the timer. to stop the countdown. to resume the countdown. +1 MIN to add an extra minute to the remaining time. -1 MIN to subtract a minute from the timer. ... -
Page 161: File Commander
Storage: Select Phone or SD card. 3. Tap to start recording a sound file. 4. Tap to pause recording. Tap again to resume recording. 5. Tap to stop recording. to play the recorded sound file. Play Audio Data 1. - Page 162 1. From home, tap Apps > File Commander File Commander launches. Follow onscreen instructions for first-time use and permissions. 2. The following options are available. Pictures: Stores still image files. Music: Stores the audio files. Videos: Stores video files. ...
-
Page 163: Outdoor Report
■ Tap a folder or file to access it. You can search or sort in the folder and file lists. The app opens and displays the file. ■ Tap for available options. Supported Formats Following image, video and audio formats are supported by the phone. Image Video Audio... - Page 164 2. Tap NEXT on the welcome screen and follow the on-screen prompts. 3. The following information is available: WEATHER: Displays the weather information in 6 hour increments. SUNRISE/SUNSET: Displays the current position of the Sun and the Moon. SOLUNAR: Displays the peak activities of animals and wildlife according to the Moon phases.
-
Page 165: Entertainment And Activities
Entertainment and Activities The following topics provide an overview of your phone’s entertainment apps, from music players and YouTube, to health apps, games, and more. Google Play Music App The Google Play Music app lets you browse, shop, and play back songs purchased from Google Play as well as songs you have loaded from your own music library. -
Page 166: Google Play Music Screen Layout
Listen Now: Your starting point to play music. Top charts: Displays Google Play Music best hit charts. New releases: Displays Google Play Music newly released music. Music library: Your music is sorted by PLAYLISTS, ARTISTS, ALBUMS, SONGS and ... - Page 167 Feature Description Repeat/Play next Repeat the current song or play the next song queued. Elapsed time Amount of time the song has been playing. Rate (thumbs up/thumbs down) Rate the current song. Previous song Play the previous song. Play/pause Play or pause the current song. Music title/artist Display music title and artist (if available).
-
Page 168: Create Playlists In Google Play Music
Create Playlists in Google Play Music Organize music into playlists to fit every occasion. 1. From home, tap Apps > Play Music The Play Music app opens to the Listen Now screen. 2. Tap to view your library or playlists, or to access Google Play Music online. 3. -
Page 169: Music Plus
Music Plus With Music Plus and the Music Store, Ringtone Store, and Ringback Tone Store, you can purchase, download, and play music, ringtones, and ringback tones for your phone. Install the Music Plus App on Your Phone Before you use Music Plus on your phone, you must download and install the app from the Google Play store app. -
Page 170: Youtube
Purchase and Download Music from the Music Plus Store From the Music Plus Store, you can shop for songs to purchase and download to your phone. 1. From home, tap Apps > Music Plus > Music Store. [illustration] The app will open and display the Music Store. 2. -
Page 171: Post A Video To Youtube
The YouTube app launches. If you’re prompted to provide confirmation to use the site, follow the onscreen instructions to continue. 2. Search through the YouTube channels and tap a video you want to see. The video plays on your phone screen. 3. -
Page 172: Zone
2. Tap Account > Add The Open from menu appears. 3. Select a video to upload. Enter a title, description, and tags, and select a privacy setting. 4. Tap Upload The video is uploaded to your YouTube channel. Zone Access your account, get phone information and help, find recommended apps, and more. - Page 173 1. From home, tap Apps > Play Store 2. Tap the Search icon and search for "nascar mobile". 3. Tap NASCAR MOBILE from the results list. 4. Tap Install, and then tap Accept. The app will be downloaded and installed on your phone. 5.
-
Page 174: Settings
Settings The following set of topics will cover your phone’s settings menus and options. For an overview of the settings menu, see Basic Settings. -
Page 175: Wireless & Networks Settings
Wireless & Networks Settings The following topics introduce your phone’s basic settings menus and cover your phone’s Connections settings options. Basic Settings See below for basic settings. ■ From home, tap Apps > Settings to access your phone’s settings menu. –... - Page 176 View total and available system memory. Storage View battery usage by application and system process. Battery Address your phone’s connectivity options, including USB file transfer and Memory tethering, Wi-Fi, Bluetooth, and more. Use the Tap & pay feature to pay for items just by touching your phone to a Tap &...
-
Page 177: Wi-Fi Settings Menu
Access Settings 1. From home, tap Apps > Settings The settings menu opens. 2. Select categories and then select your settings options. Settings are made and applied. Tip: You can also access settings from the notification panel. Swipe down from the top of any screen and tap the settings icon on the top right. - Page 178 2. Tap Wi-Fi The Wi-Fi settings menu appears. 3. Tap the ON/OFF switch to turn Wi-Fi on Wi-Fi is enabled. You will see the names and security settings of in-range Wi-Fi networks. To disable Wi-Fi, tap the ON/OFF switch again ...
-
Page 179: Hotspot Settings
The password, for a household wireless LAN router, is sometimes found on a sticker on the router (WEP, WPA, KEY, etc.). Contact the router manufacturer for information. For password for a public wireless LAN, check with user's service provider. Entering a password is not required if an access point is not security protected. -
Page 180: Bluetooth Settings
1. From home, tap Apps > Settings > Hotspot 2. Tap the ON/OFF switch next to Hotspot to turn it on Hotspot is enabled. To disable Hotspot, tap the switch again Advanced Hotspot Settings The Set up Hotspot window lets you configure advanced options. 1. -
Page 181: Data Usage Settings
3. Tap the ON/OFF switch to turn the Bluetooth on to search for other visible in-range Bluetooth devices. The Bluetooth Settings Menu ■ In the Bluetooth Settings display, tap and choose from the following options. Refresh to update the Available devices list. ... - Page 182 2. Tap the ON/OFF switch next to Cellular data to turn it on or off. Set Cellular Data Limit Warning: The usage displayed is measured by your phone. Your carrier’s data usage accounting may differ and the usage in excess of your data limit plan can result in charges. Data usage limit set in this menu is not guaranteed to prevent additional charges.
-
Page 183: More Settings
More Settings The more settings menu provides access to additional wireless and network options, such as Airplane mode, NFC, VPN, cellular networks, and more. More Settings Options Setting Description Airplane mode Disable all settings that emit or receive signals. Phone stays powered on. Allow data exchange when the phone touches another device. -
Page 184: Virtual Private Networks (Vpn)
3. Set items. Your settings are saved and implemented. Virtual Private Networks (VPN) From your phone, you can add, set up, and manage virtual private networks (VPNs) that allow you to connect and access resources inside a secured local network, such as your corporate network. Prepare Your Phone for VPN Connection Depending on the type of VPN you are using at work, you may be required to enter your login credentials or install security certificates before you can connect to your company’s local network. -
Page 185: Connect To Or Disconnect From A Vpn
2. Tap More > VPN > Basic VPN. Note: Tap Advanced IPsec VPN to access the KeyVPN app. 3. If you are asked to set up a screen lock, tap OK and set up a required type of lock. To set up a screen lock, see Security Type. -
Page 186: Nfc Settings
> Always-on VPN to select a VPN profile to always remain connected to. 2. When prompted, enter your login credentials, and then tap CONNECT. You will connect to the selected VPN. When you are connected, a VPN connected icon appears in the notification area. ... -
Page 187: Cellular Networks Settings
Tap the ON/OFF icon to turn Android Beam off To share app contents: 1. With Android Beam turned on, display the contents you want to share on your screen. 2. Bring your phone close to another NFC-enabled device, typically back to back aiming the NFC antenna, and then tap your screen. - Page 188 Presidential: Receives an emergency presidential alert. (Presidential is always grayed out [not selectable] and cannot be excluded.) Extreme Alert: Receives emergency alerts in an extreme emergency situation (an extraordinary threat to life or property). Severe Alert: Receives emergency alerts in a severe emergency situation (a significant ...
-
Page 189: Device Settings
Device Settings The following topics outline the device settings options available on your phone, including sounds, display, gestures, applications, and more. Call Settings Your phone's Call settings menu lets you configure your Voice Mail options and a number of other settings for the phone application. -
Page 190: Phone Ringtone Settings
Connect your phone to the devices that support Miracast to share the Cast displayed images via Wi-Fi connection. Turn the function on to enable a pulse notification light when receiving Pulse notification light notifications. Persistent alerts Set alerts, such as beep, vibration, or LED blinking for notifications. Your phone is capable of showing the notifications on the screen when When device is locked the phone is locked. -
Page 191: Default Notification Ringtone Settings
2. Tap Phone ringtone. 3. Tap a ringtone from the available list. – or – and select a sound data. The ringtone briefly plays when selected. 4. Tap OK to assign the ringtone. Default Notification Ringtone Settings 1. From home, Apps >... -
Page 192: Display Settings
Programmable Key Setting Description Programmable key Assign a function to your programmable key. Wake up device Press and hold on the programmable key to wake up the device. Access Programmable Key Settings 1. You may press and hold the programmable key on the side of the phone. –... -
Page 193: Daydream Settings
Set whether to allow the screen to rotate the display with the phone When device is rotated orientation, where applicable. Key Backlight Select the delay time before the key backlight automatically turns off. Connect your phone to the devices that support Miracast to share the Cast displayed images via Wi-Fi connection. -
Page 194: Cast Settings
3. Tap one of the following options: Clock to display the phone's analog or digital clock. Tap next to it and tap Style to select the clock style or select the Night mode option. Photos to display selected images as a slide show. Tap next to it and select the images ... -
Page 195: Usb Storage Settings
Access Storage Settings 1. From home, tap Apps > Settings 2. Tap Storage 3. Check or tap items. Review your storage settings. USB Storage Settings The USB storage options are available when your phone is connected to an external device using a USB cable. -
Page 196: Battery Settings
Erase the Data on the USB Storage Warning: You cannot retrieve the data once deleted. 1. From home, tap Apps > Settings 2. Tap Storage > USB storage. 3. Tap > Settings > Format or Format as internal > ERASE & FORMAT > OK. Format: Select to format your USB storage. - Page 197 – or – From home, tap Apps > Eco Mode 2. Tap an option to enable or disable the Eco Mode: ON: Enables the Eco Mode. The Eco Mode On icon appears on the status bar when selected. OFF: Disables the Eco Mode. ...
-
Page 198: Application Settings
Configured settings in the Eco Mode are automatically reflected in the respective Settings menu, and vice versa. Application Settings This menu lets you view and manage the applications on your phone. 1. From home, tap Apps > Settings > Apps 2. -
Page 199: Personal Settings
Personal Settings The following topics cover your phone’s personalization settings, including location privacy and access, security, lock screen settings, accounts, and backup and reset options. Location Settings The location services settings menu lets you decide whether you allow your phone to collect and use the location information. -
Page 200: Security Settings
If you see a confirmation, follow the onscreen instructions to connect. Select a Locating Method 1. From home, tap Apps > Settings 2. Tap Location 3. Tap Mode. 4. Select a locating method. High accuracy: Use GPS, Wi-Fi, and cellular networks to determine your location. ... - Page 201 Security Settings Overview Many security settings are dependent on Screen lock settings, etc. The following table outlines the settings available through the Security settings menu: Security Setting Description Encrypt and decrypt the data in your phone, such as Contacts, Calendar, Phone Email, settings values, personal data, etc.
-
Page 202: Lock Screen Settings
2. Tap Security The Security settings menu opens. 3. Set your security options. Your security settings are applied and saved. Lock Screen Settings The lock screen settings let you set your method for unlocking your phone, customize lock screen options, determine whether to show pop-up tips for unlocking the phone, and enter your owner information to be displayed on the lock screen. -
Page 203: Use A Screen Unlock Pattern
Important: To protect your phone and data from unauthorized access, it is recommended that you use the highest security level available (Password protection). It is also recommended you frequently change your password to ensure the safety of your phone and personal data. Access Screen Lock Settings 1. - Page 204 The phone records the pattern. 3. Tap CONTINUE. 4. When prompted, draw the screen unlock pattern again, and then tap CONFIRM. The screen unlock pattern is saved. 5. Choose how do you want notifications displayed when your phone is locked and tap DONE. If you fail to draw the correct unlock pattern on the screen after five attempts, you will be ...
-
Page 205: Use A Screen Unlock Password
Use a Screen Unlock PIN 1. From the Screen lock settings menu, tap PIN. 2. Enter a PIN, tap CONTINUE, re-enter your PIN, and tap OK to save the setting. The screen lock is set. If you fail to enter the correct PIN after five attempts, you will be prompted to wait for 30 ... -
Page 206: Disable The Screen Lock
8. If required, name the fingerprint and tap DONE. Note: Fingerprint authentication technology does not guarantee completely accurate personal authentication and identification. Kyocera assumes no responsibility for any damages resulting from using your device by the third party or inability to use your device. -
Page 207: Lock Screen Options
The Lock screen settings menu opens. 2. Tap Security type. 3. Draw your unlock screen pattern, enter your PIN, or enter your password. 4. Tap None. The screen lock is disabled. Note: If you fail to enter the correct password after five attempts, you will be prompted to wait for 30 seconds before you can try again. -
Page 208: Backup And Reset
Activate the screen lock feature by pressing the Power key. This setting Power Key Instantly Locks appears only when you set one of the lock settings. Select from On-body detection, Trusted places, Trusted devices, Trusted Smart Lock face, or Trusted voice. Lock screen message Display the desired message on the locked screen. - Page 209 Backup and Reset Overview The following options are available in the Back up and reset menu: Backup and Reset Option Description Enable backup for application data, Wi-Fi passwords, and other settings Back up my data to Google servers. Backup account Select a Google account used to back up data.
-
Page 210: Accounts Settings
The Backup and reset menu opens. 3. Set options. The backup and reset settings are applied and saved. If you’re performing a Factory Data Reset, follow the prompts to confirm the data removal. The phone will erase all data and reboot. Factory Data Reset Tip: Before performing a factory data reset on your phone, you may want to unmount an installed SD card to avoid losing any data you may have stored on it. -
Page 211: Manage Existing Accounts
Set Up a New Account 1. From home, tap Apps > Settings 2. Tap Accounts > Add account. An Add account window appears. 3. Tap an account type and then follow the onscreen instructions to add the required account information, and then tap NEXT. - Page 212 2. Select an account type. 3. Manage the settings or select an account and tap for additional options. Available settings menus vary according to the account type. Tap the ON/OFF switch next to the item to sync. > Sync now to sync immediately. ...
-
Page 213: System Settings
System Settings The following topics detail your phone’s system settings options, including language and input settings, battery and storage, date and time, activation, system update, and device information. Language and Input Settings Your phone’s language and input settings let you select a language for the phone’s menus and keyboards, select and configure keyboard settings, configure speech input settings, and set your phone’s mouse/trackpad options. -
Page 214: Google Keyboard Settings
2. Tap Language & input The Language and input settings menu opens. 3. Set options. The language and input settings are applied and saved. Language and Input Options ■ From home, tap Apps > Settings > Language & input Set the Display Language: From the Language and input settings menu, tap Language and ... - Page 215 Languages Tap to select the input language. The dictionary for the selected language will be enabled. Preferences One handed mode: Select the keyboard layout mode from Disable, Right handed mode, or ● Left handed mode. ● Custom input styles: Change your keyboard language and layout. ●...
-
Page 216: Google Voice Typing Settings
● Double-space period: Tap to allow the space bar to insert a period and a space by double tapping. Gesture Typing ● Enable gesture typing: Check to input a word by sliding through the letters. ● Show gesture trail: Check to display the path when you slide through the letters while using the gesture typing. -
Page 217: Date And Time Settings
Date and Time Settings Use the date and time settings menu either to automatically use the network-provided date and time or manually set these values, as well as select time and date format options. Date and Time Overview The following date and time options may be configured: Date and Time Option Description Automatic date &... -
Page 218: Accessibility Settings
3. Set available date and time options. Your date and time settings are applied and saved. Accessibility Settings The accessibility menu lets you enable and manage accessibility-related applications. Accessibility Settings Overview The following accessibility options may be configured: Accessibility Option Description TalkBack Provide spoken feedback. -
Page 219: Printing
Quickly turns on accessibility features by pressing and holding the Power Accessibility shortcut key until you hear a sound or feel a vibration, and then pressing and holding with two fingers until you hear an audio confirmation. Phone options shortcut Set phone options shortcut. -
Page 220: About Phone Settings
1. From home, tap Apps > Settings 2. Tap Activate this device The Self Service menu appears. 3. Follow the onscreen prompts to activate your phone or review your summary. Your phone activates. If already activated on an account, you will see a usage and plan summary. -
Page 221: System Update Settings
2. Tap About phone 3. Select or view available options. Your phone information is displayed. System Update Settings The System Update menu provides settings for keeping your phone up-to-date with the latest software. Access System Update 1. From home, tap Apps >... - Page 222 For details about updating your phone, see Update Your Phone. System Settings...
-
Page 223: Getting Help
Getting Help The following set of topics will cover troubleshooting tips, phone specifications, and how to contact and manage your wireless service. -
Page 224: Cleaning And Drying Procedures
● Kyocera has tested cleaning products and determined they will not damage the surfaces of the phone when used properly. A table containing these products can be found at the end of this section. -
Page 225: Cleaning The Phone
Cleaning the Phone Cleaning Your Phone CAUTION! Be sure the headset jack cover, card slot cover, and charger/USB port cover are closed firmly to maintain the waterproof capability. 1. Turn off the phone. 2. Rinse the phone thoroughly under running water in order to remove dirt. 3. - Page 226 4. Rinse both sides of the phone and all physical keys until there are no more bubbles left. Note: Hold your phone below the faucet as shown below and rinse with low pressure tap water for more than 20 seconds for each part. Use only lukewarm water. CAUTION! If detergent is left inside the phone, the audio quality as well as waterproof capability may deteriorate.
- Page 227 6. Rinse both sides of the back cover until there are no bubbles left. 7. Rinse the physical keys, speakers, microphones (2), earpiece, and pressure adjustment hole under running water and make sure all bubbles are removed. Cleaning and Drying Procedures...
- Page 228 8. Put about 2 inches (5 cm) of water in a large bowl and gently rinse the phone by swirling it under water for about 10 seconds. 9. Dry your phone until you are sure there is no moisture left. See Drying Your Phone for details.
-
Page 229: Alternate Cleaning Procedure
Alternate Cleaning Procedure 1. Gently wipe the front and back of the phone with a lint-free cloth moistened with alcohol* or a sanitizer wipe. Note: Do not open the back cover while cleaning. *Note: Use only ethanol or isopropyl alcohol. See table at end of this section. 2. -
Page 230: Drying Your Phone
Drying Your Phone CAUTION! If your phone has been submerged in water, for example to use the camera in Underwater Mode, be sure to remove the back cover and rinse all surfaces of the phone thoroughly with clean, fresh water before drying. 1. - Page 231 5. After removing all the water, leave back cover off to help with the drying process. Let the phone dry completely at room temperature. CAUTION! Excessive heat may damage your phone; never use a hair dryer, an oven or any other appliance to dry out your phone.
-
Page 232: Kyocera Tested Products
Kyocera Tested Products Mild Dish Detergents Manufacturer Brand Product name Seventh Seventh Dish Liquid, Free & Clear Generation Generation Dish Liquid Lemongrass & Clementine Zest P&G Dawn Ultra Antibacterial Hand Soap Dishwashing Liquid, Apple Blossom Scent Ultra Dishwashing Liquid, Original Scent... - Page 233 Refreshing Sanitizing Wipes PURELL Hand Sanitizing Wipes Clean Refreshing Scent Nice-Pak Products, Inc. Sani-Hands® Sani-Hands® Instant Hand Sanitizing Wipes CleanWell Company CleanWell Cleanwell All Natural Hand Sanitizing Pocket Pack Wipes Cleaning and Drying Procedures...
-
Page 234: For Assistance
For Assistance The following topics address areas of support for your phone, including troubleshooting, specifications, account information, warranty information, and customer service contact information. Troubleshooting Check the questions and answers below for troubleshooting solutions for common phone issues. Check Here First Issue: Phone freezes/operation is unstable. -
Page 235: Specifications
Issue: Battery level goes down quickly. Solution: Are you where signal is weak or have been out of service area for a long period? Calling where signal is weak or being out of service area uses a lot of Battery. Issue: Cannot install applications. -
Page 236: Account Information And Help
Type Lithium-ion Capacity xxxx mAh Dimensions (W x H x D) Approx. xx.xx x xx.xx x x.xmm Account Information and Help Find out about account passwords and information about managing your account and finding help. Account Passwords You will need to create passwords to protect access to your personal account information, your voicemail account, and your data services account. -
Page 237: Support Services
● Shop for the latest phones. ● View available service plans and options. ● Learn more about data services and other products like games, ringtones, screen savers, and more. From Your Phone 1. From home, tap Phone > DIALPAD tab. 2. -
Page 238: Copyright Information
The Bluetooth word mark and logos are registered trademarks owned by Bluetooth SIG, Inc. and any use of such marks by Kyocera Corporation is under license. Other trademarks and trade names are those of their respective owners. Bluetooth QD ID (Qualified Design ID): 83110 ®... - Page 239 microSD, microSDHC and microSDXC Logos are trademarks of SD-3C, LLC. For Assistance...
-
Page 240: Index
Index 3-way Calling, 62 alcohol, 220 4G, 99 mild dish detergent, 216 Accessibility, 209 sanitizer wipe, 220 Accessory Port, 4 Cleaning Procedure, 215 Accounts cleaning, 216 Add new, 202 drying, 221 Manage, 202 precautions, 215 Settings, 201 tested products, 223 Activation, 17 Clock Airplane Mode, 26... - Page 241 Add account, 96 Customize, 46 Features, 97 Extended, 40 Extended Home Screen, 40 Hotspot, 119 Factory Data Reset, 201 Settings, 170 Files Import Contacts, 81 Transfer between phone and computer, 113 Incoming Call Flick, 15 Answer, 53 Folders, 48 Reject, 54 Font Input Settings, 204 Size, 183...
- Page 242 Using phone keypad, 51 SIM Card, 105 with Pauses, 56 Slide, 14 Phone Layout (illustration), 3 Sound Settings, 180 Phone Number Speaker, 4 Save to contacts, 71 Spread, 16 Phone Status, 211 411, 228 Phone Update Account PRL, 38 Management, 227 Profile, 38 Passwords, 227 Software, 36...
- Page 243 Share via YouTube, 136 Button, 5 View, 131 VPN, 175 Visual Voicemail, 58 Add connection, 175 Options, 60 Connect or disconnect, 176 Review, 59 Prepare for connection, 175 Set up, 59 Secure credential storage, 175 Settings, 61 Wallpaper, 46, 183 Voice Search, 145 Widgets, 48 Voice Typing, 28, 204...