Table of Contents
Advertisement
Quick Links
Advertisement
Table of Contents

Related Manuals for Kyocera DuraForce XD


Summary of Contents for Kyocera DuraForce XD
- Page 1 KYOCERA DuraForce XD User Guide...
-
Page 2: Table Of Contents
Table of Contents 1 Phone Basics ......... 6 Call from Contacts ......26 Phone Overview ........6 Call an Emergency Number ....26 Key Functions ........7 Enhanced 9-1-1 (E911) Information ..27 Get the Phone Ready ......8 Call a Number with Pauses ....27 Insert the Battery ........ - Page 3 TTY Mode ........... 32 Facebook ..........47 Auto Answer ........33 Google+ ..........47 Call Timer and Call Duration ....33 YouTube ..........47 Recent Calls .......... 33 Hangouts ..........48 View Recent Calls ......33 6 Apps and Entertainment ....49 Recent Calls Options ......
- Page 4 Learn to Navigate Web Browser ..56 Eco Mode ..........71 Bluetooth ..........71 USB Tethering and Mobile Hotspot ..57 Turn Bluetooth On or Off ..... 71 USB Tethering ........57 The Bluetooth Settings Menu ....71 Mobile Hotspot ........57 Disconnect a Bluetooth Device ...
- Page 5 Default SMS App ........ 79 NFC Settings ........79 Android Beam ........79 Tethering & Mobile Hotspot Settings .. 79 VPN Settings ........80 Cellular Network Settings ....80 Emergency Alerts ....... 80 Device Settings ........81 Display Settings ........81 Sound &...
-
Page 6: Phone Basics
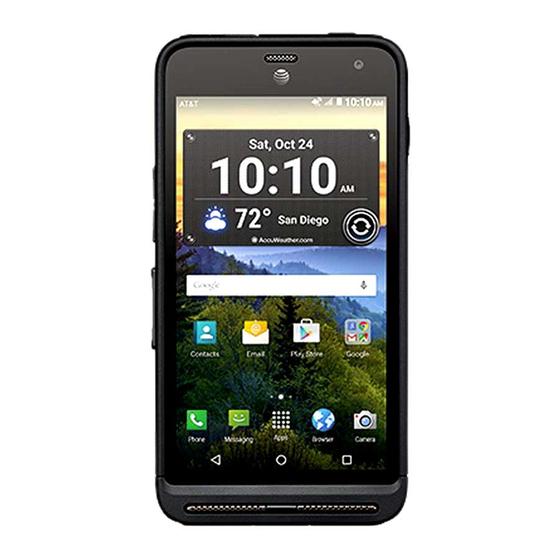
Phone Basics Phone Overview User Manual... -
Page 7: Key Functions
● Headset Jack allows you to plug in an Key Functions optional headset for convenient, hands- CAUTION! Inserting an accessory into free conversations. the incorrect jack may damage the ● Secondary Microphone suppresses phone. background noise improving audio ● LED Indicator displays a phone quality for the other party during voice notification, charging status, or alert. -
Page 8: Get The Phone Ready
● Power/Lock Key lets you turn the Get the Phone Ready phone on/off, turn the screen on/off, switch your phone to silent mode, You must first install and charge the battery vibration mode, or airplane mode, or to begin setting up your phone. capture screen shots. -
Page 9: Charge The Battery
3. Insert the battery, contacts end first ( Warning: Press all around the edges of the battery door ensuring it is properly and gently press the battery into place sealed to maintain the phone's waterproof capability. 6. Using a coin, rotate the battery door screw clockwise until it is tight. -
Page 10: Replace The Sim Card
4. When charging is complete, remove the 3. Slide the flap of the SIM card holder in cable from the port and close the cover. the direction of the arrow to unlock it Press around the edges of the cover to ), lift the flap ( ) and remove the ensure that it is securely closed. -
Page 11: Optional: Insert The Microsd Card
6. Place the battery back into its 3. Insert the microSD card into the compartment, lock it in place by sliding microSD card holder with the gold the locking bar and replace the battery contacts facing down. Gently push the door. -
Page 12: Turn The Phone On And Off
certain period of time when you leave it idle. Turn the Phone On and You will still be able to receive messages and calls while the phone’s screen is off. For information on how to adjust the time before the screen turns off, see “Sleep” on Turn the Phone On page 81. -
Page 13: Touchscreen Navigation
Drag Touchscreen Navigation Touch and hold your finger before you start Your phone’s touchscreen lets you control to move it. Do not release your finger until you have reached the target position. actions through a variety of tap gestures. Tap the screen with your finger to select or launch a menu, option, or application. - Page 14 Rotate Flick For most screens, you can automatically Flicking the screen is similar to swiping, change the screen orientation from portrait except that you need to swipe your finger in to landscape by turning the phone light, quick strokes. sideways. When entering text, you can turn the phone sideways to bring up a bigger keyboard.
-
Page 15: Function Buttons
Function Buttons At the bottom of the touchscreen, you will find a row of three buttons that let you perform specific functions. ● Back ( ) - Tap to return to the previous screen, or close a dialog box, options menu, the Notifications panel, or onscreen keyboard. -
Page 16: Home Screen
Home Screen ● Shortcut: Allows you to quickly launch The Home screen is the starting point for your phone’s applications, functions, and applications. menus. You can customize your Home ● Apps: Displays all of your apps. screen by adding application icons, ●... - Page 17 ► Swipe to the rightmost Home screen Add Widgets to the Home Screen and drag an app or widget to the right 1. Touch and hold the background of any edge. Home screen. -or- 2. Tap WIDGETS and choose a widget. Touch and hold the background of any 3.
-
Page 18: Clock & Weather
To add more apps to the folders: Clock & Weather 1. Tap a folder icon and tap in the top- Your Clock & Weather widget can display right corner. multiple time and weather information. To 2. Slide the screen to browse through the use the clock feature, tap the time display available apps and place checkmarks on the widget to access the Clock app. -
Page 19: Dura Grid
widget and then sliding the screen to Dura Grid the left. The Dura Grid widget provides one-touch Delete a Location access to frequently used apps or settings. 1. Tap the weather image on the widget The high contrast, large icons allow easy and then tap >... -
Page 20: Status Bar
Status Bar Notification Icons Icon Description The status bar at the top of the screen provides phone and service status Missed call information on the right side and notification New Gmail alerts on the left. Note: All icons are simulated. Actual New message images may vary. -
Page 21: Notifications Panel
● To open the main Settings app, tap the Notifications Panel settings icon . For details, see Open the Notifications panel to view the “Settings” on page 78. Quick Settings panel and a list of your To close the Notifications panel: current notifications. - Page 22 Interruptions to access the Interruptions settings. Usage Mgr to open the Usage Manager screen. ● To change the positions of items, tap EDIT. Touch and hold the item you want to move, and then drag it to a different location and release your finger.
-
Page 23: Text Entry
Text Entry using your voice (see “Google Voice Typing” Touchscreen Keyboard on page 24 for details). The touchscreen keyboard lets you enter Google Keyboard text directly onscreen. Your phone provides Google Keyboard lets you use a traditional convenient ways to enter letters, numbers, QWERTY setup to enter text. -
Page 24: Google Voice Typing
3. Confirm the text you want to enter is Text Mode displayed. Tap again to continue ► Tap to select ABC mode. Tap entering. to select Number & Symbol mode. Tip: For more information about the In ABC mode, tap to alter the settings of Google voice typing, see capitalization. -
Page 25: Tips For Editing Text
holding to make all letters in a word uppercase. In Number & Symbol mode, tap to display more symbols. Some keys have alternate characters. In either mode, if a key displays an extra character at the upper right corner, touch and hold the key to enter the character. -
Page 26: Phone Calls
Phone Calls 2. Tap the RECENT CALLS tab to display Make Phone Calls the recent calls list. 3. Tap the Phone icon next to the Call Using the Phone Dialpad name or number you want to place a 1. From the Home screen, tap Apps >... -
Page 27: Enhanced 9-1-1 (E911) Information
Enhanced 9-1-1 (E911) Information 2. For speed dial numbers 2-9, touch and hold the number on the dialpad. This phone features an embedded Global – or – Positioning System (GPS) chip necessary for utilizing E911 emergency location For speed dial numbers 10-99, tap the services where available. -
Page 28: Call Using Internet Call
phone automatically prepends the Make an Internet Call access code for international dialing, 1. From the Home screen, tap Apps > followed by the country code and phone Phone > Contacts. number. 2. Tap a contact and tap Call Using Internet Call When a Wi-Fi network is available, you can Internet Call Settings make and receive calls through an Internet... -
Page 29: Send An Incoming Call To Voicemail
password, anyone who has access to Send an Incoming Call to your phone is able to access your Voicemail voicemail messages. ► On the Incoming call screen, swipe Voicemail Notification to send the call to your voicemail inbox. There are several ways your phone alerts you to a new voicemail message. -
Page 30: Phone Call Options
3. Select the Call waiting check box. Use Another Phone to Access Messages To respond to an incoming call while you 1. Dial your wireless phone number. are on a call: 2. When your voicemail answers, press the asterisk key (*) on the phone. ►... -
Page 31: Call Settings
Service to select the voicemail Call Settings service provider. Setup to configure the voicemail Phone Ringtone number if necessary. 1. From the Home screen, tap Apps > Sound to select the sound to ring for Phone. a new voicemail message. ... -
Page 32: Fixed Dialing Numbers (Fdn)
3. Select Network default, Hide number, Fixed Dialing Numbers (FDN) or Show number. 1. From the Home screen, tap Apps > Call Barring Phone. 1. From the Home screen, tap Apps > 2. Tap > Call settings > Fixed Dialing Phone. -
Page 33: Auto Answer
landline communications. Wireless TTY Recent Calls calls to 911 may be corrupted when received by public safety answering View Recent Calls points (PSAPs), rendering some communications unintelligible. The 1. From the Home screen, tap Apps > problem encountered appears related to Phone. -
Page 34: Delete Recent Calls
2. Tap the RECENT CALLS tab to display the recent calls list. 3. Tap > Filter by. 4. Select All calls, Missed calls, Outgoing calls, or Incoming calls. Delete Recent Calls 1. From the Home screen, tap Apps > Phone. 2. -
Page 35: Contacts
Contacts Import/export: Imports/exports your Display Contacts contacts from/to the microSD card, SIM card and phone or shares your ► From the Home screen, tap Apps > visible contacts. Contacts. You will see the Contacts list. Settings: Opens the display settings screen. -
Page 36: Add A Contact
Email 2. Tap > Settings. Address 3. Set the following options: Incoming settings Position of index tab to choose ADD ANOTHER FIELD: Tap to were to place the index tab. include additional information such Sort by to choose how your contacts as IM, Notes, Nickname, Website, are sorted. -
Page 37: Edit A Contact
and any additional information and tap Copy a Contact SAVE. 1. From the Home screen, tap Apps > Contacts > CONTACTS tab. Edit a Contact 2. Tap a contact to display it, and tap > Add or Change Information for a Contact Copy contact. -
Page 38: Add A Group Contact
Add a Contact to Favorites Delete Single or Multiple Contacts 1. From the Home screen, tap Apps > 1. From the Home screen, tap Apps > Contacts > CONTACTS tab. Contacts > CONTACTS tab. 2. Select a contact to display it. 2. -
Page 39: Edit A Group Contact
5. Tap Add/remove contacts and check 3. Tap Vibration Pattern and select a the entries that you want to add to the vibration pattern. group contact. 4. Tap OK to save the settings. 6. Tap DONE > SAVE. Delete a Group Contact Edit a Group Contact 1. -
Page 40: Synchronize Contacts
2. Tap and tap the contact to remove. 3. Tap OK. Personal Information 1. From the Home screen, tap Apps > Contacts > CONTACTS tab and then tap ICE- In Case of Emergency. 2. Tap My emergency information > 3. Enter or edit the necessary information and tap SAVE. -
Page 41: Accounts And Messaging
Accounts and Messaging Sign In to Your Google Account Gmail 1. From the Home screen, tap Apps > Create a Google Account Settings > Accounts > Add account. If you do not already have a Google 2. Tap Google. Account, you can create one online or 3. -
Page 42: Send A Gmail Message
Send a Gmail Message 4. After composing your message, tap 1. From the Home screen, tap Apps > Gmail Account Settings Gmail. 1. From the Home screen, tap Apps > Gmail . 2. In any folder, tap 3. Enter the message recipient’s email 2. -
Page 43: Delete A Gmail Account
Confirm before deleting: Check to 7. Configure the account options as display a confirmation before necessary and tap NEXT. deleting a message. 8. Follow the onscreen prompts to Confirm before archiving: Check to complete. display a confirmation before Add an Exchange Account archiving a message 1. -
Page 44: Send A Multimedia Message (Mms)
sending the message to several subject, Attach or Add preset recipients, separate the phone numbers message. or email addresses with a comma. 5. Tap and select from the following Tip: You can type a name or email file attachments: address saved in your Contacts to call ... -
Page 45: New Messages Notification
1. On the Messaging screen, tap the Delete a Message Thread message to resume editing it. “Draft” in 1. From the Home screen, tap Apps > red appears at the right of the message Messaging. in the list. 2. On the Messaging screen, touch and 2. -
Page 46: Text (Sms) And Multimedia (Mms) Settings
Select All messages to delete all Attachment storage: Select your messages. desired storage for attachments. Preset message: Edit text that you 2. Tap the message you want to delete. frequently insert when composing The thread is highlighted and the messages. -
Page 47: Social Networking Accounts
Vibrate: Select this option if you YouTube want the phone to vibrate when a YouTube™ is a video sharing website on new text or multimedia message which users can upload and share videos. arrives. Open YouTube Social Networking ► From the Home screen, tap Apps >... -
Page 48: Hangouts
Hangouts Hangouts is an application for instant messaging offered by Google. 1. From the Home screen, tap Apps > Hangouts. 2. If you have already signed in to a Google account, it displays on the Hangouts screen. – or – Tap Or create a new account to create a new Google account, or sign in to an existing Google account. -
Page 49: Apps And Entertainment
Apps and Entertainment 4. The subsequent screen notifies you AppStore whether the app will require access to your personal information or access to AppStore allows you to browse and buy certain functions or settings of your apps for your phone. phone. -
Page 50: Request A Refund For A Paid App
your permission. (For more information, Navigation see “Security Settings” on page 88.) Your phone offers a number of location- Request a Refund for a Paid based navigation programs to help you figure out where you are and get you where you are going. -
Page 51: Music
Get Directions Tip: Tap to search by speaking the location you are searching for. 1. On the Google Maps screen, tap 3. Tap a matching result on the drop-down 2. Do one of the following: list or tap the magnifying glass key on ... -
Page 52: Google Play Music
Phone’s microSD Card as a Media Tap to go back to the start of the Device” on page 75. current item. Tap to jump to the start of the next item. Access the Music Player App Tap to display the Now Playing 1. - Page 53 The label of the currently playing Manage the Music Library song appears at the bottom of the 1. From the Home screen, tap Apps > screen when you play music. Simply Play Music. on the label to manage 2. Swipe right or tap at the top left of the music or tap the label for more the screen to display the Google Play...
-
Page 54: Web And Data
Web and Data 2. Tap the wireless network that the phone Wi-Fi is currently connected to. You will see a message box showing the Wi-Fi Turn Wi-Fi On and Connect to a network name, status, signal strength, Wireless Network speed, and other details. Note: If you want to remove the 1. -
Page 55: Data Services
Install Security Certificates Data Services 1. Download and install the certificates Data Connection Status and needed to access your local network Indicators into a microSD card. Your network administrator can tell you how to do this. Your phone displays the current status of 2. -
Page 56: Connect To Or Disconnect From A Vpn
Connect to or Disconnect from Learn to Navigate Web Browser a VPN. Scrolling ► In a single motion, tap and drag across Connect to a VPN or up and down a page. 1. From the Home screen, tap Apps > Selecting Settings >... -
Page 57: Usb Tethering And Mobile Hotspot
The first time you turn it on, you will USB Tethering and be prompted to set up Mobile Mobile Hotspot Hotspot. 3. Follow the onscreen instructions. USB Tethering Mobile Hotspot Settings Turn USB Tethering On To set up Mobile Hotspot: 1. - Page 58 To limit maximum connections: 2. Scan for Wi-Fi networks from the device and select your phone's hotspot from 1. From the Home screen, tap Apps > the network list. Settings > More > Tethering & Mobile 3. Select this device and follow the Hotspot >...
-
Page 59: Camera And Video
Camera and Video ● Thumbnail: Displays the thumbnail of Take Pictures the latest image. ● Shutter Button: Takes a picture. Open the Camera App ► From the Home screen, tap Apps ● > Record Button: Records a video. Camera. Take a Picture or Record a Close the Camera App Video ►... -
Page 60: Review Screen
Set as to set the currently displayed Review Screen image as a contact photo or After taking a picture or video, tap the wallpaper. thumbnail image to see the item in the Captions to add captions to your review screen. - Page 61 1200), 0.8M (1024 x 768), or VGA Back Camera: Select from FullHD (640 x 480). (1920×1080), HD720p (1280x720), DVD (720x480), VGA (640x480), Flash to choose a flash setting (back QVGA (320x240), or QCIF camera only). Select from Auto, ON, (176x144).
-
Page 62: Choose A Shooting/Recording
ISO speed to set the ISO level (back Choose a Shooting/Recording camera only). Select from Auto, 100, Mode 200, 400, or 800. 1. From the Home screen, tap Apps > Contrast allows you to use the slider Camera. bar to set the contrast (back camera only). -
Page 63: View Pictures And Videos Using Gallery
Favorites to view pictures and View Pictures and videos you have marked as a favorite. Videos Using Gallery View Pictures and Videos Open the Gallery App 1. From the Home screen, tap Apps > 1. From the Home screen, tap Apps >... -
Page 64: Share Pictures And Videos
PAINT: Displays options for Delete to delete the displayed paint tools. image. Tap OK to confirm the Tap deletion to undo an action. Tap Effect to choose an effect to add to redo an action. to the pictures. - Page 65 3. Touch and hold the picture or video until 2. Touch and hold the picture or video until you see a blue frame around it or tap you see a blue frame around it or tap > Select. Tap multiple pictures and >...
-
Page 66: Tools And Calendar
Tools and Calendar If the event is a special occasion Calendar such as a birthday or an all-day event, tap All-day and set the dates. Note: If you have not added an account to sync with on your phone, you need to 6. -
Page 67: Edit Calendar Events
the notifications area of the status bar to 2. Open the calendar event details. remind you. In Schedule, Day, and 5 Day views, To view or postpone the reminder: tap the calendar event you want to edit. 1. Swipe down from the top of the screen ... -
Page 68: Clock
sounds. Choose from: Silent, Clock Snooze, Dismiss, or Do nothing. Desk Clock Alarm ► From the Home screen, tap Apps > Set an Alarm Clock > WORLD CLOCK tab. 1. From the Home screen, tap Apps > Touch and hold the screen to turn Clock >... -
Page 69: Stopwatch
Tap Stopwatch to add a new timer. 1. From the Home screen, tap Apps > World Clock Clock > STOPWATCH tab. 1. From the Home screen, tap Apps > 2. Tap START to start the stopwatch. Clock > WORLD CLOCK tab. 3. -
Page 70: Voice Services
Share to share voice data via 2. Tap to start recording a sound file. Bluetooth, Gmail, Messaging, etc. 3. Tap to pause recording. Tap Delete to delete the file. again to resume recording. Edit file name to edit the file name. 4. -
Page 71: Eco Mode
Note: Turn off Bluetooth when not in From the Home screen, tap Apps > use to conserve battery power, or in Voice Search. places where using a wireless phone is 2. Speak clearly into the phone’s prohibited. microphone when Listening… is The Bluetooth Settings Menu displayed on the screen. -
Page 72: Send Information From Your Phone To Another Device
6. If prompted, accept the connection on Send Information from Your the receiving device, and enter the Phone to Another Device same passcode on both your phone and You can send the following types of the device, or confirm the auto- information, depending on the device you generated passcode. -
Page 73: Near Field Communication (Nfc) Technology
To turn Android Beam on or off: Near Field 1. From the Home screen, tap Apps > Communication (NFC) Settings > More. 2. Tap the ON/OFF switch next to NFC to Technology turn it on. If a security reminder appears, NFC (Near Field Communication) read it and tap OK. -
Page 74: Microsd Card
microSD Card A microSD™ card is an optional accessory that allows you to store images, videos, music, documents, and voice data on your phone. Your phone supports a microSD card up to 64GB. Note: The microSD card is sold separately. 4. -
Page 75: View The Microsd Card Memory
Use the Phone’s microSD Card 7. Place the battery back into its compartment and lock it in place by as a Media Device sliding the locking bar. 1. Connect the phone to your computer 8. Replace the battery door. using the supplied USB cable. Warning: Press all around the edges of 2. -
Page 76: Outdoor Report
When the current location Outdoor Report changes: Update the weather information when your current The Outdoor Report offers useful apps location changes. Data usage may which provide important and interesting increase when this is on. information for your outdoor activities. It also has shortcut buttons to access handy Solunar Tables tools, such as compass, barometer or... -
Page 77: Tide
3. Tap the SUN or MOON button to switch 2. Tap the COMPASS or CLINOMETER the display. button to switch the display. 4. The following information is available: 3. To use the Compass, you need to calibrate it, repeating the following step ... -
Page 78: 10 Settings
10 Settings Refresh to reload the list of networks. Access to Phone’s Wi-Fi Direct to use a peer-to-peer Settings Menu Wi-Fi connection. Advanced to configure advanced ► From the Home screen, tap Apps > Wi-Fi settings. Settings. Bluetooth –... -
Page 79: Airplane Mode
limit set in this menu is not guaranteed Airplane Mode to prevent additional charges. 1. From the Home screen, tap Apps > 1. From the Home screen, tap Apps > Settings > More. Settings > Data usage. 2. Tap the ON/OFF switch next to 2. -
Page 80: Vpn Settings
settings, see “USB Tethering and Mobile 2. Tap and enter the necessary Hotspot” on page 57. information. VPN Settings 3. Tap > Save. A virtual private network (VPN) is a network To restore the default settings: that uses a public telecommunication 1. -
Page 81: Device Settings
Imminent Threat - Extreme: Select emergency alert out when it is the check box to display alerts for received. extreme threats to life or property. Device Settings Imminent Threat - Severe: Select the check box to display alerts for Display Settings severe threats to life or property. -
Page 82: Sound & Notification Settings
1. From the Home screen, tap Apps > When Device Is Rotated Settings > Display > Daydream. 1. From the Home screen, tap Apps > 2. Tap the ON/OFF switch to turn Settings > Display > When device is Daydream on. rotated. - Page 83 2. Drag the onscreen sliders to adjust the 3. Tap OK to assign the ringtone. volume level settings for Media volume, Other Sounds Settings Alarm volume, Ring volume, or System volume. 1. From the Home screen, tap Apps > Settings > Sound & notification. Enable or Disable Call Vibrations 2.
- Page 84 To set priority interruptions: 1. From the Home screen, tap Apps > Settings > Sound & notification > 1. From the Home screen, tap Apps > When device is locked. Settings > Sound & notification > 2. Select Show all notification content, Interruptions.
-
Page 85: Storage Settings
– or – Storage Settings From the Home screen, tap Apps > View Memory Information Usage Manager. ► From the Home screen, tap Apps > 2. On this screen, you can: Settings > Storage. See the current battery level, ... -
Page 86: Apps Settings
Battery saving: Uses only Wi-Fi Camera (PTP): Connects the phone as a camera and transfers pictures and cellular networks to using a camera software, and also determine your location. Device only: Uses only the GPS transfers any files on the computer that do not support MTP. - Page 87 horizontal, or diagonal direction. Lift Make Pattern Visible your finger from the screen when 1. From the Home screen, tap Apps > finished. The phone records the pattern. Settings > Lock screen. 3. Tap CONTINUE. 2. Tap the ON/OFF switch next to Make 4.
-
Page 88: Security Settings
Set up SIM card lock: Set up a PIN Smart Lock to lock your phone's SIM card (may 1. From the Home screen, tap Apps > not be available on your device). Settings > Lock screen > Smart Lock. ... -
Page 89: Accounts Settings
Screen Pinning Language & Input Settings 1. From the Home screen, tap Apps > Language Settings > Security > Screen pinning. 1. From the Home screen, tap Apps > 2. Set the switch to on. Settings > Language & input > 3. - Page 90 Keyboard and Input Method Swype Keyboard Settings Settings 1. Touch and hold on the Swype keyboard. Current Keyboard – or – 1. From the Home screen, tap Apps > From the Home screen, tap Apps > Settings > Language & input > Current Keyboard.
- Page 91 Next Word Prediction: Check to Google” on the Google search screen. predict words based on the previously entered text. Hands-free: Allow Bluetooth and Show Voice Key: Check to wired headset requests when the display the voice key on the phone is locked.
-
Page 92: Onehand Operation Settings
Preferred engine: Select your Back up my data: When enabled, your can back up your app data, Wi- preferred engine. Tap Fi passwords, and other settings to configure its settings. Google servers. Speech rate: Choose a comfortable ... -
Page 93: System Settings
If set to ON, you cannot set the time Factory Data Reset zone values manually. 1. From the Home screen, tap Apps > 6. Tap Select time zone and then select a Settings > Backup & reset. time zone from the onscreen list. Scroll 2. - Page 94 1. From the Home screen, tap Apps > Speak Passwords Settings > Accessibility > Switch 1. From the Home screen, tap Apps > Access. Settings > Accessibility. 2. Tap the ON/OFF switch to turn Switch 2. Tap the ON/OFF switch next to Speak Access on.
- Page 95 2. Tap the Color inversion switch to turn 2. Tap the ON/OFF switch next to Mono on or off. audio to turn it on or off. Color Correction Sound Balance 1. From the Home screen, tap Apps > 1. From the Home screen, tap Apps >...
-
Page 96: Printing
Phone Options Shortcut 1. From the Home screen, tap Apps > Settings > Accessibility > Phone options shortcut. 2. Select the Screenshot and/or Accessibility check box. Printing 1. From the Home screen, tap Apps > Settings > Printing. 2. Select an available print service and follow the online instructions. -
Page 97: 11 Notes
● All features, functionality and other specifications, as well as the information contained in this guide are based upon the latest available information and are believed to be accurate at the time of issuing. Kyocera Communications, Inc. reserves the right to change or modify any information or specifications without notice or obligation. -
Page 98: Copyright & Trademarks
The Bluetooth word mark and logos are registered trademarks owned by Bluetooth SIG, Inc. and any use of such marks by Kyocera Corporation is under license. Other trademarks and trade names are those of their respective owners. Swype and the Swype logos are registered trademarks or trademarks of Nuance Communications, Inc. -
Page 99: Index
Index Accessibility Calculator, 69 Display, 94 Calendar, 66 Hearing, 95 Edit events, 67 Mobility, 95 Erase events, 67 Switch access, 93 Event alerts, 66 TalkBack, 93 View events, 67 Vision, 94 Call Settings Accounts settings, 89 Auto answer, 33 Add Accounts Call Forwarding, 32 Exchange, 43 Call timer and call duration, 33... - Page 100 Delete single or multiple contacts, 38 Delete an account, 43 Display, 35 Google Account, 41 Edit a contact, 37 Read and reply to a message, 42 ICE (In case of emergency), 39 Send a message, 42 Save a phone number, 36 Google Account Share a contact, 40 Create, 41...
- Page 101 Insert, 11, 74 Security, 88 Remove, 74 Start screen, 86 Unmount, 75 Phone Use as a media device, 75 Overview, 6 Mobile Hotspot, 57 Turn off, 12 Connect, 58 Turn on, 12 Set up, 57 Phone Call Settings, 57 Emergency call, 26 Music, 51, 52 From Contacts, 26 Back up, 53...
- Page 102 Security Settings, 88 USB port, 7 Settings, 78 USB tethering, 57 Share Pictures and Videos, 64 SIM Card Replace, 10 Videos Sound Recorder, 69 Share, 64 Sound Settings, 82 Voice Search, 70 Speaker, 7 Voice Services, 70 Start Screen, 86 Voicemail, 29 Status Bar, 20 Notification, 29...