Table of Contents
Advertisement
Quick Links
Advertisement
Table of Contents

Related Manuals for Kyocera DuraForce XD


Summary of Contents for Kyocera DuraForce XD
- Page 1 KYOCERA DuraForce XD User Guide...
-
Page 2: Table Of Contents
Table of Contents 1 Phone Basics ......... 6 Call from Contacts ......26 Phone Overview ........6 Call an Emergency Number ....26 Key Functions ........7 Enhanced 9-1-1 (E911) Information ..27 Get the Phone Ready ......8 Call a Number with Pauses ....27 Insert the Battery ........ - Page 3 Call Timer and Call Duration ....33 Save and Resume a Draft Message ... 49 Recent Calls .......... 33 New Messages Notification ....49 View Recent Calls ......33 Text (SMS) and Multimedia (MMS) Recent Calls Options ......33 Settings..........50 Filter Recent Calls ......
- Page 4 Connect to or Disconnect from a Synchronize Calendars with Your VPN............ 60 Phone ..........77 Web Browser ........60 Clock ............78 Launch Web Browsers ....... 60 Desk Clock .......... 78 Learn to Navigate Web Browser ..60 Alarm ........... 79 Browser Menu ........
- Page 5 Solunar Tables ........87 Onehand Operation settings ..... 104 Motions of the Sun and Moon ..... 87 Backup & Reset Settings ....104 Tide ............. 88 System Settings ........105 Date & Time Settings ......105 Compass and Clinometer ....88 Accessibility Settings ......
-
Page 6: Phone Basics
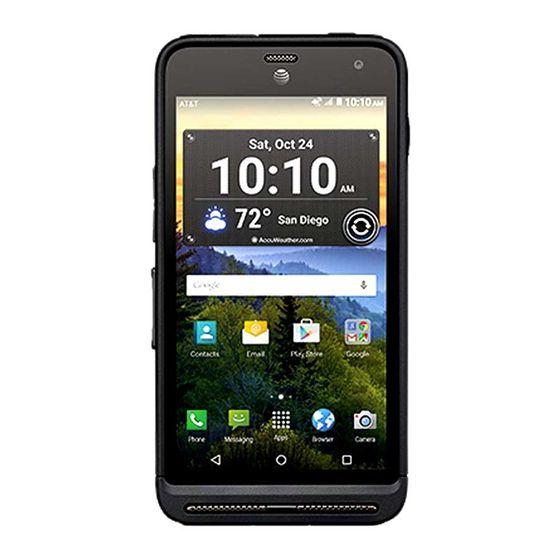
Phone Basics Phone Overview Note: Screen images simulated. Actual displays may vary. User Manual... -
Page 7: Key Functions
● Headset Jack allows you to plug in an Key Functions optional headset for convenient, hands- CAUTION! Inserting an accessory into free conversations. the incorrect jack may damage the ● Secondary Microphone suppresses phone. background noise improving audio ● LED Indicator displays a phone quality for the other party during voice notification, charging status, or alert. -
Page 8: Get The Phone Ready
● Power/Lock Key lets you turn the Get the Phone Ready phone on/off, turn the screen on/off, switch your phone to silent mode, You must first install and charge the battery vibration mode, or airplane mode, or to begin setting up your phone. capture screen shots. -
Page 9: Charge The Battery
3. Insert the battery, contacts end first ( Warning: Press all around the edges of the battery door ensuring it is properly and gently press the battery into place sealed to maintain the phone's waterproof capability. 6. Using a coin, rotate the battery door screw clockwise until it is tight. -
Page 10: Replace The Sim Card
4. When charging is complete, remove the 3. Slide the flap of the SIM card holder in cable from the port and close the cover. the direction of the arrow to unlock it Press around the edges of the cover to ), lift the flap ( ) and remove the ensure that it is securely closed. -
Page 11: Optional: Insert The Microsd Card
5. Slide the flap in the direction of the 3. Insert the microSD card into the arrow to lock it ( microSD card holder with the gold contacts facing down. Gently push the 6. Place the battery back into its card in until it snaps into place. -
Page 12: Turn The Phone On And Off
certain period of time when you leave it idle. Turn the Phone On and You will still be able to receive messages and calls while the phone’s screen is off. For information on how to adjust the time before the screen turns off, see “Sleep” on Turn the Phone On page 92. -
Page 13: Touchscreen Navigation
Drag Touchscreen Navigation Touch and hold your finger before you start Your phone’s touchscreen lets you control to move it. Do not release your finger until you have reached the target position. actions through a variety of tap gestures. Tap the screen with your finger to select or launch a menu, option, or application. - Page 14 Rotate Flick For most screens, you can automatically Flicking the screen is similar to swiping, change the screen orientation from portrait except that you need to swipe your finger in to landscape by turning the phone light, quick strokes. sideways. When entering text, you can turn the phone sideways to bring up a bigger keyboard.
-
Page 15: Function Buttons
Function Buttons At the bottom of the touchscreen, you will find a row of three buttons that let you perform specific functions. ● Back ( ) - Tap to return to the previous screen, or close a dialog box, options menu, the Notifications panel, or onscreen keyboard. -
Page 16: Home Screen
● Shortcut: Allows you to quickly launch Home Screen applications. The Home screen is the starting point ● Apps: Displays all of your apps. for your phone’s applications, functions, ● Favorites Tray: Contains up to five and menus. You can customize your icons and appears on every home Home screen by adding application screen. - Page 17 -or- Add Widgets to the Home Screen Touch and hold the background of any 1. Touch and hold the background of any Home screen. From the thumbnail view, Home screen. tap the thumbnail with a plus sign (+) on 2. Tap WIDGETS and choose a widget.
-
Page 18: Clock & Weather
To add more apps to the folders: Clock & Weather 1. Tap a folder icon and tap in the top- Your Clock & Weather widget can display right corner. multiple time and weather information. To 2. Slide the screen to browse through the use the clock feature, tap the time display available apps and place checkmarks on the widget to access the Clock app. -
Page 19: Dura Grid
widget and then sliding the screen to Dura Grid the left. The Dura Grid widget provides one-touch Delete a Location access to frequently used apps or settings. 1. Tap the weather image on the widget The high contrast, large icons allow easy and then tap >... -
Page 20: Status Bar
Status Bar Notification Icons Icon Description The status bar at the top of the screen provides phone and service status Missed call information on the right side and notification New Gmail alerts on the left. Note: All icons are simulated. Actual New message images may vary. -
Page 21: Notifications Panel
● To open the main Settings app, tap the Notifications Panel settings icon . For details, see Open the Notifications panel to view the “Settings” on page 89. Quick Settings panel and a list of your To close the Notifications panel: current notifications. - Page 22 Interruptions to access the Interruptions settings. Usage Mgr to open the Usage Manager screen. ● To change the positions of items, tap EDIT. Touch and hold the item you want to move, and then drag it to a different location and release your finger.
-
Page 23: Text Entry
Text Entry using your voice (see “Google Voice Typing” Touchscreen Keyboard on page 24 for details). The touchscreen keyboard lets you enter Google Keyboard text directly onscreen. Your phone provides Google Keyboard lets you use a traditional convenient ways to enter letters, numbers, QWERTY setup to enter text. -
Page 24: Google Voice Typing
3. Confirm the text you want to enter is Text Mode displayed. Tap again to continue ► Tap to select ABC mode. Tap entering. to select Number & Symbol mode. Tip: For more information about the In ABC mode, tap to alter the settings of Google voice typing, see capitalization. -
Page 25: Tips For Editing Text
holding to make all letters in a word uppercase. In Number & Symbol mode, tap to display more symbols. Some keys have alternate characters. In either mode, if a key displays an extra character at the upper right corner, touch and hold the key to enter the character. -
Page 26: Phone Calls
Phone Calls 2. Tap the RECENT CALLS tab to display Make Phone Calls the recent calls list. 3. Tap the Phone icon next to the Call Using the Phone Dialpad name or number you want to place a 1. From the Home screen, tap Apps >... -
Page 27: Enhanced 9-1-1 (E911) Information
Enhanced 9-1-1 (E911) Information 2. For speed dial numbers 2-9, touch and hold the number on the dialpad. This phone features an embedded Global – or – Positioning System (GPS) chip necessary for utilizing E911 emergency location For speed dial numbers 10-99, tap the services where available. -
Page 28: Call Using Internet Call
phone automatically prepends the Make an Internet Call access code for international dialing, 1. From the Home screen, tap Apps > followed by the country code and phone Phone > Contacts. number. 2. Tap a contact and tap Call Using Internet Call When a Wi-Fi network is available, you can Internet Call Settings make and receive calls through an Internet... -
Page 29: Send An Incoming Call To Voicemail
password, anyone who has access to Send an Incoming Call to your phone is able to access your Voicemail voicemail messages. ► On the Incoming call screen, swipe Voicemail Notification to send the call to your voicemail inbox. There are several ways your phone alerts you to a new voicemail message. -
Page 30: Phone Call Options
3. Select the Call waiting check box. Use Another Phone to Access Messages To respond to an incoming call while you 1. Dial your wireless phone number. are on a call: 2. When your voicemail answers, press the asterisk key (*) on the phone. ►... -
Page 31: Call Settings
Service to select the voicemail Call Settings service provider. Setup to configure the voicemail Phone Ringtone number if necessary. 1. From the Home screen, tap Apps > Sound to select the sound to ring for Phone. a new voicemail message. ... -
Page 32: Fixed Dialing Numbers (Fdn)
3. Select Network default, Hide number, Fixed Dialing Numbers (FDN) or Show number. 1. From the Home screen, tap Apps > Phone. Call Barring 1. From the Home screen, tap Apps > 2. Tap > Call settings > Fixed Dialing Phone. -
Page 33: Auto Answer
landline communications. Wireless TTY Recent Calls calls to 911 may be corrupted when received by public safety answering View Recent Calls points (PSAPs), rendering some communications unintelligible. The 1. From the Home screen, tap Apps > problem encountered appears related to Phone. -
Page 34: Delete Recent Calls
2. Tap the RECENT CALLS tab to display the recent calls list. 3. Tap > Filter by. 4. Select All calls, Missed calls, Outgoing calls, or Incoming calls. Delete Recent Calls 1. From the Home screen, tap Apps > Phone. 2. -
Page 35: Contacts
Contacts Import/export: Imports/exports your Display Contacts contacts from/to the microSD card, SIM card and phone or shares your ► From the Home screen, tap Apps > visible contacts. Contacts. You will see the Contacts list. Settings: Opens the display settings screen. -
Page 36: Add A Contact
Incoming settings 2. Tap > Settings. ADD ANOTHER FIELD: Tap to 3. Set the following options: include additional information such Position of index tab to choose as Phonetic name, Organization, where to place the index tab. IM, Notes, Nickname, Website, SIP, ... -
Page 37: Edit A Contact
Assign a Ringtone to a Contact Edit a Contact 1. From the Home screen, tap Apps > Add or Change Information for a Contact Contacts > CONTACTS tab. 1. From the Home screen, tap Apps > 2. Tap a contact to display it, and tap Contacts >... -
Page 38: Add A Group Contact
2. Tap and select the check box next 3. Tap > Join. to the contact(s) that you want to add to 4. Choose the contact you wish to join with your Favorites list. the primary listing. 3. Tap DONE. Add a Group Contact Add a Contact Widget to the Home Screen 1. -
Page 39: Ice (In Case Of Emergency)
Assign a Ringtone to a Group Contact 1. From the Home screen, tap Apps > Contacts > CONTACTS tab and then 1. From the Home screen, tap Apps > tap ICE- In Case of Emergency. Contacts > GROUPS tab. 2. Tap 2. -
Page 40: Share A Contact
Share a Contact 1. From the Home screen, tap Apps > Contacts > CONTACTS tab. 2. Tap an entry, and tap > Share. 3. In the Share contact via menu, select a method. User Manual... -
Page 41: Accounts And Messaging
Accounts and Messaging Sign In to Your Google Account Gmail 1. From the Home screen, tap Apps > Create a Google Account Settings > Accounts > Add account. If you do not already have a Google 2. Tap Google. Account, you can create one online or 3. -
Page 42: Send A Gmail Message
Send a Gmail Message 4. After composing your message, tap 1. From the Home screen, tap Apps > Gmail Account Settings Gmail. 1. From the Home screen, tap Apps > Gmail . 2. In any folder, tap 3. Enter the message recipient’s email 2. -
Page 43: Delete A Gmail Account
Confirm before deleting: Check to Email display a confirmation before deleting a message. Use the Mail application to send and receive email from your webmail or other Confirm before archiving: Check to accounts using POP3 or IMAP, or access display a confirmation before your Exchange ActiveSync account for your archiving a message... -
Page 44: Add A Corporate Account
Password: typically your network Add a Corporate Account access password (case-sensitive). If you synchronize your phone with your Server: your Exchange server corporate account, you can read, manage, remote email address. Typically it is and send email in the same easy way as in the form of mail.XXX.com. -
Page 45: Send An Email Message
Others: Select other files. Send an Email Message 5. Tap to send the message. 1. From the Home screen, tap Apps > Email > View and Reply to Email Tip: Tap the account name at the top of 1. From the Home screen, tap Apps >... -
Page 46: General Email Settings
View type of the mail list: Choose If Inbox is not displayed, tap how your mail list is displayed. select Inbox. Sender image: Check to display an – or – image of the sender in conversation Swipe right or tap at the top left list. -
Page 47: Email Account Settings
your phone to check your new Email Account Settings emails during peak time. 1. From the Home screen, tap Apps > Frequency during off Peak- Email > > Settings. Time: Select the time interval used by your phone to check your 2. -
Page 48: Text Messaging And Mms
Email notifications: Check to Text Messaging and display the email notification icon on the status bar when a new mail is received. Choose ringtone: Select a ringtone Compose Text Messages for new email messages. 1. From the Home screen, tap Apps >... -
Page 49: Save And Resume A Draft Message
recipients, separate the phone numbers Tip: To remove an attachment, tap or email addresses with a comma. beside its information. Tip: You can type a name or email 6. When done, tap address saved in your Contacts to bring up the contact information, or tap Save and Resume a Draft add recipients. -
Page 50: Text (Sms) And Multimedia (Mms) Settings
Notifications panel. Tap the new Delete a Single Message message to open and read it. 1. While viewing a message thread, touch and hold the message that you want to Reply to a Message delete. 1. From the Home screen, tap Apps >... - Page 51 Storage automatically download to your phone. If you clear this check box, Delete old messages: Automatically only the multimedia message header delete older messages when the set will be retrieved and shown in your limits are reached. Messaging screen. ...
-
Page 52: Social Networking Accounts
left or right to rewind or fast-forward the Social Networking video. Accounts Search for Videos Google+ 1. On the YouTube screen, tap at the With Google+ you can check your friends’ upper right of the screen to open the updates, post updates of your own, and search box. -
Page 53: Apps And Entertainment
Apps and Entertainment Warning: Read the notification Google Play Store App carefully! Be especially cautious with apps that have access to many Google Play™ is your digital content functions or a significant amount of your destination to discover Android apps, books, data. -
Page 54: Navigation
3. Tap the app you want to uninstall and 2. Type the place that you want to search then tap UNINSTALL. for. You can enter an address, a city, or type of establishment. 4. When prompted, tap OK to uninstall the app from your phone. -
Page 55: Music
Note: Tap Tips and Tricks, Settings, Music Help, or Send feedback for additional options. Music Player Get Directions Your phone’s built-in music player app lets you listen to and organize music files you 1. On the Google Maps screen, tap have loaded into your phone’s memory or 2. -
Page 56: Google Play Music
Listen to Music Using the Music Player Open the Music Library ► From the Home screen, tap Apps 1. On the Music Player app, browse for the > item you want to play. Play Music. The music library screen appears. 2. -
Page 57: Work
2. Swipe right or tap at the top left of Work the screen and then tap Listen Now. Android for Work 3. You may do any of the following: Your phone supports Android for Work. Tap Shuffle all to play the music on Android for Work enables you to separate your phone in shuffle mode. -
Page 58: Web And Data
Web and Data 2. Tap the wireless network that the phone Wi-Fi is currently connected to. You will see a message box showing the Wi-Fi Turn Wi-Fi On and Connect to a network name, status, signal strength, Wireless Network speed, and other details. Note: If you want to remove the 1. -
Page 59: Data Services
Install Security Certificates Data Services 1. Download and install the certificates Data Connection Status and needed to access your local network Indicators into a microSD card. Your network administrator can tell you how to do this. Your phone displays the current status of 2. -
Page 60: Connect To Or Disconnect From A Vpn
Connect to or Disconnect from Learn to Navigate Web Browser a VPN. Scrolling ► In a single motion, tap and drag across Connect to a VPN or up and down a page. 1. From the Home screen, tap Apps > Selecting Settings >... -
Page 61: Browser Menu
As you enter the address, possible Stop to stop loading the current Web matches are displayed in an page. onscreen list. Tap an entry to launch Refresh to reload the current Web the desired website. page. Tip: You can also enter a search term ... -
Page 62: Select Text On A Web Page
General Select Text on a Web Page Set homepage: Sets the home You can highlight text on a Web page and page for the Web browser. copy it, search for it, or share it. Storage: Sets where to store 1. -
Page 63: Manage Bookmarks
Reset to default: Resets the Accessibility browser settings to default. Text scaling: Changes the text Bandwidth management size to the size you see on the Search result preloading: Allows preview screen. Minimum font size: Sets the browser to preload high minimum font size on the Web as confidence search results in the... - Page 64 HISTORY: Displays a record of your 4. Edit the necessary information and tap browsing history. These records are OK. The star now turns into organized into folders such as: Set a Bookmarked or Browsed Page as Today, Yesterday, Last 7 days, and Homepage Most visited.
-
Page 65: Usb Tethering And Mobile Hotspot
The first time you turn it on, you will USB Tethering and be prompted to set up Mobile Hotspot. Mobile Hotspot 3. Follow the onscreen instructions. USB Tethering Mobile Hotspot Settings Turn USB Tethering On To set up Mobile Hotspot: 1. - Page 66 To limit maximum connections: 1. From the Home screen, tap Apps > Settings > More > Tethering & Mobile Hotspot > Mobile Hotspot settings > Maximum connections. 2. Select the number of devices you will allow to connect. Connect to Mobile Hotspot 1.
-
Page 67: Camera And Video
Camera and Video ● Thumbnail: Displays the thumbnail of Take Pictures the latest image. ● Shutter Button: Takes a picture. Open the Camera App ► From the Home screen, tap Apps ● > Record Button: Records a video. Camera. Take a Picture or Record a Close the Camera App Video ►... -
Page 68: Review Screen
Set as to set the currently displayed Review Screen image as a contact photo or After taking a picture or video, tap the wallpaper. thumbnail image to see the item in the Captions to add captions to your review screen. - Page 69 1200), 0.8M (1024 x 768), or VGA Back Camera: Select from FullHD (640 x 480). (1920×1080), HD720p (1280x720), DVD (720x480), VGA (640x480), Flash to choose a flash setting (back QVGA (320x240), or QCIF camera only). Select from Auto, ON, (176x144).
-
Page 70: Choose A Shooting/Recording
ISO speed to set the ISO level (back Choose a Shooting/Recording camera only). Select from Auto, 100, Mode 200, 400, or 800. 1. From the Home screen, tap Apps > Contrast allows you to use the slider Camera. bar to set the contrast (back camera only). -
Page 71: View Pictures And Videos Using Gallery
Panorama to take a panoramic organized by months. You may picture as you pan the phone for additional actions. sideways (back camera only). Albums to view pictures and videos in an album. View Pictures and Favorites to view pictures and videos you have marked as a Videos Using Gallery favorite. -
Page 72: Share Pictures And Videos
Share to display the sharing FRAME: Displays options to add options. a frame. Delete to delete the displayed TRIM: Displays options to crop, image. Tap OK to confirm the rotate, or mirror image. deletion PAINT: Displays options for ... - Page 73 Send Picture or Videos by Messaging Share Pictures and Videos on Google+ Note: You need to be signed in to a 1. From the Home screen, tap Apps > Google Account to share pictures and Gallery. videos on Google+. 2. Tap the folder that contains the pictures 1.
-
Page 74: Tools And Calendar
Tools and Calendar 6. Specify the date and time of the event: Calendar If there is a time frame for the event, Use Calendar to create and manage events, tap the FROM and TO dates and meetings, and appointments. Your calendar times to set them. -
Page 75: Add A Task
1. Open Calendar and create a new event. Add a Task Tap the Calendar field and then select Note: The task feature is available for your account. See “Add an Event to the Exchange ActiveSync accounts only. Calendar” on page 74. 1. - Page 76 ● By playing the assigned ringtone or Tap the event name to access the edit screen of the event. See “Edit vibration type. Calendar Events” on page 77. ● By showing the event icon on the To set reminder settings: status bar.
-
Page 77: Edit Calendar Events
Tap an event to view its details. Tap to assign a color to the Tap event. , or slide right or left across the screen, to view earlier or Tap to share the event. later weeks. ... -
Page 78: Clock
Synchronize a Google Calendar Tip: When enabled, you can easily turn off night mode by touching the screen. 1. From the Home screen, tap Apps > Settings > Accounts > Google. Change Clock Settings 2. Tap the account you want to sync with. 1. -
Page 79: Alarm
2. Tap START to start the stopwatch. Alarm 3. Do any of the following: Set an Alarm Tap STOP to stop timing. 1. From the Home screen, tap Apps > Tap LAP to record the time. Clock > ALARM tab. ... -
Page 80: World Clock
World Clock Sound Recorder 1. From the Home screen, tap Apps > Record a Sound File Clock > WORLD CLOCK tab. 1. From the Home screen, tap Apps > 2. Tap to display the world clock list. Sound Recorder. 3. Tap the check box next to the city you 2. -
Page 81: Voice Services
Default language status to view the Voice Data List Options status of language support for voice 1. From the Home screen, tap Apps > recognition. Sound Recorder. Voice Search 2. Tap to list the recorded sound files. 1. Tap on the Google Search Widget. -
Page 82: Bluetooth
Disconnect a Bluetooth Device Bluetooth 1. From the Home screen, tap Apps > Turn Bluetooth On or Off Settings > Bluetooth. 1. From the Home screen, tap Apps > 2. On the Paired devices list, tap next Settings > Bluetooth. to the device you want to disconnect. -
Page 83: Receive Information From Another Device
the items you want to share and then 7. When your phone receives a file transfer request notification, slide down > Bluetooth. the Notifications panel and tap ACCEPT. Contacts: Display a contact and tap 8. When a file is transferred, a notification >... -
Page 84: Near Field Communication (Nfc) Technology
To turn Android Beam on or off: Near Field 1. From the Home screen, tap Apps > Communication (NFC) Settings > More. 2. Tap the ON/OFF switch next to NFC to Technology turn it on. If a security reminder appears, NFC (Near Field Communication) read it and tap OK. -
Page 85: Microsd Card
microSD Card A microSD™ card is an optional accessory that allows you to store images, videos, music, documents, and voice data on your phone. Your phone supports a microSD card up to 64GB. Note: The microSD card is sold separately. 4. -
Page 86: View The Microsd Card Memory
Use the Phone’s microSD Card 7. Place the battery back into its compartment and lock it in place by as a Media Device sliding the locking bar. 1. Connect the phone to your computer 8. Replace the battery door. using the supplied USB cable. Warning: Press all around the edges of 2. -
Page 87: Outdoor Report
When the current location Outdoor Report changes: Update the weather information when your current The Outdoor Report offers useful apps location changes. Data usage may which provide important and interesting increase when this is on. information for your outdoor activities. It also has shortcut buttons to access handy Solunar Tables tools, such as compass, barometer or... -
Page 88: Tide
3. Tap the SUN or MOON button to switch 2. Tap the COMPASS or CLINOMETER the display. button to switch the display. 4. The following information is available: 3. To use the Compass, you need to calibrate it, repeating the following step ... -
Page 89: 10 Settings
10 Settings Saved networks to display your Access to Phone’s saved wireless networks. Settings Menu Refresh to reload the list of networks. Wi-Fi Direct to use a peer-to-peer ► From the Home screen, tap Apps > Wi-Fi connection. Settings. -
Page 90: Airplane Mode
the usage in excess of your data limit Airplane Mode plan can result in charges. Data usage 1. From the Home screen, tap Apps > limit set in this menu is not guaranteed Settings > More. to prevent additional charges. 2. -
Page 91: Vpn Settings
settings, see “USB Tethering and Mobile 2. Tap and enter the necessary Hotspot” on page 65. information. VPN Settings 3. Tap > Save. A virtual private network (VPN) is a network To restore the default settings: that uses a public telecommunication 1. -
Page 92: Device Settings
Presidential: Receives an Speak alert message: Select the emergency presidential alert. check box to use the text-to-speech (Presidential is always displayed.) feature on your phone to read the emergency alert out when it is Imminent Threat - Extreme: Select received. - Page 93 Daydream Font Size To select what is displayed: 1. From the Home screen, tap Apps > Settings > Display > Font size. 1. From the Home screen, tap Apps > Settings > Display > Daydream. 2. Make your desired selection. 2.
-
Page 94: Sound & Notification Settings
Sound & Notification Settings Vibrate Intensity 1. From the Home screen, tap Apps > Sound Settings Settings > Sound & notification > 1. From the Home screen, tap Apps > Vibrate intensity. Settings > Sound & notification. 2. Select Weak, Medium or Strong. 2. - Page 95 Vibrate: Select the check box to Don't interrupt (None): Allows you vibrate when notification is on the to prevent any sort of interruptions. notification bar. When selected, the no interruptions icon appears on the status bar. Blink LED: Select check box to blink the LED indicator when notification is To set app notifications: on the notification bar.
-
Page 96: Programmable Key
End time: Adjust the time you want Storage Settings downtime to end. View Memory Information Interruptions allowed: Select the ► From the Home screen, tap Apps type of interruptions allowed. Select > from Priority only or None. Settings > Storage. Notification Access ... -
Page 97: Usage Manager
Unmount USB storage: Prepare Battery Settings an installed USB storage for safe 1. From the Home screen, tap Apps > removal. Settings > Battery. Erase USB storage: 2. For additional details and settings Permanently remove all content options, tap a usage category. from an installed USB storage. -
Page 98: Personal Settings
Password: Enter four to seventeen Personal Settings letters, digits, or symbols to unlock. Location Settings Use Swipe 1. From the Home screen, tap Apps > 1. From the Home screen, tap Apps > Settings > Location. Settings > Lock screen > Security 2. - Page 99 2. Tap the ON/OFF switch next to Power Use PIN button instantly locks to turn it on or 1. From the Home screen, tap Apps > off. Settings > Lock screen > Security type > PIN. Owner Info 2. Enter your PIN and tap CONTINUE. 1.
-
Page 100: Security Settings
Trusted voice: Allows you to have Trusted credentials: Allows you to your phone unlock when you do a see the trusted credentials on your phone’s system. search with "Ok Google." On-body detection: Allows you to Install from SD card: Allows you to keep your phone unlocked while it's install encrypted certificates from the on you. -
Page 101: Accounts Settings
the same time. The screen will be 4. Tap to configure the settings. unpinned. Personal Dictionary Accounts Settings 1. From the Home screen, tap Apps > Settings > Language & input > Set up a New Account Personal dictionary. 1. From the Home screen, tap Apps >... - Page 102 Pop-up on keypress: Check to Languages: Allows you to select the input language. The dictionary for the display a larger image of the key selected language will be enabled. above it when you tap it. Long-press delay: Tap to set the ...
- Page 103 Languages: Tap to select the Note: The settings available may vary language to use on Swype. depending on your phone and version of Android. Gestures: Tap to learn some useful shortcuts on the Swype keyboard. Voice Input Help: Tap to see some helpful 1.
-
Page 104: Onehand Operation Settings
Pointer Speed Network Settings Reset 1. From the Home screen, tap Apps > 1. From the Home screen, tap Apps > Settings > Language & input > Settings > Backup & reset. Pointer speed. 2. Tap Network settings reset. 2. Use the slider to set the speed and tap 3. -
Page 105: System Settings
Accessibility Settings System Settings Services Date & Time Settings TalkBack Your phone obtains date and time information from the network. These values TalkBack provides spoken feedback to help also can be manually set. visually impaired users. 1. From the Home screen, tap Apps >... - Page 106 Vision Persistent Alerts 1. From the Home screen, tap Apps > Magnification Gestures Settings > Accessibility > Persistent 1. From the Home screen, tap Apps > alerts. Settings > Accessibility > 2. The following options are available: Magnification gestures. Audible tone: Select the check box 2.
- Page 107 3. To change the color correction mode, 3. Tap OK. select Correction mode, then make Mobility your desired selection. Touch & Hold Delay Hearing 1. From the Home screen, tap Apps > Captions Settings > Accessibility > Touch & 1. From the Home screen, tap Apps >...
-
Page 108: Printing
Printing 1. From the Home screen, tap Apps > Settings > Printing. 2. Select an available print service and follow the online instructions. 3. Tap the ON/OFF switch to turn the service on or off. The service must be ON to configure settings or print. ... -
Page 109: 11 Notes
● All features, functionality and other specifications, as well as the information contained in this guide are based upon the latest available information and are believed to be accurate at the time of issuing. Kyocera Communications, Inc. reserves the right to change or modify any information or specifications without notice or obligation. -
Page 110: Copyright & Trademarks
The Bluetooth word mark and logos are registered trademarks owned by Bluetooth SIG, Inc. and any use of such marks by Kyocera Corporation is under license. Other trademarks and trade names are those of their respective owners. Swype and the Swype logos are registered trademarks or trademarks of Nuance Communications, Inc. -
Page 111: Index
Index Settings menu, 82 Turn on or off, 82 About Phone, 108 Browser, 60 Accessibility Display, 106 Hearing, 107 Calculator, 80 Mobility, 107 Calendar, 74 Switch access, 105 Add Event, 74 TalkBack, 105 Add Task, 75 Vision, 106 Edit Events, 77 Accounts Erase events, 78 Settings, 101... - Page 112 Record a video, 67 Settings, 92 Review screen, 68 Dura Grid, 19 Take a picture, 67 Camera and Video Settings, 68 Eco Mode, 81 Cellular Network, 91 Email, 43 Charger/USB Port, 7 Account Settings, 47 Clinometer, 88 General Settings, 46 Clock, 18, 78 Reply, 45 Change settings, 78...
- Page 113 Settings, 101 Connect, 66 Google Maps, 54 Set up, 65 Google Play Settings, 65 Play Store, 53 Music, 55, 56 Google Play Music, 56 Back up, 57 Google Voice Typing, 24 Google Play Music, 56 Google+, 52 Manage the library, 56 Music Player, 55 Open the library, 56 Headset Jack, 7...
- Page 114 Overview, 6 Settings, 89 Turn off, 12 Share Pictures and Videos, 72 Turn on, 12 SIM Card Phone Call Replace, 10 Emergency call, 26 Sound From Contacts, 26 Settings, 94 From Recent Calls, 26 Touch Dialpad, 31 Make calls, 26 Sound Recorder, 80 Plus code dialing, 27 Speaker, 7...
- Page 115 Weather, 18 Web, 58 Usage Manager, 97 Web Browser USB port, 7 Bookmarks, 63 USB tethering, 65 Chrome, 60 Launch, 60 Menu, 61 Vibration Navigation, 60 Assign, 37, 39, 94 Select Text, 62 Videos Settings, 62 Share, 72 Wi-Fi, 58 Voice Search, 81 Connect to a different network, 58 Voice Services, 81...