Kyocera DuraForce PRO User Manual
Rugged, waterproof phone
Hide thumbs
Also See for DuraForce PRO:
- User manual (178 pages) ,
- User manual (180 pages) ,
- User manual (244 pages)
Table of Contents
Advertisement
Quick Links
Advertisement
Table of Contents

Related Manuals for Kyocera DuraForce PRO


Summary of Contents for Kyocera DuraForce PRO
- Page 1 KYOCERA DuraForce PRO User Manual...
-
Page 2: Table Of Contents
Table of Contents Get Started ..........................1 Your Phone at a Glance ...................... 1 Set Up Your Phone ......................3 Charge the Battery ....................... 3 Insert the SIM Card ...................... 4 Charge the Battery Wirelessly ..................5 Turn Your Phone On and Off ....................6 Turn Your Screen On and Off .................. - Page 3 Make Phone Calls ......................26 Call Using the Phone Dialpad ..................26 Call from Recents .......................27 Call from Contacts ......................27 Call Using a Speed Dial Number ................27 Call Emergency Numbers ...................27 Call Numbers with Pauses ..................28 Call Using the Plus (+) Code ..................28 Call Using Wi-Fi Calling ....................29 Receive Phone Calls ......................30 Voicemail ...........................30...
- Page 4 Voicemail Settings ......................39 Fixed Dialing Numbers ....................39 TTY Mode ........................40 Hearing Aids .......................41 Call Timer ........................41 Contacts............................42 Contacts List ........................42 Add a Contact ........................43 Save a Phone Number .......................44 Edit a Contact ........................45 Add a Group Contact ......................48 Edit a Group Contact ......................48 ICE (In Case of Emergency) ....................50 Synchronize Contacts ......................51 Share a Contact .........................51...
- Page 5 Social Networking Accounts ....................59 YouTube ........................59 Hangouts ........................59 Apps and Entertainment ......................60 Google Play Store App ......................60 Find and Install an App ....................60 Google Play Store Options ..................61 Request a Refund for a Paid App ................61 Open an Installed App ....................62 Uninstall an App ......................62 Google Maps ........................63 Music ..........................65...
- Page 6 Mobile HotSpot ........................75 Tethering ...........................77 USB Tethering ......................77 Bluetooth Tethering ....................77 Camera and Camcorder ......................79 Use the Camera App ......................79 Open or Close the Camera App ..................79 Viewfinder Screen.......................79 Take a Picture or Record a Video ................80 Review Screen ......................81 Underwater Mode .......................82 Camera and Camcorder Settings ..................82 View Pictures and Videos Using Photos ................83...
- Page 7 Alarm ..........................91 Timer ..........................93 Stopwatch ........................93 Calculator ..........................94 Flashlight ...........................94 Sound Recorder .........................94 Voice Services ........................96 Text-to-Speech ......................96 Voice Search ......................96 Eco Mode ..........................97 Bluetooth ...........................97 Turn Bluetooth On or Off.....................98 The Bluetooth Settings Menu ..................98 Change the Phone Name ...................98 Connect a Bluetooth Headset or Car Kit ..............99 Reconnect a Headset or Car Kit .................99 Disconnect or Unpair from a Bluetooth Device ............
- Page 8 Bluetooth Settings ......................109 Data Usage Settings ......................109 More Settings........................110 Airplane Mode ......................110 NFC Settings ......................111 Android Beam ......................111 Tethering & Mobile HotSpot Settings ................ 111 VPN Settings ......................111 Cellular Networks Settings ..................111 Wireless Emergency Alerts ..................
- Page 9 Cast .......................... 119 Pulse Notification Light ..................... 119 Persistent Alerts ....................... 119 When Device is Locked .................... 119 App Notifications ....................... 119 Notification Access ....................120 Do Not Disturb Access ....................120 Programmable Key ......................120 Apps ..........................120 Storage Settings ......................121 Your Phone’s Memory ....................
- Page 10 Printing ..........................141 About Phone ........................141 Cleaning and Drying Procedures .................... 142 Precautions ........................142 Cleaning the Phone ......................143 Cleaning Your Phone ....................143 Alternate Cleaning Procedure ................... 147 Drying Your Phone ......................148 Kyocera Tested Products ....................150...
- Page 11 Mild Dish Detergents ....................150 Alcohol ........................150 Sanitizer Wipes ......................150 Notes ............................151 Copyright & Trademarks ......................152...
-
Page 12: Get Started
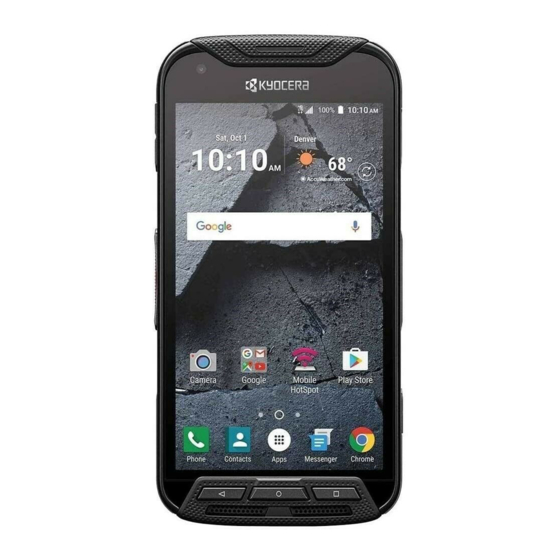
Get Started The following topics give you all the information you need to set up your phone and the service the first time. Your Phone at a Glance The following illustration outlines your phone’s primary external features and keys. Get Started... - Page 13 Key Functions ● Proximity/Light sensor detects how close an object is to the surface of the screen. This is typically used to detect when your face is pressed up against the screen, such as during a phone call. ● Touchscreen displays all the information needed to operate your phone. Use finger gestures to navigate and interact with items on the screen.
-
Page 14: Set Up Your Phone
● Volume key allows you to adjust the ringtone or media volume when you are not on a call, or adjust the voice volume during a call. ● Power key lets you turn the phone on or off or turn the screen on or off, restart the phone, switch your phone to Airplane mode, or capture screenshots. -
Page 15: Insert The Sim Card
When charging is complete, remove the cable from the port and close the cover. Press around the edges of the cover to ensure that it is securely closed. Warning: Be sure all ports and covers are properly sealed to maintain the phone’s waterproof capability. -
Page 16: Charge The Battery Wirelessly
Securely close the SIM/microSD slot cover. Warning: Be sure the SIM/microSD slot cover is properly sealed to maintain the phone’s waterproof capability. Replace the back cover. Press around the edges to ensure a proper fit. Warning: Be sure all ports and covers are properly sealed to maintain the phone’s waterproof capability. -
Page 17: Turn Your Phone On And Off
Before starting wireless charging, please note the following: ● If the charging areas are not touching, the charging results will be poor. ● Make sure there is nothing between your phone and wireless charger. ● Your phone may become hot while charging the battery. ●... -
Page 18: Turn Your Screen On And Off
Hard Reset ► Press and hold the Power key for about ten seconds. The phone shuts down and automatically starts up. Turn Your Screen On and Off Your phone allows you to quickly turn the screen off when not in use and to turn it back on when you need it. -
Page 19: Setup Wizard
to access the Home screen or the screen displayed before the phone was turned off. to launch the Camera app. to launch the voice search function. Setup Wizard Your phone has a Setup Wizard to set up your phone quickly and easily. When you turn on your phone for the first time, the Setup Wizard starts automatically. -
Page 20: Phone Basics
Phone Basics Your phone is packed with features that simplify your life and expand your ability to stay connected to the people and information that are important to you. The following topics will introduce the basic functions and features of your phone. Touchscreen Navigation Your phone’s touchscreen lets you control actions through a variety of tap gestures. - Page 21 Swipe or Slide Flick Pinch and Spread To swipe or slide means to Flicking the screen is similar Pinch the screen using your quickly drag your finger to swiping, except that you thumb and forefinger to zoom vertically or horizontally need to swipe your finger in out, or spread the screen to across the screen.
-
Page 22: Function Keys
Function Keys Just below the touchscreen, you will find a row of three buttons that let you perform specific functions. ● Back key ( ) - Press to return to the previous screen, or close a dialog box, options menu, the Notifications panel, or onscreen keyboard. ●... -
Page 23: Home Screen Overview
Home Screen Overview The following illustration describes the basics of the Home screen. Status Bar: Displays the time, notification icons, and phone status icons. Slide down to ● display the Notifications panel. See Status Bar. ● Widget: Allows users to access various useful programs. ●... -
Page 24: Extended Home Screens
Extended Home Screens The Home screen extends beyond the initial screen. In addition to the main Home screen, your phone can have up to ten extended Home screens to provide more space for adding icons and widgets. ► On the Home screen, swipe across the screen to move from the main Home screen to an extended Home screen. - Page 25 When you find the position to place the item, release your finger. Tip: You can also select a Home screen thumbnail where you want to place the item and then simply tap the item. Move or Remove Items on the Home Screen ►...
-
Page 26: Weather
Change the Wallpaper Touch and hold any empty area on the Home screen and then tap WALLPAPERS. – or – From the Home screen, tap Apps > Settings > Display > Wallpaper. Tap Pick image to use your own image, or browse through the preset choices. Tap SET WALLPAPER. -
Page 27: Dura Grid
Temperature scale: Select Fahrenheit or Celsius. Refresh time: Select the frequency of auto update. When launching: Update the weather information when the application is opened. When the current location changes: Update the weather information when your current location changes. -
Page 28: Status Bar
Access the Launcher Screens From the Home screen, tap Apps Following options are available: > All (Customize) to customize the order of apps. See Rearrange Your Apps on the Launcher Screens below. > All (Alphabetical) to reset the order of apps in alphabetical order. ... - Page 29 Icon Status 4G (data service) 3G (data service) 2G (data service) GPRS; General Packet Radio Service (data service) Airplane mode GPS active Alarm set Battery (full charge) Battery (charging) Battery (discharged) Notification Icons Icon Status Missed call New Gmail New message Event Music application is running in the background Alarm...
-
Page 30: Notifications Panel
Notifications Panel You can open the Notifications panel to view the list of notifications you received, Wi-Fi connection status, and more. To open the Notifications panel: ► Slide the status bar down to the bottom of the touchscreen. ● When you are finished with a notification, swipe it away to the left or right. ●... -
Page 31: Enter Text
Note: You can only add up to 8 entries in Quick Settings panel. Slide the status bar down to the bottom of the touchscreen. Tap on a quick setting panel icon to enable or disable the feature: Wi-Fi to enable or disable the Wi-Fi function. ... -
Page 32: Key Description
Google Keyboard Overview Note: Key appearance may vary depending on the selected application or text field. Some of the keys on the Google Keyboard are given below: Description Shift: Tap to toggle between lower case and upper case. Caps lock: Double-tap the lower case or upper case shift key. Text mode: Tap to toggle between the Alphabet keyboard and Number &... - Page 33 Description Alternate: Tap to toggle between the default Number & Symbol keyboard and additional Number & Symbol keyboard. Go: Tap to go to a Web address. Space: Tap to insert a space. Touch and hold to select the input method. Text Mode ABC mode is primarily used for entering letters while Number &...
-
Page 34: Gesture Typing
Type the word you want to add. Type the shortcut to bring up the typed word if you want, and tap Press Back . A list of words you have added to the dictionary is displayed. Tap a word to edit it. ... -
Page 35: Copy And Paste Text
From the Home screen, tap Apps > Settings > Language & input. Tap Current Keyboard > CHOOSE KEYBOARDS. Tap Google voice typing to on. To enter text by speaking: Tap the microphone icon on the keyboard. If you see Speak now, say the text you wish to enter into the microphone. If you see Tap to pause, Google Voice Typing recognizes your voice. - Page 36 Open the application into which you want to paste the text. Touch and hold the text box where you want to paste the text, tap PASTE, and select the text you want to paste from the Paste list. If you want to add the selected text to the current text, place a cursor to the position ...
-
Page 37: Phone Calls
Phone Calls With the network and your phone’s calling features, you can enjoy clear phone calls across the country. Make Phone Calls There are several convenient ways to place calls from your phone. Call Using the Phone Dialpad The most “traditional” way to place a call is by using the phone dialpad. From the Home screen, tap Phone >... -
Page 38: Call From Recents
Call from Recents The Recent calls list lets you quickly place calls to recent incoming, outgoing, or missed numbers. From the Home screen, tap Phone > RECENTS to display the recent calls list. Tap the phone icon next to the number or contact to place a call. For additional options, tap the name or number. -
Page 39: Call Numbers With Pauses
Tap EMERGENCY CALL on the screen. Enter 911 and tap Enhanced 911 (E911) Information This phone features an embedded Global Positioning System (GPS) chip necessary for utilizing E911 emergency location services where available. When you place an emergency 911 call, the GPS feature of your phone seeks information to calculate your approximate location. -
Page 40: Call Using Wi-Fi Calling
Enter the country code and phone number, and then tap . The phone automatically prepends the access code for international dialing, followed by the country code and phone number. Call Using Wi-Fi Calling Wi-Fi Calling allows you to make and receive phone calls and messages over a Wi-Fi connection. -
Page 41: Receive Phone Calls
> Call settings > Wi-Fi Calling > Help. Tap Tutorial or Top Questions. Receive Phone Calls The following information lets you know how to answer incoming calls, mute the ringtone on incoming calls, reject incoming calls, and more. When you receive a phone call from a contact, the Incoming call screen appears and displays the caller ID icon, name, and phone number of the calling party. -
Page 42: Voicemail Notification
Voicemail Notification There are several different ways your phone may alert you to a new Voicemail message. ● By sounding the assigned notification sound. ● By vibrating the phone if you have selected this option. ● By displaying within the Notifications area of the Status bar when new voicemail messages are received. -
Page 43: Caller Id
For example: When you call your bank’s toll-free number, use your dialpad to enter your account number and PIN. ● Mute: Mute or unmute the microphone during an active call. Speaker: Turn the speaker on or off. ● ● Audio: Route the phone’s audio through a connected Bluetooth headset, through the earpiece, or through the speaker. -
Page 44: Call Waiting
Call Waiting When you’re on a call, Call Waiting alerts you to incoming calls by sounding beeps. Your phone screen informs you that another call is coming in and displays the caller’s phone number (if available). To enable Call waiting: From the Home screen, tap Phone >... -
Page 45: Call Forwarding
Note: If one of the parties you called hangs up during your call, you and the remaining party stay connected. If you initiated the call and are the first to hang up, all callers are disconnected. Call Forwarding Call Forwarding lets you forward all your incoming calls to another phone number – even when your phone is turned off. -
Page 46: Set Up Speed Dialing
Set Up Speed Dialing You can store up to 98 numbers in your phone’s speed dial memory. To assign a speed dial number to a contact: From the Home screen, tap Phone > DIALPAD > > Speed dial setup. Tap Add speed dial next to the location number you want to assign a number to. Select a contact. -
Page 47: Call Settings
Recent Calls Options From the Home screen, tap Phone > RECENTS. Tap an entry to view the contact. to call the number. to make a video call. to send a text message. to add the number to Contacts. ... -
Page 48: Quick Responses
From the Home screen, tap Phone > > Call settings > Call rejection. Tap Call rejection to turn on. Tap Rejection list and specify the numbers you want to reject. Following options are available: Tap Unknown number to turn on. ... -
Page 49: Auto Answer
To edit a message, tap a message, edit it, and tap OK. To add a new message, tap , enter text, and tap OK. To delete a message, tap > Delete, select the check box next to the message(s) ... -
Page 50: Phone Ringtone
Select Start regulation or Stop regulation. To check the current status, select Confirm the settings. Enter your password, if prompted, and tap OK. Phone Ringtone Assign a ringtone to your incoming calls. From the Home screen, tap Phone > > Call settings > Phone ringtone. Select the file and tap OK to assign the ringtone. -
Page 51: Tty Mode
From the Home screen, tap Phone > > Call settings > Fixed Dialing Numbers. Tap Enable FDN. Enter your PIN2 and tap OK. To change a PIN for FDN access: From the Home screen, tap Phone > > Call settings > Fixed Dialing Numbers. Tap Change PIN2. -
Page 52: Hearing Aids
Tap TTY Off to turn TTY mode off. Note: When enabled, TTY mode may impair the audio quality of non-TTY devices connected to the headset jack. Warning: 911 Emergency Calling It is recommended that TTY users make emergency calls by other means, including Telecommunications Relay Services (TRS), analog cellular, and landline communications. -
Page 53: Contacts
Contacts The Contacts application lets you store and manage contacts from a variety of sources, including contacts you enter and save directly in your phone as well as contacts synchronized with your Google Account, your PC, and compatible email programs. Contacts List Scroll through the list to view all your contacts. -
Page 54: Add A Contact
Settings: Opens the display settings screen. You can select how your contacts are displayed. See Display Options below. Clear frequents: Clears the frequently contacted list under the FAVORITES tab. Change order: Allows you to change the order of the listed contacts under the ... -
Page 55: Save A Phone Number
Phone: Stores your contact to your phone. SIM: Stores your contact to the SIM card. Select an account (for example, Google) from the displayed list. ADD NEW ACCOUNT: Adds a new account. Use the keyboard to enter as much information as you want. Tap the location/account above name and select an option to change where to save ... -
Page 56: Edit A Contact
Edit a Contact Once you’ve added a contact, you can add or edit any of the information in the entry, assign a caller ID picture, customize with a unique ringtone, and more. Add or Edit Information for a Contact Follow the instructions to add or edit information for an existing contact. From the Home screen, tap Apps >... - Page 57 Tap CHANGE to the right of the contact icon. Tap Take photo. to take a picture. You may be prompted to size the picture for use with contacts. Drag the square to frame the portion of the picture to use. Tap and drag the side of the square to resize the square and complete the action.
- Page 58 . The icon changes to when the contact is added to Favorites. – or – From the Home screen, tap Apps > Contacts > FAVORITES. and select the check box next to the contact(s) that you want to add to your Favorites list.
-
Page 59: Add A Group Contact
Separate Contacts You can separate merged contacts into multiple contacts. From the Home screen, tap Apps > Contacts > CONTACTS. Select a merged contact. > Separate > OK. Copy/Move Contact You can copy or move contact entries between the phone and SIM card. From the Home screen, tap Apps >... - Page 60 Tap the group’s name to rename it. Tap Add/remove contacts to add or remove entries. Tap DONE. Tap SAVE. Assign a Ringtone to a Group Contact You can assign a specific ringtone to a group. From the Home screen, tap Apps >...
-
Page 61: Ice (In Case Of Emergency)
ICE (In Case of Emergency) Registering ICE information might help rescue workers, such as paramedics, police and hospital personnel identify your primary contact. You can register up to three contacts. ICE contact To add an ICE contact: From the Home screen, tap Apps >... -
Page 62: Synchronize Contacts
Synchronize Contacts Syncing data from your managed accounts lets you add and manage new or existing contacts from your online or remote accounts to your phone. Prior to syncing, you must have an active Google or corporate account with associated contacts, and be signed into your account with the phone. -
Page 63: Accounts And Messaging
Accounts and Messaging With the service and your phone’s messaging capabilities, you have the opportunity to share information through many different channels and accounts, including Gmail (Google), personal and corporate email, text and multimedia messaging, and social networking accounts. Gmail / Google You will need a Google Account to access several phone features such as Gmail, YouTube, and the Google Play Store applications. -
Page 64: Sign In To Your Google Account
encounter problems or forget your password. It is strongly encouraged for Android users so you can regain access to Google Mobile™ services and purchases on your phone. Follow the onscreen prompts to create your free account. Sign In to Your Google Account If you have a Google Account but have not yet signed in with your phone, follow these instructions. -
Page 65: Read And Reply To Gmail Messages
If you want to send a carbon copy (CC) or a blind carbon copy (BCC) of the email to other recipients, tap on the right side of the To field. Enter the subject and then compose your message. Note: If you want to add a file as attachment, tap , select Attach file or Insert from Drive and then locate and choose the file you want to attach. -
Page 66: Delete A Gmail Account
Reply all: Check to display the Reply all option as default. Auto-fit messages: Check to shrink the messages to fit the screen and allow zooming. Auto-advance: Choose which screen to show after you delete a message. Confirm before deleting: Check to display a confirmation before deleting a ... -
Page 67: Text Messaging And Mms
Tap Exchange. Enter your Exchange email address and password and tap NEXT. Enter the Exchange account details and tap NEXT. Note: You may need to contact your Exchange Server administrator for required sign-in information. Configure the account options as necessary and tap NEXT. Follow the onscreen prompts to complete. -
Page 68: Save And Resume A Draft Message
and select from the following file attachments: = Take a picture to attach or record a video to attach. = Select a stored picture to attach. = Select a pictogram to attach. = Record an audio file to attach. ... -
Page 69: Text And Mms Settings
Tap the text box at the bottom of the screen, enter your reply message, attach files if desired and then tap Delete a Message Thread From the Home screen, tap Apps > Messenger. On the Messenger screen, touch and hold the message thread that you want to delete. Tap another thread to select multiple threads. -
Page 70: Social Networking Accounts
Social Networking Accounts Stay in touch while on the go with all your social networking accounts. YouTube YouTube™ is a video sharing website on which users can upload and share videos. The site is used to display a wide variety of user-generated video content, including movie clips, TV clips, and music videos, as well as video content such as video blogging, informational shorts and other original videos. -
Page 71: Apps And Entertainment
Apps and Entertainment All your phone’s features are accessible through the Apps list. Google Play Store App Google Play™ is your digital content destination to discover Android apps, books, movies, music and much more. Choose from a wide variety of free and paid content ranging from productivity apps and games to bestselling books and blockbuster movies and music. -
Page 72: Google Play Store Options
Google Play Store Options Some convenient options are available with the Google Play Store app. Available options may vary. ► In the Google Play Store app, tap on the top left of the screen to display the following options: Tip: You can also touch and hold the left end of the screen and slide it to the right to display the options. -
Page 73: Open An Installed App
Tap the app to uninstall for a refund. The details screen for the app opens. Tap Refund. Your app is uninstalled and the charge is cancelled. Open an Installed App There are options for opening an installed app. ► On the status bar, check if you see the icon. -
Page 74: Google Maps
When prompted, tap OK to remove the app on your phone. Google Maps Use the Google Maps app to determine your location, find directions, browse local businesses and attractions, rate and review places, and more. Enable Location Services on Your Phone Before using any location-based services, you must enable your phone’s GPS location feature. - Page 75 Search Maps On the Google Maps screen, tap inside the Search bar at the top of the screen. Type the place that you want to search. You can enter an address, a city, or type of establishment. Tip: to enter the location by speaking. Tap a matching result on the drop-down list, or tap on the keyboard.
-
Page 76: Music
Tap Choose destination and type your destination or select a destination from the list. to switch the starting point and the destination. Select the method to get to the destination (by car, by public transit, or by foot). You may tap or OPTIONS to configure available settings options. -
Page 77: Back Up Your Downloaded Music Files
The Listen Now Screen Learn the basics to use the Play Music application. ► Tap Shuffle all to play the music on your phone in shuffle mode. ► Tap an album image and then tap a song in the album to play it. ►... -
Page 78: Web And Data
Web and Data Your phone’s data capabilities let you wirelessly access the Internet or your corporate network through a variety of connections, including Wi-Fi, 4G LTE, 4G, 3G, 2G, GPRS, and Virtual Private Networks (VPN). The following topics address your phone’s data connections and the built-in Web browser. Additional data-related features can be found in Accounts and Messaging,... -
Page 79: Check The Wireless Network Status
Note: Wi-Fi networks are self-discoverable, which means no additional steps are required for your phone to connect to a Wi-Fi network. It may be necessary to provide a user name and password for certain closed wireless networks. Check the Wireless Network Status Check the status of your current wireless network, including speed and signal strength, through the Wi-Fi settings menu. -
Page 80: Data Services
▪ Keep Wi-Fi on during sleep to stay connected to Wi-Fi when the screen goes to sleep to manage mobile data usage. ▪ Install certificates to install the certificates for communicating via Wi-Fi. Wi-Fi Direct to use a peer-to-peer Wi-Fi connection. The Wi-Fi client and the ▪... -
Page 81: Virtual Private Networks (Vpn)
Icon Description Your phone is connected to the GPRS (General Packet Radio Service) network. When the arrows are animated, your phone is transferring data (for example, when you are opening a Web page); when the arrows are gray, your phone is connected to the network but is not currently transferring data (for example, when you are viewing a Web page that is completely open). -
Page 82: Connect To Or Disconnect From A Vpn
If you are asked to set up a screen lock, tap OK and set up a required type of lock. To set up a screen lock, see Lock Screen Settings. and enter the information for the VPN you want to add. Information may include Name, Type, Server address, PPP encryption (MPPE), and ... -
Page 83: Launch Chrome
Launch Chrome Launching Chrome is as easy as tapping an icon. ► From the Home screen, tap Apps > Chrome. Learn to Navigate Chrome Navigating through menus and websites during a data session is easy once you have learned a few basics. -
Page 84: Chrome Menu
► Press Back on your phone. Repeat this process to keep going back through your Web page history of recently visited pages. Go to a Specific Website Tap the search/address field at the top of the browser window and enter a new Web address. -
Page 85: Select Text On A Web Page
● Share…: Allows you to share the current Web page via Bluetooth, Gmail, Message+, etc. ● Print…: Displays the printing options. Find in page: Searches the current Web page for a word. ● ● Add to Home screen: Creates a shortcut icon of the current page on the Home screen. ●... -
Page 86: Manage Bookmarks
Manage Bookmarks Make browsing easier by setting up and using custom bookmarks. View Bookmarks ► From the Home screen, tap Apps > Chrome > > Bookmarks. Create Bookmarks From the Home screen, tap Apps > Chrome. Open the Web page you want to bookmark. >... - Page 87 in the Security field and verify the security level is set to WPA2 PSK. Edit the Password field and then enter a new password. Select the Broadcast network name (SSID) check box if you would like to broadcast your SSID name to nearby devices. Tap SAVE.
-
Page 88: Tethering
Note: The more complex the password, the harder it will be for intruders to break your security. It is recommended that you not use names, birthdays, or other personal information. Connect to Mobile HotSpot Enable Wi-Fi (wireless) functionality on your target device (laptop, media device, etc.). Scan for Wi-Fi networks from the device and select your phone’s hotspot from the network list. - Page 89 Pair your phone with a Bluetooth device. If they are already paired, establish their connection. See Connect a Bluetooth Headset or Car Kit Reconnect a Headset or Car for details. Web and Data...
-
Page 90: Camera And Camcorder
Camera and Camcorder You can use the camera or camcorder to take and share pictures and videos. Your phone comes with an 13.0 megapixel back camera with an autofocus feature and 5.0 megapixel front camera that let you take sharp pictures and videos and also has the Super Wide-View FHD Action Camera that allows you to take wide angle shots. -
Page 91: Take A Picture Or Record A Video
● Thumbnail: Displays the thumbnail of the latest image. Tap to view and manage. ● Shutter Button: Takes a picture. Record Button: Records a video. ● ● MENU Button: Opens the camera and camcorder settings menu. For more information, Camera and Camcorder Settings. -
Page 92: Review Screen
to record a video. Tap to pause or resume recording. To stop recording, tap Choose what you want to do with the image you’ve just taken or recorded. See Review Screen below. Review Screen After taking a picture or video, tap the thumbnail image to see the item in the review screen. From there, you can instantly edit your photos, replay videos, or share your photos or videos (see View Pictures and Videos Using Photos... -
Page 93: Underwater Mode
Underwater Mode You can take a picture or record video also in the water. Your phone is immersible in water for up to 30 minutes at a depth not exceeding two meters (about 6.56 ft.). Warning: Avoid using phone in saltwater. It is highly corrosive and can damage internal components and degrade the audio performance over time. -
Page 94: View Pictures And Videos Using Photos
Slow motion: Records a video or view in slow motion. Time lapse: Selects the time lapse recording setting from 1s, 2s, 3s, 5s, or 10s. Night view: Takes a picture or records a video with the night effect. ... -
Page 95: Open Or Close Photos
Open or Close Photos Open the Photos App ► From the Home screen, tap Apps > Photos. To view pictures and videos organized by category (Photos, Albums, etc.) or other applications, and select an item. When viewing pictures in Photos, scroll left or right to view more albums. Simply tap an album to view the pictures or videos in that album. -
Page 96: Zoom In Or Out On A Picture
For playing the video, tap . Tapping the other areas of the screen will display the control options. Tap to pause the video, or drag the dot on the timeline to rewind or forward the video. Zoom In or Out on a Picture There are two ways you can zoom in or out on a picture. -
Page 97: Share Pictures And Videos
Tap a thumbnail for the labeled effect. Auto: Optimizes the picture quality automatically. Light: Displays the brightness slider. Color: Displays the slider to adjust the saturation. Pop: Displays the level correction slider. Vignette: Displays the slider to adjust the vignette. ... -
Page 98: Send Pictures Or Videos By Messenger
> Gmail. Compose your message and send a message. Note: If you have multiple accounts, the default account will be used. For more information about sending Gmail, see Send a Gmail Message. Send Pictures or Videos by Messenger You can send pictures and videos using the Messenger app. Although you can send several pictures or videos, it may be better to just send one at a time, especially if the files are large in size. -
Page 99: Tools And Calendar
Tools and Calendar Learn how to use many of your phone’s productivity-enhancing features. Calendar Use Calendar to create and manage events, meetings, and appointments. Your Calendar helps organize your time and reminds you of important events. Note: If you have not added an account to sync with on your phone, you need to set one up. From the Home screen, tap Apps >... -
Page 100: Calendar Event Alerts
Enter email addresses to invite guests to your event. If you have already signed in to a Google account, select a color for the event. Tap Add note to add event descriptions. Tap SAVE. Calendar Event Alerts When your phone is turned on and you have an event alarm scheduled, your phone alerts you and displays the event summary. -
Page 101: Edit Calendar Events
● Schedule: Schedule view show a list of all your schedule in chronological order. ● Day: Day view displays a list of the events of one day. 3 Day: 3 Day view displays a list of the events of three days. ●... -
Page 102: Clock
Clock The Clock application functions as a world clock that shows the date and time. You can also use it to turn your phone into an alarm clock, a countdown timer, or a stopwatch. World Clock You can add the time from around the globe on the World Clock screen. From the Home screen, tap Apps >... - Page 103 to add a new alarm. Set the hours and minutes you want and tap OK. You will see the ON icon displayed next to the time you have set. Select the Repeat check box and choose the days of the week you want the alarm to repeat.
-
Page 104: Timer
Default alarm sound: Select the default alarm sounds. Start week on: Select the day that the week starts on the alarm. Timer You can use your phone as a countdown timer. From the Home screen, tap Apps > Clock. Tap the TIMER tab to display the Timer screen, if necessary. -
Page 105: Calculator
to resume timing. SHARE to share the recorded time via Messenger, Bluetooth, etc. RESET to reset the stopwatch. Calculator Your phone has a convenient calculator that lets you perform basic mathematical equations. From the Home screen, tap Apps >... - Page 106 to configure the following options: File format: Select Normal or High quality. Storage: Select Phone or SD card. to start recording. to pause recording. Tap to resume recording. to stop recording. Play Audio Data On the screen where you finished recording, tap –...
-
Page 107: Voice Services
• Details to display the information about the audio file. Voice Services Your phone’s voice services let you place calls using your voice, convert text into speech, and more. Text-to-Speech Your phone can convert text into speech in certain downloaded applications. You may select the language you hear or adjust its speed. -
Page 108: Eco Mode
Eco Mode The Eco Mode allows you to save battery life while using your phone. From the Home screen, tap Apps > Eco Mode. Tap an option to enable or disable the Eco Mode: ON: Enables the Eco Mode. The Eco Mode On icon appears on the status bar ... -
Page 109: Turn Bluetooth On Or Off
handhelds, computers, printers, and wireless phones. The Bluetooth communication range is usually approximately 30 feet. Turn Bluetooth On or Off Use the settings menu to enable or disable your phone’s Bluetooth capabilities. From the Home screen, tap Apps > Settings > Bluetooth. Tap the OFF icon next to Bluetooth to turn Bluetooth on. -
Page 110: Connect A Bluetooth Headset Or Car Kit
Connect a Bluetooth Headset or Car Kit You can listen to music over a Bluetooth stereo headset, or have hands-free conversations using a compatible Bluetooth headset or car kit. It’s the same procedure to set up stereo audio and hands-free devices. To listen to music with your headset or car kit, the headset or car kit must support the A2DP Bluetooth profile. -
Page 111: Disconnect Or Unpair From A Bluetooth Device
sometimes you will need to reconnect manually, for example if you have been using your headset with another Bluetooth device. From the Home screen, tap Apps > Settings > Bluetooth. If Bluetooth is not switched on, tap the OFF icon to turn Bluetooth on. Make sure that the headset is discoverable. - Page 112 Send Information from Your Phone to Another Device You can send the following types of information, depending on the device you are sending to: ● Images and videos ● Contacts Set the receiving device to discoverable mode. You may also need to set it to “Receive Beams”...
-
Page 113: Supported Bluetooth Profiles
If prompted, enter the same passcode on both your phone and the other device, or confirm the auto-generated passcode. A Bluetooth authorization request is displayed on your phone. Tap OK. When your phone receives a file transfer request notification, slide down the Notifications panel, tap the notification, and then tap ACCEPT. -
Page 114: Near Field Communication (Nfc) Technology
Near Field Communication (NFC) Technology NFC (Near Field Communication) technology is a short-range, wireless technology that lets you quickly and wirelessly exchange information between your phone and other NFC-enabled smartphones, smart accessories, and NFC-enabled access points. You can also use NFC technology to save, view, create, or change smart tags. -
Page 115: Microsd Card
microSD Card A microSD™ card is an optional accessory that allows you to store images, videos, music, documents, and voice data on your phone. Your phone supports a microSD card up to 256 GB. Insert or Remove a microSD Card Inserting a compatible microSD card into your phone will increase the storage capacity. - Page 116 Securely close the SIM/microSD slot cover. Warning: Be sure the SIM/microSD slot cover is properly sealed to maintain the phone’s waterproof capability. Replace the back cover. Press around the edges to ensure a proper fit. To remove a microSD card: If your phone is on, turn it off.
-
Page 117: View The Microsd Card Memory
Replace the back cover. Press around the edges to ensure a proper fit. Note: You can easily damage the microSD card by improper operation. Please be careful when inserting, removing, or handling the microSD card. Note: Make sure your battery is fully charged before using the microSD card. Your data may become damaged or unusable if the battery runs out while using the microSD card. -
Page 118: File Commander
Tap the USB connection notification > File transfers. On your computer, the connected phone is recognized as a portable media device. Navigate to the device and select SD card. Note: Once you format your SD card as internal storage, SD card may not be displayed. Manage the data as you wish, unmount the phone as required by your computer’s operating system to safely remove your phone, and disconnect the phone from the computer. -
Page 119: Outdoor Report
Image Video Audio • BMP • H.263 • AAC • MP3 • WBMP • H.264 • AAC+ • Volbis • GIF • H.265 • eAAC+ • PCM (WAVE) • JPEG • MPEG-4 • AMR-WB • Opus • PNG • VP8 •... -
Page 120: Settings
Settings The following topics provide an overview of items you can change using your phone’s Settings menus. Wi-Fi Settings The Wi-Fi settings menu lets you turn Wi-Fi on or off, set up and connect to available Wi-Fi networks, and configure advanced Wi-Fi options. For more information about the Wi-Fi settings, see Wi-Fi. -
Page 121: More Settings
Drag the red tab vertically to set the limit you want. – or – Tap the red line, select the limit by scrolling the value and then tap SET. When your data usage reaches the limit, mobile data will be turned off automatically. ... -
Page 122: Nfc Settings
To quickly turn Airplane Mode on or off: ► Press and hold the Power key, and then tap Airplane mode. While in Airplane Mode, the status bar will display To turn Airplane Mode on or off in Settings: From the Home screen, tap Apps >... - Page 123 From the Home screen, tap Apps > Settings > More > Cellular networks > Preferred network type. Select an option: LTE/WCDMA/GSM (Auto mode): The phone will connect to LTE, WCDMA or GSM. The phone will scan for the appropriate network and will automatically connect to it when it is available.
-
Page 124: Wireless Emergency Alerts
> Reset to default. Network Operators You may select a network operator. From the Home screen, tap Apps > Settings > More > Cellular networks > Network operators. Select an option: SEARCH NETWORKS: Searches available networks. Select the network you want ... -
Page 125: Wi-Fi Calling Settings
Notifications: Receives notifications when you receive an emergency alert. Sound: Plays a sound when you receive an emergency alert. Vibrate: Vibrates your phone when you receive an emergency alert. Alert reminder: Sets how often your phone alerts you: Choose from Once, Every 2 ... -
Page 126: Adaptive Brightness
Adaptive brightness Adjust your screen’s brightness to suit your surroundings. From the Home screen, tap Apps > Settings > Display. Tap the ON/OFF switch next to Adaptive brightness to turn it on or off. Wallpaper Select and assign your phone’s background wallpaper. See Change the Wallpaper. -
Page 127: Key Backlight
phone sideways. By default, the screen orientation automatically changes when the phone is rotated. To deactivate the Auto-rotate screen feature: From the Home screen, tap Apps > Settings > Display. Tap When device is rotated > Stay in portrait view. Key Backlight Select the delay time before the key backlight automatically turns off. -
Page 128: Sound & Notification Settings
Sound & notification Settings The Sound & notification settings menu lets you control your phone’s audio, from ringtones and alerts to tap tones and notifications. Volume Configure your phone’s volume settings. From the Home screen, tap Apps > Settings > Sound & notification. Use the sliders to set the volume level for Media volume, Alarm volume, Ring volume, or Notification volume. -
Page 129: Vibration Pattern
From the Home screen, tap Apps > Settings > Sound & notification > Phone ringtone. Tap a ringtone from the available list. The ringtone briefly plays when selected. – or – and select a sound data. Tap OK to assign the ringtone. Vibration Pattern Select a vibration pattern. -
Page 130: Cast
From the Home screen, tap Apps > Settings > Sound & notification > Other sounds. Make your desired selection. Cast You can connect your phone to devices that support Miracast to share the displayed images via Wi-Fi connection. See Cast for details. -
Page 131: Notification Access
From the Home screen, tap Apps > Settings > Sound & notification > App notifications. Tap apps you want to modify the notification settings. Notification Access You can control which apps have access to read your notifications. From the Home screen, tap Apps >... -
Page 132: Storage Settings
From the Home screen, tap Apps > Settings > Apps. for the following options: All apps to display all applications on your phone. Downloaded to display the downloaded applications. Enabled to display enabled applications on your phone. Disabled to display the disabled applications. -
Page 133: Battery Settings
Unmount the USB Storage Unmount the USB storage so that you can safely remove it. From the Home screen, tap Apps > Settings > Storage. next to USB storage. Erase the Data on the USB Storage Warning: You cannot retrieve the data once deleted. From the Home screen, tap Apps >... -
Page 134: Memory
Memory You can quickly see which apps are using memory on your phone. ► From the Home screen, tap Apps > Settings > Memory. You can see the current memory status. to change a time period. Tap Memory used by apps to display which apps are running and using memory. ... -
Page 135: Security Type
Security Type You can increase the security of your phone by creating a screen lock. In order from no security to most secure, the available options are: None (No security): Turn off the screen lock. ● ● Swipe (No security): Tap and swipe up. ●... - Page 136 To unlock the screen with Pattern: ► Draw the pattern on the locked screen. Note: Tap Make pattern visible to OFF if you do not want the unlock pattern to display on the screen when you draw it. Use PIN From the Home screen, tap Apps >...
-
Page 137: Fingerprint
Read the confirmation message and then tap YES, REMOVE. Fingerprint Enabling this option requires you to touch the fingerprint sensor to unlock the screen. Note: Please remove the USB cable prior to registering your fingerprint for authentication. Note: If you fail fingerprint authentication five times, input your backup PIN, pattern, or password. -
Page 138: Power Key Instantly Locks
From the Home screen, tap Apps > Settings > Lock screen > Automatically lock. Select a time to elapse before the screen locks. Power Key Instantly Locks Activate the screen lock feature by pressing the Power key. This setting is available only when you have enabled one of the lock settings. -
Page 139: Show Instructions
From the Home screen, tap Apps > Settings > Lock screen > Lock screen wallpaper. Select from Same as Home screen or Use another image and select from Pick image or others. Show Instructions You can display unlock instructions on the locked screen. From the Home screen, tap Apps >... -
Page 140: Make Passwords Visible
Tap Lock SIM card to turn on. Enter your SIM PIN and tap OK. To change the SIM PIN: From the Home screen, tap Apps > Settings > Security > Set up SIM card lock > Change SIM PIN. Enter your current SIM PIN and tap OK. Enter a new SIM PIN, tap OK, re-enter the new SIM PIN, and tap OK. -
Page 141: Advanced
► From the Home screen, tap Apps > Settings > Security. You will see the type under Storage type. Trusted Credentials You can see the trusted credentials on your phone’s system. From the Home screen, tap Apps > Settings > Security > Trusted credentials. Tap an item to read the information. -
Page 142: Accounts Settings
Press Recent on your phone. Swipe up to reveal the pin icon on the upper right corner of your selected screen. Tap the pin icon . Tap GOT IT. To exit from the pinned screen, press and hold Back and Recent at the same time. -
Page 143: Language & Input Settings
> Remove account > REMOVE ACCOUNT to delete the account from your phone. Language & Input Settings Your phone’s language and input settings let you select a language for the phone’s menus and keyboards, select and configure keyboard settings, configure speech input settings, and more. For details, see Enter Text. - Page 144 Note: The settings available may vary depending on the version of the app installed on your phone. Languages Tap to select the input language. The dictionary for the selected language will be enabled. Preferences One-handed mode: Select the keyboard layout mode from Off, Right-handed ...
-
Page 145: Google Voice Typing Settings
Personalized suggestions: Tap to learn from Google apps and services and your typed data to improve suggestions. Auto-correction: Tap to allow the space bar and punctuation to automatically correct mistyped words. Auto capitalization: Tap to capitalize the first word of each sentence on the texts ... -
Page 146: Text-To-Speech Settings
"Ok Google" detection: Launches Google voice search by saying "Ok Google" on the Google search screen. Hands-free: Allow Bluetooth and wired headset requests when the phone is locked. Speech output: Choose options for speech output. Offline speech recognition: Allows you to download the speech recognition data ... -
Page 147: Network Settings Reset
From the Home screen, tap Apps > Settings > Backup & reset. Select your backup and restore options. Back up my data: When enabled, you can back up your app data, Wi-Fi passwords, and other settings to Google servers. Backup account: Allows you to set a Google Account for your phone backup. -
Page 148: Accessibility Settings
Tap Automatic date & time to turn off if necessary. If set to ON, you cannot set the date or time values manually. Tap Automatic time zone to turn off if necessary. If set to ON, you cannot set the time zone values manually. ... -
Page 149: Vision
Tap SETTINGS to configure its settings. Vision Magnification Gestures You can zoom in and out by triple-tapping the screen. From the Home screen, tap Apps > Settings > Accessibility > Magnification gestures. Read the information and tap the OFF icon to enable the feature. Font Size Select the font size on the screen. -
Page 150: Display
Display Color Inversion Set the display color inversion on or off. From the Home screen, tap Apps > Settings > Accessibility. Tap Color inversion to turn on. Color Correction Set the display color correction on or off, and select color correction mode. From the Home screen, tap Apps >... -
Page 151: Mobility
Use the slider to adjust the balance. A sound clip will play when you tap on the slider to adjust the balance. Tap OK. Mobility Touch & Hold Delay Set the delay time when the screen recognizes the touch and hold operation. From the Home screen, tap Apps >... -
Page 152: Printing
Read the information and tap the OFF icon to enable the feature. Phone Options Shortcut Press and hold the Power key and use shortcuts on phone options. From the Home screen, tap Apps > Settings > Accessibility > Phone options shortcut. -
Page 153: Cleaning And Drying Procedures
● Kyocera has tested cleaning products and determined they will not damage the surfaces of the phone when used properly. A table containing these products can be found at the end of this section. See Kyocera Tested Products. -
Page 154: Cleaning The Phone
Cleaning the Phone Cleaning Your Phone CAUTION! Be sure the headset jack cover, card slot cover, and charger/USB port cover are closed firmly to maintain the waterproof capability. Turn off the phone. Rinse the phone thoroughly under running water in order to remove dirt. Add equal parts mild dish detergent and warm water and whip until it gets frothy. - Page 155 Rinse both sides of the phone and all physical keys until there are no more bubbles left. Note: Hold your phone below the faucet as shown below and rinse with low pressure tap water for more than 20 seconds for each part. Use only lukewarm water. CAUTION! If detergent is left inside the phone, the audio quality as well as waterproof capability may deteriorate.
- Page 156 Rinse both sides of the back cover until there are no bubbles left. Rinse the physical keys, speakers, microphones (2), earpiece, and pressure adjustment hole under running water and make sure all bubbles are removed. Cleaning and Drying Procedures...
- Page 157 Put about 2 inches (5 cm) of water in a large bowl and gently rinse the phone by swirling it under water for about 10 seconds. Dry your phone until you are sure there is no moisture left. See Drying Your Phone details.
-
Page 158: Alternate Cleaning Procedure
Alternate Cleaning Procedure Gently wipe the front and back of the phone with a lint-free cloth moistened with alcohol* or a sanitizer wipe. Note: Do not open the back cover while cleaning. *Note: Use only ethanol or isopropyl alcohol. See table at end of this section. Remove any excess moisture with a dry lint-free cloth until it is completely dry. -
Page 159: Drying Your Phone
Drying Your Phone CAUTION! If your phone has been submerged in water, for example to use the camera in Underwater Mode, be sure to remove the back cover and rinse all surfaces of the phone thoroughly with clean, fresh water before drying. Wipe down all outside surfaces of your phone with a clean lint-free cloth. - Page 160 After removing all the water, leave back cover off to help with the drying process. Let the phone dry completely at room temperature. CAUTION! Excessive heat may damage your phone; never use a hair dryer, an oven or any other appliance to dry out your phone. Note: If your phone still retains some moisture, audio quality and speaker performance may be affected.
-
Page 161: Kyocera Tested Products
Kyocera Tested Products Mild Dish Detergents Manufacturer Brand Product name Seventh Generation Seventh Generation Dish Liquid, Free & Clear Dish Liquid Lemongrass & Clementine Zest P&G Dawn Ultra Antibacterial Hand Soap Dishwashing Liquid, Apple Blossom Scent Ultra Dishwashing Liquid, Original Scent... -
Page 162: Notes
All features, functionality and other specifications, as well as the information contained in this guide are based upon the latest available information and are believed to be accurate at the time of issuing. Kyocera International, Inc. reserves the right to change or modify any information or specifications without notice or obligation. -
Page 163: Copyright & Trademarks
The Bluetooth word mark and logos are registered trademarks owned by Bluetooth SIG, Inc. and any use of such marks by Kyocera Corporation is under license. Other trademarks and trade names are those of their respective owners. Bluetooth QD ID (Qualified Design ID): 83110 ®... - Page 164 Index Accessibility add an event, 88 settings, 137 edit events, 90 Account erase events, 90 create, 131 event alerts, 89 manage, 131 view events, 89 Airplane Mode, 110 Call Alarm, 91 additional settings, 38 Android Beam, 103 answer, 30 Application auto answer on headset, 38 settings, 120 call barring, 38...
- Page 165 Call Waiting, 33 save a phone number, 44 Caller ID, 32 share, 51 Camera synchronize, 51 back, 3 Data services, 69 flash, 3 connection status and indicators, 69 front, 2 Data usage settings, 109 key, 3 Date & Time, 136 settings, 82 Display take picture, 79...
- Page 166 install apps, 60 Play Music, 65 open apps, 62 NFC (Near field communication), 103 options, 61 Android Beam, 103 Play Store, 60 Tap & pay, 123 refund, 61 Notification uninstall apps, 62 icon, 17 Google voice typing, 23, 134 panel, 19 Hangouts, 59 Outdoor Report, 108 Headset jack, 2...
- Page 167 Rotate, 10, 115 USB, 121 Screen lock Swipe, 10 fingerprint, 126 TalkBack, 137 password, 125 Tap, 9 pattern, 124 Tap & pay, 123 pin, 125 Tethering, 77 swipe, 124 Text Security, 123, 128 copy and paste, 24 credential storage, 129 enter, 20 device administrators, 129 Text Messaging and MMS...
- Page 168 Widget turn on, 67 add to the Home screen, 13 Wireless Emergency alerts, 113 Wi-Fi, 67 World clock, 91 check status, 68 YouTube, 59 connect, 67, 68 share videos, 87 settings, 68 Index...