Table of Contents
Advertisement
Advertisement
Table of Contents

Related Manuals for Brady IP 300


Summary of Contents for Brady IP 300
- Page 2 No part of this manual nor any translation may be reproduced or transmitted in any form or by any means, for any purpose other than the purchaser’s personal use, without the express written permission of Brady. United States Note: This equipment has been tested and found to comply with the limits for a Class A digital device, pursuant to part 15 of the FCC Rules.
-
Page 3: Table Of Contents
Quick Start Guide Quick Start Guide About the Printer The Brady IP™ printer is designed to work with BradySoft, BradyCode, IdentiLab or LabelMark software. When used with one of those software packages, the printer will automatically recognize all Brady non-metallized labels up to 4 inches (101.6 mm) wide. -
Page 4: Safety
Quick Start Guide Safety The label printer is configured for voltages of 100 to 240 V ~ (50 to 60 Hz). ■ Connect only to a grounded power outlet. The label printer may only be used in a dry environment, do not expose it to ■... -
Page 5: Unpacking The Label Printer
To schedule a free phone setup assistance appointment, call 1-800-643-8766 and select Menu Option 4. During this call, a Brady technician will help you set up the printer and make sure that the software is working. Brady Technical Support will also call you back 11 days after setup to be sure the system is working properly and to answer any questions you have about your printer or software. -
Page 6: Installation
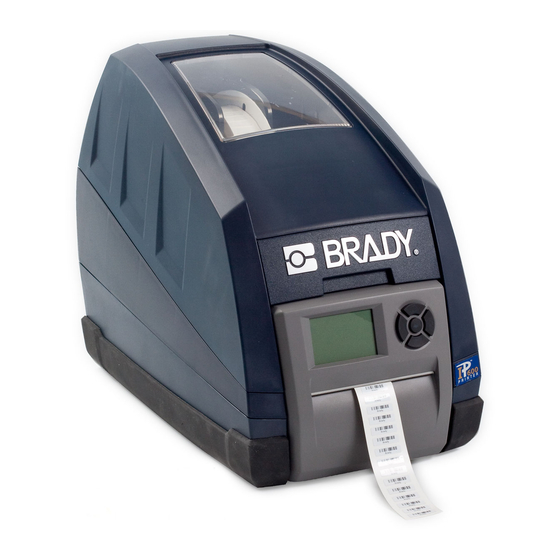
Quick Start Guide Installation Figure 1, Brady IP Label Printer Item Description Ribbon Carrier Release Button Ribbon Carrier Close Points Ribbon Take-up Spindle Printer Cover Material Holder Front Cover... -
Page 7: Connecting The Printer
Open the label printer cover (Figure 1, 4). ■ For operation in Peel-off mode, place the printer in such a position that the ■ liner can run down without hindrance. Refer to the “Brady IP™ Printer Operator’s/Configuration Guide” for additional information about Peel-off mode. - Page 8 Quick Start Guide The printer has a RS-232 port (Figure 2, 1), a USB port (Figure 2, 2) and an Ethernet port (Figure 2, 3). Figure 2, Interfaces and Connectors 1. Plug the power cable into the power connection socket on the back of the printer (Figure 2, 4).
-
Page 9: Loading The Ribbon
Quick Start Guide NOTE: If an error occurs during installation, refer to the “Brady IP™ Printer Operator’s/Configuration Guide” located on the Product Loading the Ribbon Figure 3, Ribbon Carrier Release Button 1. Lift open the label printer cover (Figure 1, 4). - Page 10 Quick Start Guide Figure 4, Loading the Ribbon 3. Pull the front cover (Figure 4, 1) toward you and lift the ribbon carrier into the loading position (Figure 4, 4). 4. Position the square end of the new ribbon spindle in the square notch on the right side of the printer, push the spindle slightly to the right and slide the other end of the spindle into the notch (Figure 4, 2) on the left side of the printer.
- Page 11 Quick Start Guide Figure 5, Ribbon Take-up Spindle NOTE: If you need to remove the ribbon take-up spindle, push the spindle slightly to the right and slide the other end of the spindle out of the notch on the left side of the printer. Remove the ribbon take-up spindle.
-
Page 12: Loading The Material
Quick Start Guide Loading the Material Figure 6, Material Supply Holder 1. Remove the material supply holder (Figure 6) from the printer by lifting it up and out of the frame. NOTICE There are sensors located under the side tabs (Figure 6, 3) on both sides of the material supply holder. - Page 13 Quick Start Guide Figure 7, Labeling Material 3. Slide the Brady labeling material roll onto the material supply holder and reinstall the end piece (Figure 7, 1), which will automatically center the roll on the holder. 4. Reinsert the material supply holder onto the frame. Ensure the sensors under the side tabs (Figure 7, 2) are properly seated in the frame so the printer will correctly read the material identification tag.
- Page 14 Quick Start Guide Figure 8, Alignment Guides 5. Thread the material under the ribbon carrier, under the guides (Figure 8, 2) and forward through the slot in the front cover. 6. Turn the green dial on the left (Figure 8, 1) to adjust the guides so they just snug up against the labels.
-
Page 15: Calibrating The Printer
Figure 9 is an example of a typical display. Figure 9, Typical Ready Display If the printer is in a state other than Ready, refer to the “Brady IP™ Printer Operator’s/Configuration Guide” located on the product CD to determine what the problem might be. -
Page 16: Other Modes
Quick Start Guide Other Modes The Brady IP printer can be used in modes other than described in this manual. For information regarding use of metallized labels, other manufacturers labels or software packages and Auto Peel-off mode, refer to the “Brady IP™ Printer Operator’s/Configuration Guide” included on the Product CD. - Page 18 For Repair or Technical Assistance, find your regional Brady Tech Support office by going to: In the Americas: www.bradyid.com ■ In Europe: www.bradyeurope.com ■ In Asia: www.bradycorp.com ■ Y555077 Bar Code Label...