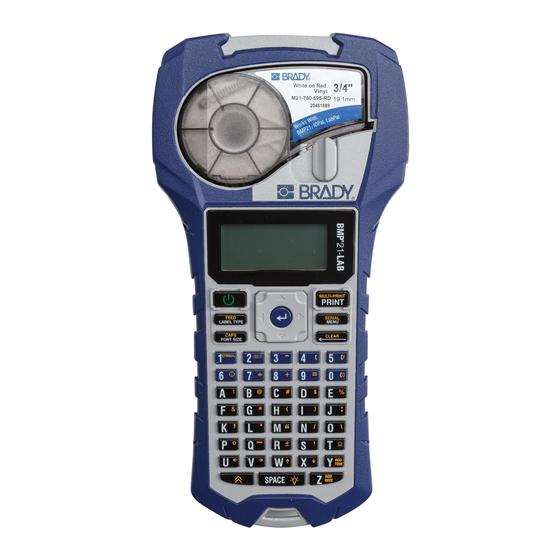
Brady BMP21 User Manual
Hide thumbs
Also See for BMP21:
- Quick start manual (6 pages) ,
- Quick start manual (93 pages) ,
- Frequently asked questions (2 pages)

Related Manuals for Brady BMP21


Summary of Contents for Brady BMP21
-
Page 1: User Guide
www.bradyid.com User Guide Instructions Instrukties / Instruções Instruktionen / Instrucciones... -
Page 2: Table Of Contents
Contents Copyright ......................iii Trademarks ....................iii Brady Warranty ..................... iv Technical Support ....................v Regulatory Information ..................vi Product Registration ..................1 Power ........................1 Batteries ......................1 A/C Power ...................... 1 Display Description .................... 2 Change Label Cartridge ..................3 Create Labels ...................... -
Page 3: Copyright
Brady disclaims all warranties of merchantability of fitness for a particular purpose. Trademarks Brady reserves the right to make changes without further notice to any product or system described herein to improve reliability, function, or design. © 2009 Brady Worldwide, Inc. All Rights Reserved. -
Page 4: Brady Warranty
Brady Warranty Brady products are sold with the understanding that the buyer will test them in actual use and determine for him or herself their adaptability to his/her intended uses. Brady warrants to the buyer that its products are free from defects in material and workmanship, but limits its obligations under this warranty to replacement of the product shown to Brady’s satisfaction to have been defective at the time Brady sold it. -
Page 5: Technical Support
Technical Support Please contact Brady Worldwide, Inc. with any questions or concerns. The contact support numbers for each region are listed below. 1-888-272-3946 E-Mail: technicalsupport@bradycorp.com Belgium France (Belgium, Netherlands, Luxemburg, Africa & Parc EUROCIT Middle-East) 45, avenue de l'Europe Lindestraat 20, 9240 Zele... -
Page 6: Regulatory Information
• Consult a dealer or an experienced radio/television technician for help. Modifications: The user is cautioned that any changes or modifications not expressly approved by Brady Corporation could void the user’s authority to use the equipment. BMP21 User Guide... - Page 7 Users of batteries must not dispose of batteries as unsorted municipal waste. This Directive determines the framework for the return and recycling of used batteries and accumulators that are to be collected separately and recycled at end of life. Please dispose of batteries according to your local regulations. BMP21 User Guide...
-
Page 8: Product Registration
3. Close battery compartment. A/C Power 1. Plug in optional A/C Power Supply into the power connection located on the upper left side of the printer. 2. Plug the opposite end into the wall outlet. BMP21 User Guide... -
Page 9: Display Description
Display Description Display Description When the power button is pressed, the main screen displays the following: Caps Lock Function Indicator Text Lines Label Type Font Size Bold Battery Life Indicator BMP21 User Guide... -
Page 10: Change Label Cartridge
2. On the back of the unit, push the Release Button (2). 3. Remove the old cartridge. 4. Insert the new cartridge and push solidly into place. 5. Slide the Locking Lever up to lock. 3, 4 1, 5 BMP21 User Guide... -
Page 11: Create Labels
4. Select .75” (16-10AWG), then press Enter 5. Press Font Size , select 6pt., then press Enter 6. Type: 12345. 7. Press Print. 8. Press the two side buttons together, or individually, to cut the label. 9. Clear text from the screen: Press BMP21 User Guide... -
Page 12: Creating Serialized Label In Banner Landscape
02. - or - Type: 2 and press Enter 7. Press Print. 8. Either Cut or Print the 2 thru 6 label. 12345 12345 12346 12346 12347 12347 9. Clear text from the screen: Press BMP21 User Guide... -
Page 13: Creating Terminal Block Labels
3 - or - Type: 3. 6. Press to Rotation then until the picture displays a vertical legend 7. Press Enter. 8. Type: E000. 9. Press Print. 10. Clear text from the screen: Press BMP21 User Guide... -
Page 14: Creating Fixed-Length Label With Autosize
3. Select Fixed: 2.0” and press Enter 4. Press Font Size 5. Select Auto and press Enter 6. Type: 12345. 7. Press Enter and type: WM12. 8. Press Print. 12345 WM12 9. Clear text from the screen: Press BMP21 User Guide... -
Page 15: Creating A Barcode Label
8. Select Code 39 and press Enter 9. In the box, type: 12345 (the box indicates text that will appear in barcode format) 10. Press to exit the barcode box, then type: BB 11. Press: Print 12. Clear text from the screen: Press BMP21 User Guide... -
Page 16: Creating A Patch Panel* Label
3 - or - Type: 3 6. Press to Rotation, then until the pictures displays a horizontal legend 7. Press Enter 8. Type: E000. 9. Press Print 10. Clear text from the screen: Press BMP21 User Guide... -
Page 17: Creating Terminal Block Labels Without Serialization
7. Press Enter 8. Type: E000, then press Print. 9. Press , then type: B1B2. 10. Press Print 11. Press , then type: 45TS 12. Press Print 13. Cut the label. 14. Clear text from the screen: Press BMP21 User Guide... -
Page 18: Creating Symbols Labels
2. Select Banner Landscape, then press Enter 3. Press , then select Symbols. 4. Press Enter - or - Press 5. Select the symbol , then press Enter 6. Type: CAUTION, then press Print. 7. Clear text from the screen: Press BMP21 User Guide... -
Page 19: File Management
, then select File. 2. Press Enter , then select Open. Press Enter 4. Move the cursor to the number and name of the saved label. 5. Press Enter . Your file is displayed on the screen. BMP21 User Guide... -
Page 20: Replacing A Label File
8. Move the cursor to the number and name of your last saved label, then press Enter 9. When prompted to replace the file, select Yes. 10. Type the label file name: NEW, then press Enter 11. Press to clear the display BMP21 User Guide... -
Page 21: Deleting A Label File
5. Move the cursor to the number and name of the saved label and press Enter 6. When prompted to delete the file, select Yes. Your file is deleted and will not longer display in the list. BMP21 User Guide... -
Page 22: Saving And Opening A Serialization File
10. Move your cursor to a number where you want the serialization label saved, then press Enter 11. Type the label file name: SERIAL, then press Enter 12. Press Print. 13. When your serialization file is printed, press to clear the display. BMP21 User Guide... - Page 23 2. Press Enter , then select Open. Press Enter 4. Move the cursor to the number and name of the saved label. 5. Press Enter . The first label in the serialization file is displayed on the screen. BMP21 User Guide...
-
Page 24: Setup
, then select Units. 2. Press Enter 3. Select either Inches or Millimeters, then press Enter Changing the Language 1. Press , then select Language. 2. Press Enter 3. Select one of the six languages, then press Enter BMP21 User Guide... -
Page 25: Changing International Characters
4. Press Enter Toggling the Backlight Note: The backlight will automatically turn off when the printer shuts off. To turn the backlight on: 1. Press 2. Press To turn the backlight off: 1. Press 2. Press BMP21 User Guide... -
Page 26: Keypad Descriptions
Clear FUNCTION + CLEAR key. (Clears whole legend.) Delete Deletes text and exits menu screens. Enter The Enter key works to accept choices with menus and to add additional lines to text. Feed FUNCTION + LABEL TYPE. BMP21 User Guide... - Page 27 Keypad Descriptions Option Description International In Menu or FUNCTION + 6. Multi-Print FUNCTION + PRINT. Serial FUNCTION + MENU (Serializes based on cursor location. Allows for increment and copies.) Symbols In Menu or FUNCTION +1. BMP21 User Guide...
-
Page 28: Cartridge Selection Guide
Cartridge Selection Guide Cartridge Selection Guide Outdoor Perma- Self Lam Application Nylon Vinyl Sleeve Polyester Vinyl Smooth Surfaces Textured Surface Cable and Wire Highly Textured Surfaces Terminal Blocks Patch Panel General ID BMP21 User Guide... - Page 30 Copyright 2009 Brady Worldwide, Inc. Y954346 All Rights Reserved BRADY WORLDWIDE, INC. P.O. Box 2131 Milwaukee, Wisconsin 53201-2131 U.S.A.