Table of Contents
Advertisement
Quick Links
Advertisement
Table of Contents

Related Manuals for Yamaha aventage RX-A3070


Summary of Contents for Yamaha aventage RX-A3070
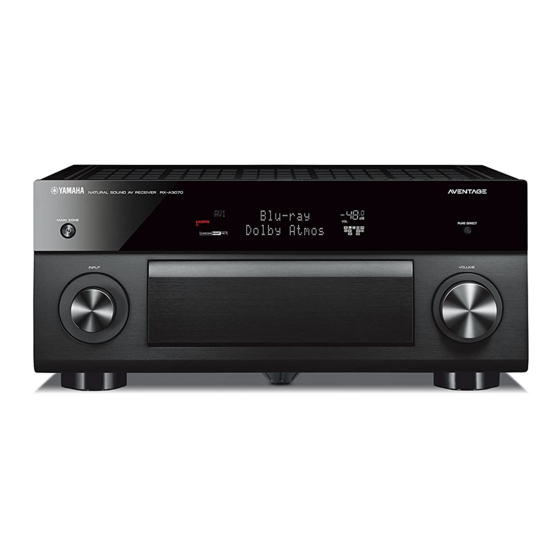
- Page 1 AV Receiver Owner’s Manual • This unit is a product for enjoying video and music at home. • This manual explains preparations and operations for everyday users of the unit. • Read the supplied booklet “Quick Start Guide” before using the unit.
-
Page 2: Table Of Contents
CONTENTS Introduction 3 Connecting the radio antennas............48 FM/AM antennas (except Australia, U.K., Europe and Russia models) ............48 Accessories................... 5 DAB/FM antenna (Australia, U.K., Europe and Russia models only) ............49 4 Connecting a network cable or preparing the wireless antenna ..50 About this book ................ - Page 3 PLAYBACK Playing back music stored on a USB storage device ......99 Connecting a USB storage device ........................99 Basic playback procedure .............75 Playback of USB storage device contents ....................100 Playing back music stored on media servers (PCs/NAS) ....103 Selecting an HDMI output jack ........................75 Selecting the input source and favorite settings with one touch Media sharing setup ...........................103 (SCENE) ..................76...
- Page 4 Configuring the system settings (ADVANCED SETUP menu).... 163 Network information ..........................187 ADVANCED SETUP menu items ......................... 164 Yamaha technologies ..........................187 Changing the speaker impedance setting (SPEAKER IMP.) ..............164 Supported devices and file formats ..........188 Turning on/off the remote control sensor (REMOTE SENSOR)..............164 Supported devices............................188...
-
Page 5: Introduction
Introduction Accessories About this book Check that the following accessories are supplied with the product. The illustrations of the main unit used in this manual are of the RX-A3070 (U.S.A. model), unless otherwise specified. AM antenna YPAO microphone In this manual, illustrations of English menu screens are used as examples. (except Australia, U.K., Europe and Some features are not available in certain regions. -
Page 6: About Remote Control
About remote control This section explains how to use the supplied remote control. Batteries Insert the batteries the right way round. Operating range of the remote control Point the remote control at the remote control sensor on the unit and remain within the operating range shown below. -
Page 7: Features
FEATURES What you can do with the unit The unit is equipped with the various useful features. More advanced ENTERTAINMENT Various wireless connection sound programs (p.80) methods (p.66) Connecting various devices (p.41) By processing front left and front right sound fields The unit supports the Wi-Fi feature that allows the unit to A number of HDMI jacks and various input/output jacks on individually, the ENTERTAINMENT sound programs are... -
Page 8: What Is A Sound Field
CINEMA DSP The excitement of a concert hall and the powerful sense of being inside a movie - we all want to enjoy these experiences in our own living room. Yamaha has pursued the fulfillment of these desires for more than 30 years, and this fulfillment has now taken shape as the Yamaha AV receivers. - Page 9 YPAO YPAO is Yamaha original automatic calibration system to optimizing your sound and surround environment by using microphone measurement. It can be create ideal listening environment for maximizing high sound quality contents playback by adjusting various speakers setting and the sound field automatically.
- Page 10 Unrivaled audio and video quality You can enjoy unrivaled high-quality audio and videos with the unit. High-resolution music enhancer High-quality video processing Hi-bit high-sampling extension up to 96 kHz / 24-bit can be applied to lossless 44.1/48 kHz From low-quality digital video to BD (Blu-ray disc) images, any content can be played back as content such as from a CD (2-channel PCM) or a FLAC file for further heightening of the a high-quality image (p.149).
- Page 11 Enjoying music using speakers in another room While enjoying multichannel playback in your living room, you can listen to music through the The best expandability in Yamaha (RX-A3070 only) speakers of a different room. By connecting an external power amp, you can enjoy the highest peak of CINEMA DSP - an 11.2-channel 3-dimensional sound field.
-
Page 12: Av Controller
“AV CONTROLLER” will turn your smartphone/tablet into a MusicCast CONTROLLER is an application that allows you to Wi-Fi enabled remote control for your Yamaha network cable connections between AV receiver and source devices link a MusicCast compatible device to other MusicCast products. -
Page 13: Part Names And Functions
Part names and functions This section explains the functions of the parts of the unit. Front panel MAIN ZONE PURE DIRECT INPUT VOLUME INFO (WPS) ON SCREEN OPTION TONE CONTROL SCENE MEMORY PRESET (CONNECT) PROGRAM MULTI ZONE TUNING ENTER ZONE 2 ZONE 3 ZONE 4 ZONE CONTROL... - Page 14 ■ Inside of the front panel door ON SCREEN OPTION TONE CONTROL SCENE INFO (WPS) MEMORY PRESET (CONNECT) MULTI ZONE PROGRAM TUNING ENTER ZONE 2 ZONE 3 ZONE 4 ZONE CONTROL RETURN DISPLAY PHONES YPAO MIC SILENT CINEMA AUDIO HDMI IN (U.S.A.
-
Page 15: Front Display (Indicators)
Front display (indicators) VOL. MUTE ZONE ZONE ZONE A-DRC PARTY VIRTUAL YPAO VOL. LINK MASTER STEREO TUNED R FPR Hi-Res ENHANCER SLEEP HDMI Information display VIRTUAL Lights up when HDMI signals are being input or output. Displays the current status (such as input name and sound mode Lights up when the Virtual Presence Speaker (VPS) or Virtual name). -
Page 16: Rear Panel
Rear panel HDMI (HDCP2.2) NETWORK HDMI OUT ( 3 NET ) (HDCP2.2) AV 1 AV 2 AV 3 AV 4 AV 5 AV 6 AV 7 (ZONE OUT) (1 BD/DVD) AC IN TRIGGER AV 1 AV 2 AV 3 AV 4 COMPONENT VIDEO (1 BD/DVD) AV 1... - Page 17 PHONO jacks ZONE OUT/PRE OUT jacks (RX-A3070) For connecting to a turntable (p.46). For connecting to an external amplifier used in Zone2 or Zone3 and outputting audio (p.113), or for connecting to an external power amplifier for front presence or rear presence channels (p.40). AUDIO 1-3 jacks ZONE OUT jacks (RX-A2070) For connecting to audio playback devices and inputting audio signals (p.46).
-
Page 18: Remote Control
Remote control Remote control signal transmitter Radio keys Operate the FM/AM/DAB radio when “TUNER” is selected as the Transmits infrared signals. input source (p.85). RECEIVER z key SOURCE RECEIVER BAND: Switches between FM and DAB radio (Australia, U.K., Turns on/off (standby) the unit. Europe and Russia models), or FM and AM radio (other models). -
Page 19: Preparations
PREPARATIONS General setup procedure Connecting speakers ................(p.20) Connecting a TV and playback devices. -
Page 20: Connecting Speakers
Connecting speakers The unit has 9 built-in amplifiers. You can connect 2 to 11 speakers and up to 2 subwoofers to create the favorite acoustic space in your room. You can also apply bi-amp connections, channel expansion (using an external power amplifier) or multi-zone configurations to enhance your system (p.30). Caution Under its default settings, the unit is configured for 8-ohm speakers. -
Page 21: Basic Speaker Configuration
Basic speaker configuration If you do not apply bi-amp connections, channel expansion (using an external amplifier) or multi-zone configurations, follow the procedure below to place the speakers in your room and connect them to the unit. ■ Placing speakers in your room 7.2.2/5.2.4 system [S] (using both surround back and rear presence speakers) Depending on the number of speakers, place the speakers and subwoofer in your room. - Page 22 5.2.4 system [S] (using rear presence speakers) 7.2.2 system [S] (using surround back speakers) This speaker system uses the front and rear presence speakers to produce a highly-natural This speaker system uses the front presence speakers to produce a natural 3-dimensional 3-dimensional sound field, and also creates Virtual Surround Back Speaker (VSBS) using the sound field, and also allows you to enjoy extended surround sounds using the surround back surround speakers to add a sense of depth to the rear sound field.
- Page 23 5.1.2 system [S] (using front presence speakers) 7.1 system (using surround back speakers) This speaker system uses the front presence speakers to produce a natural 3-dimensional This speaker system creates front Virtual Presence Speaker (VPS) using the front, center and sound field, and also creates Virtual Surround Back Speaker (VSBS) using the surround surround speakers to produce a 3-dimensional sound field, and also allows you to enjoy speakers to add a sense of depth to the rear sound field.
- Page 24 5.1 system 5.1 system (front 5.1-channel) (using surround speakers) We recommend using this speaker system when you cannot place speakers in the rear side of the room. You can enjoy surround sound even without the center speaker (4.1 system). When placing surround speakers in the front side, set “Layout (Surround)” in the “Setup” menu to “Front” before performing YPAO (p.53).
- Page 25 5.1 system (front 5.1-channel) (using front presence speakers) 2.1 system We recommend using this speaker system when you cannot place speakers in the rear side of the room. Add the center speaker to configure a 3.1 system. When using front presence speakers installed to the ceiling or when using the Dolby Enabled speakers as the presence speakers, configure the “Layout (Front Presence)”...
-
Page 26: Presence Speaker Layout
Presence speaker layout Dolby Enabled SP Use the Dolby Enabled speakers as the presence speakers. The unit provides three layout patterns for presence speakers (Front Height/Rear Height, It utilizes sounds reflected from ceiling and lets you enjoy overhead sounds only from speakers Overhead and Dolby Enabled SP). -
Page 27: Setting The Speaker Impedance
When using four presence speakers ■ Setting the speaker impedance Under its default settings, the unit is configured for 8-ohm speakers. When using a 6-ohm speaker for any channel, set the speaker impedance to “6 Ω MIN”. In this case, you can also use 4-ohm speakers as the front speakers. - Page 28 ■ Connecting speakers Speakers to be connected Connect the speakers placed in your room to the unit. Speaker system (the number of channels) Speaker type Precaution for connecting of the speaker cables 7.2.2/5.2.4 7.1/5.1.2 Prepare speaker cables in a place away from the unit, to avoid accidentally dropping wire Front (L/R) 1 2 strands into the unit’s interior which could result in a short circuit or malfunction of the unit.
- Page 29 Connection diagram Connecting speaker cables Refer to the following diagram and connect the speakers to the unit. Speaker cables have two wires. One is for connecting the negative (-) terminal of the unit and the speaker, and the other is for the positive (+) terminal. If the wires are colored to prevent ZONE OUT/PRE OUT PRE OUT (SINGLE)
-
Page 30: Advanced Speaker Configuration
Advanced speaker configuration In addition to the basic speaker configuration (p.21), the unit also allows you to apply the following speaker configurations to enhance your system. Combining with an external Using the four internal Using the excess internal power amplifier (Hi-Fi amplifier, amplifiers for front speakers to amplifiers for stereo speakers multichannel amplifier, etc.) to... - Page 31 ■ Available speaker configurations (RX-A2070) Main zone (RX-A3070) Power Amp Assign Output External power Multi-zone Page External (p.142) channel Bi-amp amplifier Main zone speakers (max) (required) Power Amp Assign Output External power Multi-zone Page External (p.142) Surround back +1 room 7.2 +1Zone channel Bi-amp...
- Page 32 7.2 +1Zone 7.2.2 +1Zone Zone2 Zone2 Main zone Main zone Speaker Connect to Speaker Connect to FRONT FRONT CENTER CENTER SURROUND SURROUND SURROUND BACK SURROUND BACK (not used) EXTRA SP 1 (not used) (not used) SUBWOOFER 1-2 SUBWOOFER 1-2 Zone2 speakers EXTRA SP 1 Zone2 speakers EXTRA SP 2...
- Page 33 7.2 +2Zone 7.2.4 [ext.RP] (RX-A3070 only) Zone2 external amp external amp Main zone Zone3 Speaker Connect to FRONT Speaker Connect to CENTER FRONT SURROUND CENTER SURROUND BACK SURROUND (not used) SURROUND BACK (not used) EXTRA SP 1 SUBWOOFER 1-2 R.PRESENCE (PRE OUT) via external power amplifier Zone2 speakers EXTRA SP 1 SUBWOOFER 1-2...
- Page 34 7.2.4 [ext.Front] (RX-A3070 only) 7.2.4 [ext.FP+RP] (RX-A3070 only) via external amp via external amp via external amp external amp external amp Speaker Connect to Speaker Connect to FRONT (PRE OUT) via external power amplifier FRONT CENTER CENTER SURROUND SURROUND SURROUND BACK SURROUND BACK EXTRA SP 1 F.PRESENCE (PRE OUT) via external power amplifier...
- Page 35 7.2.2 [ext.Front] +1Zone 7.2 [ext.Front] +2Zone via external amp via external amp Zone2 Zone2 Main zone Main zone Zone3 Speaker Connect to Speaker Connect to FRONT (PRE OUT) via external power amplifier FRONT (PRE OUT) via external power amplifier CENTER CENTER SURROUND SURROUND...
- Page 36 7.2 Bi-Amp 5.2.2 Bi-Amp Bi-amp Bi-amp Speaker Connect to Speaker Connect to FRONT and EXTRA SP 1 (bi-amp connection) FRONT and EXTRA SP 1 (bi-amp connection) CENTER CENTER SURROUND SURROUND SURROUND BACK (not used) (not used) EXTRA SP 2 (not used) (not used) SUBWOOFER 1-2 SUBWOOFER 1-2...
- Page 37 7.2 Bi-Amp +1Zone 7.2.4 Bi-Amp [ext.FP+RP] (RX-A3070 only) Bi-amp Bi-amp via external amp via external amp Zone2 external amp external amp Main zone Speaker Connect to FRONT and EXTRA SP 1 (bi-amp connection) Speaker Connect to CENTER FRONT and EXTRA SP 1 (bi-amp connection) SURROUND CENTER SURROUND BACK...
- Page 38 5.2.4 Bi-Amp [ext.RP] (RX-A3070 only) Bi-amp external amp external amp Speaker Connect to FRONT and EXTRA SP 1 (bi-amp connection) CENTER SURROUND (not used) EXTRA SP 2 R.PRESENCE (PRE OUT) via external power amplifier SUBWOOFER 1-2 When this configuration is applied, you cannot utilize the ZONE OUT/PRE OUT jacks for connecting an external amplifier for Zone3 (p.113).
- Page 39 ■ Connecting front speakers that support bi-amp ■ Connecting Zone2/3 speakers connections When using Zone2/3 speakers, connect them to the EXTRA SP 1-2 terminals. When using front speakers that support bi-amp connections, connect them to the FRONT To utilize the EXTRA SP 1-2 terminals for Zone2/3 speakers, configure the “Power Amp Assign” terminals and EXTRA SP1 terminals.
-
Page 40: Connecting An External Power Amplifier
■ Connecting an external power amplifier (Example) Connecting front speakers via an external power amplifier When connecting an external power amplifier to enhance speaker output, connect the input jacks of the power amplifier to the PRE OUT jacks of the unit. The same channel signals are PRE OUT (FRONT) jacks output from the PRE OUT jacks as from their corresponding SPEAKERS terminals. -
Page 41: Connecting A Tv And Playback Devices
Connecting a TV and playback devices Connect a TV and playback devices (video and audio devices) to the unit. For information on how to connect a USB storage device, see “Connecting a USB storage device” (p.99). Input/output jacks and cables The unit is equipped with the following input/output jacks. - Page 42 XLR jacks Transmit analog audio signals. Use an XLR balanced cable. Match the pins and insert the “male” connector of the XLR balanced cable until you hear a click. XLR balanced cable(male) IO 4 A U D When disconnecting the cable from the unit, hold down the PUSH button on the unit and then pull the connector out.
-
Page 43: Connecting A Tv
Connecting a TV • You do not make an audio cable connection between the TV and the unit in the following cases: Connect a TV to the unit so that video input to the unit can be output to the TV. –... -
Page 44: Connecting Video Devices (Such As Bd/Dvd Players)
■ Connecting another TV or a projector Connecting video devices (such as BD/DVD players) The unit has two HDMI output jacks. If you connect another TV or a projector to the unit with Connect video devices such as BD/DVD players, set-top boxes (STBs) and game consoles to the an HDMI cable, you can switch the TV (or projector) to be used for watching videos with the unit. -
Page 45: Component Video Connection
■ Component video connection ■ Composite video connection Connect a video device to the unit with a component video cable and an audio cable (digital Connect a video device to the unit with a video pin cable and an audio cable (digital coaxial, coaxial or stereo pin cable). -
Page 46: Connecting Audio Devices (Such As Cd Players)
Connecting audio devices (such as CD players) Audio output PHONO jacks (PHONO) PHONO Connect audio devices such as CD players and a turntable to the unit. Depending on the audio PHONO output jacks available on your audio device, choose one of the following connections. The unit (rear) •... -
Page 47: Connecting To The Jacks On The Front Panel
Connecting to the jacks on the front panel ■ Analog stereo connection Connect a playback device (such as CD players) to the unit with a stereo pin cable. Use the VIDEO AUX jack to temporarily connect a playback device to the unit. Use the USB jack to connect a USB storage device. -
Page 48: Connecting The Radio Antennas
Connecting the radio antennas Connect the supplied radio antenna to the unit. Assembling the AM antenna FM/AM antennas (except Australia, U.K., Europe and Russia models) Connect the supplied FM/AM antennas to the unit. Fix the end of the FM antenna to a wall, and place the AM antenna on a flat surface. FM antenna AM antenna Connecting the AM antenna... -
Page 49: Dab/Fm Antenna (Australia, U.k., Europe And Russia Models Only)
DAB/FM antenna (Australia, U.K., Europe and Russia models only) Connect the supplied DAB/FM antenna to the unit and fix the antenna ends to a wall. DAB/FM antenna The unit (rear) AV 1 AV 2 AV 3 AV 4 TRIGGER COMPONENT VIDEO (1 BD/DVD) AV 1 0.1A... -
Page 50: Connecting A Network Cable Or Preparing The Wireless Antenna
Connecting a network cable or preparing the wireless antenna Connect the unit to a router (access point) with a network cable, or prepare the wireless antenna for establishing a wireless network connection. • Some security software installed on your PC or the firewall settings of network devices (such as a router) may block the access of the unit to the network devices or the Internet. -
Page 51: Connecting Other Devices
Improper setting of VOLTAGE SELECTOR may cause damage to the unit and create a potential fire hazard. The trigger function can control an external device in conjunction with operating the unit (such as powering on/off and input selection). If you have a Yamaha subwoofer that supports a The unit (rear) -
Page 52: Selecting An On-Screen Menu Language
Selecting an on-screen menu language Select the desired on-screen menu language from English, Japanese, SOURCE SOURCE RECEIVER RECEIVER RECEIVER z Use the cursor keys (e/r) to select “Language” and the French, German, Spanish, Russian, Italian and Chinese. cursor keys (q/w) to select the desired language. V-AUX V-AUX V-AUX... -
Page 53: Configuring The Necessary Speaker Settings
Configuring the necessary speaker settings If you use any of the following speaker configurations, follow the SOURCE SOURCE RECEIVER RECEIVER RECEIVER z Configure the corresponding speaker settings. procedure below to configure the corresponding speaker settings manually before performing YPAO. • When using any of advanced speaker configurations, select V-AUX V-AUX V-AUX... -
Page 54: Optimizing The Speaker Settings Automatically (Ypao)
Optimizing the speaker settings automatically (YPAO) The Yamaha Parametric room Acoustic Optimizer (YPAO) function SOURCE SOURCE RECEIVER RECEIVER RECEIVER z Place the YPAO microphone at your listening position and detects speaker connections, measures the distances from them to your connect it to the YPAO MIC jack on the front panel. - Page 55 If desired, select the measuring options. Use the cursor keys to select “Multi Position” (p.56) or SOURCE SOURCE RECEIVER RECEIVER “Angle/Height” (p.57) and press ENTER. V-AUX V-AUX V-AUX Use the cursor keys to select a setting and then press ENTER. AUDIO AUDIO PHONO...
-
Page 56: Multi Position
Multi Position Multi measure Single measure (5 listening positions) Selects multi measure or single measure. Settings Multi measure Multi measure Select this option if you will have several listening positions or if you want others (1 listening position + (2 listening positions + to enjoy surround sound. -
Page 57: Angle/Height
Angle/Height Measuring at one listening position (single measure) Enables/disables the angle/height measurement. SOURCE SOURCE RECEIVER RECEIVER When “Multi Position” is set to “No”, follow the procedure below for measurement. It takes about 5 minutes to perform the measurement. V-AUX V-AUX V-AUX AUDIO AUDIO... - Page 58 (when angle/height measurement is enabled) Place the microphone base at the listening position and set the Proceed to Step 2. YPAO microphone to the position “1”. SOURCE SOURCE RECEIVER RECEIVER V-AUX V-AUX V-AUX AUDIO AUDIO PHONO PHONO PHONO BLUETOOTH BLUETOOTH BLUETOOTH TUNER TUNER...
- Page 59 Set the YPAO microphone at the top of the pole and perform the To save the measurement results, use the cursor keys fourth angle measurement. (e/r) to select “SAVE” and press ENTER. SOURCE SOURCE RECEIVER RECEIVER V-AUX V-AUX V-AUX AUDIO AUDIO PHONO PHONO...
-
Page 60: Measuring At Multiple Listening Positions (Multi Measure)
Measuring at multiple listening positions When the measurements at the positions you want to (multi measure) measure are completed, use the cursor keys to select SOURCE SOURCE RECEIVER RECEIVER “CANCEL” and press ENTER. When “Multi Position” is set to “Yes”, follow the procedure below for When you have taken measurements at 8 listening positions, the measurement. - Page 61 Press ENTER to start the first angle measurement. Perform the angle/height measurement. The following screen appears on the TV when the first angle Use the cursor keys to select “YES” and press ENTER. measurement finishes. SOURCE SOURCE RECEIVER RECEIVER Select “NO” to cancel the angle/height measurement. V-AUX V-AUX V-AUX...
- Page 62 Use the cursor keys to select “Save/Cancel” and press Disconnect the YPAO microphone from the unit. ENTER. This completes optimization of the speaker settings. SOURCE SOURCE RECEIVER RECEIVER Caution To check the measurement results, select “Result”. For details, see “Checking V-AUX V-AUX V-AUX...
-
Page 63: Checking The Measurement Results
Checking the measurement results Angle Horizontal angle of each speaker at the listening position (Horizontal) You can check the YPAO measurement results. Height of the presence speakers above the level of the SOURCE SOURCE RECEIVER RECEIVER Height listening position After the measurement, use the cursor keys to select V-AUX V-AUX V-AUX... -
Page 64: Error Messages
Connect the YPAO microphone to the YPAO MIC jack firmly and follow the on-screen instructions to start the E-8: No Signal The YPAO microphone cannot detect test tones. measurement again. If this error occurs repeatedly, contact the nearest authorized Yamaha dealer or service center. E-9: User Cancel The measurement has been canceled. -
Page 65: Warning Messages
Warning messages If a warning message is displayed after the measurement, you can still save the measurement results by following on-screen instructions. However, we recommend you perform YPAO again in order to use the unit with the optimal speaker settings. Warning message Cause Remedy... -
Page 66: Connecting To A Network Device Wirelessly
Connecting to a network device wirelessly Connect the unit to a wireless router (access point) or a mobile device by establishing a ■ Connecting without a wireless router (access point) wireless connection. Connect a mobile device to the unit directly. You can use the application for smartphone / tablet “AV CONTROLLER”... -
Page 67: Connecting The Unit To A Wireless Network
Connecting the unit to a wireless network Use the cursor keys to select “Setup” and press ENTER. There are several methods to connect the unit to a wireless network. SOURCE SOURCE RECEIVER RECEIVER Use the cursor keys (e/r) to select “Network”. RECEIVER z Select a connection method according to your environment. - Page 68 ■ Using the WPS push button configuration After checking the on-screen message, use the cursor You can easily set up a wireless connection with one push of the WPS keys (e/r) and ENTER to select “NEXT”. button. SOURCE SOURCE RECEIVER RECEIVER RECEIVER z This configuration does not work if the security method of your wireless router (access...
- Page 69 ■ Using other connection methods Use the cursor keys (q/w) and ENTER to select the If your wireless router (access point) does not support WPS push button desired connection method and select “NEXT”. configuration method, follow the procedure below to configure the SOURCE SOURCE RECEIVER...
- Page 70 Searching for an access point Setting up the wireless connection manually If you select “Access Point Scan” as the connection method, the unit If you select “Manual Setting” as the connection method, the wireless starts searching for access points. After a while, the list of available connection setting screen appears on the TV.
- Page 71 Using the PIN code Use the cursor keys and ENTER to enter the security key If you select “PIN Code” as the connection method, the list of available and select “NEXT”. access points appears on the TV screen. SOURCE SOURCE RECEIVER RECEIVER If you select “None”...
-
Page 72: Connecting A Mobile Device To The Unit Directly (Wireless Direct)
Connecting a mobile device to the unit Use the cursor keys (q/w) and ENTER to check “Wireless directly (Wireless Direct) Direct” and select “OK”. SOURCE SOURCE RECEIVER RECEIVER RECEIVER z Follow the procedure below to connect a mobile device to the unit directly. - Page 73 Use the cursor keys and ENTER to enter the security key Configure the Wi-Fi settings of a mobile device. and select “NEXT”. For details on settings of your mobile device, refer to the SOURCE SOURCE RECEIVER RECEIVER instruction manual of the mobile device. If you select “None”...
-
Page 74: Connecting To The Musiccast Network
Connecting to the MusicCast network MusicCast is a brand new wireless musical solution from Yamaha, SOURCE SOURCE RECEIVER RECEIVER RECEIVER z Press RECEIVER z to turn on the unit. allowing you to share music among all of your rooms with a variety of devices. -
Page 75: Playback
PLAYBACK SOURCE SOURCE RECEIVER RECEIVER Basic playback procedure V-AUX V-AUX AUDIO Input selection keys On-screen input selection Turn on the external devices (such as a TV or BD/DVD PHONO PHONO BLUETOOTH BLUETOOTH a Press ON SCREEN. player) connected to the unit. TUNER TUNER MAIN... -
Page 76: Selecting The Input Source And Favorite Settings With One Touch (Scene)
Selecting the input source and favorite settings with one touch (SCENE) The SCENE function allows you to select the assigned input source, sound program, HDMI output and various settings with just one touch. SOURCE SOURCE RECEIVER RECEIVER You can use up to 12 scenes to register your favorite settings and switch them depending on a playback source. V-AUX V-AUX V-AUX... -
Page 77: Registering A Scene
Registering a scene Selecting setting items to be included as scene assignments SOURCE SOURCE RECEIVER RECEIVER Set the unit to the condition (such as input source and In addition to the default scene assignments (Input, HDMI Output and sound program) that you want to assign to a scene. Mode), you can also include the following setting items as the scene V-AUX V-AUX... -
Page 78: Selecting The Sound Mode
Selecting the sound mode The unit is equipped with a variety of sound programs and surround On-screen sound program/surround decoder selection SOURCE SOURCE RECEIVER RECEIVER decoders that allow you to enjoy playback sources with your favorite a Press ON SCREEN. sound mode (such as sound field effect or stereo playback). -
Page 79: Enjoying Stereoscopic Sound Fields (Cinema Dsp Hd 3 )
The following sound programs are optimized for viewing video sources, such as movies, TV programs, and games. MOVIE THEATER The unit is equipped with a variety of sound programs that utilize Yamaha’s original DSP technology (CINEMA DSP HD ). It allows you to easily create sound fields like actual movie theaters or concert halls in your room and enjoy natural stereoscopic sound fields. - Page 80 ENTERTAINMENT ■ Sound programs suitable for music/stereo playback (MUSIC) This program allows listeners to enjoy the rich vividness of sport broadcasts and The following sound programs are optimized for listening to music sources. light entertainment programs. In sports broadcasts, the commentators’ voices Sports are positioned clearly at the center, while the atmosphere inside the stadium is You can also select stereo playback.
-
Page 81: Virtual Cinema Dsp
If you select one of the sound programs (except 2ch Stereo and 9ch Stereo) when no surround makes the powerful reflections converge toward the stage located in the center. speakers are connected, the unit utilizes Yamaha’s original virtual surround technology to The warehouse resembles some lofts in Soho. Sound reflects off the concrete... -
Page 82: Enjoying Unprocessed Playback
Enjoying unprocessed playback Press SUR. DECODE to select a surround decoder. You can play back input sources without any sound field effect Each time you press the key, the surround decoder changes. SOURCE SOURCE RECEIVER RECEIVER processing. SUR. DECODE VOL. †‡... -
Page 83: Enjoying Pure High Fidelity Sound (Pure Direct)
Enjoying pure high fidelity sound Playing back digitally compressed formats (Pure Direct) (such as MP3, etc.) with enriched sound SOURCE SOURCE RECEIVER RECEIVER (Compressed Music Enhancer) When Pure Direct is enabled, the unit plays back the selected source with the least circuitry in order to reduce the electrical noise from other V-AUX V-AUX V-AUX... -
Page 84: Listening To Fm/Am Radio (Except Australia, U.k., Europe And Russia Models)
Listening to FM/AM radio (except Australia, U.K., Europe and Russia models) You can tune into a radio station by specifying its frequency or selecting from registered radio Setting the frequency steps stations. (Brazil, Asia and General models only) At the factory, the frequency step setting is set to 50 kHz for FM and 9 kHz for AM. Depending •... -
Page 85: Selecting A Frequency For Reception
Selecting a frequency for reception Registering favorite radio stations (presets) SOURCE SOURCE RECEIVER RECEIVER Press TUNER to select “TUNER” as the input source. You can register up to 40 radio stations as presets. Once you have registered stations, you can easily tune into them by selecting their Press BAND to select a band (FM or AM). -
Page 86: Selecting A Preset Station
■ Selecting a preset station Tune into a registered radio station by selecting its preset number. SOURCE SOURCE RECEIVER RECEIVER Press TUNER to select “TUNER” as the input source. V-AUX V-AUX V-AUX Press PRESET repeatedly to select the desired radio AUDIO AUDIO station. -
Page 87: Operating The Radio On The Tv
Operating the radio on the TV ■ Browse screen You can view the radio information or select a radio station on the TV. SOURCE SOURCE RECEIVER RECEIVER Press TUNER to select “TUNER” as the input source. V-AUX V-AUX V-AUX The playback screen is displayed on the TV. AUDIO AUDIO PHONO... -
Page 88: Listening To Dab Radio (Australia, U.k., Europe And Russia Models Only)
Listening to DAB radio (Australia, U.K., Preparing the DAB tuning Europe and Russia models only) Before tuning into DAB radio stations, follow the procedure below to SOURCE SOURCE RECEIVER RECEIVER perform an initial scan. DAB (Digital Audio Broadcasting) uses digital signals for clearer sound and more stable reception compared to analog signals. -
Page 89: Selecting A Dab Radio Station For Reception
Selecting a DAB radio station for reception Registering favorite DAB radio stations (presets) You can select a DAB radio station from the stations stored by the initial SOURCE SOURCE RECEIVER RECEIVER scan. You can register up to 40 DAB radio stations as presets. Once you have registered stations, you can easily tune into them by selecting their Press TUNER to select “TUNER”... -
Page 90: Displaying The Dab Information
■ Selecting a preset DAB radio station Displaying the DAB information Tune into a registered DAB radio station by selecting its preset number. The unit can receive various types of DAB information when it is tuned SOURCE SOURCE RECEIVER RECEIVER into a DAB radio station. -
Page 91: Checking Reception Strength Of Each Dab Channel Label
Checking reception strength of each DAB channel label SOURCE SOURCE RECEIVER RECEIVER You can check reception strength of each DAB channel label (0 [none] to 100 [best]). V-AUX V-AUX V-AUX AUDIO AUDIO Press TUNER to select “TUNER” as the input source. PHONO PHONO PHONO... - Page 92 ■ DAB frequency information The unit supports Band III (174 to 240 MHz) only. Frequency Channel label Frequency Channel label 174.928 MHz 225.648 MHz 176.640 MHz 227.360 MHz 178.352 MHz 229.072 MHz 180.064 MHz 230.784 MHz 181.936 MHz 232.496 MHz 183.648 MHz 234.208 MHz 185.360 MHz...
-
Page 93: Listening To Fm Radio (Australia, U.k., Europe And Russia Models Only)
Listening to FM radio (Australia, U.K., Europe and Russia models only) You can tune into a radio station by specifying its frequency or selecting Registering favorite FM radio stations SOURCE SOURCE RECEIVER RECEIVER from registered radio stations. (presets) V-AUX V-AUX V-AUX AUDIO AUDIO... -
Page 94: Radio Data System Tuning
■ Selecting a preset station Radio Data System tuning Tune into a registered radio station by selecting its preset number. (U.K., Europe and Russia models only) SOURCE SOURCE RECEIVER RECEIVER Radio Data System is a data transmission system used by FM stations in Press TUNER to select “TUNER”... -
Page 95: Operating The Radio On The Tv
Operating the radio on the TV Program service name Program Service Current program type Program Type You can view the radio information or select a radio station on the TV. SOURCE SOURCE RECEIVER RECEIVER Information on the current program Radio Text Current time Clock Time Press TUNER to select “TUNER”... - Page 96 ■ Browse screen SOURCE SOURCE RECEIVER RECEIVER V-AUX V-AUX V-AUX AUDIO AUDIO PHONO PHONO PHONO BLUETOOTH BLUETOOTH BLUETOOTH TUNER TUNER TUNER MAIN MAIN 2 3 4 2 3 4 PARTY PARTY HDMI OUT HDMI OUT ZONE ZONE Preset station list SCENE SCENE Displays the list of preset stations.
-
Page 97: Playing Back Music Via Bluetooth
Playing back music via Bluetooth You can play back music files stored on a Bluetooth device (such as Playing back Bluetooth device music on the SOURCE SOURCE RECEIVER RECEIVER smartphones) on the unit. Also, you can enjoy audio played back on the unit unit using Bluetooth speakers/headphones. -
Page 98: Enjoying Audio Using Bluetooth Speakers/Headphones
Enjoying audio using Bluetooth Use the cursor keys and ENTER to check the desired speakers/headphones Bluetooth speakers/headphones. SOURCE SOURCE RECEIVER RECEIVER Follow the procedure below to establish a Bluetooth connection between Bluetooth speakers/headphones and the unit, and enjoy audio V-AUX V-AUX played back on the unit using Bluetooth speakers/headphones. -
Page 99: Playing Back Music Stored On A Usb Storage Device
Playing back music stored on a USB storage device You can play back music files stored on a USB storage device on the unit. Connecting a USB storage device The unit supports USB mass storage class devices (FAT16 or FAT32 format). Connect the USB storage device to the USB jack. -
Page 100: Playback Of Usb Storage Device Contents
Playback of USB storage device contents Use the cursor keys to select an item and press ENTER. Follow the procedure below to operate the USB storage device contents If a song is selected, playback starts and the playback screen is SOURCE SOURCE RECEIVER... - Page 101 ■ Browse screen ■ Playback screen SOURCE SOURCE RECEIVER RECEIVER V-AUX V-AUX V-AUX AUDIO AUDIO PHONO PHONO PHONO BLUETOOTH BLUETOOTH BLUETOOTH TUNER TUNER TUNER MAIN MAIN 2 3 4 2 3 4 PARTY PARTY HDMI OUT HDMI OUT ZONE ZONE Status indicators Status indicators SCENE...
- Page 102 ■ Shuffle/repeat settings You can configure the shuffle/repeat settings for playback of USB storage device contents. SOURCE SOURCE RECEIVER RECEIVER When “USB” is selected as the input source, press V-AUX V-AUX V-AUX AUDIO AUDIO OPTION. PHONO PHONO PHONO BLUETOOTH BLUETOOTH BLUETOOTH Use the cursor keys to select “Shuffle”...
-
Page 103: Playing Back Music Stored On Media Servers (Pcs/Nas)
Playing back music stored on media servers (PCs/NAS) You can play back music files stored on your PC or DLNA-compatible NAS on the unit. ■ For a PC or a NAS with other DLNA server software installed • To use this function, the unit and your PC must be connected to the same router (p.50). You can check whether Refer to the instruction manual for the device or software and configure the media sharing the network parameters (such as the IP address) are properly assigned to the unit in “Network Connection”... -
Page 104: Playback Of Pc Music Contents
Playback of PC music contents Use the cursor keys to select an item and press ENTER. Follow the procedure below to operate the PC music contents and start If a song is selected, playback starts and the playback screen is SOURCE SOURCE RECEIVER... - Page 105 ■ Browse screen ■ Playback screen SOURCE SOURCE RECEIVER RECEIVER V-AUX V-AUX V-AUX AUDIO AUDIO PHONO PHONO PHONO BLUETOOTH BLUETOOTH BLUETOOTH TUNER TUNER TUNER MAIN MAIN 2 3 4 2 3 4 PARTY PARTY HDMI OUT HDMI OUT ZONE ZONE Status indicators Status indicators SCENE...
- Page 106 ■ Shuffle/repeat settings You can configure the shuffle/repeat settings for the playback of PC music content. SOURCE SOURCE RECEIVER RECEIVER When “SERVER” is selected as the input source, press V-AUX V-AUX V-AUX AUDIO AUDIO OPTION. PHONO PHONO PHONO BLUETOOTH BLUETOOTH BLUETOOTH Use the cursor keys to select “Shuffle”...
-
Page 107: Listening To Internet Radio
Listening to Internet radio You can listen to Internet radio stations from all over the world. Playback of Internet radio SOURCE SOURCE RECEIVER RECEIVER • To use this function, the unit must be connected to the Internet (p.50). You can check V-AUX V-AUX V-AUX... - Page 108 ■ Browse screen ■ Playback screen SOURCE SOURCE RECEIVER RECEIVER V-AUX V-AUX V-AUX AUDIO AUDIO PHONO PHONO PHONO BLUETOOTH BLUETOOTH BLUETOOTH TUNER TUNER TUNER MAIN MAIN 2 3 4 2 3 4 PARTY PARTY HDMI OUT HDMI OUT ZONE ZONE Playback indicator Playback indicator SCENE...
-
Page 109: Registering Favorite Internet Radio Stations (Favorites)
Registering favorite Internet radio stations (Favorites) By registering your favorite Internet radio stations to “Favorites”, you SOURCE SOURCE RECEIVER RECEIVER can quickly access to them from the “Favorites” folder in the browse screen. V-AUX V-AUX V-AUX AUDIO AUDIO You can also register up to 40 favorite USB and network contents or Bluetooth input PHONO PHONO PHONO... -
Page 110: Playing Back Itunes/Ipod Music With Airplay
Playing back iTunes/iPod music with AirPlay The AirPlay function allows you to play back iTunes/iPod music on the unit via network. Playback of iTunes/iPod music contents iTunes Follow the procedure below to play back iTunes/iPod music contents on the unit. Turn on the unit, and start iTunes on the PC or display the playback screen Router on the iPod. - Page 111 ■ Playback screen SOURCE SOURCE RECEIVER RECEIVER V-AUX V-AUX V-AUX AUDIO AUDIO PHONO PHONO PHONO BLUETOOTH BLUETOOTH BLUETOOTH TUNER TUNER TUNER MAIN MAIN 2 3 4 2 3 4 PARTY PARTY HDMI OUT HDMI OUT ZONE ZONE Playback indicator SCENE SCENE Playback information Displays the artist name, album name, song title, and elapsed/remaining time.
-
Page 112: Playing Back Videos/Audio In Multiple Rooms (Multi-Zone)
Since there are many possible ways to use the unit in a multi-zone configuration, we Guest room recommend that you consult with your nearest authorized Yamaha dealer or service center (Zone2) about the multi-zone connections that best meet your requirements. -
Page 113: Preparing The Multi Zone System
Preparing the multi zone system Using an external amplifier Connect the external amplifier placed in Zone2 or Zone3 to the unit with a stereo pin cable and Connect the device that will be used in other rooms to the unit. connect speakers to the external amplifier. - Page 114 ■ Connecting an HDMI-compatible device to play back videos/audio • When the HDMI OUT 2 (ZONE OUT) jack is assigned to Zone2, you can enable/disable the audio output from the HDMI OUT 2 jack by setting “Zone2 - Audio Output” (p.157) in the “Setup” menu to “On” or “Off” (default). Connect an HDMI-compatible device (such as a TV) to play back videos/audio at Zone2 or •...
- Page 115 Remote connections between Yamaha products (remote connection) An infrared signal transmitter is not required if you are using Yamaha products that support remote connections, as the unit does. You can transmit remote control signals by connecting You can operate the unit and external devices from Zone2, Zone3 or Zone4 using the supplied the REMOTE IN/OUT jacks with monaural mini-jack cables and an infrared signal receiver.
-
Page 116: Controlling Zone2, Zone3 Or Zone4
Controlling Zone2, Zone3 or Zone4 Start playback on the external device or select a radio station. SOURCE SOURCE RECEIVER RECEIVER Use the ZONE switch to select a zone. RECEIVER z Refer to the instruction manual for the external device. For details on the following operations, see the corresponding Press RECEIVER z. - Page 117 ■ Other operations for Zone2, Zone3 or ■ Enjoying the same source in multiple Zone4 rooms (party mode) SOURCE SOURCE RECEIVER RECEIVER The following functions are also available when the zone you want to The party mode allows you to play back in all zones the same music that operate is enabled.
-
Page 118: Registering Favorite Items (Shortcut)
Registering favorite items (shortcut) You can register up to 40 favorite USB and network contents or Bluetooth Recalling a registered item SOURCE SOURCE RECEIVER RECEIVER input source as shortcuts and access them directly by selecting the shortcut numbers. Recall a registered item by selecting the shortcut number. V-AUX V-AUX V-AUX... -
Page 119: Controlling The Unit From A Web Browser (Web Control)
Controlling the unit from a web browser (web control) You can control the unit with the web control screen displayed in a web browser. • You can check the IP address of the unit in “Network” (p.162) in the “Information” menu. Web browser •... -
Page 120: Top Menu Screen
Top menu screen Control screen PLAY INFO CONTROL Selects an input source or controls playback for the selected zone. Moves to the control screen for the selected zone. TOP MENU STATUS Moves to the top menu screen. Turns on/off the power for each zone or displays the input source and volume set for each zone. SCENE SETTINGS Selects a scene for the selected zone. -
Page 121: Settings Screen
Settings screen Google Analytics Displays an explanation of data collection by Google Analytics. Data collection can be enabled or disabled at any time. BACK Moves to the top menu screen. RELOAD Reloads the current status of the unit. Note • If the network settings are changed, you may need to restart the browser or regain access to the unit. •... -
Page 122: Viewing The Current Status
Viewing the current status Currently input Item source You can view the current status (input or DSP program currently AV 1-7 SOURCE SOURCE RECEIVER RECEIVER VIDEO AUX selected) on the front panel display or TV. DSP Program (sound mode name), Audio Decoder (decoder name AUDIO 1-4 V-AUX... -
Page 123: Viewing The Status Information On The Tv
Viewing the status information on the TV SOURCE SOURCE RECEIVER RECEIVER Press DISPLAY. The following information is displayed on the TV. V-AUX V-AUX V-AUX Compressed Music AUDIO AUDIO Input source/ Enhancer/Hi-Res Volume/YPAO Party mode status mode status Volume status PHONO PHONO PHONO BLUETOOTH... -
Page 124: Configuring Playback Settings For Different Playback Sources (Option Menu)
Configuring playback settings for different playback sources (Option menu) You can configure separate playback settings for different playback sources. This menu is Option menu items available on the front panel (or on the TV screen), allowing you to easily configure settings during playback. - Page 125 ■ YPAO Volume (YPAO Volume) Item Function Page Enables/disables YPAO Volume or Adaptive DRC. Input Trim Corrects volume differences between input sources. (In.Trim) YPAO Volume (YPAO Vol.) Input Settings Audio Select Selects the audio input jack to use when more than one (Input Settings) (A.Sel) audio connection is made for one input source.
- Page 126 ■ Dialogue (Dialog) ■ Lipsync Adjustment (Lipsync Adj.) Adjusts the volume or perceive height of dialogue sounds. Adjusts the delay between video and audio output. Setting range Dialogue Level (Dialog Lvl) 0 ms to 500 ms (1 ms increments) Adjusts the volume of dialogue sounds. If dialogue sounds cannot be heard clearly, you can turn up its volume by increasing this setting.
- Page 127 ■ Enhancer (Enhancer) ■ Video Processing (Video Process.) Enables/disables Compressed Music Enhancer and the high-resolution mode. Configures the video signal processing settings. Enhancer (Enhancer) Video Mode (V.M) Enables/disables Compressed Music Enhancer (p.83). Enables/disables the video signal processing (resolution, aspect ratio and video adjustments) settings configured in “Processing”...
- Page 128 ■ Input Settings (Input Settings) ■ FM Mode (FM Mode) Configures the input settings. Switches between stereo and monaural for FM radio reception. Settings This setting is applied separately to each input source. Stereo (Stereo) Receives FM radio in stereo sounds. Mono (Mono) Receives FM radio in monaural sounds.
-
Page 129: Configurations
CONFIGURATIONS Configuring input sources (Input menu) Use the cursor keys (q/w) to select an item and press ENTER. You can change the input source settings using the TV screen. Press ON SCREEN. Use the cursor keys to select “Input” and press ENTER. To return to the previous screen during menu operations, press RETURN. -
Page 130: Input Menu Items
Input menu items Use the cursor keys and ENTER to rename and select “ENTER” to confirm the entry. • Available items vary depending on the selected input source. • Default settings are underlined. Item Function Page Rename/Icon Select Changes the input source name and icon. Decoder Mode Sets the format of digital audio playback to DTS. - Page 131 ■ Decoder Mode ■ Balance Input Attenuator Sets the format of digital audio playback to “DTS”. (RX-A3070 only) For example, if the unit does not detect DTS audio and outputs noise, set “Decoder Mode” to Selects whether to activate the attenuator for the balance input (AUDIO 4) so that you can “DTS”.
-
Page 132: Configuring The Scene Function (Scene Menu)
Configuring the SCENE function (Scene menu) Use the cursor keys and ENTER to change the setting. You can change the settings of the SCENE function (p.76) using the TV screen. To exit from the menu, press ON SCREEN. Press ON SCREEN. Scene menu items Use the cursor keys to select “Scene”... - Page 133 ■ Load Check or uncheck Loads the settings registered for the selected scene. Select “DETAIL” to configure the SCENE link playback setting or view the scene assignments. Device Control Recalls a selected scene and starts its playback on an external device connected to the unit via HDMI.
- Page 134 Playing a radio station or content included as the scene assignments automatically when ■ Rename/Icon Select pressing SCENE Changes the scene name and icon displayed on the front display or TV screen. ■ Setup procedure Individual contents cannot be registered for “Bluetooth” and “AirPlay”. The content lastly played back on each device will be recalled.
-
Page 135: Configuring Sound Programs/Surround Decoders (Dsp Program Menu)
Configuring sound programs/surround decoders Use the cursor keys (q/w) to select an item and press ENTER. (DSP Program menu) You can change the settings of the sound programs and surround decoders using the TV screen. Press ON SCREEN. Use the cursor keys to select “DSP Program” and press ENTER. •... -
Page 136: Dsp Program Menu Items
DSP Program menu items Item Function Settings 1.0 s to 5.0 s Adjust the decay time of the rear Higher to enrich the reverberant Reverb Time reverberant sound. sound and lower to have clear • Available items and the default settings vary depending on the selected sound program or surround decoder. sound. - Page 137 ■ Settings for decoders The following items are available when you set “Decode Type” of “SURROUND DECODER” to “bDsur” or “Neo:6 Music”. Decode Type Item Function Settings Off, On Selects whether to spread the center channel signals Select “On” to spread center channel bDsur Center Spread to left and right when...
-
Page 138: Configuring Various Functions (Setup Menu)
Configuring various functions (Setup menu) You can configure the unit’s various function with the menu displayed on the TV screen. Use the cursor keys (q/w) to select an item and press ENTER. Press ON SCREEN. Use the cursor keys to select “Setup” and press ENTER. To return to the previous screen during menu operations, press RETURN. -
Page 139: Setup Menu Items
Setup menu items Menu Item Function Page Auto Setup Automatically optimizes the speaker settings (YPAO). Setting Pattern Registers two speaker setting patterns and switches between them. Setting Data Copy Copies the “Setting Pattern” parameters in the specified direction. Power Amp Assign Selects a speaker system. - Page 140 Menu Item Function Page Enables/disables the Lipsync adjustment for each input source. Delay Enable Selects the method to adjust the delay between video and audio output. Lipsync Auto/Manual Select Adjusts the delay between video and audio output manually. Adjustment Selects the dynamic range adjustment method for bitstream audio (Dolby Digital and DTS signals) playback. Dynamic Range Sets the limit value of the volumes.
- Page 141 Menu Item Function Page Changes the zone name (for main zone) displayed on the front display or TV screen. Main Zone Set Zone Rename Enables/disables volume adjustments for Zone2 or Zone3 output. Volume Sets the Zone2 or Zone3 limit value of the volume. Max Volume Sets the Zone2 or Zone3 initial volume for when the unit is turned on.
-
Page 142: Speaker (Manual Setup)
Speaker (Manual Setup) ■ Setting Data Copy Copies the “Setting Pattern” parameters in the specified direction. Configures the speaker settings manually. Choices Pattern1 ▶ 2 Copies the “Pattern1” parameters to “Pattern2”. Default settings are underlined. Pattern2 ▶ 1 Copies the “Pattern2” parameters to “Pattern1”. ■... - Page 143 Center Select this option when you use Zone2 and Zone3 speakers in addition to the 7.2 system (including front channel expansion using an external amplifier) in the Selects whether or not a center speaker is connected and its size. main zone (p.35). 7.2 [ext.Front] +2Zone You can select a zone to be assigned to the EXTRA SP 1 and EXTRA SP 2 jacks Settings...
- Page 144 Surround Back Rear Presence Selects whether or not surround back speakers are connected and their sizes. Selects whether or not rear presence speakers are connected and their size. Settings Settings Select this option when one large speaker is connected. Large Select this option for large speakers.
- Page 145 Layout Rear Presence Selects a rear presence layout when rear presence speakers are used. This setting facilitates Selects the layouts of the surround speakers, front/rear presence speakers and subwoofers. the optimization of the sound field effect. Surround Settings Selects a surround speaker layout when surround speakers are used. Rear Height Select this option when rear presence speakers are installed on the rear side wall.
-
Page 146: Test Tone
■ Level Use the cursor keys (e/r) to select a center frequency from the 7 preset bands (4 for Adjusts the volume of each speaker. subwoofer) and the cursor keys (q/w) to adjust the gain. Choices Front L, Front R, Center, Surround L, Surround R, Surround Back L, Surround Back R, Front Presence L, Front Presence R, Rear Presence L, Rear Presence R, Subwoofer 1, Subwoofer 2 Setting range -10.0 dB to 0.0 dB to +10.0 dB (0.5 dB increments) -
Page 147: Sound
Sound Adjustment Adjusts the delay between video and audio output manually when “Auto/Manual Select” is set Configures the audio output settings. to “Manual”. You can fine-adjust the audio output timing when “Auto/Manual Select” is set to “Auto”. ■ Lipsync Setting range Adjusts the delay between video and audio by holding up the audio output. - Page 148 ■ Max Volume ■ CINEMA DSP 3D Mode Sets the limit value of the volume. Enables/disables CINEMA DSP HD (p.79). If this function is set to “On”, CINEMA DSP HD functions with the selected sound programs (except 2ch Stereo and 9ch Stereo). Setting range -30.0 dB to +15.0 dB (5.0 dB increments), +16.5 dB Settings...
-
Page 149: Video
■ DAC Digital Filter Video (RX-A3070 only) Configures the video output settings. Selects the digital filter type of the audio DAC (digital-to-analog converter) to have favorite sounds. Settings Removes out-of-band noises by the filter with steep attenuation characteristics. Sharp Roll-off Type It has a tendency to produce clear sounds. - Page 150 Aspect Detail Enhancement Adjusts the enhancement effect of video details. Selects an aspect ratio to output HDMI video signals when “Video Mode” is set to “Processing”. Setting range Settings 0 to 50 Through Does not convert the aspect ratio. Edge Enhancement Outputs 4:3 video signals to a 16:9 TV with black bands on either side of the 16:9 Normal screen.
-
Page 151: Hdmi
HDMI Enables/disables ARC (p.192) when “HDMI Control” is set to “On”. Configures the HDMI settings. Settings Disables ARC. Enables ARC. You do not need to change this setting normally. In case noises are produced from the speakers connected to the unit because TV audio signals input to the unit via ARC are not supported by the unit, set “ARC”... -
Page 152: Network
■ Audio Output Network Selects a device to output audio. Configures the network settings. • The “HDMI OUT1” setting is available only when “HDMI Control” is set to “Off”. • The “HDMI OUT2” setting is available only when “HDMI OUT2 Assign” (p.157) is set to “Main”. HDMI OUT1, HDMI OUT2 Enables/disables the audio output from a TV connected to the HDMI OUT 1 jack or HDMI OUT 2 jack. -
Page 153: Mac Address Filter
■ Manual network settings ■ MAC Address Filter Sets the MAC address filter to limit access to the unit from other network devices. Set “DHCP” to “Off”. Use the cursor keys (q/w) to select a parameter type and press ENTER. Filter Enables/disables the MAC address filter. -
Page 154: Bluetooth
■ Network Name Bluetooth Edits the network name (the unit’s name on the network) displayed on other network devices. Configures the Bluetooth settings. ■ Setup procedure Press ENTER to enter the name edit screen. Use the cursor keys and ENTER to rename and select “ENTER” to confirm the entry. ■... -
Page 155: Multi Zone
■ Audio Send Multi Zone Configures the Bluetooth settings when the unit is used as the Bluetooth audio transmitter. Configures the multi zone settings. Transmitter Enables/disables the Bluetooth audio transmitter function. When this function is enabled, you can enjoy audio played back on the unit using Bluetooth speakers/headphones (p.98). -
Page 156: Audio Delay
■ Zone2 Set, Zone3 Set Audio Delay Configures the Zone2 or Zone3 settings. Adjusts the audio output timing for Zone2 or Zone3 so that the audio is synchronized with the video. Volume Setting range Enables/disables volume adjustments for Zone2 or Zone3 output. 0 ms to 100 ms (1 ms increments) If you have connected an external amplifier with volume control to the unit, disable the volume Mono... -
Page 157: Hdmi Out2 Assign
Extra Bass ■ HDMI OUT2 Assign Select the zone for which the HDMI OUT 2 (ZONE OUT) jack is used. Enables/disables Extra Bass for Zone2 or Zone3 output. When Extra Bass is enabled, you can enjoy enhanced bass sounds, regardless of the size of speakers. Settings Main, Zone2, Zone4 Settings... -
Page 158: Function
Function ■ Remote PROGRAM Key Assigns the desired function to the PROGRAM keys of the remote control. Configures the functions that make the unit easier to use. For example, when “INPUT Selection” is selected, the PROGRAM keys will operate as the input switching keys. -
Page 159: Target Zone
Wallpaper Manual Switches the output level for electronic signal transmission manually when “Trigger Mode” is Selects the image to be used as wallpaper on the TV. set to “Manual”. This setting can also be used to confirm proper function of the external device Settings connected via the TRIGGER OUT jack. -
Page 160: Eco
■ Memory Guard Prevents accidental changes to the settings. Configures the power supply settings. Settings Does not protect the settings. Protects the settings until “Off” is selected. When “Memory Guard” is set to “On”, the lock icon (o) is displayed on the menu screen. Icon ■... -
Page 161: Language
■ ECO Mode Viewing information about the unit Enables/disables the eco (power saving) mode. (Information menu) You can reduce the unit’s power consumption by setting “ECO Mode” to “On”. After setting, be sure to press ENTER to restart the unit. You can view information about the unit using the TV screen. -
Page 162: Types Of Information
Types of information ■ HDMI Monitor Displays information about the TVs connected to the HDMI OUT jacks. You can check the following information in the Information menu. Use the cursor keys (q/w) to switch between “OUT1” and “OUT2”. ■ Audio Signal Interface TV interface Displays information about the current audio signal. -
Page 163: Configuring The System Settings (Advanced Setup Menu)
(When using Wireless Direct) Configuring the system settings (ADVANCED SETUP menu) SSID The SSID of the wireless network Security Security method Configure the system settings of the unit while viewing the front display. Security Key Security key IP Address IP address Set the unit to standby mode. -
Page 164: Advanced Setup Menu Items
ADVANCED SETUP menu items Changing the speaker impedance setting (SPEAKER IMP.) Default settings are underlined. SPEAKER IMP. Item Function Page 8¬MIN SPEAKER IMP. Changes the speaker impedance setting. Change the unit’s speaker impedance settings depending on the impedance of the speakers REMOTE SENSOR Turns on/off of the remote control sensor on the main unit. -
Page 165: Selecting The Remote Control Id (Remote Id)
Change the unit’s remote control ID so that it matches the remote control’s ID (default: ID1). Switch the video signal type of the unit so that it matches to the format of your TV. When using multiple Yamaha AV receivers, you can set each remote control with a unique Settings remote control ID for its corresponding receiver. -
Page 166: Selecting The Hdmi 4K Signal Format (4K Mode)
Selecting the HDMI 4K signal format (4K MODE) Switching the DTS format notification setting (DTS MODE) 4K MODE MODE 1 DTS MODE MODE 1 Selects the format of signals input/output at the unit when HDMI 4K compatible TV and playback device are connected to the unit. Switches the DTS format notification setting. -
Page 167: Restoring The Default Settings (Initialize)
New firmware that provides additional features or product improvements will be released as needed. Updates can be downloaded from the Yamaha website. If the unit is connected to the Internet, you can download the firmware via the network. For details, refer to the information supplied with updates. -
Page 168: Controlling External Devices With The Remote Control
PROGRAM PROGRAM MUTE MUTE VOLUME VOLUME Once the remote control code is successfully registered, SOURCE blinks Under the unit’s default settings, the amplifier code (Yamaha: 5098) is set for all the twice. TOP MENU TOP MENU TOP MENU POP-UP/MENU POP-UP/MENU POP-UP/MENU input selection keys. -
Page 169: Registering The Remote Control Codes For Playback Devices
Registering the remote control codes for ■ Playback device operations playback devices Once you have registered the remote control code for your playback device, you can control it using the following keys after selecting the SOURCE RECEIVER SOURCE z You can use the unit’s remote control to operate playback devices if you input source or scene. -
Page 170: Resetting Remote Control Codes
Resetting remote control codes You can reset a remote control code registered to each input selection SOURCE RECEIVER SOURCE key. RECEIVER Press CODE SET. V-AUX V-AUX AUDIO Input selection keys SOURCE blinks twice. PHONO PHONO BLUETOOTH BLUETOOTH Perform each of the following steps within 1 minute. Otherwise, TUNER TUNER the setting will be canceled. -
Page 171: Updating The Unit's Firmware Via The Network
In this case, update the firmware using the USB memory device (p.167). the front display, press MAIN ZONE z on the front panel. • For details on update, visit the Yamaha website. PROGRAM PROGRAM... -
Page 172: Updating The Unit's Firmware At Power Off
Updating the unit’s firmware at power off SOURCE SOURCE RECEIVER RECEIVER Read the on-screen description. To set the firmware to update at power off, use the cursor V-AUX V-AUX V-AUX AUDIO AUDIO keys to select “LATER” and press ENTER. PHONO PHONO PHONO BLUETOOTH... -
Page 173: Appendix
If you want to fix the volume, use “Initial Volume” in the “Setup” menu to set the volume to be When using multiple Yamaha products, the remote control may work on another Yamaha applied when the receiver is turned on (p.148). You can also set the initial volume for Zone2 or product or another remote control may work on the unit. -
Page 174: Troubleshooting
Refer to the table below when the unit does not function properly. If the problem you are experiencing is not listed below or if the instructions below do not help, turn off the unit, disconnect the power cable, and contact the nearest authorized Yamaha dealer or service center. - Page 175 Problem Cause Remedy The unit is out of the operating range. Use the remote control within the operating range (p.6). The batteries are weak. Replace with new batteries. The unit’s remote control sensor is exposed to direct sunlight or strong Adjust the lighting angle, or reposition the unit.
-
Page 176: Audio
Audio Problem Cause Remedy Another input source is selected. Select an appropriate input source with the input selection keys. Some digital audio formats cannot be played back on the unit. To check the audio format No sound. Signals that the unit cannot reproduce are being input. of the input signal, use “Audio Signal”... - Page 177 Problem Cause Remedy Change the audio output setting on your TV so that the TV audio is output from the The TV is set to output audio from the TV speakers. speakers connected to the unit. A TV that does not support ARC is connected to the unit only with an Use a digital optical cable to make an audio connection (p.41).
-
Page 178: Video
Video Problem Cause Remedy Another input source is selected on the unit. Select an appropriate input source with the input selection keys. Another input source is selected on the TV. Switch the TV input to display the video from the unit. No video. -
Page 179: Fm/Am Radio (Am Radio Feature Is Not Available For The Australia, U.k., Europe And Russia Models)
FM/AM radio (AM radio feature is not available for the Australia, U.K., Europe and Russia models) Problem Cause Remedy There is multi-path interference. Adjust the FM antenna height or orientation, or place it in a different location. Set “FM Mode” in the “Option” menu to “Mono” to select monaural FM radio reception FM radio reception is weak or noisy. -
Page 180: Bluetooth
Bluetooth Problem Cause Remedy The Bluetooth function of the unit is disabled. Enable the Bluetooth function (p.154). Another Bluetooth device is already connected to the unit. Terminate the current Bluetooth connection and then establish a new connection (p.97). The unit and the Bluetooth device are too far apart. Move the Bluetooth device closer to the unit. -
Page 181: Usb And Network
USB and network Problem Cause Remedy The USB device is not connected to the USB jack securely. Turn off the unit, reconnect your USB device, and turn the unit on again. The unit does not detect the USB device. The file system of the USB device is not FAT16 or FAT32. Use a USB device with FAT16 or FAT32 format. - Page 182 Problem Cause Remedy There may be a network problem at the radio station, or the service may have been The selected Internet radio station is currently not available. stopped. Try the station later or select another station. Some Internet radio stations broadcast silence at certain of times of the day. Try the The selected Internet radio station is currently broadcasting silence.
-
Page 183: Error Indications On The Front Display
Twist the bare wires of the cables firmly and connect to the unit and speakers properly. Internal Error An internal error has occurred. Contact the nearest authorized Yamaha dealer or service center. No content There are no playable files in the selected folder. -
Page 184: Glossary
Glossary This section explains the technical terms used in this manual. DSD (Direct Stream Digital) DSD (Direct Stream Digital) technology stores audio signals on digital storage media, such as SACD (Super Audio CDs). The signals are stored at a high-frequency sampling rate (such as 2.8224 MHz and 5.6448 MHz). The highest Audio information (audio decoding format) frequency response is equal to or higher than 100 kHz, with a dynamic range of 120 dB. - Page 185 DTS Neo:6 WMA (Windows Media Audio) DTS Neo:6 enables 6-channel playback from 2-channel sources. There are two modes available: “Music mode” for One of the compressed digital audio formats developed by Microsoft Corporation. With psychoacoustic music sources and “Cinema mode” for movie sources. This technology provides discrete full-bandwidth matrix technologies, this compression method achieves a high compression rate.
-
Page 186: Audio Information (Others)
Audio Information (Others) HDMI and video information Bi-amplification connection (Bi-amp) Component video signal A bi-amplification connection uses two amplifiers for a speaker. When you use the bi-amplification connection, the With the component video signal system, the video signal is separated into the Y signal for luminance and the Pb and unit drives the tweeter and woofer in a speaker with the discrete amplifiers. -
Page 187: Network Information
Wi-Fi (Wireless Fidelity) is a technology that allows an electronic device to exchange data or connect to the Internet hear. Based on a wealth of actually measured data, CINEMA DSP, Yamaha’s original DSP technology provides the wirelessly using radio waves. Wi-Fi offers the advantage of eliminating the complexity of making connections with audiovisual experience of a movie theater in your own home. -
Page 188: Supported Devices And File Formats
Supported devices and file formats File formats For information about specifications of each file, refer to the instruction manual of your This section explains the devices and file formats supported by the unit. recording device or consult file’s help. Supported devices ■... -
Page 189: Video Signal Flow
Video signal flow Video conversion table Video signals input from a video device to the unit are output to a TV as shown below. • You can select the resolution and the aspect ratio applied to HDMI-output video processing in “Video Mode” (p.149) in the “Setup” menu. •... -
Page 190: Multi-Zone Output
Multi-zone output Information on HDMI Audio signals that can be output to Zone2, Zone3 and Zone4 vary depending on how you This section explains the functions related to HDMI and its signal compatibility. connect the device in each zone to the unit’s output jacks. HDMI Control Using the unit’s internal Using an external amplifier (p.113) - Page 191 (Example) Use the cursor keys (e/r) to select “HDMI”. HDMI Control HDMI Control Playback starts Turns on and displays video from the playback device Press SCENE 1 To use HDMI Control, you need to perform the following HDMI Control link setup after connecting the TV and playback devices.
-
Page 192: Audio Return Channel (Arc)
HDMI signal compatibility • If HDMI Control does not work properly, try unplugging the TV in Step 3 and plugging in the TV again in Step 4. It may solve the problem. Also, HDMI Control may not work if the number of connected devices exceeds the •... -
Page 193: Trademarks
Blu-ray is a trademark of the Blu-ray Disc Association. redistribute this open-source code only. For information on Bluetooth SIG, Inc. and any use of such marks by Yamaha Corporation is GPL/LGPL open source software, how to obtain it, and the under license. -
Page 194: Specifications
Specifications Input jacks [RX-A2070] • Video Format (Repeater Mode) – Pre Out x 7 (FRONT L/R, CENTER, SURROUND L/R, SURROUND – VGA • Analog Audio BACK L/R) – 480i/60 Hz [RX-A3070] – ZONE OUT x 2 (ZONE2/ZONE3) – 576i/50 Hz Audio (Unbalance) x 9 (AV 1–4, AUDIO 1–3, PHONO, VIDEO AUX) •... -
Page 195: Audio Section
Bluetooth • Wi-Fi function Audio Section – Capable of WPS by PIN Method and Push-Button-Method • Sink Function • Rated Output Power (2-channel driven) – Capable of sharing with iOS devices by wireless connection and Source Device to AVR (ex. Smartphone/Tablet) [RX-A3070] USB connection •... - Page 196 (1 kHz, 0.9% THD, 8 Ω) • Maximum Effective Output Power (1-channel driven) Surround L/R ..............220 W/ch Front L/R ..............155 W+155 W [RX-A3070] Surround Back L/R ............220 W/ch Center ..................155 W (1 kHz, 10% THD, 6 Ω) Front Presence L/R............220 W/ch Surround L/R ...............155 W+155 W Front L/R ................230 W/ch •...
-
Page 197: Video Section
L.P.F. (Subwoofer) .............. 24 dB/oct. * The contents of this manual apply to the latest specifications as of the • Power Supply publishing date. To obtain the latest manual, access the Yamaha Video Section [U.S.A. and Canada models]........AC 120 V, 60 Hz website then download the manual file. - Page 198 List of remote control codes Asuka 0277, 0282, 0337, 0340, 0342 Carena 0320 Daewoo 0007, 0008, 0026, 0037, 0053, Atlantic 0277, 0320, 0342, 0349, 0350 Carnivale 0050 0167, 0266, 0275, 0277, 0282, Atori 0323, 0343 Carrefour 0344 0315, 0320, 0323, 0331, 0335, A.R.
- Page 199 Emprex 0154 Genexxa 0320, 0340, 0347, 0350 Hygashi 0277, 0282, 0342 Kendo 0161, 0320, 0341, 0346 Envision 0008, 0026, 0050 0128, 0227 Hyper 0277, 0282, 0323, 0342, 0343 Kenwood 0008, 0026, 0050 Epson 0155, 0206, 0359 Giant 0282 Hypson 0282, 0320, 0321, 0337, 0342, 0282 Erres 0320, 0349, 0350...
- Page 200 Manesth 0282, 0320, 0337, 0342, 0349, 0320, 0349, 0350 Philips 0008, 0009, 0010, 0011, 0012, Radiomarelli 0320, 0339 0350 Net-TV 0176 0032, 0048, 0049, 0052, 0122, Radiotone 0161, 0320, 0323, 0350 Marantz 0008, 0010, 0026, 0050, 0204, Neufunk 0320, 0323 0128, 0134, 0186, 0187, 0213, Rank 0344...
- Page 201 Xrypton 0320 Serino 0277 Sutron 0323, 0343 0282, 0283, 0293, 0304, 0306, Yamaha 0008, 0026, 0050, 0053, 0080, Sharp 0000, 0001, 0002, 0003, 0007, 0151 0307, 0329, 0344, 0355, 0454, 0081, 0082, 0083, 0086, 0087 0008, 0012, 0026, 0060, 0088,...
- Page 202 Bush 1008, 1009, 1024, 1025, 1029, Fisher 1065 Instant Replay 1068 Mitsubishi 1026, 1028, 1079 1049, 1051, 1063, 1217 Flint 1024 Interbuy 1008, 1031 Motorola 1068 Calix 1071 Formenti/Phoenix 1028 Interfunk 1028 1070 Candle 1070, 1071 Frontech 1030 Intervision 1009, 1026 Multitech 1008, 1026, 1028, 1029, 1030, Canon...
- Page 203 Stern 1009 Weltblick 1031 Cambridge Audio 2354 Radiola 1028 1068 XR-1000 1068, 1069 2352, 2353 Radix 1071 Sunkai 1024 Yamaha 1064, 1065 CAVS 2192 Randex 1071 Sunstar 1026 Yamishi 1008, 1029 Centrum 2353 1019, 1068, 1070, 1075, 1110, Suntronic 1026...
- Page 204 2137 Kiss 2380 Optim 2381 Rowa 2154, 2383 Finlux 2354, 2362, 2367 2131, 2149 Optimus 2180 Rownsonic 2353 Fintec 2377 Koda 2358 Orava 2358 Saba 2148, 2188 Fisher 2134 Koss 2013, 2148, 2158 Orbit 2363 Sabaki 2355 Funai 2137 2359 Orion 2073, 2110 Saivod...
- Page 205 2032, 2036, 2037, 2039, 2049, 3017, 3025, 3066, 3084, 3090, Technika 2362, 2367 Onkyo 2504 2054, 2055, 2076 3096, 3117 Telefunken 2353 Panasonic 2011, 2209, 2214, 2476, 2477, Yamaha 2056 Goldstar 3120 Tensai 2362 2479 Gooding 3099 Tevion 2182, 2355, 2357 Philips...
- Page 206 Quasar 3122 CHEROKEE 4216 EURIEULT 4031 RadioShack 3123, 3127 Chess 4212, 4217 Eurodec 4052 Satellite 3030, 3031, 3087, 3118 CityCom 4006, 4215, 4219 Europa 4053, 4218, 4219 AB Sat 4216, 4217 Realistic 3070 Clatronic 4013 Europhon 4219 AccessHD 4104 Recoton 3126 4010 Eurosat...
- Page 207 Hughes 4064, 4068, 4192, 4194, 4196, Maspro 4006, 4217 Panasonic 4006, 4035, 4036, 4121, 4124, Satec 4217 4202 Matsui 4216 4126, 4198, 4221 Satelco 4024 Hughes Network Systems 4219 Panda 4006, 4219 Satford 4012 4071 Mediabox 4213 Pansat 4125 Satmaster 4012 Humax 4025, 4030, 4060, 4097...
- Page 208 Teleka 4004, 4011, 4014, 4218, 4219 Telemaster 4010 TELENET 4241 Yamaha 5082, 5095, 5114 Telesat 4219 Telestar 4212, 4213, 4218 Televes 4006, 4218 Telewire 4048 CD Recorder Tempo 4223 Yamaha 5083 Tevion 4008, 4217 Thomson 4006, 4020, 4052, 4058, 4208,...
- Page 209 Yamaha Global Site https://www.yamaha.com/ Yamaha Downloads http://download.yamaha.com/ Manual Development Group © 2017 Yamaha Corporation Published 05/2017 AM-A0 YJ291A0/EN1...
-
Page 210: Quick Start Guide
UCRABL AV Receiver Ampli-tuner audio-vidéo Safety Instructions ..........2 English Connections ............7 Quick Start Guide Basic operations ..........18 Guide de démarrage rapide Consignes de sécurité......... 22 Français Guía de inicio rápida Raccordements ........... 27 Fonctionnement de base ........38 Instrucciones de segurida ........ - Page 211 Caution: Do not attempt to play this CD-ROM in an audio player. The Owner’s Manual contained in the CD-ROM can be downloaded from the following website. http://download.yamaha.com/ IMPORTANT SAFETY INSTRUCTIONS Do not install near any heat sources such as radiators, heat registers, stoves, or other apparatus (including amplifiers) that produce heat.
- Page 212 CA 90620, USA. and on, the user is encouraged to try to correct the interference by one or more of the following The above statements apply ONLY to those products distributed by Yamaha Corporation of measures: America or its subsidiaries.
- Page 213 12 Only voltage specified on this unit must be used. Using this unit with a higher voltage than specified or acid leak. is dangerous and may cause fire, damage to this unit, and/or personal injury. Yamaha will not be • If you find leaking batteries, discard the batteries immediately, taking care not to touch the leaked held responsible for any damage resulting from use of this unit with a voltage other than specified.
- Page 214 Directive for the chemical involved. SIMPLIFIED EU DECLARATION OF CONFORMITY Hereby, Yamaha Music Europe GmbH declares that the radio equipment type [RX-A3070, RX-A2070] is in compliance with Directive 2014/53/EU. The full text of the EU declaration of conformity is available at...
- Page 215 For more information about this product, refer to the Owner’s Manual included on the supplied CD-ROM. The latest Owner’s Manual can be downloaded from the following website. http://download.yamaha.com/ The Owner’s Manual in HTML format can be viewed on your smartphone, tablet, or PC. Visit the following website.
- Page 216 Preparation Confirming package contents Power cable AM antenna The supplied power cable varies Batteries (AAA, R03, UM-4) (except for U.K., Europe, Australia depending on the region of purchase. (x2) and Russia models) Remote control FM antenna DAB/FM antenna YPAO microphone Microphone base Pole (except for U.K., Europe, Australia...
- Page 217 Connecting speakers/subwoofer When connecting 6-ohm speakers Positioning speakers Set the unit’s speaker impedance to “6 Ω MIN”. For details, see “Setting the Use the diagram as a reference for positioning speakers. speaker impedance” in the Owner’s Manual. 0.5 to 1 m 0.5 to 1 m Precautions for connecting speaker cables (1.6 to 3.3 ft)
- Page 218 Surround speaker (R) Surround speaker (L) Subwoofer Use a subwoofer equipped with built-in amplifier. 10 mm (3/8") Audio pin cable Surround back speaker (L) Surround back speaker (R) PRE OUT (SINGLE) (FRONT) (REAR) FRONT SURROUND SUR. BACK CENTER SUBWOOFER SPEAKERS EXTRA SP2 EXTRA SP1 SURROUND...
-
Page 219: Connecting External Devices
Connecting external devices HDMI (HDCP2.2) HDMI OUT (HDCP2.2) AV 1 AV 2 AV 3 AV 4 AV 5 AV 6 AV 7 (ZONE OUT) (1 BD/DVD) HDMI HDMI HDMI HDMI HDMI HDMI HDMI input HDMI HDMI output HDMI output HDMI HDMI BD/DVD player Satellite/cable set top box... - Page 220 Connecting the radio antennas FM/AM antennas DAB/FM antenna (except for U.K., Europe, (U.K., Europe, Australia and Australia and Russia models) Russia models) Assembling the AM antenna Fix the end of the FM antenna to a wall. Place the AM antenna on a DAB/FM antenna (supplied) Fix the antenna flat surface.
- Page 221 Preparing a network connection Prepare a wired or wireless network connection in accordance with your network environment. Note The wireless antenna must be raised if the unit will be connected to a Bluetooth device. Wireless network connection Wired network connection NETWORK ( 3 NET ) Network cable...
- Page 222 Connecting the power cable to an AC wall outlet, and turning on the unit Press RECEIVER z to turn on The Network Setup screen shown below will be displayed on the TV when the unit is turned on for Before connecting the power cable the unit.
- Page 223 Tap “Setup”. Internet radio stations. It also allows you to play this rich variety of music content on all devices in the MusicCast network at the same time. Visit the following website for details. http://www.yamaha.com/musiccast/...
- Page 224 Confirm that the unit is turned on, and tap “Next”. Using WPS push-button configuration Wireless connection can be configured with one push of the WPS button on the wireless router (access point). Press and hold INFO (WPS) on the unit’s front panel for more than 3 seconds.
- Page 225 Optimizing the speaker settings automatically (YPAO) The Yamaha Parametric room Acoustic Optimizer (YPAO) function detects speaker connections, measures the distances from them to your listening position(s), and then automatically optimizes the speaker settings, such as volume balance and acoustic parameters, to suit your room.
- Page 226 Turn on the subwoofer and set the volume to half. Use the cursor keys to select “Measure” and press ENTER. If the crossover frequency is adjustable, set it to maximum. The measurement will start in 10 seconds. CROSSOVER/ VOLUME It takes about 3 minutes to measure. HIGH CUT The screen below appears on the TV when the measurement finishes.
-
Page 227: Basic Operations
Basic operations This section describes basic operations such as playing Blu-ray Discs and DVDs, and tuning into radio stations. Most operations can be performed using the remote control. Operating the remote control Unit input sources and settings that have been Turn on/off (standby) the unit assigned to SCENE keys can be selected with just one touch (SCENE function). - Page 228 Playing a BD/DVD Listening to FM/AM radio SOURCE SOURCE RECEIVER RECEIVER (except for U.K., Europe, Australia and We recommend playing back multichannel audio (5.1- AV 1 Russia models) channel or more) to feel surround sound produced by the unit. V-AUX V-AUX Press TUNER to select “TUNER”...
-
Page 229: Init Scan
Press ENTER to start an initial scan. Setting the frequency steps (Asia and General RECEIVER RECEIVER SOURCE SOURCE models only) Init Scan At the factory, the frequency step setting is set to 50 kHz VOL. >>>------- 30% for FM and 9 kHz for AM. Depending on your country or region, set the frequency V-AUX V-AUX... - Page 230 Playing music stored on a Playing music stored on a SOURCE SOURCE RECEIVER RECEIVER ® Bluetooth device USB flash drive Press BLUETOOTH to select Connect the USB flash drive to the V-AUX V-AUX AUDIO AUDIO “Bluetooth” as the input source. USB jack.
- Page 231 Yamaha Global Site http://www.yamaha.com/ Yamaha Downloads http://download.yamaha.com/ Manual Development Group © 2017 Yamaha Corporation Published 04/2017 KS-A0 Printed in Malaysia ZX14290...