Kodak DRYVIEW 5800 User Manual
Laser imager
Hide thumbs
Also See for DRYVIEW 5800:
- Service manual (328 pages) ,
- User manual (62 pages) ,
- Safety manual (22 pages)
Table of Contents
Advertisement
Quick Links
Download this manual
See also:
Service Manual
Advertisement
Table of Contents

Related Manuals for Kodak DRYVIEW 5800


Summary of Contents for Kodak DRYVIEW 5800
- Page 1 KODAK DRYVIEW 5800 Laser Imager User’s Guide...
- Page 2 Carestream Health, Inc. 150 Verona Street Rochester, New York 14608 © Carestream Health, Inc., 2008 DRYVIEW is a trademark of Carestream Health. KODAK is a trademark of Kodak used under license. Pub No. 2G0733 Rev. A...
-
Page 3: Table Of Contents
Table of Contents 1 Overview - - - - - - - - - - - - - - - - - - - - - - - - - - - - - - - - - - - - - - - - - - - - - - - - - - - - - - - - - 1-1 5800 Laser Imager - - - - - - - - - - - - - - - - - - - - - - - - - - - - - - - - - - - - - - - - - - - - - - - - - - - - - - - - - 1-1 How the Laser Imager Works - - - - - - - - - - - - - - - - - - - - - - - - - - - - - - - - - - - - - - - - - - - - - - - - - 1-1 System Components - - - - - - - - - - - - - - - - - - - - - - - - - - - - - - - - - - - - - - - - - - - - - - - - - - - - - - - 1-2... - Page 4 4 Film Technical Information - - - - - - - - - - - - - - - - - - - - - - - - - - - - - - - - - - - - - - - - - - - - 4-1 General Description - - - - - - - - - - - - - - - - - - - - - - - - - - - - - - - - - - - - - - - - - - - - - - - - - - - - - - - - 4-1 Spectral Sensitivity - - - - - - - - - - - - - - - - - - - - - - - - - - - - - - - - - - - - - - - - - - - - - - - - - - - - - - 4-1 Image Quality - - - - - - - - - - - - - - - - - - - - - - - - - - - - - - - - - - - - - - - - - - - - - - - - - - - - - - - - - 4-1...
- Page 5 Warranty/Special Provisions for Canada - Limited Warranty - - - - - - - - - - - - - - - - - - - - - - - A-13 GARANTIE ET DISPOSITIONS PARTICULIÈRES POUR LE CANADA GARANTIE LIMITÉE A-14 Warranty/Special Provisions for the United States of America and any Other Country - Limited War- ranty - - - - - - - - - - - - - - - - - - - - - - - - - - - - - - - - - - - - - - - - - - - - - - - - - - - - - - - - - - - - A-15...
-
Page 7: Overview
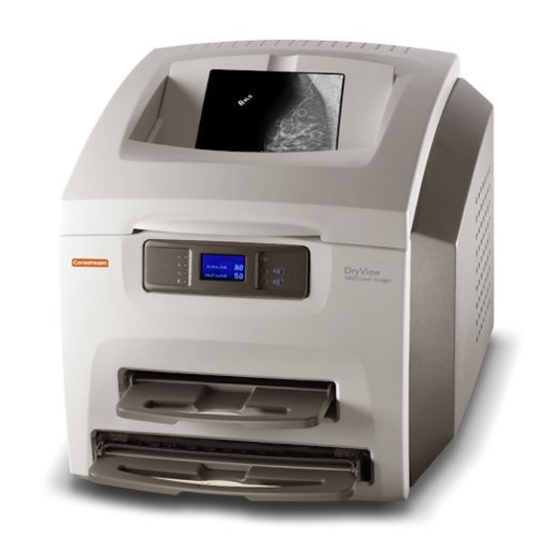
Overview 5800 Laser Imager The KODAK DRYVIEW 5800 Laser Imager is a continuous-tone laser imager with an internal photothermographic film processor. Heat, rather than photo chemicals, is used to develop the film. The Imager receives digital images from medical image source devices (modalities) over a network. -
Page 8: System Components
Overview During normal operation, the Imager requires very little operator attention. The Imager prints automatically in response to print requests from the associated image devices. Information sent along with print requests, such as film size, density and priority, control the print operations. Main operator responsibilities include loading film and monitoring for malfunctions. -
Page 9: Print Sequence
Overview Print Sequence When the Imager receives a print request, it determines the requested film size and type and then it selects the appropriate film cartridge. Each time the Imager receives a print request, the following print sequence occurs: 1. Suction cups in the pickup area lift a single sheet of film out of the supply cartridge and feed the film into the transport rollers. -
Page 10: Automatic Image Quality Control
A film tray is inserted into the Imager for which a current calibration is not stored. Agency Compliance See the KODAK DRYVIEW 5800 Laser Imager Safety Manual, 2G0734. User Guide Conventions The following special messages emphasize information or indicate potential risks to personnel or equipment. -
Page 11: Using And Maintaining The Imager
Using and Maintaining the Imager Operator Control of the Imager During normal operation, the Imager receives and automatically prints images sent by modalities over a network. Very little operator control is required. The main responsibilities of the operator are: Turning Imager Power ON and OFF Power switch There is a power switch located at the back right of the Imager. -
Page 12: Local Panel And Display Screen
Using and Maintaining the Imager Local Panel and Display Screen Local Panel Layout Ready LED. This LED, when lit indicates that the Imager is ready for printing. When flashing, the Imager is processing and printing films. When unlit, the Imager is not ready to print. Error LED. -
Page 13: Display Screen Icons
Using and Maintaining the Imager Display Screen Icons Icon Description This icon indicates that film calibration is required. The Imager is unable to print jobs from this supply until a successful calibration occurs. This icon indicates that a door is open on the Imager. This icon indicates an error with the film tray. -
Page 14: Web Portal
Using and Maintaining the Imager Icon Description This icon indicates there are prints in the queue that are waiting to be deleted. This icon indicates that a user-initiated system restart is in process. This icon indicates that the Imager has been placed in service mode. -
Page 15: Accessing The Web Portal
Using and Maintaining the Imager Level 3: Local Service - Local Service providers are Carestream Health, Inc., trained and certified self-maintenance customers. Level 3 First Call Service provides access to all Level 1 and 2 features and functions. In addition, First Call activities include preventive maintenance with the ability to reset some imaging parameters. - Page 16 Using and Maintaining the Imager To log on to the Web Portal as a Level 2 or Level 3 user, do the following. 1. Click the Log On icon. The following window appears. 2. Enter your User ID and password. NOTE: The Imager comes with a default User ID and password for Level 2 and Level 3 users.
-
Page 17: Operations
Using and Maintaining the Imager Operations Unloading and IMPORTANT: Leave the Imager powered on while loading or unloading loading the Film Tray the film tray. When 100 sheets of film have been used, a 0 film count appears on the display screen, and the Imager will automatically unlock the film tray for removal. - Page 18 Using and Maintaining the Imager Bag holder Film package Diverter 3. Pull the diverter (plastic bar) and bag holder (silver bar) into the up position. 4. Press the new film package down in the tray with the label facing up. 5.
- Page 19 Using and Maintaining the Imager Tear strip 9. Remove the tear strip from the plastic bag. 10. Swing the diverter of the film tray back in place. IMPORTANT: Do not install the Film Saver onto the film tray. 11. Slide the tray back into the Imager slot. Plastic bag 12.
-
Page 20: Inserting The Film Saver And Removing The Film Tray
Using and Maintaining the Imager Inserting the Film A film saver must be inserted into a film tray when: Saver and Removing • the hood is opened. the Film Tray • any panel on the Imager is removed. • a film tray with film in it is removed. 1. -
Page 21: Running A Calibration Print
Using and Maintaining the Imager Running a You may occasionally have to request that the Imager print a calibration Calibration Print print to calibrate the Imager. You may be asked to do this if you call for service. You should also run a calibration print if a "Not Calibrated" status message appears on the Web Portal Home screen, or if a calibration error code (2x-624, 2x-631, or 2x-632) appears on the display screen. -
Page 22: Removing Print Jobs From The Undeliverable Jobs Queue
Using and Maintaining the Imager 5. Enter the desired density (0.1 to 3.2). 6. Use the drop-down menu to select the film tray. 7. Select the number of copies to be printed. 8. Click Run. Removing Print Jobs When there are jobs in the undeliverable jobs queue that can not be printed, From the condition code 20703 and an icon show on the display screen. - Page 23 Using and Maintaining the Imager Hood Charcoal filter Front panel 3. Raise the hood. 4. Pull the front panel forward. 5. Remove the charcoal filter by lifting it up and pulling it forward. 6. Install a new charcoal filter. 7. Close the front panel. 8.
-
Page 25: Troubleshooting
Troubleshooting Error and Alarm Indications The Imager can detect errors and other conditions that require operator action. These errors or abnormal conditions are reported on the display screen and on the Web Portal in the form of condition codes and messages. -
Page 26: Printer Status Messages
Troubleshooting Printer Status Messages The following table describes how the local panel and Web Portal indicate printer status to the user. Table 3-2: Printer Status Messages Printer Web Portal Local Panel DICOM Status Description Status Display Any Film • Ready LED off Not Ready WARNING / At least one of the film... -
Page 27: Film Supply Status Messages
Troubleshooting Table 3-2: Printer Status Messages (Cont’d) Printer Web Portal Local Panel DICOM Status Description Status Display Service • Ready LED off Service Mode WARNING / The service switch is Mode • Attention LED on PRINTER enabled. The Imager is not OFFLINE "Ready". - Page 28 Troubleshooting Table 3-3: Film Supply Status Messages (Cont’d) Film Supply Web Portal Local Panel Description State Display Manual Mode • Attention LED on The film in this film tray does • Status code: 21002 (upper), not meet AIQC standards. 23002 (lower) However, the user has selected •...
-
Page 29: Job Manager Status Messages
Troubleshooting Job Manager Status Messages The following table describes how the local panel and Web Portal indicate job status to the user. Table 3-4: Job Manager Status Messages Job Manager Web Portal Display Screen Description Status Display Active Shows how many The Imager is accepting DICOM job jobs having this requests and film is available for all current... -
Page 30: Condition Codes
Troubleshooting Condition Codes Condition codes are shown on the display screen in the order in which they are generated. If there is more than one code associated with the current condition of the Imager, the first code is shown on the display screen for 6 seconds, while other codes in the list are displayed for 3 seconds as the list is cycled. - Page 31 Troubleshooting Table 3-5: Condition Codes (Cont’d) Code Web Portal Message User Action 10003 MIS: Image Buffer Error 1. Shut down the Imager, then start the Imager. 2. If the error persists, call for service. 10015 MIS: Database Error 1. Shut down the Imager, then start the Imager. 2.
- Page 32 Troubleshooting Table 3-5: Condition Codes (Cont’d) Code Web Portal Message User Action 20706 none 1. Turn the Imager power OFF. 20915 Internal Image Data Transfer 1. Shut down the Imager, then start the Imager. Failed 2. If the error persists, call for service. 20919 Internal Image Data Render 1.
- Page 33 Troubleshooting Table 3-5: Condition Codes (Cont’d) Code Web Portal Message User Action 21122 or xxxxx Supply: Internal 1. Cover the film tray with the film saver. Remove the 23122 Hardware Failure tray from the Imager. 2. Take the film tray to a dark room and remove the film saver.
- Page 34 Troubleshooting Table 3-5: Condition Codes (Cont’d) Code Web Portal Message User Action 21624 or xxxxx Supply: Film Calibration 1. Try a different film pack. 23624 Failure 2. If the error repeats, shut down the Imager, then start the Imager. 3. If the error persists, call for service. 21631 or xxxxx Supply: Film Calibration 1.
- Page 35 Troubleshooting Table 3-5: Condition Codes (Cont’d) Code Web Portal Message User Action 27604 Optics: Calibration Failed 1. Shut down the Imager, then start the Imager. 2. If the error persists, call for service. 27607 Optics: Calibration Failed 1. Shut down the Imager, then start the Imager. 2.
- Page 36 Troubleshooting Table 3-5: Condition Codes (Cont’d) Code Web Portal Message User Action 29924 Densitometer: Internal 1. Shut down the Imager, then start the Imager. Diagnostic Failure 2. If the error persists, call for service. 29925 Densitometer: Internal 1. Shut down the Imager, then start the Imager. Diagnostic Failure 2.
-
Page 37: Clearing Film Jams
Troubleshooting Clearing Film Jams CAUTION Shutting off power to clear a film jam is not required. Jam Areas and Film Path January 14, 2008 2G0733 3-13... -
Page 38: Film Jam - Code 2X-116
Troubleshooting Film Jam - Code 1. Remove the film trays (see “Inserting the Film Saver and Removing 2x-116 the Film Tray”). Film tray slots 2. Remove any misplaced films from Area 1. This area can be accessed through the film trays slots. NOTE: If the film is not accessible from the front of the Imager, continue with... - Page 39 Troubleshooting Hood Left panel 2 screws 3. Open the hood. 4. Loosen the 2 screws and remove the left panel January 14, 2008 2G0733 3-15...
- Page 40 Troubleshooting Pickup access areas 5. Remove any misplaced films seen in the pickup access areas. 6. If Area 1 did not contain misplaced films, take the film trays to a dark room and remove the film saver. Remove any misplaced films and cover the tray with the film saver.
-
Page 41: Film Jam - Code 2X126
Troubleshooting Film Jam - Code 1. Remove the film trays (see “Inserting the Film Saver and Removing 2x126 the Film Tray”). Film tray slots 2. Remove any misplaced films from Area 1. This area can be accessed through the film trays slots. 3. - Page 42 Troubleshooting Hood Left panel 2 screws 5. Open the hood. 6. Loosen the 2 screws and remove the left panel. Pickup access areas 3-18 2G0733 January 14, 2008...
-
Page 43: Film Jam - Code 26325
Troubleshooting 7. Remove any misplaced films seen in the pickup access areas. 8. Set the left panel in place and tighten the 2 screws. 9. Close the hood. Film Jam - Code IMPORTANT: If this error occurred at the same time as 2x-126, follow the 26325 instructions for “Film Jam - Code... - Page 44 Troubleshooting 4. Carefully remove any films found in the drum area. 5. Close the drum cover and secure the cover latches. If the film was not found in the drum area, continue with Step Hood Left panel 2 screws 6. Open the hood. 7.
-
Page 45: Film Jam - Code 26544
Troubleshooting Film advance knob 8. Use the manual advance knob to move the film through the processor. 9. Set the left panel in place and tighten the 2 screws. 10. Close the hood. If film was not previously removed, the misplaced films will emerge from the IMAGER within 2 minutes. -
Page 46: Calling For Support
Troubleshooting Calling for Support If you cannot correct a condition and need help, call for support. Have the following information ready when you call: • Model Number: 5800 • K-Number • Condition code and message if they are shown on the display screen and Web Portal. - Page 47 Troubleshooting Table 3-6: Service Phone Numbers (Cont’d) Country Phone Number Pakistan 00 92 21 2638881 Palestinian Territory 00 970 92387421 Paraguay 54-3327-458-195 54-3327-458-163 Peru 80051853 Portugal 351 21 414 7642 Puerto Rico 18669430227 Qatar 00 974 4469 830 00 974 4360 820 Romania 00 40 1210 3854 Russian Federation...
-
Page 49: Film Technical Information
Film Technical Information General Description This section describes the characteristics of DRYVIEW Laser Imaging Film, not the operation of the 5800 Laser Imager. DRYVIEW Laser Imaging Film is a high-resolution, infrared-sensitive, photothermographic film designed specifically for the family of DRYVIEW Laser Imagers. DRYVIEW Laser Imaging Film is packaged in daylight-load packages and is available in blue, clear, and mammography 7-mil polyester base. -
Page 50: Environmental Impact
Film Technical Information Environmental Tests show that DRYVIEW Laser Imaging Film is not considered hazardous Impact to the environment. As a result, you can develop, recycle, and dispose of film with less impact on the environment than if you were using wet-developed silver halide films. -
Page 51: Archiving Developed Film
Film Technical Information With DRYVIEW technology, a small amount of final development occurs when the film exits the laser imager and is initially exposed to ambient or view-box lighting. This is virtually undetectable and has no effect on image quality (i.e., typically 0.02 change in density). This small density increase is uniform and permanent upon full exposure of the film under normal handling conditions (i.e., room light or view box). -
Page 53: Specifications
Specifications Location Equipment Specifications Unpacked Packed Height 62 cm (24.25 in.) 95.25 cm (32.0 in.) Width 62 cm (24.25 in.) 81.6 cm (32.125 in.) Depth 66 cm (26.0 in.) without film trays 106.7 cm (42.0 in.) 76 cm (30 in.) with film trays 147.4 kg (325 lbs) Weight 70 kg (155 lbs) Operating Space... -
Page 54: Other Location Considerations
Specifications Other Location Additional factors that influence where the Imager is located include Considerations proximity to patients, flammable materials, liquids, and other equipment. CAUTION This equipment is not contained in a sealed cabinet. Do not use this equipment in locations where it can come in contact with liquids, including body fluids. -
Page 55: Environmental Requirements
Specifications Environmental Requirements Temperature • Operating: 15° to 33° C (59° to 91° F) • Storage: -40° to 60° C (-40° to 140° F) Relative Humidity • Operating: 20% to 80% RH, noncondensing • Storage: 10% to 90% RH, noncondensing Altitude •... -
Page 56: Power Requirements
KODAK DRYVIEW DVC Laser Imaging Film • KODAK DRYVIEW DVB+ Laser Imaging Film • KODAK DRYVIEW DVB+ Premium Laser Imaging Film NOTE: Not all film types are available in every country. Film Sizes The Imager accommodates the following film sizes: •... -
Page 57: Glossary
Glossary Computed Radiography, the process of creating digital radiographic images. Computed Tomography, the process of creating digital tomographic images. Cycle power Cycle power means to shut down and power up the Laser Imager. DICOM Digital Imaging and Communications in Medicine. A TCP/IP-based protocol for transmitting and receiving medical imaging and related data over a network. - Page 58 Glossary Transfer Function Tables. Undelivered queue The queue of jobs that cannot be printed because of problems with the job description. Version A different rendition of an image. A second version of an image is processed using a second set of image processing parameters. 2G0733 January 14, 2008...
-
Page 59: Appendix A: Warranty And Limitation Of Liability
Appendix A: Warranty and Limitation of Liability Important Notice to Purchaser Carestream Health, Inc. warrants that Carestream Health, Inc. hardware products will be free from defects in parts, materials and manufacture. For defects occurring during the warranty period and about which Carestream Health, Inc. -
Page 60: End User License Agreement (Eula
Warranty and Limitation of Liability Virus Policy: In accordance with the Health Group Digital Solutions Virus Policy, document 3E4111, Carestream Health, Inc.’s time to install patches and other changes to our products, toward cure of vulnerabilities to and effects of malicious software attacks, and additional professional services to assist customers to eliminate attack consequences and/or harden their information technology infrastructure against future attacks, is billable unless a clear and specific contractual agreement states otherwise. -
Page 61: Limited Warranty
Warranty and Limitation of Liability Copyright. The Software is owned by Carestream Health, Inc. or its suppliers and protected by copyright laws and international treaties. You may not copy the Software other than as expressly provided in this license. You may not reverse engineer, decompile, or disassemble the Software. If this Software is used within a country of the European Union, nothing in this Agreement shall be construed as restricting any rights available under the European Community Software Directive (91/250/EEC). -
Page 62: Limitation Of Remedies
Warranty and Limitation of Liability cannot be excluded, so the above exclusion may not apply to you. This warranty gives you specific legal rights and you may also have other rights. Limitation of Remedies The remedies set forth above are Carestream Health, Inc.'s only obligation under the warranty. -
Page 63: Software Product License
Warranty and Limitation of Liability YOU UNDER THE TERMS OF THAT LICENSE AGREEMENT. BY INSTALLING, COPYING, DOWNLOADING, ACCESSING OR OTHERWISE USING THE SOFTWARE PRODUCT, YOU AGREE TO BE BOUND BY THE TERMS OF THIS EULA. IF YOU DO NOT AGREE TO THE TERMS OF THIS EULA, MANUFACTURER AND MICROSOFT LICENSING, INC. - Page 64 Warranty and Limitation of Liability limited to: e-mail, word processing, spreadsheets, database, network browsing, scheduling, and personal finance. – Back-up Copy. If Manufacturer has not included a back-up copy of the SOFTWARE PRODUCT with the COMPUTER, you may make a single back-up copy of the SOFTWARE PRODUCT. You may use the back-up copy solely for archival purposes.
- Page 65 Warranty and Limitation of Liability (1) Microsoft OS. Upon selection, the one Microsoft OS selected by you will be set up on the COMPUTER, and the other Microsoft OS(s) not selected by you will be automatically and permanently deleted from the hard disk of the COMPUTER. –...
- Page 66 Warranty and Limitation of Liability – Application Sharing. The SOFTWARE PRODUCT may contain Microsoft NetMeeting, a product that enables applications to be shared between two or more computers, even if an application is installed on only one of the computers. You may use this technology with all Microsoft application products for multi-party conferences.
- Page 67 Warranty and Limitation of Liability 6. LEASED HARDWARE. In the event that you receive the HARDWARE under the terms of a lease from Manufacturer or Manufacturer's third-party representative, the following additional terms shall apply: (i) you may not transfer the SOFTWARE PRODUCT to another user as part of the transfer of the HARDWARE, whether or not the SOFTWARE PRODUCT transferred with the HARDWARE is otherwise allowed in this...
-
Page 68: Warranty/Special Provisions For Austria, New Zealand Or Papua New Guinea - Express Limited War- Ranty
Warranty and Limitation of Liability will not directly or indirectly export or re-export the SOFTWARE PRODUCT (or portions thereof), other than to Canada, without first obtaining an export license or determining that a license exception is applicable. For additional information see http://www.microsoft.com/exporting/. - Page 69 Warranty and Limitation of Liability LIMITATION OF LIABILITY. To the maximum extent permitted by applicable law, any conditions or warranties imposed or implied by law are hereby excluded. Consumers may nevertheless have the benefit of certain rights or remedies pursuant to the Trade Practices Act and similar state and territory laws in Australia or the Consumer Guarantees Act in New Zealand, in respect of which liability may not be excluded.
-
Page 70: Warranty/Special Provisions For England Scotland, Wales And Ireland - Limited Warranty
Warranty and Limitation of Liability Warranty/Special Provi- LIMITED WARRANTY. Manufacturer warrants that (a) the SOFTWARE sions for England Scot- will perform substantially in accordance with the accompanying written land, Wales and Ireland - materials for a period of ninety (90) days from the date of receipt, and (b) Limited Warranty any Microsoft hardware accompanying the SOFTWARE will be free from defects in materials and workmanship under normal use and service for a... - Page 71 Warranty and Limitation of Liability INCIDENTAL DAMAGES, THE ABOVE LIMITATION MAY NOT APPLY TO YOU. SPECIAL PROVISIONS: Reverse Engineering: If you acquired the SOFTWARE in the European Community, you may not reverse engineer, decompile, or disassemble the SOFTWARE except to the extent and for the express purposes authorized by applicable law.
- Page 72 Warranty and Limitation of Liability LOSS OF BUSINESS INFORMATION, OR ANY OTHER PECUNIARY LOSS) ARISING OUT OF THE USE OF OR INABILITY TO USE THIS PRODUCT, EVEN IF MANUFACTURER HAS BEEN ADVISED OF THE POSSIBILITY OF SUCH DAMAGES. IN ANY CASE, MANUFACTURER'S AND ITS SUPPLIERS' ENTIRE LIABILITY UNDER ANY PROVISION OF THIS AGREEMENT SHALL BE LIMITED TO THE AMOUNT ACTUALLY PAID BY YOU FOR THE...
- Page 73 Warranty and Limitation of Liability ABSENCE DE RESPONSABILITÉ POUR LES DOMMAGES INDIRECTS. Selon la portée maximale autorisée par la loi applicable, le Fabricant ou ses fournisseurs ne pourront être tenus responsables en aucune circonstance de tous dommages quels qu'ils soient (y compris mais non de façon limitative les dommages directs ou indirects causés par des lésions corporelles, la perte de bénéfices commerciaux, l'interruption des affaires, la perte d'information commerciale ou toute autre perte pécuniaire) découlant...
- Page 74 Warranty and Limitation of Liability WHICH VARY FROM STATE/JURISDICTION TO STATE/JURISDICTION. NO LIABILITY FOR CONSEQUENTIAL DAMAGES. TO THE MAXIMUM EXTENT PERMITTED BY APPLICABLE LAW, IN NO EVENT SHALL MANUFACTURER OR ITS SUPPLIERS BE LIABLE FOR ANY DAMAGES WHATSOEVER (INCLUDING WITHOUT LIMITATION, SPECIAL, INCIDENTAL, CONSEQUENTIAL, OR INDIRECT DAMAGES FOR PERSONAL INJURY, LOSS OF BUSINESS PROFITS, BUSINESS INTERRUPTION, LOSS OF BUSINESS...
- Page 75 Index Agency compliance, 1-4 Heat dissipation, 5-3 Altitude, 5-3 Automatic image quality control (AIQC), 1-4 Image quality, 4-1 Calling for support, 3-22 Conventions, 1-4 Job manager status messages, 3-5 Correcting film jams, 3-13 Laser specifications, 5-3 DICOM, 1-1 Limited warranty, A-3 DICOM printer status messages, 3-1 Local panel layout, 2-2 Display screen icons, 2-3...
- Page 76 Spectral sensitivity, 4-1 Storing undeveloped film, 4-2 System components, 1-2 Temperature, 5-3 Troubleshooting, 3-1 Warranty, A-1 Web portal, 2-4 Accessing, 2-5 Default user passwords, 2-6 Error messages, 3-6 Levels of user access, 2-4 Logging in, 2-6 2G0733 January 14, 2008...
- Page 78 Carestream Health, Inc. 150 Verona Street Rochester, New York 14608 © Carestream Health, Inc., 2008 DRYVIEW is a trademark of Carestream Health. KODAK is a trademark of Kodak used under license. Pub No. 2G0733 Rev. A...