ZyXEL Communications NWA1100-N Quick Start Manual
802.11b/g/n poe access
point
Hide thumbs
Also See for NWA1100-N:
- User manual (240 pages) ,
- Quick start manual (121 pages) ,
- Manual (250 pages)
Table of Contents

Related Manuals for ZyXEL Communications NWA1100-N


Summary of Contents for ZyXEL Communications NWA1100-N
-
Page 1: Quick Start Guide
NWA1100-N Quick Start Guide 802.11b/g/n PoE Access Point Firmware Version 1.00 Edition 1, 3/2011 DEFAULT LOGIN DETAILS IP Address http://192.168.1.2 Username admin Password 1234 www.zyxel.com 2011 ZyXEL Communications Corporation... - Page 2 Panels...
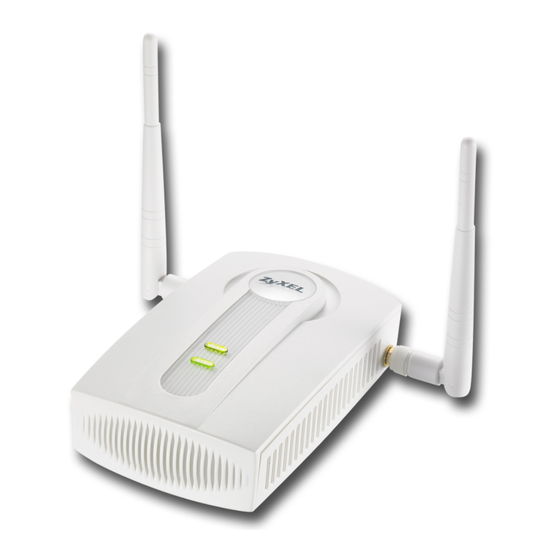
- Page 3 Overview This Quick Start Guide shows how to set up and configure the NWA1100-N (marked Z in the figure) to allow wireless clients to securely access your wired network. See your User’s Guide for more information. You may need your Internet access information.
-
Page 4: Connect The Hardware
1. Using the Ethernet cable, connect the ETHERNET port to a computer for initial configuration. 2. Connect the POWER 12VDC socket to a power source using only the included power adaptor. Connect the NWA1100-N’s ETHERNET port to an Ethernet jack with network access after you have completed the initial configuration. -
Page 5: Access The Web Configurator
LEDs • The SYS LED blinks red, then turns steady green when the power is connected. • One of the LEDs by the ETHERNET port turns on if the port is properly connected, and blinks when there is traffic. The yellow light shines if the connection is at 1000 Mbps. - Page 6 IP address) as the address. If you cannot access the Web configurator, make sure the IP addresses and subnet masks of the NWA1100-N and the computer are in the same IP address range. 2. Enter admin (the default username) in the Username field and 1234 (the default password) in the Password field.
-
Page 7: Configure System Settings
Configure the NWA1100-N Configure System Settings 1. Click SYSTEM in the navigation panel. 2. The SYSTEM > General screen appears. • System Name is for identifying the NWA1100-N on your network. Choose a distinctive name, or leave this at its default. -
Page 8: Configure Wireless Settings
1. Click WIRELESS in the navigation panel. The Wireless Settings screen displays. Configure the basic settings for your wireless network. The wireless stations and the NWA1100-N must use the same SSID, channel ID and encryption settings for wireless communication. • Operation Mode: Ensure that Access Point mode is selected. - Page 9 • Wireless Mode: Select the wireless standard you want your network to use. If you are not sure which to select, select 802.11b/ g/n. • SSID Profile: Select the SSID profile you want to configure for network access from the drop-down list box. •...
- Page 10 • Ensure that all your wireless clients support the type of security you set. Click Apply when you have finished. If the wireless clients cannot communicate with the network, ensure that the clients and the NWA1100-N are using the same wireless security settings.
-
Page 11: Configure Ip Settings
Configure IP Settings 1. You need to set your NWA1100-N’s IP address to be in the same subnet as your network. Click IP in the navigation panel. • Select Obtain IP Address Automatically if you want to have a DHCP server on your network assign an IP address to the NWA1100-N. -
Page 12: Install The Hardware
You can do this now, or once you have attached the antennas and mounted the NWA1100-N. If the NWA1100-N cannot communicate with the network, ensure that the NWA1100-N is using an IP address on the same subnet as the switch / router. Install the Hardware Attaching Antennas... - Page 13 Wall-mounting Do the following to attach your NWA1100-N to a wall.
- Page 14 Run the connection cables down the back of the NWA1100-N as shown in the following figure. Run the connection cables upward and along the edge of the ceiling. 3. Align the holes on the back of the NWA1100-N with the screws on the wall. Hang the NWA1100-N on the screws.
- Page 15 NWA1100-N ( • • • NWA1100-N • •...
- Page 16 ETHERNET POWER 12VDC NWA1100-N ETHERNET...
- Page 17 • SYS LED • ETHERNET 1000 Mbps 10/100 Mbps ETHERNET Internet Explorer 6.0 JavaScript Mozilla Firefox 3 Safari 2.0...
- Page 18 192.168.1.3 - 192.168.1.254 255.255.255.0 NWA1100-N NWA1100-N ETHERNET 192.168.1.2 (NWA1100-N NWA1100-N Username ( admin ( Password ( 1234 Login ( Apply ( NWA1100-N RESET (...
- Page 19 STATUS ( NWA1100-N SYSTEM (...
- Page 20 SYSTEM > General ( > • System Name ( NWA1100-N • Ethernet Data Rate ( Auto ( Apply (...
- Page 21 WIRELESS ( Wireless Settings NWA1100-N SSID • Operating Mode ( Access Point ( • Wireless Mode ( 802.11b/g/n • SSID Profile (SSID SSID • Channel ( • Channel Width ( 20/40 MHz...
- Page 22 Apply ( SSID SSID SSID SSID Edit Security ( Edit (...
- Page 23 • Security Mode ( None ( • WPA2-PSK • Apply ( NWA1100-N NWA1100-N...
- Page 24 DHCP NWA1100-N Obtain IP Address Automatically ( • Use Fixed IP Address ( • DNS ( System DNS Servers ( • Apply ( ) NWA1100-N NWA1100-N NWA1100-N Obtain IP Address Automatically ( DHCP NWA1100-N DHCP NWA1100-N NWA1100-N NWA1100-N NWA1100-N NWA1100-N...
- Page 25 NWA1100-N NWA1100-N 60 mm 6mm ~ 8mm (0.24" ~ 0.31") NWA1100-N NWA1100-N...
- Page 26 NWA1100-N NWA1100-N NWA1100-N...
-
Page 28: Legal Information
Legal Information Certifications Federal Communications Commission (FCC) Interference Statement The device complies with Part 15 of FCC rules. Operation is subject to the following two conditions: • This device may not cause harmful interference. • This device must accept any interference received, including interference that may cause undesired operations. - Page 29 distance of at least 20 cm must be maintained between the antenna of this device and all persons.
- Page 30 Viewing Certifications Go to http://www.zyxel.com. Select your product on the ZyXEL home page to go to that product's page. Select the certification you wish to view from this page.