Pioneer VSX-818V-K Operating Instructions Manual
Audio/video multi-channel receiver
Hide thumbs
Also See for VSX-818V-K:
- Service manual (146 pages) ,
- Catalog (10 pages) ,
- Specifications (2 pages)

Related Manuals for Pioneer VSX-818V-K


Summary of Contents for Pioneer VSX-818V-K
- Page 1 VSX-918V VSX-818V Discover the benefits of registering your product online at http://www.pioneer.co.uk Operating Instructions -S/-K AUDIO/VIDEO MULTI-CHANNEL RECEIVER -S/-K (or http://www.pioneer.eu).
-
Page 2: Operating Environment
L or coloured RED. How to replace the fuse: Open the fuse compartment with a screwdriver and replace the fuse. Thank you for buying this Pioneer product. Please read through these operating instructions so you will know how to operate your model properly. - Page 3 If you want to dispose this product, do not mix it with general household waste. There is a separate collection system for used electronic products in accordance with legislation that requires proper treatment, recovery and recycling. Private households in the member states of the EU, in Switzerland and Norway may return their used electronic products free of charge to designated collection facilities or to a retailer (if you purchase a similar new one).
-
Page 4: Table Of Contents
Contents 01 Before you start Checking what’s in the box ....6 Loading the batteries ....6 Installing the receiver . - Page 5 The Input Assign menu ....64 The Other Setup menu ....66 SR+ Setup for Pioneer flat screen TVs ..66 12 Additional information Troubleshooting .
-
Page 6: Before You Start
Before you start Chapter 1: Before you start Checking what’s in the box Please check that you’ve received the following supplied accessories: • Setup microphone • Remote control unit • Dry cell batteries (AA size IEC R6) x2 • AM loop antenna •... -
Page 7: 02 5 Minute Guide
5 minute guide Chapter 2: 5 minute guide Introduction to home theater Home theater refers to the use of multiple audio tracks to create a surround sound effect, making you feel like you’re in the middle of the action or concert. The surround sound you get from a home theater system depends not only on your speaker setup, but also on the source and the sound settings of the receiver. -
Page 8: Automatically Setting Up For Surround Sound (Mcacc)
5 minute guide Automatically setting up for surround sound (MCACC) The Auto Multi-Channel Acoustic Calibration (MCACC) setup measures the acoustic characteristics of your listening area, taking into account ambient noise, speaker size and distance, and tests for both channel delay and channel level. - Page 9 5 minute guide Follow the instructions on-screen. • Make sure the microphone is connected. • If you’re using a subwoofer, it is automatically detected every time you switch on the system. Make sure it is on and the volume is turned up. •...
-
Page 10: Other Problems When Using The Auto Mcacc Setup
5 minute guide You can also choose to view the settings by selecting individual parameters from the Analyzed Data Check screen: • Speaker Setting – The size and number of speakers you’ve connected (see page 42 for more on this) •... -
Page 11: Connecting Up
Connecting up Chapter 3: Connecting up Making cable connections Make sure not to bend the cables over the top of this unit (as shown in the illustration). If this happens, the magnetic field produced by the transformers in this unit may cause a humming noise from the speakers. -
Page 12: Connecting A Dvd Player And Tv
Connecting up Connecting a DVD player and TV This page shows you how to connect your DVD player and TV to the receiver. Connect a coaxial digital audio output on your DVD player to the DIGITAL COAX 1 (DVD/BD) input on this receiver. Use a coaxial digital audio cable for the connection. -
Page 13: Connecting The Multichannel Analog
Connecting up Connecting the multichannel analog outputs For DVD Audio and SACD playback, your DVD player may have 5.1 channel analog outputs. In this case, you can connect them to the multi- channel analog outputs to the multichannel inputs of this receiver as shown below. VSX-918V ANTENNA HDMI... -
Page 14: Connecting Other Audio Components
Connecting up Connecting other audio components The number and kind of connections depends on the kind of component you’re connecting. Follow the steps below to connect a CD-R, MD, DAT, tape recorder or other audio component. If your component has a digital output, connect this to a digital input on the receiver as shown. -
Page 15: Connecting An Hdd/Dvd Recorder, Vcr And Other Video Sources
Connecting up Windows Media and the Windows logo are trademarks or registered trademarks of Microsoft Corporation in the United States and/ or other countries. Connecting an HDD/DVD recorder, VCR and other video sources This receiver has audio/video inputs and outputs suitable for connecting analog or digital video recorders, including VCRs and HDD/DVD recorders. -
Page 16: Using The Component Video Jacks
Connecting up Using the component video jacks Component video should deliver superior picture quality when compared to composite video. A further advantage (if your source and TV are both compatible) is progressive-scan video, which delivers a very stable, flicker-free picture. See the manuals that came with your TV and source component to check whether they are compatible with progressive-scan video. -
Page 17: About Hdmi
Connecting up Use an HDMI cable to connect the HDMI IN 1/2 interconnect on this receiver to an HDMI output on your HDMI component. Use an HDMI cable to connect the HDMI OUT interconnect on this receiver to an HDMI interconnect on a HDMI-compatible monitor. -
Page 18: Connecting To The Front Panel Audio
Connecting up Connecting to the front panel audio mini jack Front audio connections are accessed via the front panel using the VIDEO/PORTABLE button. Press VIDEO/PORTABLE and select PORTABLE input. Use a stereo mini-jack cable to connect a digital audio player, etc. •... -
Page 19: Connecting Antennas
Connecting up Connecting antennas Connect the AM loop antenna and the FM wire antenna as shown below. To improve reception and sound quality, connect external antennas (see Using external antennas below). fig. a fig. b FM UNBAL Ω LOOP Pull off the protective shields of both AM antenna wires. -
Page 20: Connecting The Speakers
Connecting up Connecting the speakers A complete setup of six speakers (including the subwoofer) is shown here but everyone’s home setup will vary. Simply connect the speakers you have in the manner shown below. The receiver will work with just two stereo speakers (the front speakers in the diagram) but using at least three speakers is recommended, and a complete setup is best for surround sound. -
Page 21: Hints On Speaker Placement
Connecting up Bare wire connections A-Speaker terminals: Twist exposed wire strands together. Loosen terminal and insert exposed wire. Tighten terminal. 10 mm B-Speaker terminals: Twist exposed wire strands together. Push open the tabs and insert exposed wire. Release the tabs. 10 mm Caution •... -
Page 22: Speaker Placement Diagrams
Connecting up Caution • If you choose to install the center speaker on top of the TV, be sure to secure it with putty, or by other suitable means, to reduce the risk of damage or injury resulting from the speaker falling from the TV in the event of external shocks such as earthquakes. -
Page 23: Controls And Displays
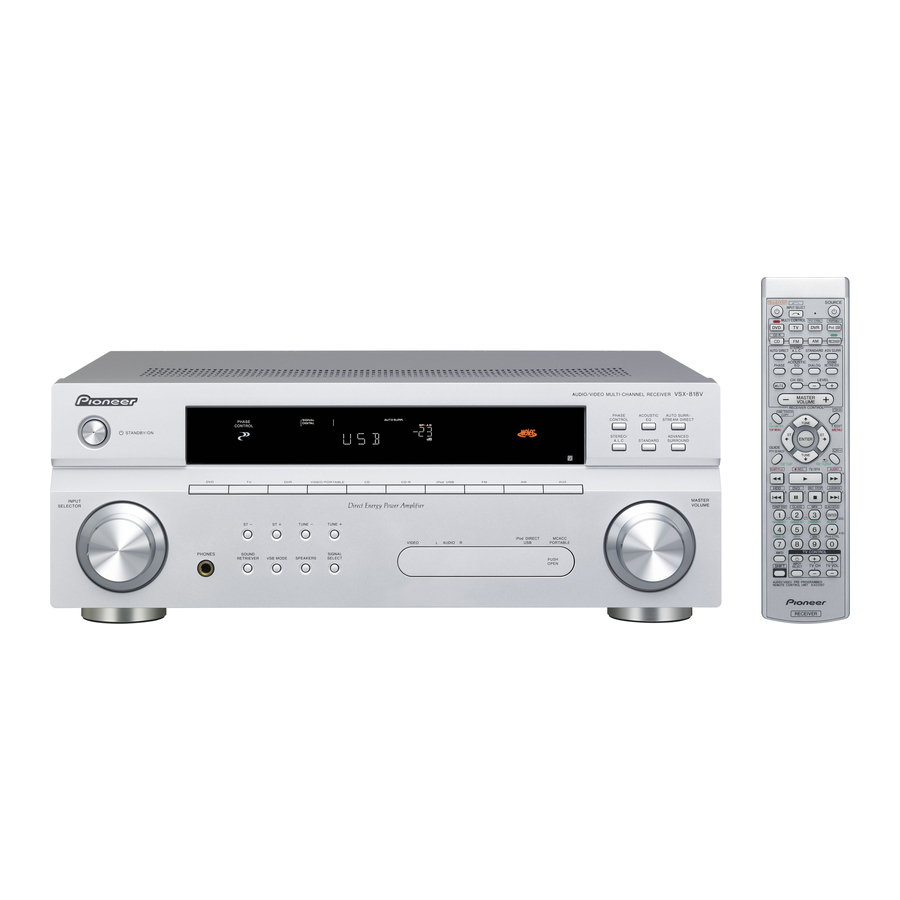
Controls and displays Chapter 4: Controls and displays Front panel Illustration shows the VSX-918V model PHASE CONTROL STANDBY / ON INPUT SELECTOR PHONES SOUND RETRIEVER PHONES SOUND RETRIEVER VSB MODE STANDBY/ON INPUT SELECTOR dial Selects an input source. Input select buttons Selects an input source. -
Page 24: Display
Controls and displays 10 MCACC PORTABLE jack Use to connect a microphone when performing Auto MCACC setup, or connect an auxiliary component using a stereo mini-jack cable (page 18). 11 PHONES jack Use to connect headphones (when connected, there is no sound output from the speakers (except speaker system B connections)). - Page 25 Controls and displays ANALOG Lights when an analog signal is detected. Lights when a source with DTS encoded audio signals is detected. Lights to indicate decoding of a DTS multichannel signal. 2 DIGITAL Lights to indicate decoding of a Dolby Digital multichannel signal.
-
Page 26: Remote Control
Controls and displays Remote control Illustration shows the VSX-918V model RECEIVER INPUT SELECT MULTI CONTROL CD-R STEREO/ AUTO/DIRECT STANDARD A.L.C. ACOUSTIC PHASE DIALOG CH SEL MUTE MASTER VOLUME RECEIVER CONTROL ONE TOUCH COPY TUNE PARAMETER TOP MENU ENTER GUIDE PTY SEARCH TUNE SETUP SUBTITLE... - Page 27 These buttons switch between the hard disk and DVD controls for HDD/DVD recorders. REC STOP* Stops recording. JUKEBOX* Switches to the Jukebox feature. TV/DTV Switches between the analog TV and DTV input modes for Pioneer flat screen TVs. ), ENTER...
- Page 28 Controls and displays Number buttons and other component controls Use the number buttons to directly select a radio frequency (page 46) or the tracks on a CD, DVD, etc. There are other buttons that can be accessed after the RECEIVER button is pressed.
-
Page 29: Operating Range Of Remote Control
Controls and displays 14 TV CONTROL buttons These buttons are dedicated to control the TV assigned to the TV CTRL button. Thus if you only have one TV to hook up to this system assign it to the TV CTRL MULTI CONTROL button. -
Page 30: Listening To Your System
Listening to your system Chapter 5: Listening to your system Important • Certain features explained in this section will not be possible depending on the source (for example, PCM 88.2 kHz/96 kHz, DTS 96 kHz (24 bit) or WMA9 Pro sources). Auto playback The simplest, most direct listening option is the Auto Surround feature. -
Page 31: Using The Advanced Surround Effects
Listening to your system Using the Advanced surround effects The Advanced surround feature creates a variety of surround effects. Try different modes with various soundtracks to see which you like. STEREO/ AUTO/DIRECT STANDARD ADV SURR A.L.C. ACOUSTIC SOUND PHASE DIALOG RETRIEVER •... -
Page 32: Using Front Stage Surround Advance
Listening to your system Using Front Stage Surround Advance The Front Stage Surround Advance function allows you to create natural surround sound effects using just the front speakers and the subwoofer. STEREO/ AUTO/DIRECT STANDARD A.L.C. ACOUSTIC PHASE DIALOG • While listening to a source, press STEREO/ A.L.C. -
Page 33: Listening With Acoustic Calibration Eq
Listening to your system Listening with Acoustic Calibration EQ • Default setting: OFF / ALL CH (after the Auto MCACC Setup or EQ Auto Setting) You can listen to sources using the Acoustic Calibration Equalization set in Automatically setting up for surround sound (MCACC) on page 8 or Acoustic Calibration EQ on page 40. -
Page 34: Setting The Av Options
Listening to your system Setting the AV options There are a number of additional sound settings you can make using the AV Parameter menu. The defaults, if not stated, are listed in bold. Important • The AV Parameter menu is not available with DVD 5.1ch selected by SIGNAL SEL (SIGNAL SELECT) (see Choosing the input signal on page 36). - Page 35 Listening to your system Setting What it does Specifies how dual mono encoded Dolby Digital DUAL MONO soundtracks should be played. Adjusts the level of dynamic range for movie soundtracks optimized for Dolby Digital and DTS (you may need to use (Dynamic Range this feature when listening to surround sound at low Control)
-
Page 36: Playing Other Sources
Listening to your system Playing other sources Turn on the power of the playback component. Turn on the power of the receiver. Select the source you want to playback. Use the MULTI CONTROL buttons (INPUT SELECTOR). Start playback of the component you selected in step 1. -
Page 37: The System Setup Menu
The System Setup menu Chapter 6: The System Setup menu Using the System Setup menu The following section shows you how to make detailed settings to specify how you’re using the receiver, and also explains how to fine-tune individual speaker system settings to your liking. -
Page 38: Fine Channel Level
The System Setup menu Important • For some of the settings below, you’ll have to connect the setup microphone to the front panel and place it about ear level at your normal listening position. See Automatically setting up for surround sound (MCACC) on page 8 if you’re unsure how to do this. -
Page 39: Fine Speaker Distance
The System Setup menu When it sounds like both tones are the same volume, press ENTER to confirm and continue to the next channel. 2a.Fine Channel Level + 0.0dB (Reference) 0.0dB ] +1.0dB –3.0dB ] [ +10.0dB ] –1.5dB ] :Finish •... -
Page 40: Acoustic Calibration Eq
The System Setup menu • If you want to go back and adjust a channel, simply use When you’re finished, press RETURN. You return to the Manual MCACC setup menu. Acoustic Calibration EQ Acoustic Calibration Equalization is a kind of room equalizer for your speakers (excluding the subwoofer). - Page 41 The System Setup menu Select CUSTOM1 or CUSTOM2 then use to select the setting you want to copy. 2d.EQ Data Copy 2d.EQ Data Copy FROM CUSTOM1 CUSTOM1 CUSTOM1 CUSTOM2 CUSTOM2 CUSTOM2 Start Copy Start Copy :Cancel • You can also copy from one custom setting to another.
-
Page 42: Manual Speaker Setup
The System Setup menu Checking your Acoustic Calibration EQ settings After you have completed an automatic or manual Acoustic Calibration EQ adjustment, you can check the ALL CH ADJUST, FRONT ALIGN and custom settings using the on- screen display. Select ‘EQ Data Check’ from the Manual MCACC setup menu. -
Page 43: Crossover Network
The System Setup menu Select ‘Speaker Setting’ from the Manual SP Setup menu. 3a.Speaker Setting 3.Manual SP Setup Front a.Speaker Setting Center b.Crossover Network Surr c.Channel Level SUB W. : d.Speaker Distance :Return Choose the set of speakers that you want to set then select a speaker size. -
Page 44: Channel Level
The System Setup menu Select ‘Crossover Network’ from the Manual SP Setup menu. 3.Manual SP Setup a.Speaker Setting b.Crossover Network c.Channel Level d.Speaker Distance :Return Choose the frequency cutoff point. Frequencies below the cutoff point will be sent to the subwoofer (or LARGE speakers). When you’re finished, press RETURN. -
Page 45: Speaker Distance
The System Setup menu Speaker Distance For good sound depth and separation from your system, you need to specify the distance of your speakers from the listening position. The receiver can then add the proper delay needed for effective surround sound. Select ‘Speaker Distance’... -
Page 46: Using The Tuner
Using the tuner Chapter 7: Using the tuner Listening to the radio The following steps show you how to tune in to FM and AM radio broadcasts using the automatic (search) and manual (step) tuning functions. If you already know the frequency of the station you want, see Tuning directly to a station below. -
Page 47: Saving Station Presets
Using the tuner Saving station presets If you often listen to a particular radio station, it’s convenient to have the receiver store the frequency for easy recall whenever you want to listen to that station. This saves the effort of manually tuning in each time. -
Page 48: An Introduction To Rds
Using the tuner An introduction to RDS Radio Data System (RDS) is a system used by most FM radio stations to provide listeners with various kinds of information—the name of the station and the kind of show they’re broadcasting, for example. One feature of RDS is that you can search by type of program. -
Page 49: Using Eon
Using the tuner Press ST ( ST +/– ) to select the program type you want to hear. Press ENTER to search for the program type. The system starts searching through the station presets for a match. When it finds one, the search stops and the station plays for five seconds. -
Page 50: Making Recordings
Making recordings Chapter 8: Making recordings Making an audio or a video recording You can make an audio or a video recording from the built-in tuner, or from an audio or video source connected to the receiver (such as a CD player or TV). Keep in mind you can’t make a digital recording from an analog source or vice-versa, so make sure the components you are... -
Page 51: Controlling The Rest Of Your System
Operating other Pioneer components (VSX-918V model only) Many Pioneer components have SR CONTROL jacks which can be used to link components together so that you can use just the remote sensor of one component. When you use a remote control, the control signal is passed along the chain to the appropriate component. -
Page 52: Selecting Preset Codes Directly
Controlling the rest of your system Selecting preset codes directly RECEIVER SOURCE INPUT SELECT MULTI CONTROL TV CTRL PORTABLE iPod USB CD-R RECEIVER While pressing the RECEIVER button, press and hold the ‘ 1 ’ button. The LED blinks. Press the MULTI CONTROL button for the component you want to control. -
Page 53: Controls For Tvs
Controlling the rest of your system Controls for TVs This remote control can control components after entering the proper codes or teaching the receiver the commands (see Controlling the rest of your system on page 51 for more on this). Use the MULTI CONTROL buttons to select the component. -
Page 54: Controls For Other Components
Controlling the rest of your system Button(s) Function ENTER/DISC Use to enter a channel. MENU Select the menu screen. & Press to select or adjust and navigate items on the menu ENTER screen. Controls for other components This remote control can control these components after entering the proper codes or teaching the receiver the commands (see Controlling the rest of your system on page 51 for more on this). - Page 55 Controlling the rest of your system Button(s) Function +10 button Selects tracks higher than 10. (For example, press +10 then 3 to select track 13.) ENTER / Chooses the disc. DISC Ejects the disc. Use as the ENTER button. Displays the setup screen for DVR players. Changes sides of the LD.
-
Page 56: Preset Code List
SANYO 645 BUSH 647 FUJITSU 648 SEI 649 GOLDSTAR 650 GRANDIENTE 657 DAEWOO 676, 677 PIONEER 600, 651, 655, 664, 665, 680 STB (SATELLITE/CATV) Manufacturer Code SA 706, 708 JERROLD 716 ZENITH 717 PIONEER 200, 204, 254, 700 Manufacturer Code... -
Page 57: Other Connections
• Pioneer cannot under any circumstances accept responsibility for any direct or indirect loss arising from any inconvenience or loss of recorded material resulting from the iPod failure. 2 The controls of your iPod will be inoperable when connected to this receiver (Pioneer shows in the iPod display). Connecting your iPod to the receiver... -
Page 58: Ipod Playback
Other connections iPod playback To navigate songs on your iPod, you can take advantage of the OSD of your TV connected to this receiver. You can also control all operations for music in the front panel display of this receiver. Finding what you want to play When your iPod is connected to this receiver, you can browse songs stored on your iPod by... -
Page 59: Connecting A Usb Device
(MP3 players) of format FAT16/32. It is not possible to connect this unit to a personal computer for USB playback. • Pioneer cannot guarantee compatibility (operation and/or bus power) with all USB mass storage devices and assumes no responsibility for any loss of data that may occur when connected to this receiver. -
Page 60: Basic Playback Controls
Other connections Connecting your USB device to the receiver Switch on the receiver and your TV. Press iPod USB . No USB appears in the OSD. Connect your USB device. The USB terminal is located on the front panel. Loading appears in the OSD as this receiver starts recognizing the USB device connected. -
Page 61: Selecting A File From The Folder/File List For Playback
Other connections Selecting a file from the folder/file list for playback The folder/file list displays folders and files stored on your USB device hierarchically. You can select and play back a file of your choice by and ENTER. using Press RETURN to display the folder/file list for the USB device connected. -
Page 62: Using This Receiver With A Pioneer Flat
Microsoft Corporation in the United States and/ or other countries. Note 1 This receiver is compatible with all Pioneer flat screen TVs from 2003 onward. Using this receiver with a Pioneer flat screen TV (VSX-918V model only) -
Page 63: Screen Tv
• If you connect to a Pioneer flat screen TV using an SR+ cable, you will need to point the remote control at the flat screen TV remote sensor to control the receiver. In this case, you won’t be able to control the receiver using the remote control if you switch the flat screen TV off. -
Page 64: Other Settings
Other Settings Chapter 11: Other Settings The Input Assign menu You only need to make settings in the Input Assign menu if you didn’t hook up your digital equipment according to the default settings for the digital inputs, or if you have connected equipment using component video cables. - Page 65 Other Settings Assigning the component video inputs • Default settings: Component 1 – DVD Component 2 – TV Component 3 – DVR If you used component video cords to connect your video equipment you must tell the receiver which device it is, or else you may see the composite video input instead of the component video signal.
-
Page 66: The Other Setup Menu
SR+ cable. Note that the number of settings available will depend on the flat screen TV you’ve connected. See also Using this receiver with a Pioneer Flat Screen TV on page 62. Press RECEIVER on the remote control, then press the SETUP button. -
Page 67: Additional Information
The receiver suddenly switches • After about a minute (you won’t be able to switch the unit on during this time), off and the power indicator switch the receiver back on. If the message persists, call a Pioneer authorized blinks. independent service company. - Page 68 • VSX-918V model only: Unplug anything connected to the CONTROL IN jack and use remote normally (see Operating other Pioneer components on page 51). • Reinsert the SR cable, making sure it’s connected to the right jack (see Using this receiver with a Pioneer flat screen TV on page 62).
-
Page 69: Hdmi
Important on page 61 of Connecting a USB device, take the unit to your nearest device. Pioneer authorized service center or your dealer for servicing. Can’t play audio files. • The WMA or MPEG-4 AAC files were recorded using DRM (digital rights management), or the bit rate/sampling rate is not compatible (see Compressed audio compatibility on page 61). -
Page 70: Important Information Regarding The Hdmi Connection
Additional information Important information regarding the HDMI connection (VSX-918V model only) There are cases where you may not be able to route HDMI signals through this receiver (this depends on the HDMI equipped component you are connecting-check with the manufacturer for HDMI compatibility information). -
Page 71: Changing The Tv Format Setting
A damaged power cord can cause a fire or give you an electrical shock. Check the power cord once in a while. When you find it damaged, ask your nearest Pioneer authorized service center or your dealer for a replacement. Cleaning the unit •... - Page 72 Additional information • Frequency response DVR/VCR, DVD/BD, TV/SAT MONITOR ..5 Hz to 7 MHz Signal-to-Noise Ratio ....55 dB Crosstalk .
- Page 73 253 Alexandra Road, #04-01, Singapore 159936 TEL: 65-6472-7555 PIONEER ELECTRONICS AUSTRALIA PTY. LTD. 178-184 Boundary Road, Braeside, Victoria 3195, Australia, TEL: (03) 9586-6300 PIONEER ELECTRONICS DE MEXICO S.A. DE C.V. Blvd.Manuel Avila Camacho 138 10 piso Col.Lomas de Chapultepec, Mexico,D.F. 11000 TEL: 55-9178-4270 Published by Pioneer Corporation.