Pioneer S-X360 Operating Instructions Manual
5.1ch surround system
Hide thumbs
Also See for S-X360:
- Operating instructions manual (68 pages) ,
- Service manual (88 pages) ,
- Service manual (6 pages)

Related Manuals for Pioneer S-X360


Summary of Contents for Pioneer S-X360
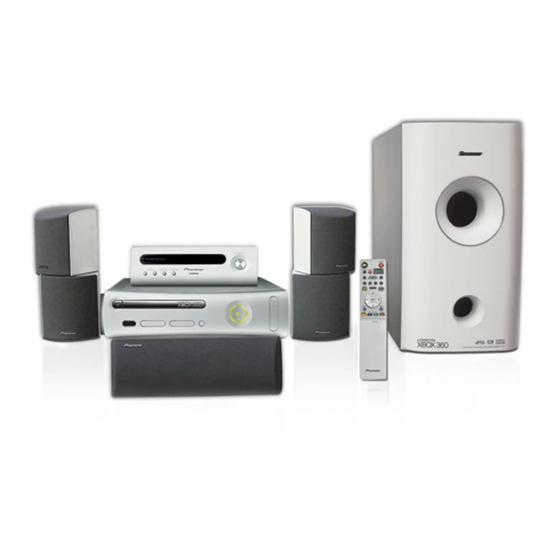
- Page 1 5.1ch Surround System HTP-GS1 SX-X360 Audio Multi-channel Receiver Subwoofer S-X360 Speaker System Discover the benefits of registering your product online at (www.pioneer-eur.com). Operating Instructions www.pioneer.co.uk...
-
Page 2: Operating Environment
Check K041_En the power cord once in a while. When you find it damaged, ask your nearest PIONEER authorized service center or your dealer for a replacement. D3-4-2-1-9a_En The exclamation point within an equilateral... - Page 3 Replacement and mounting of an AC plug on the power supply cord of this unit should be performed only by qualified service personnel. IMPORTANT: THE MOULDED PLUG This appliance is supplied with a moulded three pin mains plug for your safety and convenience. A 5 amp fuse is fitted in this plug. Should the fuse need to be replaced, please ensure that the replacement fuse has a rating of 5 amps and that it is approved by ASTA or BSI to BS1362.
-
Page 4: Table Of Contents
• Microphone (for Auto MCACC setup) (page 16) • These operating instructions • Warranty card Speakers (S-X360) box: • Speakers (front x 2, surround x 2, center x 1) (page 6) • Non-skid pads (small) x 12 (page 6) • Non-skid pads (large) x 4 (page 6) •... - Page 5 Channel level setting ......24 Speaker distance setting ..... 24 Dynamic Range Control .
-
Page 6: Speaker Setup Guide
• Attach the smaller non-skid pads to the base of each of the front speakers and the center speaker. The four large non-skid pads are for the receiver subwoofer (as shown). Use the supplied adhesive to attach 4 pads to the base (flat surface) of each speaker. -
Page 7: Front Surround Setup
After testing for the slack necessary to turn the speaker (see the following step), use the groove provided to secure the speaker wire as shown. Leave 5 cm of slack from the speaker terminals so the upper (surround) speaker can turn freely. -
Page 8: Wall Mounting The Front And Surround Speaker System
Caution • If you are unsure of the qualities and strength of the wall, consult a professional for advice. • Pioneer is not responsible for any accidents or damage that result from improper installation. Additional notes on speaker placement • Install the main front left and right speakers at an equal distance from the TV. -
Page 9: Connecting Up
Connecting up Chapter 2 Connecting up Basic connections Important • When connecting this system or changing connections, be sure to switch power off and disconnect the power cord from the wall socket. After completing all connections, connect the power cord to the wall socket. Receiver subwoofer ANTENNA CONTROL IN... - Page 10 (Connect to rear panel) • Twist and pull off the protective shields on each wire. • Connect the wires to the speaker. Match the colored wired with the color-coded label (model label), then insert the colored wire into the red (+) side and the other wire into the black (–) side.
-
Page 11: Power Cord
Make sure to insert completely. The small lug at the wire-end of the speaker plug should face up or down depending on whether it’s being plugged into one of the upper or lower speaker terminals. -
Page 12: Using This System For Tv Audio
Connecting up Using this system for TV audio If your TV has a stereo audio output you can connect it to this system and enjoy surround TV sound. CONTROL SPEAKERS DVD/DVR SYSTEM CONNECTOR SUB WOOFER SURROUND (COAXIAL) USE ONLY WITH DISPLAY UNIT CENTER FRONT... -
Page 13: Controls And Displays
Controls and displays Chapter 3 Controls and displays Display unit 5.1ch SURROUND SYSTEM – VOLUME + STANDBY/ON Press to switch the system on/into standby. IR remote sensor (page 15) Front panel display See below for details. Indicator Lights blue when the power is on (except when the dimmer/sleep timer is active). -
Page 14: Remote Control
Press to set the sleep timer (page 29). 13 RDS DISP VOLUME MCACC – Changes RDS displays (page 23). 14 ADVANCED Use to select a Pioneer original surround mode OPEN OPEN (page 19). 15 SURROUND Use to select a Surround mode (page 18). 16 MCACC Starts the Auto MCACC setup (page 16). -
Page 15: Aa/Lr6 Alkaline Batteries
Controls and displays Using the remote control Please keep in mind the following when using the remote control: • Make sure that there are no obstacles between the remote and the remote sensor on the unit. • Remote operation may become unreliable if strong sunlight or fluorescent light is shining on the unit’s remote sensor. -
Page 16: Getting Started
REC MODE information from a series of test tones to optimize the ONE TOUCH COPY speaker settings and equalization (Acoustic Calibration EQ) for your particular room. TEST TONE VIDEO IN SOUND • The test tones used for Auto MCACC setup are loud;... - Page 17 • If you see an ERR MIC or ERR SP message in the display, there may be a problem with your mic or the speaker connections. To try again, press ENTER when you see RETRY When the MCACC setup is complete, the volume level...
-
Page 18: Listening To Your System
Listening to your system Chapter 5 Listening to your system Auto listening mode The Auto listening mode is the simplest way to listen to any source as it was mastered: the output from the speakers mirrors the channels in the source material. If you set up the system for Front surround (page 7), the Front Surround modes will give the best results (see Using Front Surround on page 19). -
Page 19: Using Front Surround
Using Front Surround The Front Surround modes are effective when you are using the Front surround speaker setup as described on page 7. The surround speakers should be placed on top of the front speakers and oriented either towards the walls, or straight ahead, depending on which mode you are using (see below). -
Page 20: Using The Sound Retriever
EQ ON or EQ OFF then press ENTER to confirm. • On the EQ OFF setting, equalization is set to off and speaker settings (channel delay and channel level) remains as it is set. • Acoustic Calibration EQ is set to on automatically after Auto MCACC setup is used. -
Page 21: Boosting The Bass Level
Listening to your system Boosting the bass level There are two bass modes you can use to enhance the bass in a source. Press SOUND . Use the (cursor left/right) buttons to select BASSMODE then press ENTER . Use the (cursor up/down) buttons to select the sound then press ENTER to confirm. -
Page 22: Listening To The Radio
Listening to the radio Chapter 6 Listening to the radio Listening to the radio The tuner can receive both FM and AM broadcasts, and lets you memorize your favorite stations so you don’t have to manually tune in every time you want to listen. AUDIO SUBTITLE TIMER REC REC MODE... -
Page 23: Using Rds
Listening to the radio Using RDS Radio Data System (RDS) is a system used by most FM radio stations to provide listeners with various kinds of information—the name of the station and the kind of show they’re broadcasting, for example. One feature of RDS is that you can search by type of program. -
Page 24: Surround Sound Settings
• SR – Surround right speaker • SL – Surround left speaker • SW – Subwoofer Each speaker can be adjusted from 0.3 m to 9.0 m. Press ENTER when you’re finished. • If you use the Auto MCACC feature again, it will overwrite the settings you have made here. -
Page 25: Dual Mono Setting
(see Channel level setting on page 24). A test tone is played through each speaker in turn, allowing you to adjust the level as it plays. Note that the channel level settings for stereo sources are independent of the settings for surround sound sources. -
Page 26: Other Connections
Other connections Chapter 8 Other connections Important • When connecting this system or changing connections, be sure to switch power off and disconnect the power cord from the wall socket. After completing all connections, connect the power cord to the wall socket. Connecting auxiliary components The receiver subwoofer has optical and coaxial digital inputs for digital playback components, such as DVD, CD... -
Page 27: Using This Unit With A Pioneer Plasma Display
1 This system is compatible with all Pioneer plasma displays from 2003 onward. 2 The 3-ringed SR+ cable from Pioneer is commercially available under the part number ADE7095. Contact the Pioneer Customer Support division for more information on obtaining an SR+ cable. -
Page 28: Using The Sr+ Mode With A Pioneer Plasma Display
• The SR+ setting remains in effect even in standby. • The SR+ setting does not affect the FM/AM tuner function. Using the SR+ mode with a Pioneer plasma display Press SR+ on the remote. (cursor left/right) to select SR+ ON then press ENTER. -
Page 29: Additional Information
Additional information Chapter 9 Additional information Setting the sleep timer The sleep timer switches off the receiver subwoofer after a specified time so you can fall asleep without worrying about it. TIMER REC REC MODE ONE TOUCH COPY MENU MCACC TEST TONE SLEEP SURROUND ADVANCED... -
Page 30: Glossary
Additional information Use in an excessively dusty or damp environment. Place directly on top of an amplifier, or other component in your stereo system that becomes hot in use. Use near a television or monitor as you may experience interference—especially if the television uses an indoor antenna. -
Page 31: Using The Tv Remote Control Buttons
REX 631, 646 WATSON 607 ROADSTAR 641, 644, 646 WATT RADIO 632, 642, 649 SABA 631, 636, 642, 651 WHITE SAISHO 639, 644, 646 WESTINGHOUSE 607 YOKO 607, 642, 646 ZENITH 603, 620 PIONEER 600, 631, 632, 607, 636, 642, 651... -
Page 32: Troubleshooting
If the trouble cannot be rectified even after exercising the checks listed below, ask your nearest Pioneer authorized service center or your dealer to carry out repair work. • If the system does not operate normally due to external effects such as static electricity disconnect the plug from the outlet and insert again to return to normal operating conditions. -
Page 33: Fm Wire Antenna
EEP ERROR • Contact your Pioneer authorized service center or your dealer for servicing. NO SPTYP • Try switching the unit off then on again. If the error still appears, please contact a Pioneer authorized service center or your dealer. -
Page 34: Microphone (For Auto Mcacc Setup)
FM wire antenna ...1 Microphone (for Auto MCACC setup) ...1 Power cord...1 Warranty card ...1 These operating instructions S-X360 Speaker system (Front speakers x2, surround speakers x2, center speaker • Front speakers Enclosure ... Closed-box bookshelf type System...7.7 cm 1-way system Speakers ...7.7 cm cone type... - Page 35 253 Alexandra Road, #04-01, Singapore 159936 TEL: 65-6472-7555 PIONEER ELECTRONICS AUSTRALIA PTY. LTD. 178-184 Boundary Road, Braeside, Victoria 3195, Australia, TEL: (03) 9586-6300 PIONEER ELECTRONICS DE MEXICO S.A. DE C.V. Blvd.Manuel Avila Camacho 138 10 piso Col.Lomas de Chapultepec, Mexico,D.F. 11000 TEL: 55-9178-4270 <06C00001>...