Table of Contents
Advertisement
Advertisement
Table of Contents

Related Manuals for Agilent Technologies 6490


Summary of Contents for Agilent Technologies 6490
- Page 1 Agilent 6400 Series Triple Quadrupole LC/MS System Installation Guide...
- Page 2 Notices Warranty Safety Notices © Agilent Technologies, Inc. 2017 No part of this manual may be reproduced in The material contained in this docu- any form or by any means (including elec- ment is provided “as is,” and is sub-...
- Page 3 In This Guide… This guide contains information to install the Agilent 6400 Series Triple Quadrupole LC/MS System. Instrument Installation This chapter describes the steps that are needed to install the Triple Quadrupole LC/MS. Software Installation and Configuration This chapter describes the steps that are needed to install the MassHunter software.
- Page 4 This page intentionally left blank. Agilent 6400 Series Triple Quad LC/MS System Installation Guide...
-
Page 5: Table Of Contents
Content Instrument Installation Step 1. Unpack and set up the Triple Quadrupole LC/MS Step 2. Prepare to install the system Step 3. Set up the Agilent MS40+ pumps Step 4. Connect the Triple Quadrupole LC/MS Step 5. Install the spray chamber Step 6. - Page 6 Contents Installation and Verification of Other Sources G1947B APCI Source To install the G1947B APCI source To verify the operation of the G1947B APCI source G1978B Multimode Source To install the G1978B multimode source To verify the operation of the G1978B multimode source G1971B APPI Source To install the G1971B APPI source To verify the operation of the G1971B APPI source...
-
Page 7: Instrument Installation
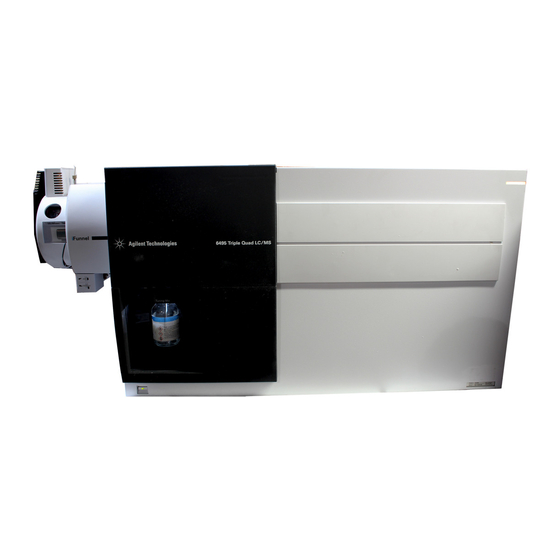
Agilent 6400 Series Triple Quadrupole LC/MS System Installation Guide Instrument Installation Step 1. Unpack and set up the Triple Quadrupole LC/MS Step 2. Prepare to install the system Step 3. Set up the Agilent MS40+ pumps Step 4. Connect the Triple Quadrupole LC/MS Step 5. - Page 8 Instrument Installation Figure 1 6490 (left) and 6495B (with Gate Valve) Triple Quadrupole LC/MS Figure 2 6470 Triple Quadrupole LC/MS Figure 3 6460 Triple Quadrupole LC/MS Agilent 6400 Series Triple Quad LC/MS System Installation Guide...
-
Page 9: Step 1. Unpack And Set Up The Triple Quadrupole Lc/Ms
2 Check off each item on the packing list, and verify the serial numbers. 3 Record the serial numbers in the installation documentation. 4 Report any discrepancies to Agilent Technologies. 5 Check that site preparation is complete, which includes power and gas supplies and chemical supplies needed for installation and performance verification. -
Page 10: Step 2. Prepare To Install The System
Instrument Installation Step 2. Prepare to install the system Step 2. Prepare to install the system Before you begin, check that you have these parts: • Utility knife and needle nose pliers 1 Unpack and set up the Triple Quadrupole LC/MS. a Cut the tie wraps around the package. - Page 11 Instrument Installation Step 2. Prepare to install the system Figure 5 Instrument unpacked on shipping pallet (6460 pictured) c Remove the front, top, right, back-left, and lower front-left cosmetic covers so that you can remove the shipping brackets. You do not need to remove the upper front-left cover.
- Page 12 Instrument Installation Step 2. Prepare to install the system Figure 6 Remove shipping screws from back of top panel. The screws to remove are circled in this picture. d Remove the shipping brackets (a total of 7). You will need to use a 13-mm wrench.
- Page 13 Instrument Installation Step 2. Prepare to install the system e Take an inventory of the contents of the packages. f Record serial numbers. The serial number label for the Triple Quadrupole LC/MS is located on the lower left corner to the left of the instrument power push button.
-
Page 14: Step 3. Set Up The Agilent Ms40+ Pumps
Step 3. Set up the Agilent MS40+ pumps Do these steps if your instrument include one or more Agilent MS40+ pump. Install two foreline pumps for 6490/6495 and one foreline pump for 6420/6460C/6470A. Before you begin, make sure that you have: •... - Page 15 Instrument Installation Step 3. Set up the Agilent MS40+ pumps 1 Unpack the Tygon 1/2-inch I.D. exhaust tubing (p/n G1946-80077) Pump oil pan (p/n G1946-00034) from the shipping kit. 2 Remove the Agilent MS40+ foreline pump from its shipping container. 3 Set the Agilent MS40+ foreline pump into the...
- Page 16 Expander assembly ports. Connect the Ion Funnel Foreline Pump to the port labeled Auxiliary and connect the Foreline Pump to the port labeled Foreline. See Figure Figure 9 Pump expander box ports for 6460C (left) and 6470/6490/6495 Agilent 6400 Series Triple Quad LC/MS System Installation Guide...
- Page 17 Instrument Installation Step 3. Set up the Agilent MS40+ pumps 11 For 6490/6495: Plug the two pump power cord (p/n 8121-1753) into the power inlets of the foreline pumps. Secure the pump power cords in place using the retaining bale mechanisms. Plug the other ends into the Pump Expander assembly ports.
-
Page 18: Step 4. Connect The Triple Quadrupole Lc/Ms
Instrument Installation Step 4. Connect the Triple Quadrupole LC/MS Step 4. Connect the Triple Quadrupole LC/MS 1 Connect the rough hose (p/n G1969-20123) that is supplied in the ship kit to the KF-25 foreline pump hose connection on the back left of the instrument. - Page 19 Instrument Installation Step 4. Connect the Triple Quadrupole LC/MS Spray chamber drain tube Drain bottle vent CDS inlet and LC waste fitting Waste drain bottle Secondary containment (customer supplied) Figure 10 Drain bottle 7 Install the gas filter(s): For Triple Quadrupole LC/MSs without AJS ESI source: Outlet to LC/MS a Cut an appropriate length of the...
- Page 20 1/4-inch nitrogen gas connection for drying gas supply Do not use! 1/8-inch nitrogen gas connection for collision gas supply Figure 13 Power and gas connections on back left of the 6470/6490/6495 Agilent 6400 Series Triple Quad LC/MS System Installation Guide...
- Page 21 Instrument Installation Step 4. Connect the Triple Quadrupole LC/MS 1/8-inch nitrogen gas connection for collision gas supply Do not use! 1/4-inch nitrogen gas connection for drying gas supply Figure 14 Power and gas connections on back left of the 6420/6460 8 Set the pressure on the nitrogen supply regulator at 80 to 100 psi (550 to 690 kPa).
- Page 22 AC line power from HUB/switch connection Foreline pump power cord connection/ Pump Expander Assembly control connection Figure 15 Power and electrical connection at back left side of Triple Quadrupole LC/MS (6470/6490/6495) Agilent 6400 Series Triple Quad LC/MS System Installation Guide...
- Page 23 Auxiliary power connection Main power connection Connection to AC board Foreline pump power cord connection Figure 16 Power and electrical connection for internal Pump Expander Assembly at back left side of 6470/6490/6495 Agilent 6400 Series Triple Quad LC/MS System Installation Guide...
- Page 24 Instrument Installation Step 4. Connect the Triple Quadrupole LC/MS Remote start connection LAN connection from HUB/switch Foreline pump power cord connection/ Pump Expander Assembly control connection AC line power connection Figure 17 Power and electrical connection at back left side of Triple Quadrupole LC/MS (6460C).
- Page 25 Instrument Installation Step 4. Connect the Triple Quadrupole LC/MS Remote start connection LAN connection from HUB/switch Foreline pump power cord connection/ Pump Expander Assembly control connection AC line power connection Figure 18 Power and electrical connection at back left side of Triple Quadrupole LC/MS (6420/6460A) 10 Set the pressure on the Collision Cell supply regulator at 10 to 30 psi (70 to 210 kPa).
- Page 26 Triple Quadrupole LC/MS power cord into the wall outlet. See Figure 13 through Figure 15 For 6460C/6470/6490/6495: Plug the Pump Expander Assembly power cord into the wall outlet. Figure 19 Pump Expander Assembly box for 6460C (left) and 6470/6490/6495.
-
Page 27: Step 5. Install The Spray Chamber
For the 6470/6490/6495, the AJS ESI source is shipped outside of the instrument chassis. Figure 20 Packaging for AJS ESI source for 6460. For 6470/6490/6495, the AJS ESI is shipped outside of the instrument chassis. 3 Remove the foil that covers the spray chamber mount, and remove the shipping cover from the Electrospray spray chamber. - Page 28 Instrument Installation Step 5. Install the spray chamber 4 Put the nebulizer in the nebulizer adjustment fixture supplied in the shipping kit and check that the nebulizer needle is properly adjusted. The nebulizer needle should be even with the end of the nebulizer nozzle. 5 Install the nebulizer in the spray chamber.
- Page 29 Instrument Installation Step 5. Install the spray chamber high voltage connection vaporizer port nebulizer gas sheath gas Figure 21 Connections for AJS ESI source (6420/6460) Agilent 6400 Series Triple Quad LC/MS System Installation Guide...
- Page 30 Figure 22 Connections for AJS ESI source (6470/6490/6495) 11 Rinse the calibrant bottle three times with hot (60°C) water and then three times with methanol. Then rinse it once with acetonitrile. 12 Add the ESI-L Low Concentration Tuning Mix to the calibrant bottle.
- Page 31 Instrument Installation Step 5. Install the spray chamber Agilent G1948B Electrospray Source Before you begin, check that you have these parts: • Agilent G1948B Electrospray interface (the G1948A Electrospray interface is not supported) • Nebulizer spacer kit (p/n G1946-60254) • ESI-L Low Concentration Tuning Mix (p/n G1969-85000) 1 Remove the foil that covers the spray chamber mount, and remove the shipping cover from the Electrospray spray chamber.
- Page 32 Instrument Installation Step 5. Install the spray chamber 10 Turn on the Triple Quadrupole LC/MS front power switch to start the pump-down of the Triple Quadrupole LC/MS. The foreline pump(s) will become quieter within a few seconds. G1978B Multimode Source 1 Install these parts from the Multimode and APCI enablement kits that ship with the G1978B Multimode source into the Aux module on the Triple Quadrupole LC/MS:...
- Page 33 Instrument Installation Step 5. Install the spray chamber Figure 23 Multimode cable extension box 3 Put the nebulizer in the nebulizer adjustment fixture supplied in the shipping kit and check that the nebulizer needle is properly adjusted. The nebulizer needle should be even with the end of the nebulizer nozzle. 4 Install the nebulizer in the spray chamber.
-
Page 34: Step 6. Install The Agilent Lc System
Instrument Installation Step 6. Install the Agilent LC system 9 Add the Multimode calibrant to the calibrant bottle. Never use aliphatic, aromatic or halogenated hydrocarbons in the CDS. These solvents C A U T I O N are not compatible with the O-ring in the CDS. 10 Turn on the Triple Quadrupole LC/MSrupole LC/MS front power switch to start the pump-down of the Triple Quadrupole LC/MS. -
Page 35: Software Installation And Configuration
Agilent 6400 Series Triple Quadrupole LC/MS System Installation Guide Software Installation and Configuration Step 1. Set up the computer system Step 2. Check PC network card configuration Step 3. Prepare for installation Step 4. Install the Data Acquisition program Step 5. Install the Qualitative Analysis program Step 6. -
Page 36: Step 1. Set Up The Computer System
Software Installation and Configuration Step 1. Set up the computer system Step 1. Set up the computer system 1 Set up the PC: a Unpack the PC and put it on a suitable bench top or table. b Connect the keyboard, mouse, monitor and printer to the computer. 2 Install the network hub: a Put the hub on the table next to the PC. -
Page 37: Step 2. Check Pc Network Card Configuration
Software Installation and Configuration Step 2. Check PC network card configuration Step 2. Check PC network card configuration 1 Click Start > Control Panel, and then under Network and Internet, click View network status and tasks. If Control Panel displays in Small icons view, click Network and Sharing Centers. -
Page 38: Step 3. Prepare For Installation
Software Installation and Configuration Step 3. Prepare for installation 5 Make sure the Network Adapter is set to these settings: IP address: 192.168.254.1 Subnet mask: 255.255.255.0 Figure 25 Internet Protocol Version 4 (TCP/IP) Properties dialog box Step 3. Prepare for installation •... -
Page 39: Step 4. Install The Data Acquisition Program
Software Installation and Configuration Step 4. Install the Data Acquisition program Step 4. Install the Data Acquisition program The Data Acquisition program is pre-installed on the shipping PC when ordered together with the instrument as a bundle. If the MassHunter workstation software is already installed, do only these steps: •... -
Page 40: Step 5. Install The Qualitative Analysis Program
Software Installation and Configuration Step 5. Install the Qualitative Analysis program • If you are asked to allow Agilent Technologies to install software on the computer, click Yes. • If you get a message that indicates that the screen resolution is not set to the required resolution, click OK. -
Page 41: Step 6. Install The Quantitative Analysis Program
Software Installation and Configuration Step 6. Install the Quantitative Analysis program Step 6. Install the Quantitative Analysis program • Refer to the Offline Qualitative and Quantitative Analysis Installation Guide to install the Quantitative Analysis program. You must use the Run as administrator option to install the program. Failure to do so C A U T I O N can result in an incomplete installation, which can cause the system to run unreliably. -
Page 42: Step 9. Install Quantitative Analysis Reporting
Software Installation and Configuration Step 9. Install Quantitative Analysis Reporting Step 9. Install Quantitative Analysis Reporting • Refer to the Offline Qualitative and Quantitative Analysis Installation Guide to install the Quantitative Analysis Reporting program. You must use the Run as administrator option to install the program. Failure to do so C A U T I O N can result in an incomplete installation, which can cause the system to run unreliably. - Page 43 Software Installation and Configuration Step 11. Configure the instrument 4 In the Instrument Configuration dialog box: a If you want to change the name of the instrument, type a new name for Instrument name. b Mark the Mass Spectrometer check box. c Click the option for your LC/MS instrument.
-
Page 44: Step 12. Copy The Support Folder To The Computer
Software Installation and Configuration Step 12. Copy the support folder to the computer Step 12. Copy the support folder to the computer In this step, you copy the \Support folder from the Data Acquisition installation disk to the D:\MassHunter\ folder. 1 In a Windows Explorer window, open the installation disk drive. - Page 45 Software Installation and Configuration Step 12. Copy the support folder to the computer Figure 28 Confirm Attribute Changes dialog box 6 Click Apply changes to this folder, subfolders and files, and then click Agilent 6400 Series Triple Quad LC/MS System Installation Guide...
-
Page 46: Step 13. Confirm The Lc Firmware Revision
Software Installation and Configuration Step 13. Confirm the LC firmware revision Step 13. Confirm the LC firmware revision 1 Start the Data Acquisition program. 2 Click File > Print > Instrument Configuration Report. 3 Click Screen. 4 Click OK. 5 Go to http://www.chem.agilent.com/_layouts/agilent/downloadFirmware.aspx?w hid=69761 and check that you have the most recent firmware for your... -
Page 47: Step 14. Finish The Installation
Software Installation and Configuration Step 14. Finish the installation Step 14. Finish the installation 1 Create a system recovery disc of your installed system. Check with your IT department for the appropriate backup procedure. 2 Install or enable any other program that you will use with your MassHunter workstation. - Page 48 This page intentionally left blank. Agilent 6400 Series Triple Quad LC/MS System Installation Guide...
-
Page 49: Installation Completion And System Verification
Agilent 6400 Series Triple Quadrupole LC/MS System Installation Guide Installation Completion and System Verification Step 1. Condition the Agilent LC instrument Step 2. Reset the collision cell gas flow rate Step 3. Prepare the performance evaluation samples Step 4. Set up methods and worklists Step 5. -
Page 50: Step 1. Condition The Agilent Lc Instrument
Installation Completion and System Verification Step 1. Condition the Agilent LC instrument Step 1. Condition the Agilent LC instrument Before you begin, check that you have: • 18 M, HPLC grade deionized water (p/n 8500-2236) • high-purity HPLC grade isopropanol •... - Page 51 Installation Completion and System Verification Step 1. Condition the Agilent LC instrument minutes at 3 mL/minute. Do 5 injections with the flushing solvent to clean the injector path and sample loop. Alternatively, while the Triple Quadrupole LC/MS pumps down, the flushing solvent can be pumped at a low flow rate (e.g.
- Page 52 Installation Completion and System Verification Step 1. Condition the Agilent LC instrument f Continue at “Step 3. Prepare the performance evaluation samples” page 58 to prepare the Negative Ion Mode checkout sample. Figure 29 Trapping column, for 6470/6495. 12 For positive mode checkout, after negative mode checkout is completed (all models except 6410): a For Channel A, install 1 liter of water with 0.1% formic acid.
- Page 53 Installation Completion and System Verification Step 1. Condition the Agilent LC instrument c Do 5 injections with the blank premixed mobile phase (70:30 water: methanol) to clean the injector path and sample loop. Use solvents that are at a minimum HPLC grade. Solvents that are acceptable for most LC N O T E applications may contain high levels of background that are detectable by the more sensitive LC/MS instrument.
-
Page 54: Step 2. Reset The Collision Cell Gas Flow Rate
6400 Series Model Rough Vacuum High Vacuum High Vacuum (CC Gas OFF) (CC Gas ON) 6490 2.2 to 3.7 Torr 2.0 to 3.0 × 10 Torr 5.0 to 5.8 × 10 Torr 6410 with G2573A, 6430/6460 1.8 to 2.2 Torr 2.0 to 5.0 ×... - Page 55 6410/6420 3.0 x 10 Torr 6430/6460 2.0 x 10 Torr 6490 5.5 x 10 Torr For example, to set the 1605 register value to 550, type the following and press Enter. >msepoke 1605, 550 You may need to try numbers that are above and below the default value.
- Page 56 2 Edit the acquisition parameter file so that the newly determined value will be applied whenever Data Acquisition starts up and will be used for tuning and data acquisition: a Open the D:\MassHunter\instr\default\ folder, and then open the appropriate .xml file with Notepad: 6495 G6495AHWParams.xml 6490 G6490AHWParams.xml 6470 G6470AHWParams.xml 6460C G6460CAHWParams.xml 6460A G6460AHWParams.xml...
- Page 57 Installation Completion and System Verification Step 2. Reset the collision cell gas flow rate b Close all MassHunter engines from the MassHunter Acquisition Engine launcher. (Right-click the Engine Launch icon in the system tray, and then click Shutdown Engines.) c Start the Data Acquisition program. 4 Wait 20 to 30 seconds for the collision cell pressure and gas flow to stabilize.
-
Page 58: Step 3. Prepare The Performance Evaluation Samples
Installation Completion and System Verification Step 3. Prepare the performance evaluation samples Step 3. Prepare the performance evaluation samples In this step, you dilute the supplied performance evaluation sample (reserpine) to the concentrations needed for the Triple Quadrupole LC/MS system checkout. Use the diluted samples within a day of dilution. - Page 59 Installation Completion and System Verification Step 3. Prepare the performance evaluation samples 3 Prepare the second dilution (500 fg/μL) chloramphenicol: a Use a clean graduated pipette to transfer 1 mL of the 100 pg/μL chloramphenicol dilution to a pre-rinsed 100 mL volumetric flask. b Dilute to the 100 mL mark with the 70:30 water:methanol solution.
-
Page 60: Step 4. Set Up Methods And Worklists
Installation Completion and System Verification Step 4. Set up methods and worklists d Label this bottle “500 fg/μL reserpine” along with the preparation date. 4 Refrigerate this solution and use on the day it is prepared This provides 500 fg/μL at 2 μL injection volume, which equals the final 1 pg reserpine amount that is needed for performance verification. - Page 61 6490 ESI_AJT Neg MS2 Scan.m MRM Method 6490 ESI_AJT Pos MRM Checkout Grad.m 6490 ESI_AJT Neg MRM Checkout.m Worklist 6490 ESI_AJT Pos MRM Checkout Grad.wkl 6490 ESI_AJT Neg MRM Checkout.wkl 6470 Scan Method 6470 Pos MS2scan.m 6470 Neg MS2scan.m MRM Method 6470 Pos MRM Checkout.m...
- Page 62 Installation Completion and System Verification Step 4. Set up methods and worklists Table 3 Checkout methods and worklists Model Mode Positive Ion Mode Negative Ion Mode Installation Checkout Installation Checkout 6410B Scan Method MMI-ES Post MS2 Scan.m (MMI) MRM Method MMI-ES Pos MRM Reserpine Checkout.m Worklist MMI-ESI Pos Reserpine Checkout.wkl...
-
Page 63: Step 5. Verify The Triple Quadrupole Lc/Ms Sensitivity
Installation Completion and System Verification Step 5. Verify the Triple Quadrupole LC/MS sensitivity Step 5. Verify the Triple Quadrupole LC/MS sensitivity The Performance Specification Services (G6061A, G6062A, G6063A, G6067A, G6068A, and G6069A) can be purchased only at the time of original Agilent 6400 Series Triple Quadrupole LC/MS System bundle purchase. - Page 64 Extract Chromatogram dialog box for Reserpine (Positive mode) d For 6420/6460/6470, smooth the extracted chromatogram by setting Smoothing Function to Quadratic/Cubic Savitzky-Golay, and Function width to 9 points. For 6410/6430/6490/6495, no smoothing is used to calculate S/N. Agilent 6400 Series Triple Quad LC/MS System Installation Guide...
- Page 65 Installation Completion and System Verification Step 5. Verify the Triple Quadrupole LC/MS sensitivity e Integrate each chloramphenicol peak (or reserpine peak for Positive Ion Mode), and click Calculate Signal to Noise. Use the General integrator. f Calculate the signal-to-noise using Height. Agilent 6400 Series Triple Quad LC/MS System Installation Guide...
- Page 66 Positive Mode (Chloramphenicol) (Reserpine) 6420/6460/6470 0.100 0.075 6490/6495 0.100 0.100 Figure 33 Calculate Signal-to-Noise dialog box (for an installation checkout or standard marketing Bid Specifi- cation Service checkout), shown with Noise region width of 0.075 (left) and 0.100. Agilent 6400 Series Triple Quad LC/MS System Installation Guide...
- Page 67 Installation Completion and System Verification Step 5. Verify the Triple Quadrupole LC/MS sensitivity h For sensitivity verification with a standard checkout on 6410/6430: Under Noise Measurement, for Noise definition, select RMS and select X 1. For Specific noise regions, type 0.100 - 0.350. Make sure that the noise region does not include the chloramphenicol peak.
- Page 68 Installation Completion and System Verification Step 5. Verify the Triple Quadrupole LC/MS sensitivity Figure 35 Example of a Negative mode signal-to-noise report. 6 Change solvents (to A = water w/0.1% formic acid and B = acetonitrile for Positive Ion Polarity). 7 Clean the injectors.
- Page 69 Installation Completion and System Verification Step 5. Verify the Triple Quadrupole LC/MS sensitivity 9 Run the Positive Ion Mode checkout worklist. Repeat step 2 starting on page 63, with these changes: • Run the appropriate Positive Ion Mode checkout worklist. •...
- Page 70 Step 5. Verify the Triple Quadrupole LC/MS sensitivity Table 5 Installation Sensitivity Performance Specifications Model Mode G1948B Electrospray Agilent Jet Stream 6495 Positive/Negative 75,000:1 (Auto-RMS,1pg) 6490 Positive/Negative 25,000:1 (Auto-RMS,1pg) 6470 Positive 37,500:1 (Auto-RMS,1pg) Negative 15,000:1 (Auto-RMS,1pg) 6460 Positive 5,000:1 (Auto-RMS,1 pg)
- Page 71 Step 5. Verify the Triple Quadrupole LC/MS sensitivity Table 7 G6067A/G6068A/G6069A IDL Marketing Bid Sensitivity Performance Specifications (Positive/Negative) Model G1948B Electrospray Agilent Jet Stream 6495 0.75 fg 6490 2.5 fg 6470 4.0 fg 6460 12.5 fg 6420 60 fg Agilent 6400 Series Triple Quad LC/MS System Installation Guide...
- Page 72 This page intentionally left blank. Agilent 6400 Series Triple Quad LC/MS System Installation Guide...
-
Page 73: Installation And Verification Of Other Sources
Agilent 6400 Series Triple Quadrupole LC/MS System Installation Guide Installation and Verification of Other Sources G1947B APCI Source To install the G1947B APCI source To verify the operation of the G1947B APCI source G1978B Multimode Source To install the G1978B multimode source To verify the operation of the G1978B multimode source G1971B APPI Source To install the G1971B APPI source... -
Page 74: G1947B Apci Source
Installation and Verification of Other Sources G1947B APCI Source G1947B APCI Source To install the G1947B APCI source 1 Install these parts from the APCI enablement kits that ship with the G1947B APCI source into the Aux module on the Triple Quadrupole LC/MS: •... -
Page 75: To Verify The Operation Of The G1947B Apci Source
Installation and Verification of Other Sources To verify the operation of the G1947B APCI source loosen the lock nut, adjust the latch to the proper fit, and then tighten the lock nut so that the latch maintains its adjustment. f Connect the APCI corona and vaporizer heater cables to the connector on the left side panel of the instrument. -
Page 76: G1978B Multimode Source
AJS ESI. The G1960-65115 Multimode HV board is already correctly installed on the 6460 and is backward-compatible with the G1978B multimode source. The Multimode Power Data cable is factory-installed on the 6460, 6490, and 6495. 2 Pour the electrospray tuning mix back into its original bottle or another... - Page 77 Installation and Verification of Other Sources To install the G1978B multimode source Surfaces can be extremely hot. WA R N I N G c Remove the previously installed spray chamber. Install the multimode spray shield if not already installed. d Orient the standard spray shield so the field-shaping electrode is at the 6 o'clock and 9 o’clock positions by loosening the two T10 screws that secure the end plate, orienting the spray shield, and re-tightening the two T10 screws (do not over-tighten).
-
Page 78: To Verify The Operation Of The G1978B Multimode Source
Installation and Verification of Other Sources To verify the operation of the G1978B multimode source To verify the operation of the G1978B multimode source Note that Auto Tune is not supported with this source. 1 Install the G1969-85020 MMI-L Low Concentration Tuning Mix. 2 Check the tuning of the multimode source: a In Data Acquisition program, set Context to Tune. -
Page 79: G1971B Appi Source
Installation and Verification of Other Sources G1971B APPI Source G1971B APPI Source To install the G1971B APPI source 1 Pour the Electrospray calibrant back into its original bottle or another suitable container, rinse the calibrant bottle with acetonitrile, pour the APCI/APPI calibrant into the calibrant bottle, and attach the calibrant bottle back onto the CDS. - Page 80 Installation and Verification of Other Sources To install the G1971B APPI source loosen the lock nut, adjust the latch to the proper fit, and then tighten the lock nut so that the latch maintains its adjustment. f Connect the vaporizer heater cable to the connector on the left side panel of the instrument.
-
Page 81: To Verify The Operation Of The G1971B Appi Source
Installation and Verification of Other Sources To verify the operation of the G1971B APPI source To verify the operation of the G1971B APPI source There is no sensitivity checkout with the G1971 APPI source on the Triple Quadrupole LC/MS. To verify its proper operation, run a manual tune with the G2432A APCI/APPI Calibration Solution. - Page 82 This page intentionally left blank. Agilent 6400 Series Triple Quad LC/MS System Installation Guide...
-
Page 83: Other Setup Tasks
Agilent 6400 Series Triple Quadrupole LC/MS System Installation Guide Other Setup Tasks To start the Data Acquisition program To stop MassHunter Engines To stop MassHunter processes in case of unrecoverable errors To view the log book To configure the network interface card To remove the MassHunter Workstation software To reconfigure the instrument To confirm the collision cell gas flow rate (6470A and 6495A/B only) -
Page 84: To Start The Data Acquisition Program
Other Setup Tasks To start the Data Acquisition program To start the Data Acquisition program You can start the Data Acquisition program in any of these ways: • Double-click the Data Acquisition icon in the Agilent MassHunter program group, or •... -
Page 85: To Stop Masshunter Processes In Case Of Unrecoverable Errors
Other Setup Tasks To stop MassHunter processes in case of unrecoverable errors To stop MassHunter processes in case of unrecoverable errors When you stop MassHunter processes, loss of data can occur. 1 Stop MassHunter Processes: • Windows 7: Click Programs > Agilent > MassHunter Workstation > Acq Tools >... -
Page 86: To Configure Log Book Notification
Other Setup Tasks To configure log book notification To configure log book notification If you get more log book notifications than is useful to you, you can change the type of notifications that are displayed. 1 Click the Log Book in the Task Bar. 2 Select the type of notifications that you want displayed. -
Page 87: To Configure The Network Interface Card
Other Setup Tasks To configure the network interface card To configure the network interface card The computer that is shipped with the Triple Quadrupole LC/MS is equipped with two network cards (LAN-cards). The first LAN-card is for connection to the “house network” (via 10/100/1000 Base-T network card). The IP address for this card can either be “static”... -
Page 88: To Remove The Masshunter Workstation Software
Other Setup Tasks To remove the MassHunter Workstation software To remove the MassHunter Workstation software 1 If you have any data, methods, libraries, or other files or directories that you want to save, and then move or copy them to a folder outside of those to be deleted. -
Page 89: To Reconfigure The Instrument
Other Setup Tasks To reconfigure the instrument To reconfigure the instrument If you have more than one stack of HPLC modules from which to choose, or a new supported LC module is installed, the Instrument Configuration registry must be cleared for MassHunter Workstation. 1 Put the Triple Quadrupole LC/MS into standby mode. - Page 90 Other Setup Tasks To reconfigure the instrument 6 Click OK. 7 Start the MassHunter Workstation Acquisition program and confirm that only the MS instrument is available. 8 Close the Data Acquisition program. 9 Stop MassHunter processes. 10 Open Instrument Configuration again. 11 Click the Triple Quadrupole LC/MS and mark the Agilent LC (1100, 1120, 1200, 1220, 1260, 1290)/CE check box.
-
Page 91: To Confirm The Collision Cell Gas Flow Rate (6470A And 6495A/B Only)
Other Setup Tasks To confirm the collision cell gas flow rate (6470A and 6495A/B only) To confirm the collision cell gas flow rate (6470A and 6495A/B only) This topic applies to 6470A and 6495A/B only. The collision cell gas flow for the 6470A and 6495A/B LC/MS systems are set at the factory and the value is permanently saved in the instrument Smart Card. - Page 92 Other Setup Tasks To confirm the collision cell gas flow rate (6470A and 6495A/B only) Figure 39 Add-ons screen to install from .lax file e In the Lab Advisor Extension Installer message box, click Modify. f When the Lab Advisor update is complete, click Close. Agilent 6400 Series Triple Quad LC/MS System Installation Guide...
- Page 93 Other Setup Tasks To confirm the collision cell gas flow rate (6470A and 6495A/B only) Figure 40 Lab Advisor Extension Installer message box 3 Add Lab Advisor licenses: a Click Configuration > Licenses. b Type in the appropriate License Key and FSE Password. Agilent 6400 Series Triple Quad LC/MS System Installation Guide...
- Page 94 Other Setup Tasks To confirm the collision cell gas flow rate (6470A and 6495A/B only) Figure 41 License Configuration screen 4 Connect to the MS instrument and verify that the model number, serial number and other information are correct. Figure 42 Instrument Version dialog box 5 Open the MassHunter Data Acquisition program.
- Page 95 Other Setup Tasks To confirm the collision cell gas flow rate (6470A and 6495A/B only) 7 For 6495A: a In the Manual Tune tab, set Scan Type to MRM. b In the MS1 tab, set SIM Mass to 322 amu. Figure 43 Ion Source and MS1 settings c In the MS2 tab, set SIM Mass to 290 amu.
- Page 96 Other Setup Tasks To confirm the collision cell gas flow rate (6470A and 6495A/B only) Figure 45 Acquisition settings e Set Collision Cell tab settings as shown in Figure Figure 46 Collision Cell settings f Under Ramp parameter, select Prefilter DC 2 and set the parameters as shown in Agilent 6400 Series Triple Quad LC/MS System Installation Guide...
- Page 97 Other Setup Tasks To confirm the collision cell gas flow rate (6470A and 6495A/B only) Figure 47 Ramp parameter g Click Ramp to ramp Prefilter DC 2 and find the DC value that corresponds to the abundance maximum for m/z 290. h Set the cursor to the maxima and click Accept.
- Page 98 Other Setup Tasks To confirm the collision cell gas flow rate (6470A and 6495A/B only) i In the MS 2 tab, verify that the Prefilter DC 2 value is now appropriately set. Figure 49 MS2 tab with updated Prefilter DC 2 value j Save the tune as atunes-MS2PrefilterFixed.TUNE.XML.
- Page 99 Other Setup Tasks To confirm the collision cell gas flow rate (6470A and 6495A/B only) Table 10 Minimum recommended tune abundances at gain = 10 in NEGATIVE Mode (HED = 18 kV) 6495A/B 6470A 6.E+05 6.E+05 7.E+04 4.E+04 2.E+06 2.E+06 2.E+05 2.E+05 2.E+06...
- Page 100 Other Setup Tasks To confirm the collision cell gas flow rate (6470A and 6495A/B only) Figure 51 Ion source settings for 6470A 11 Check that the calibrant level is not low. 12 In the Data Acquisition program, right-click the QQQ icon, then click Calibrant.
- Page 101 Other Setup Tasks To confirm the collision cell gas flow rate (6470A and 6495A/B only) 13 Monitor stable calibrant abundances, then start a Sample Run (no vial injection) as shown in Figure 53. Make sure the TIC signal is stable as shown in Figure Figure 53...
- Page 102 Other Setup Tasks To confirm the collision cell gas flow rate (6470A and 6495A/B only) This window shows the abundance ratio for m/z 322 and 290. Use these settings: • Start DAC = 500 This window • End DAC = 700 shows the ion abundances for •...
- Page 103 Other Setup Tasks To confirm the collision cell gas flow rate (6470A and 6495A/B only) Figure 56 Ion abundance ratio data points as a function of DAC e Click Set to make permanent the CC DAC value that appears for New flow rate (DAC).
- Page 104 Other Setup Tasks To confirm the collision cell gas flow rate (6470A and 6495A/B only) Figure 57 CC Gas Flow values The automated procedure for setting the CC gas flow is based on a linear relationship between CC DAC and m/z 322/290 abundance ratio in a tested CC pressure range.
-
Page 105: Reference
Agilent 6400 Series Triple Quadrupole LC/MS System Installation Guide Reference Positive Ion Mode Checkout Conditions Negative Ion Mode Checkout Conditions This chapter contains acquisition parameters for the checkout methods. For a list of the checkout methods for each instrument, see Table 3, “Checkout methods and worklists,”... -
Page 106: Positive Ion Mode Checkout Conditions
Reference Positive Ion Mode Checkout Conditions Positive Ion Mode Checkout Conditions These conditions are used in a Positive Ion Mode checkout. Table 11 HPLC Pump Time %A (water w/0.1% %B (acetonitrile) Flow formic acid) Initial 0.4 mL/min 0.4 mL/min 0.4 mL/min 0.4 mL/min 2.01 0.4 mL/min... - Page 107 Reference Positive Ion Mode Checkout Conditions Table 13 Source parameters ESI (6410/6420/ AJS (6460) AJS (6470) AJS (6490) AJS (6495) 6430/6460) Gas Temp 350°C 320°C 325°C 200°C 130°C Gas Flow 13 L/min 10 L/min 10 L/min 12 L/min 11 L/min...
- Page 108 Reference Positive Ion Mode Checkout Conditions Table 14 MS parameters (continued) ESI (6410/6420/ AJS (6460) AJS (6470) AJS (6490) AJS (6495) 6430/6460) Sample (stock) Reserpine, 5 Reserpine, 5 Reserpine, 5 Reserpine, 5 Reserpine, 5 ng/µL ng/µL ng/µL ng/µL ng/µL Concentration after 500 fg/µL...
-
Page 109: Negative Ion Mode Checkout Conditions
Autosampler temperature 4°C Needle wash flushport 75:25 methanol:water Needle wash location Flushport, 10 seconds Table 17 Source ESI (6420/ AJS (6460) AJS (6470) AJS (6490) AJS (6495) 6430/6460) Gas Temp 310°C 200°C 200°C 210°C 210°C Gas Flow 13 L/min 6 L/min... - Page 110 Reference Negative Ion Mode Checkout Conditions Table 18 ESI (6420/ AJS (6460) AJS (6470) AJS (6490) AJS (6495) 6430/6460) Capillary 3000 V 2500 V 2500 V 3000 V 3000 V Collision Energy 13 V 14 V 16 V 14 V...
- Page 111 Reference Negative Ion Mode Checkout Conditions Table 18 ESI (6420/ AJS (6460) AJS (6470) AJS (6490) AJS (6495) 6430/6460) Total sample 1 pg 1 pg 1 pg 1 pg 1 pg amount injected on column Sample order 5190-0591 5190-0591 5190-0591...
- Page 112 In This Book This book contains installation, configuration, verification, and start-up tasks to operate your Agilent Agilent 6400 Series Triple Quadrupole LC/MS System. Agilent Technologies, Inc. 2017 Revision A, February 2017 *G3335-90233* G3335-90233 Agilent Technologies...