TRENDnet TV-IP762IC User Manual
Wireless hd day/night cloud camera
Hide thumbs
Also See for TV-IP762IC:
- User manual (67 pages) ,
- Configuration manual (16 pages) ,
- Quick installation manual (9 pages)
Table of Contents
Advertisement
Quick Links
Download this manual
See also:
User Manual
Advertisement
Table of Contents

Related Manuals for TRENDnet TV-IP762IC


Summary of Contents for TRENDnet TV-IP762IC
- Page 1 Cover Page TRENDnet User’s Guide TV-IP762IC 720P 雲端無線夜視網路攝影機 Wireless HD Day/Night Cloud Camera...
-
Page 2: Table Of Contents
Network – Network ........................ 29 Configure Manual Wireless settings (without WPS) ............12 Network – Wireless Setup ..................... 29 Connect to your TV-IP762IC with a Mobile App ....... 19 Video/Audio – Video and Audio .................... 31 Video/Audio – Image Setup ....................31 Mobile Apps, QR code Download Option ................ -
Page 3: Product Overview
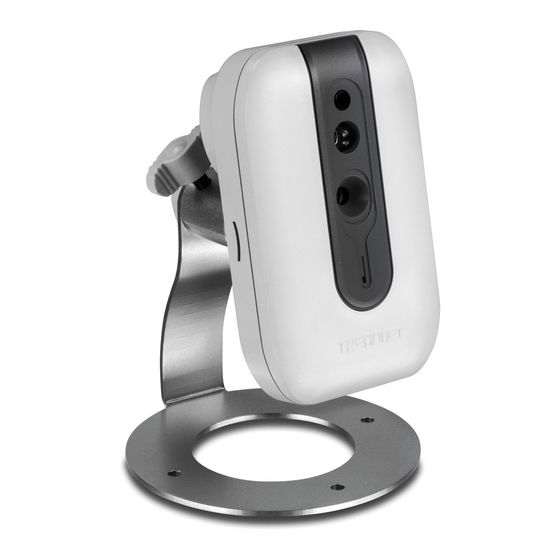
Features Product Overview TV-IP762IC The Wireless Cloud Camera, model TV-IP762IC, transmits real-time video over the Internet. Wireless n technology provides unsurpassed wireless coverage and improved streaming video quality. Add this camera to your wireless network at the touch of a button with Wi-Fi Protected Setup (WPS). -
Page 4: Product Hardware Features
Stand – a portable adjustable stand Link – This LED indicator is blinking orange when there is connection/data to your camera. WPS Button – Use this button to enable WPS © Copyright 2012 TRENDnet. All Rights Reserved. -
Page 5: Application Diagram
WPS Indicator – This LED indicator blinks orange when there is a Application Diagram connection/data link. IP NETWORK CAMERA SOLUTION Adjustable Knob – Use this to tilt and pan the camera © Copyright 2012 TRENDnet. All Rights Reserved. -
Page 6: Installation Option Description
The Install wizard CD TV-IPinside the package box will guide you step-by-step of wired or wireless options with the TRENDnet Cloud Service of installation; please refer to the page 7. -
Page 7: Trendnet Cloud Service
There are two methods to connect to the internet, wired and wireless. For wireless, follow the instructions from Image A below. For wired, follow the instructions from There are three modes when connecting your TV-IP762IC to the web. This is visible Image B below. -
Page 8: Green Mode
The “red” notification at the bottom of the viewing area warns users of the limited time The Red Mode indicates the camera is connecting to the internet or local network through a firewall. This mode doesn’t offer configuration and management options – just live streaming for 180 seconds. © Copyright 2012 TRENDnet. All Rights Reserved. - Page 9 TV-IP762IC TRENDnet User’s Guide Refresh this screen continuously if you wish to view your camera’s live stream. © Copyright 2012 TRENDnet. All Rights Reserved.
-
Page 10: Install The Camera
In this case, browse to the CD drive and run InstallWizard.exe to begin the installation wizard. Begin by selecting a language from the drop-down menu. Currently, the TV-IP762IC supports the following languages: English, French, German, Russian and Spanish. Then click Install Camera and follow the on-screen steps to continue the installation. - Page 11 6. Connect one end of the network cable to your camera and the other end to to return to the Main Menu. your router. Click Next to continue, Back to go to the previous screen or Home to return to the Main Menu. © Copyright 2012 TRENDnet. All Rights Reserved.
- Page 12 Retry to scan for the camera again. Click Next to continue, Back to go to the previous screen or Home to return to the Main Menu. 10. The wizard configures your parameters. © Copyright 2012 TRENDnet. All Rights Reserved.
- Page 13 TV-IP762IC TRENDnet User’s Guide 12. The mobile option allows the user to download the TRENDnet CloudView App in either Apple or Google android format. To use this feature, the user must have a QR Scanner App on their mobile device. This is also available from the Apple App Store or Google’s Play store.
-
Page 14: Configure Manual Wireless Settings (Without Wps)
3. Please wait while the wizard searches for your camera. 1. Power Up the Camera. Follow the instructions and click Next to continue. If you wish to go to the previous screen, click Back or Home to return to the main menu. © Copyright 2012 TRENDnet. All Rights Reserved. - Page 15 7. Once the wizard has found your Access Point, you will be prompted to enter an 8-16 bit password depending on your router configuration. Click Next to continue, Back to go to the previous screen or Home to return to the Main Menu. © Copyright 2012 TRENDnet. All Rights Reserved.
- Page 16 Also, below the icon is a warning. This warning is only shown when the internet connection is inactive or the Cloud server cannot be found. Make sure the internet connection is active, click Retry. When the Cloud server isn’t found, © Copyright 2012 TRENDnet. All Rights Reserved.
- Page 17 Click the pop-up screen to install the add-on. Click Install to install the software. The technique is illustrated below: If the camera is not configured correctly, an error indicates that you aren’t connected to the cloud. Alternatively, the camera will connect to the wireless router. © Copyright 2012 TRENDnet. All Rights Reserved.
- Page 18 Protected Setup (WPS) button. Select this option using the radio button and click Next. 11. The mobile option allows the user to download the TRENDnet CloudView App in either Apple or Google android format. To use this feature, the user must have a QR Scanner App on their mobile device.
- Page 19 Retry. If you are unsure of the camera, click Back to go back one step to attempt the process again. Otherwise, once the camera is detected click the Next button. © Copyright 2012 TRENDnet. All Rights Reserved.
- Page 20 TV-IP762IC TRENDnet User’s Guide A summary report displays the Cloud access link to TRENDnet . Click the icon to create a shortcut to the camera. The warning message at the bottom of the screen displays a failed connection to the Trendnet Cloud service. Click Next to continue.
-
Page 21: Connect To Your Tv-Ip762Ic With A Mobile App
Apple App Store or Google’s Play store. The QR codes of Apple and Android The app copies the QR link and provides a HTML link to the TRENDnet app. Click on the are presented on the last page of the Install wizard. - Page 22 TV-IP762IC TRENDnet User’s Guide Accept the license agreement from TRENDnet by clicking the arrow key. Click the install button and accept the license agreement. As the app downloads and installs, use the pull-down menu to see the status of the download.
- Page 23 Scan the QR Code using one of iOS’s QR Code apps. The app automatically creates an HTML link to the iTunes App Store. Link the link. Here is Apple iTunes version You are immediately directed to the iTunes App Store. Click the link to download. © Copyright 2012 TRENDnet. All Rights Reserved.
-
Page 24: Configuration
Web configuration utility is designed to allow you to easily access and The main screen displays some simple options you can configure. configure your TV-IP762IC camera. Open a web browser such as Internet Explorer® and enter the IP address of your camera. To log in, use the Username “admin” and the The main window consists of the main viewing screen, the settings tab (consists of Password created in the Setup Wizard. -
Page 25: Wizard
Wizard This screen shows the Network Settings. The Network tab consists of Network, This screen shows the six steps to setting up the TV-IP762IC. It guides you through LAN Wireless Setup, Dynamic DNS, Cloud Settings, and Cloud Status Settings. Settings, Internet Settings, DDNS Settings, Camera Name Settings, Time Settings, and the Setup is Complete. -
Page 26: Action
This screen shows the Recording Settings, Video Clip Settings, Snapshot Settings, and SD Management Settings. Motion Detection This screen shows the Motion Detection Video Settings for Live Video. Advanced This screen shows the Device Info and Log results. © Copyright 2012 TRENDnet. All Rights Reserved. -
Page 27: Configuring Camera Settings
Configuring Camera Settings LAN Settings: Setup IPv4 and IPv6 DHCP and IP static settings. The TV-IP762IC allows you to make configuration changes from anywhere by connecting to the camera using a standard web browser. To configure camera settings: 1. Login to the camera as described in the section Setup. -
Page 28: Camera Settings
NTP Server: Use this setting to sync it with an NTP server. Set Time and Date Manually: Set the time and date manually by using the drop-down list and radio buttons. Alternatively, copy the computer settings. © Copyright 2012 TRENDnet. All Rights Reserved. -
Page 29: Setup Complete
The system restarts. settings, Authentication, and Device settings. Admin Password Settings Enter the old password and create a new password. Retype the password again to confirm Characters must be between 8-16 characters. Click Save. © Copyright 2012 TRENDnet. All Rights Reserved. -
Page 30: Add User Account
Use the checkbox to enable synchronization with an NTP server. To do this you photo capture using the TV-IP762IC. Click Save to set the protocols. need the NTP server IP address. Two options are available, manual setup or Set NTP server from the DHCP router/server. -
Page 31: Network - Network
The menu enlarges to allow for more data fields. Then you can edit the IP/Subnet Mask/Gateway/Primary DNS/Secondary DNS and Network – Wireless Setup optional Search Domain fields. This can be tweaked for both IPv4 and IPv6. Wireless Configuration © Copyright 2012 TRENDnet. All Rights Reserved. - Page 32 Ad-Hoc is a wireless connection used without an Click the radio button to Enable or Disable cloud server syncing. Click Apply when access point, where your TV-IP762IC is directly connected to your PC. This is ready.
-
Page 33: Video/Audio - Video And Audio
Reset to Default button. like for your video. Higher rates provide smoother video but require more bandwidth on your network or internet connection. Video Profile 4: This part caters to mobile devices. © Copyright 2012 TRENDnet. All Rights Reserved. - Page 34 For the Target directory, select between the SD card and Samba Network Device. For SD , select the radio button, enter the Free Space amount, and click the Cyclic checkbox. Click Apply to apply the settings. © Copyright 2012 TRENDnet. All Rights Reserved.
- Page 35 FTP you will need to enter the FTP server, username, password, path/directory, filename prefix, interval, check Passive Mode and Apply to save. If you would like to test the service click the Test button to see if it can connect the FTP © Copyright 2012 TRENDnet. All Rights Reserved.
-
Page 36: Motion Detection Allows For Users To Record Captured Video When It Notices Motion
Detection Areas: From the live image shown on this screen, you can left-click on blocks of the grid shown to indicate which parts of the screen you would like to monitor for motion. Action SD Management © Copyright 2012 TRENDnet. All Rights Reserved. - Page 37 Click the Save Configuration button to copy the system data to your local hard drive. the Browse button to locate the path of the file. Then click the Upload button. Click the Save button to save the data. © Copyright 2012 TRENDnet. All Rights Reserved.
-
Page 38: How To Register
Complete the details as requested. Advanced The camera log records the camera’s video activity. Click Clear to clear the log or click Download to save the log file to a PC © Copyright 2012 TRENDnet. All Rights Reserved. -
Page 39: How To Setup/Access The Camera Remotely
HTTP Port on the camera is 80. The example shows above is using port number 9000. 4. Open another web browser and go to your Router’s Web Configuration page. (In the example, TRENDnet’s TEW-651BR Wireless N router is used) © Copyright 2012 TRENDnet. All Rights Reserved. - Page 40 Configure DDNS on your router 1. Go to Camera’s DDNS Ports Number section, assign a HTTP port for your camera and click Apply. 4. Enable DDNS, fill out the following information and then click Apply. © Copyright 2012 TRENDnet. All Rights Reserved.
- Page 41 Some router might use Port Forwarding or Special applications for this function. The setup steps should be very similar. 6. Open another web browser and enter your DDNS domain and camera’s port number. © Copyright 2012 TRENDnet. All Rights Reserved.
-
Page 42: Technical Specifications
Enable WPS connection Standard IEEE 802.11b, 802.11g and 802.11n Reset Button Reset to factory default Frequency 2.4 ~ 2.497 GHz ISM band Power Max. 5 watts Modulation DQPSK, DBPSK, DSSS and CCK Consumption © Copyright 2012 TRENDnet. All Rights Reserved. -
Page 43: Troubleshooting
Network Camera to be accessible outside your local LAN. For more Very High information, please refer to the section about installing your camera behind a Recording event based (motion detection) and scheduled router. Snapshot Trigger event: motion detection © Copyright 2012 TRENDnet. All Rights Reserved. - Page 44 If you are using Internet Explorer with a version number lower than 6, then you will need to upgrade your Web browser software in order to view the streaming video transmitted by the Network Camera. Try also viewing the © Copyright 2012 TRENDnet. All Rights Reserved.
- Page 45 This device complies with the essential requirements of the R&TTE Directive 1999/5/EC. The following test methods have been applied in order to prove presumption of conformity with the essential requirements of the R&TTE Directive 1999/5/EC: © Copyright 2012 TRENDnet. All Rights Reserved.
- Page 46 TV-IP762IC TRENDnet User’s Guide noteikumiem. Česky [Czech] TRENDnet tímto prohlašuje, že tento TV-IP762IC je ve shodě se základními požadavky a dalšími příslušnými ustanoveními Lietuvių Šiuo TRENDnet deklaruoja, kad šis TV-IP762IC atitinka esminius směrnice 1999/5/ES. [Lithuanian] reikalavimus ir kitas 1999/5/EB Direktyvos nuostatas.
-
Page 47: Limited Warranty
Download section and look for the desired TRENDnet product to access to the GPL Code or LGPL Code. WARRANTIES EXCLUSIVE: IF THE TRENDNET PRODUCT DOES NOT OPERATE AS These codes are distributed WITHOUT WARRANTY and are subject to the copyrights of WARRANTED ABOVE, THE CUSTOMER’S SOLE REMEDY SHALL BE, AT TRENDNET’S...