TRENDnet TV-IP651W User Manual
Wireless n ptz internet camera wireless n day/night ptz internet camera
Hide thumbs
Also See for TV-IP651W:
- Quick installation manual (7 pages) ,
- Specifications (6 pages) ,
- User manual (36 pages)
Table of Contents
Advertisement
Quick Links
Download this manual
See also:
User Manual
Advertisement
Table of Contents

Related Manuals for TRENDnet TV-IP651W


Summary of Contents for TRENDnet TV-IP651W
- Page 1 Cover P P age TRENDn n et User’s Gu u ide ...
-
Page 2: Table Of Contents
Video ......................... 1 Audio ......................... 1 Wireless s ........................ 1 Network k ........................ 1 © Copyright 2 2011 TRENDnet. Al l Rights Reserved. i ... -
Page 3: Product Overview
and four times digital zoom. A w wall/ceiling mounti ing kit is included d and the camera’s s off white housing g blends into most environments. If any package e contents are miss sing or damaged, p please contact the r retail store, online retailer, or res seller/distributor th hat the item was p urchased. © Copyright 2 2012 TRENDnet. Al l Rights Reserved. 1 ... -
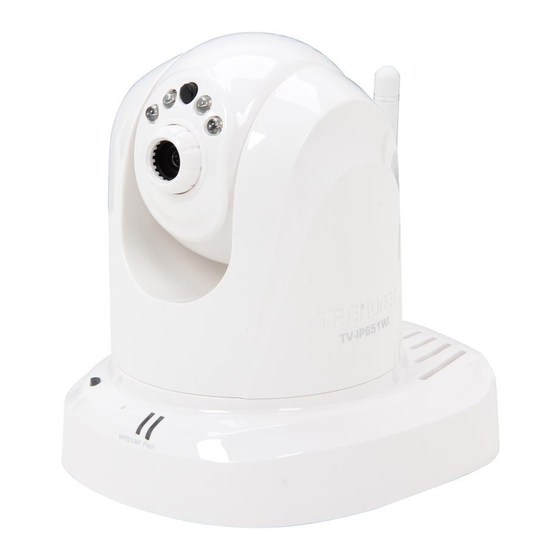
Page 4: Product Ha Rdware Features
WPS (Wi‐Fi Protected S Setup) – Push and hold this button fo or 3 seconds to Link – This LED in ndicator is blinking orange when ther re is connection/da ata to activa ate WPS. The butto on LED is blinking g green when WPS is s activated. your camera. Ante nna – 2dBi detacha able antenna © Copyright 2 2012 TRENDnet. Al l Rights Reserved. 2 ... -
Page 5: Installation
DC 12V 1.25A re eceptor on the re ar pane el of the camera an nd then connect it to a wall outlet or r power strip. A blu ue LED w will light up under t the lens indicating that the camera h as power. © Copyright 2 2012 TRENDnet. Al l Rights Reserved. 3 ... -
Page 6: Wall Mount Installation
Secur re the metal plate to the base of the Camera with the tw wo screws provi ided. The c camera can now be e mounted to the c ceiling or a wall. Se e the diagram below w for more informa ation. © Copyright 2 2012 TRENDnet. Al l Rights Reserved. 4 ... -
Page 7: Starting The E Setup Wizard
to o re‐scan the network for y your camera. When the inst tallation of the Set up Wizard is comp lete, run the Setup p Wizard: 1. Click Start > Program ms > TRENDnet > > SetupWizard > SetupWizard. Th he TREN NDnet Setup Wizard d appears. © Copyright 2 2012 TRENDnet. Al l Rights Reserved. ... - Page 8 icon to copy the local tim me enabled. to th e camera. Click Ne xt to continue. Fixed IP: Select t his option if your c camera is directly c connected to a DSL L modem and your ISP has supplied you with a fixed IP for your Internet connectio on. Select the radio b button for your con nnection type and click Next to conti nue. © Copyright 2 2012 TRENDnet. Al l Rights Reserved. 6 ...
- Page 9 following screen appears: 9. A sum mmary screen of th he settings you hav ve chosen appears. . Click Next to conti nue. You are e now ready to use your camera. Click the e IP address link or r the link button to o access the camera a’s advance ed configuration pa age. © Copyright 2 2012 TRENDnet. Al l Rights Reserved. 7 ...
- Page 10 Selec ct the type of authe entication and enc cryption required b by the access point t and e enter the Key requ ired to connect. Check t he radio button fo or the method of co onnection you wan nt to use for your ca amera and clic ck Next to continue e. © Copyright 2 2012 TRENDnet. Al l Rights Reserved. 8 ...
- Page 11 When n the Setup Wizar d has finished, the e configuration is c complete. If there is no w ireless connection found, the followi ng screen will appe ear: © Copyright 2 2012 TRENDnet. Al l Rights Reserved. 9 ...
-
Page 12: Viewing Vid Deo
OK . Window ws users who do no ot have Java install led can choose Act tiveX mode to view w video. Internet t Explorer will prom mpt you to install A ActiveX when you c click on the VIEW V VIDEO | ACTIVEX X link. Mac users m must use the Java m mode to view video o The h home page for the TV‐IP651W or TV‐ IP651WI appears. © Copyright 2 2012 TRENDnet. Al l Rights Reserved. 10 ... -
Page 13: Viewing Ca Mera Settings
From th he menu on the left side of the s screen, select an o option under the STATUS heading g. © Copyright 2 2012 TRENDnet. Al l Rights Reserved. 11 ... -
Page 14: System
IP Address, Et hernet Link Status, , Speed and Duplex x type. Wireles ss Video cryption This scr een shows the con nnection mode, lin k status, SSID nam e, channel and enc This screen sh hows the details of the video capture settings including Video Resolution, status. Compression Rate, Frame Rate, Frame Size and Lig ght Frequency. © Copyright 2 2012 TRENDnet. Al l Rights Reserved. 12 ... -
Page 15: Network K
Location: You can n enter a descripti on of the place wh here the camera is. Admin: In this fie eld you can change e the administrator r user name and pa assword. (Max. password l length is 8 characte ers) LED Control: Sett ting this to Norma l will display the lig ghts on the front of f the camera indicating g power and netw ork activity. Setting g this to OFF will tu urn off both lights on the e front of the came era. © Copyright 2 2012 TRENDnet. Al l Rights Reserved. 13 ... -
Page 16: Video
Enter a valu ue betw ween 1 and 128. Satur ration Control: Al lows you to contr rol the saturation level. Enter a valu ue betw ween 1 and 128. © Copyright 2 2012 TRENDnet. Al l Rights Reserved. 14 ... -
Page 17: Network K 1
Encry yption Type: It is h highly recommende ed that you encryp pt the connection. In Infras structure mode, select an encryp ption type and e nter details whe re © Copyright 2 2012 TRENDnet. Al l Rights Reserved. 15 ... -
Page 18: Network K
80. A correspo nding port must b be open ned on the router. For example, if th e port is changed to 1010, users mu st type “http://192.168.0. .100:1010” instead d of only “http://19 92.168.0.100”. uPnP P & uPnP Port Forw warding: Enable th hese to set your ca amera as a univers sal plug n play device on yo our network. © Copyright 2 2012 TRENDnet. Al l Rights Reserved. 16 ... -
Page 19: M Otion Detection
Motion Detectio on: Select whether r to Enable or Disa ble motion detect ion. This will allow your c camera to perform m different functio ns when activity h has been detected in the p parts of the screen that you specify. Sensitivity: Set a a percentage level to determine how w sensitive the cam mera is to activity. © Copyright 2 2012 TRENDnet. Al l Rights Reserved. 17 ... -
Page 20: Ate/Time
24 and all the pictu ures will be number red from 1‐1024. Up to 10 024 pictures can be e configured. Pictu ure number 1025 w will reset to number 1. Upload On this screen n you can enter d etails of an FTP Se erver that you wan nt to upload image es from the came era to. Host Address: The IP ad ddress of the FTP S Server Port Number: The port t number to conne ect to the FTP on, d efault port is 21. © Copyright 2 2012 TRENDnet. Al l Rights Reserved. 18 ... - Page 21 . Motion Detection: Select ting this option s ets the camera to o e‐mail images u upon detection of motion. Manual Operation: Select ting this option me eans the user is res ponsible for takin ng a snapshot from m the camera to e‐m mail. © Copyright 2 2012 TRENDnet. Al l Rights Reserved. 19 ...
-
Page 22: Da Ay/Night Mode (Fo R Tv-Ip651Wi)
Always Night Mo ode: Night mode is s always selected. T This option is best used areas of low light ting. Day Mode Sched dule: using the time e tabs 00:00 ~ 00:0 00, it is possible to select times for normal mode. Times outs side this will be in n night mode. The tim mes need to be enter red in a 24 hour for rmat. For example, , 08:00 ~ 18:30. © Copyright 2 2012 TRENDnet. Al l Rights Reserved. 20 ... -
Page 23: Tools S
E‐mail Test When you hav ve set up an e‐mail account in the con nfiguration section n, you can use this screen to test that the E‐mail set ttings are correct. Pressing the Test b button will make th he camera send a a test e‐mail to the e address specified in the configuratio on section. If you d o not receive th e test e‐mail, you s should check that y you have entered t the e‐mail details correctly in th e configuration se ction. © Copyright 2 2012 TRENDnet. Al l Rights Reserved. 21 ... -
Page 24: Actory Reset
Firmware Upg grade Click the Brow wse button and loc ate the firmware fi ile you saved on yo our computer and choose O pen. When you are e ready, click the U Upgrade button to begin the firmware upgr rade. Note: Upgrad ing the firmware is s a sensitive proces ss. Be sure that you u have the correct firmwa are for your mode l of camera and do o not disconnect th e power during the upgrade p process. © Copyright 2 2012 TRENDnet. Al l Rights Reserved. 22 ... - Page 25 3. In the e Port Number sec ction, assign an HTT TP port of the cam era. The default HTTP P Port on the came ra is 80. The examp ple shows above is s using port numbe er 9000 0. 4. Open n another web brow wser and go to you ur Router’s Web Co onfiguration page. (In th he example, TREND Dnet’s TEW‐651BR Wireless N router is used) © Copyright 2 2012 TRENDnet. Al l Rights Reserved. 23 ...
- Page 26 //yourDomainNam me:PortNumber 7. Came era’s login page wi ll appear. Configure DDN NS on your router o Camera’s DDNS Ports Number se 1. Go to ection, assign a HT TTP port for your came era and click Apply . Enable DDNS, fill out the following information and th hen click Apply. © Copyright 2 2012 TRENDnet. Al l Rights Reserved. 24 ...
- Page 27 LAN S Server: The local IP P address of your C Camera. Click Add to add the ap pplication. * Ple ase refer to your ro outer’s user’s man ual for detail Virtu ual Server setting. Some e router might use Port Forwarding o or Special applicati ions for this funct tion. The setup ste eps should be very similar. 6. Open n another web brow wser and enter you ur DDNS domain an nd camera’s port numb ber. © Copyright 2 2012 TRENDnet. Al l Rights Reserved. 25 ...
- Page 28 1 x d detachable 2dBi dipo ole antennas (Revers e‐SMA connector) Reset Button Reset to fac ctory default Date Rat te 802. .11b: up to 11Mbps 802. .11g: up to 54Mbps Privacy Button Privacy mo de on/off 802. .11n: up to 150Mbps s Power Consum ption Max. 6.12 W Watts Security y 64/1 128‐bit WEP, WPA/W WPA2‐PSK Power Input: 100~ ~240V, 50/60Hz 0.5A © Copyright 2 2011 TRENDnet. Al l Rights Reserved. 26 ...
- Page 29 Sensor: 1/5 5” CMOS Sensor Weight 485 g (1.1 lbs.) Board Lens erating: 0 C ~ 40 C (3 32 F ~ 104 F) Tempera ature Focal Lengt th: 4mm rage: ‐25 C ~ 70 C (‐1 13 F ~ 158 F) Stor F/No: 1.5 © Copyright 2 2011 TRENDnet. Al l Rights Reserved. 27 ...
- Page 30 Antenna 1 x detacha able 2dBi dipole ante nna (Reverse‐SMA co onnector) Date Rate 802.11b: up p to 11Mbps 802.11g: up p to 54Mbps 802.11n: up p to 150Mbps Security 64/128‐bit WEP, WPA/WPA2‐PS SK Output Power 802.11b: 18 8dBm (typical) 802.11g: 15 5dBm (typical) 802.11n: 15 5dBm (typical) Receiving Sensi itivity 802.11b: ‐8 85dBm at 11Mbps 802.11g: ‐7 76dBm at 54Mbps 802.11n: ‐6 65dBm at 150Mbps © Copyright 2 2011 TRENDnet. Al l Rights Reserved. 28 ...
-
Page 31: Leshooting
outsi de your local LAN. 4. Whit te vertical lines app pear on the image from the camera It cou uld be that the CM MOS sensor (a squa are panel situated behind the lens that measures the light t signals and chang ges it into a digital format so your comp puter can present it into an image th hat you are familia ar with) has becom me overl oaded when it has s been exposed to o bright lights such as direct exposure e © Copyright 2 2011 TRENDnet. Al l Rights Reserved. 29 ... - Page 32 Europe – EU D Declaration of Conf formity This device co omplies with the es ssential requireme nts of the R&TTE D Directive 1999/5/E C. The following g test methods h ave been applied d in order to pro ove presumption of conformity wi th the essential re quirements of the R&TTE Directive 1 999/5/EC: © Copyright 2 2011 TRENDnet. Al l Rights Reserved. 30 ...
- Page 33 TREND Dnet izjavlja, da je ta TV‐IP651W / TV V‐IP651WI v skladu 1999/5/CE. ve [Slove enian] bistve enimi zahtevami in ostalimi relevantn nimi določili direktiv Ελληνικ ή ΜΕ ΤΗΝ ΠΑΡ ΡΟΥΣΑ TRENDnet Δ ΔΗΛΩΝΕΙ ΟΤΙ TV‐IP P651W / TV‐ 1999/ /5/ES. [Greek] IP651WI ΣΥΜ ΜΜΟΡΦΩΝΕΤΑΙ ΠΡ ΡΟΣ ΤΙΣ ΟΥΣΙΩΔΕΙΣ Σ ΑΠΑΙΤΗΣΕΙΣ ΚΑΙ lovensky TREND Dnet týmto vyhlasu uje, že TV‐IP651W / TV‐IP651WI spĺň a ΤΙΣ ΛΟΙΠΕΣ Σ...
- Page 34 A All ACCIDE NT, FIRE, LIGHTNIN NG, OR OTHER HAZ ZARD. products that t are replaced bec ome the property of TRENDnet. Re placement produc cts may be new or reconditioned . TRENDnet does not issue refund ds or credit. Pleas se ...
- Page 35 ...