Table of Contents
Advertisement
Advertisement
Table of Contents

Related Manuals for Datavideo SE-500HD


Summary of Contents for Datavideo SE-500HD
-
Page 2: Table Of Contents
Table of Contents FCC COMPLIANCE STATEMENT ......................4 WARNINGS AND PRECAUTIONS ......................4 WARRANTY ............................5 ..........................5 TANDARD ARRANTY ..........................5 ARRANTY DISPOSAL ............................5 CHAPTER 1 INTRODUCTION ......................6 ............................6 EATURES ..........................6 YSTEM IAGRAM CHAPTER 2 CONNECTIONS AND CONTROLS ..................7 ............................ - Page 3 SERVICE AND SUPPORT ........................30 Disclaimer of Product & Services The information offered in this instruction manual is intended as a guide only. At all times, Datavideo Technologies will try to give correct, complete and suitable information. However, Datavideo Technologies cannot exclude that some information in this manual, from time to time, may not be correct or may be incomplete.
-
Page 4: Fcc Compliance Statement
7. This product should only be operated from the type of power source indicated on the marking label of the AC adapter. If you are not sure of the type of power available, consult your Datavideo dealer or your local power company. -
Page 5: Warranty
• Certain parts with limited lifetime expectancy such as LCD Panels, DVD Drives, Hard Drives are only covered for the first 10,000 hours, or 1 year (whichever comes first). Any second year warranty claims must be made to your local Datavideo office or one of its authorized Distributors before the extended warranty expires. -
Page 6: Chapter 1 Introduction
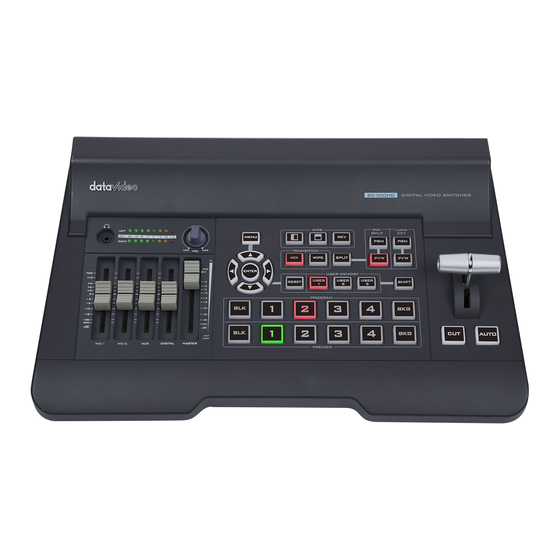
It offers 4 HDMI inputs and 2 HDMI outputs, supporting video formats up to Full HD 1080p. The SE-500HD also features an audio mixer with microphone, unbalance RCA audio inputs and RCA audio outputs. More features include Luma Keyer, PIP, Wipe Generator, Still stores and Tally. -
Page 7: Chapter 2 Connections And Controls
Multiview outputs quad view of the four HDMI inputs. 2. HDMI Video Input 1-4 The SE-500HD provides four HDMI video input channels for connecting HDMI video sources. 3. Ethernet Port Remote control feature under development 4. - Page 8 SE-500HD or send tally signal to be displayed on the monitor. 6. MIC IN – CH1/CH2 Two Channels of unbalanced MIC input. CH 1 (L) CH 2 (R) States...
-
Page 9: Front Panel
9. Power Switch Power switch ON/OFF 10. DC IN DC in socket connects the supplied 12V / 19W PSU. The connection can be secured by screwing the outer fastening ring of the DC In plug to the socket. 2.2 Front Panel Switcher Transition Volume Control... -
Page 10: Transition Effects
The white represents the current Program image and the black represents the WIPE-IN image. There are a total of 3 WIPE presets offered on the SE-500HD; the WIPE buttons allow the user to make a selection directly from the control panel for the first 2 which are horizontal and vertical wipes. - Page 11 MIX Enable/Disable button A MIX, also known as a dissolve, is a transition wherein the Program video is replaced by the Preview video at a smooth rate, and at the same time. Pressing the MIX button will enable the MIX transition effect and automatically disable the WIPE button.
- Page 12 Split Activation Button After the PIP window is activated, pressing the Split button will split the PROGRAM output display into two with the program out view on the left and the PIP view on the right. To select the Split source, i.e. the program out view, please see section 3.2.5.
-
Page 13: Volume Control
Preview Source Row Pressing the number buttons along the PREVIEW row selects a video source. BKG button: Pressing the BKG button will switch the background to the Matte background or color bars. BLK button: Pressing the BLK button places a black screen on the monitor. Volume Control Volume Adjustment Sliders Sliders to control audio levels for the Main audio... -
Page 14: Chapter 3 Osd Menu
Blue Black 3.1.1 Transition Type The SE-500HD provides two types of transition effect, which are cross dissolve (MIX) and WIPE. The default setting is MIX. 3.1.2 Transition Speed The Transition Speed allows the user to set the MIX or WIPE effect duration, in frames. If the Transition Speed is set to a value of 60 then the transition will take effect over a period of 1 second if the progressive video is chosen and 2 seconds if the interlaced video is chosen. -
Page 15: Wipe Effect
3.1.3 Wipe Effect On the SE-500HD, there are three wipe effects available for the user to choose. The three wipe effects are HORIZONTAL, VERTICAL and CENTER. The default is Horizontal. -
Page 16: Pip Source
Input 3 Input 4 Background Color Bar PIP Size 1-100% Position X -50% - +50% Position Y -50% - +50% Black Input 2 Input 1 Input 2 Split Source Input 3 Input 4 Background Color Bar Small Small Border Size Middle Large White... -
Page 17: Position X
3.2.3 Position X Adjusting Position X parameter moves the PIP window horizontally. Pressing the left or right arrow button on the control panel allows the user to either decrement or increment Position X by 1. To change the parameter value at an accelerated rate, simply press and hold the left or right arrow button. -
Page 18: Lumakey
• Bot – Adjusts the position of the bottom edge of the PIP window. 3.4 Lumakey Keyer of the SE-500HD provides the user with the capability of luma keying. Note: When PIP and Lumakey features are enabled at the same time, the lumakey source will be the upper layer and the PIP source will be the lower layer. -
Page 19: Transparency
OFF. 3.5.2 HDMI Input In this option, you can select the audio source. Selection of input 1-4 allows the SE-500HD to play the enabled audio source. If “Follow” is selected, the audio will enter Audio follow Video mode, i.e. playback of the audio of the output video. -
Page 20: User Mems
“Save”. 3.7 Setup In the “Setup” menu, the user can change the output resolution, reset the SE-500HD to its Factory Default values, choose the preferred OSD menu language, upgrade firmware and view the current firmware versions (Mainboard and Keyboard). -
Page 21: Pgm Out Res
1080i/60 1080i/59.94 1080i/50 720p/60 720p/59.94 720p/50 Save Setup [Save] Factory Default [Reset] Language English Simplified Chinese Traditional Chinese MB Software Version KBD Software Version 3.7.1 PGM Out Res. In PGM Out RES., the user is allowed to select an appropriate PROGRAM output resolution. The available resolutions are listed as follows: •... -
Page 22: Save Setup
Once done, simply go to “Save Setup” to confirm the selected output resolution. Note: The new resolution will be effective once selected. If you have selected a resolution that is not supported by the monitor, you will not be able to view the OSD menu. In this case, please reboot your machine to restore the default resolution previously configured in the “Save Setup”... -
Page 23: Chapter 4 Applications
4.1 Placing a logo on the video using the lumakey function The SE-500HD allows the user to place a logo on the video using the lumakey function. First of all, create a 1920x1080 (16:9) logo against a black or white background on a laptop. Once the logo is created, please follow the steps outlined as follows to insert the logo layer. -
Page 24: Chapter 5 Appendices
Appendix 1 Tally Outputs The SE-500HD has a D-sub 15 pin female tally output port. These connections provide bi-colour tally information to a number of other Datavideo products, such as the ITC-100 eight channel talkback system and the TLM range of LCD Monitors. The ports are open collector ports and as such do not provide power to tally light circuits. -
Page 25: Appendix 2 Firmware Upgrade
1. On the PC, copy the two SE-500HD firmware binary files to the root directory of a USB thumb drive. After the files are successfully copied, safely remove the USB thumb drive from the PC. - Page 26 Note 2: The USB disk drive system supports FAT / FAT32 formats. Note 3: There is no guarantee that the SE-500HD supports all USB disks. When you see all buttons of the program and preview rows are backlit pink or greenish pink, this indicates the disk file read error.
-
Page 27: Appendix 3 Frequently -Asked Questions
Appendix 3 Frequently-Asked Questions This section describes problems that you may encounter while using SE-500HD. If you have any questions, please refer to related sections and follow all suggested solutions. If problem still exists, please contact your distributor or the service center. -
Page 28: Appendix 4 Dimensions
Appendix 4 Dimensions All measurements in millimeters (mm) -
Page 29: Specifications
Appendix 5 Specifications Interfaces Video Inputs 4 x HDMI (HDMI1.4) 2 x HDMI (HDMI 1.4) Video Outputs 1 Multiview and 1 Program 1 x Stereo RCA (L/R) Audio Inputs 2 x Mono Microphone De-embedded Digital Audio (2 CH) 1 x Stereo RCA (L/R) Audio Outputs 1 x Stereo headphone (Mini Jack with volume control) Embedded Digital Audio (2 CH / Channel 1 &... -
Page 30: Service And Support
Service and Support...