
Related Manuals for Gigaset S910


Summary of Contents for Gigaset S910
- Page 1 Congratulations By purchasing a Gigaset, you have chosen a brand that is fully committed to sustainability. This product’s packaging is eco-friendly! To learn more, visit www.gigaset.com.
-
Page 3: Gigaset S910/S910A - More Than Just A Telephone
You can assign important numbers to the number keys on your phone. The number is then dialled by simply pressing a key (¢ page 56). u Adapt your Gigaset to suit your handsfree requirements (¢ page 59) and adjust the brightness of your keypad to suit you (¢ page 58). -
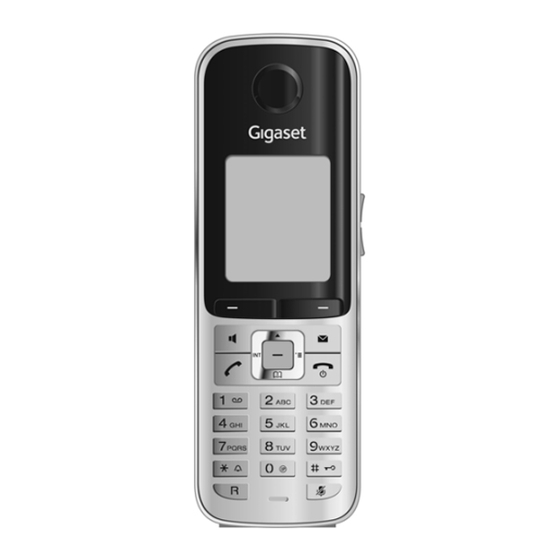
Page 4: The Handset At A Glance
The handset at a glance The handset at a glance 1 Display in idle status 2 Battery charge status (¢ page 18) 3 Side keys Set call (¢ page 58) or ringtone volume (¢ page 59) 4 Display keys (¢ page 21) 5 Message key (¢... - Page 5 Name of the handset (¢ page 51) ™ Ã Number of new messages: Ã on the answering machine (Gigaset S910A only)/ Redial Time network mailbox (¢ page 36) u ™ in the list of missed calls (¢ page 36) u in the list of missed appointments (¢ page 38)
-
Page 6: The Base At A Glance
(paging), page 50) and operate the inte- (¢ 5 Skip to next message (press once) or skip grated answer machine (Gigaset S910A ahead two messages (press twice). only). 6 Skip back to the beginning of the message (press once) or skip back to the previous mes- sage (press twice). -
Page 7: Table Of Contents
Answer machine list (Gigaset S910A only) ........ - Page 8 Automatic network provider code (preselection) ......39 Operating the Gigaset S910A base answer machine ....40 Operating via the handset .
- Page 9 Changing the Gigaset S910A base ringtones ........
-
Page 10: Safety Precautions
(e.g., paint shops). ƒ If you give your Gigaset to a third party, make sure you also give them the user guide. Remove faulty bases from use or have them repaired by our Service department, as they could interfere with other wireless services. -
Page 11: First Steps
First steps First steps Checking the package contents One Gigaset S910/S910A base One power adapter One Gigaset S910H handset One phone cord Two batteries One battery cover One belt clip One plastic headset socket cover One user guide If you have purchased a... -
Page 12: Setting Up The Base And Charger (If Included)
+5°C to +45°C. ¤ Set up the base at a central point in the building on a level, non-slip surface or mount the base (Gigaset S910 only) or charger on the wall (¢ page 72). Please note Pay attention to the range of the base. -
Page 13: Connecting The Charger (If Included)
First steps Connecting the charger (if included) ¤ Connect the flat plug from the power adapter 1. ¤ Plug the power adapter into the plug socket 2. To disconnect the plug from the charger, press the release button and disconnect the plug 4. -
Page 14: Setting Up The Handset For Use
Inserting the batteries and closing the battery cover Warning Use only rechargeable batteries recommended by Gigaset Communications GmbH (¢ page 67), i.e., Never use conventional (non-rechargeable) batteries, as this could result in significant health risks and personal injury. For example, the outer casing of the batteries could be damaged or the batteries could explode. -
Page 15: Attaching The Belt Clip
First steps ¤ Insert the plastic cover provided for the headset socket to ensure optimum sound in handsfree mode. Attaching the belt clip The handset has notches on each side to attach the belt clip. ¤ To attach — press the belt clip onto the back of the handset so that the protrusions on the belt clip engage with the notches. - Page 16 ¤ Charge the handset in the base for 8.5 hours. 8.5 h Please note The handset must only be placed in the designated Gigaset S910/S910A base or charging cradle. ¤ After charging, remove the handset from the base and only replace it when the batteries are fully discharged.
-
Page 17: Changing The Display Language
First steps Changing the display language Change the display language if you do not understand the language currently set. ¤ Press right on the control key. ¤ Slowly press keys O and 5 one after the other. Ø English ± The display for setting languages appears. -
Page 18: Setting The Date And Time
First steps Setting the date and time Set the date and time so that the correct date and time can be assigned to incoming calls, and so that the alarm can be used. ¤ Press the key below §Time§ on the dis- play screen to open the input field. - Page 19 First steps Back Save ¤ Press the key below §Save§ on the dis- play screen to confirm your entry. Date/Time ‰ The display shows Saved. You will hear a Saved confirmation tone and the handset will automatically return to idle status.
-
Page 20: Connecting The Headset
After removing the plastic cover, you can connect a head- set to the left-hand side of your telephone with the 2.5 mm jack connector. See the relevant product page at www.gigaset.com for information on recommended headsets. The headset volume corresponds to the settings for the handset volume (¢... -
Page 21: What Would You Like To Do Next
First steps What would you like to do next? Now you have successfully set up your Gigaset, you will certainly want to adapt it to your personal requirements. Use the following guide to quickly locate the most important topics. If you are unfamiliar with menu-driven devices such as other Gigaset telephones, read the section entitled "Using the phone"... -
Page 22: Using The Phone
Using the phone Using the phone Control key Below, the side of the control key that you must press in the respective operating situation is marked in black (top, bottom, right, left, centre), e.g., v for "press right on the control key" or w for "press the centre of the control key". -
Page 23: Display Keys
Using the phone Display keys The functions of the display keys change depending on the particular operating sit- uation. Example: Current display key functions. Back Save Display keys Some important display keys: Options Open a context-dependent menu. Confirm selection. Û Delete key: delete one character/word at a time from right to left. -
Page 24: Using The Menus
Using the phone Using the menus Your telephone's functions are accessed using a menu that has a number of levels. • The menu display can be extended (expert mode ) or restricted (simplified mode). Complete (export mode) mode is the active default setting. •... -
Page 25: Activating/Deactivating The Handset
Press and hold the end call key again to switch the handset on. Please note When the handset is switched on, an animation showing the Gigaset logo is dis- played for several seconds. Activating/deactivating the keypad lock The keypad lock prevents any inadvertent use of the phone. -
Page 26: Using This Guide
Using the phone Using this guide The operating steps are shown in abbreviated form. Example: The illustration: Ï v ¢ ¢ Display + Keypad ¢ Large Font (³ = on) means: ¤ Press right on the control key v to open the main menu. ¤... - Page 27 Using the phone Display + Keypad ¤ Press down on the control key s Screensaver ´ until the Large Font menu option Large Font appears on the display. Color Schemes Keypad Illumination Back Change ¤ Press the display key §Change§ activate/deactivate the function.
-
Page 28: Menu Overview
Menu overview Menu overview Setting simplified mode) or expert mode) Simplified ( Complete ( • • The menu display can be extended (expert mode ) or restricted (simplified mode). Menu options that are only available in Complete (expert mode) are marked with the icon. - Page 29 Menu overview á Organizer ¢ page 46 Calendar ¢ page 48 Missed Alarms  ¢ page 32 Directory Ï Settings ¢ page 16 Date/Time ¢ page 58 Audio Settings Handset Volume ¢ page 59 • Handsfree Profiles ¢ page 61 Advisory Tones ¢...
-
Page 30: Making Calls
Making calls Making calls One Touch Call You can set up your phone in such a way that If the backlight is deactivated (¢ page 57) it pressing any key dials a previously stored is switched on by pressing any key. Digit number. -
Page 31: Accepting A Call
– CLI (Calling Line Identification): the ¤ Pressing the handsfree key d. caller's number is transmitted. – CLIP (Calling Line Identification Pres- Gigaset S910A: Instead of accepting the call, entation): the caller's number is dis- you can also redirect it to the answer played. -
Page 32: Notes On Calling Line Display (Clip)
By default, the number of the caller is shown calling line display (CLIP) and that the in the display of your Gigaset telephone. You function has been activated for you. If do not have to make any other settings on necessary, contact your provider. -
Page 33: Switching To Mute
Making calls Switching to mute You can deactivate the microphone in your handset during an external call. Press key to mute the handset. The display shows Microphone is off. Press the key again to reactivate the microphone. Please note A connected headset will also be muted. -
Page 34: Using The Directory And Lists
(For instructions on entering text and u Answer machine list special characters, please see ¢ page 68.) (Gigaset S910A only). Phone (Home): / Phone (Office): / You can create a personalised directory for Phone (Mobile): your own handset. You can also send lists/ Enter a number in at least one of the entries to other handsets (¢... - Page 35 Using the directory and lists Order of directory entries The following functions can be selected with q: Directory entries are generally sorted alpha- Display Number betically by surname. Spaces and digits take To edit or add to a saved number, or to Ó...
- Page 36 Please note: ¤ Complete the entry (¢ page 32). u Entries with identical numbers are not Gigaset S910A: Message playback is inter- overwritten on the receiving handset. rupted during the number transfer from the u The transfer is cancelled if the phone answer machine list.
-
Page 37: Redial List
Using the directory and lists ØðÚ Storing an anniversary in the directory For each number in the directory, you can save an anniversary and specify a time at which a reminder call should be made on Miller, the anniversary (default setting: Frank Anniversary: Off). -
Page 38: Message Key Function
New message... Ã §Options§ Open menu..in the answer machine list The following functions can be selected (Gigaset S910A only) or on the net- with q: work mailbox ™ ... in the missed calls list Copy to Directory Copy an entry to the directory (page 32). -
Page 39: Answer Machine List (Gigaset S910A Only)
– Unanswered calls ing machine (Gigaset S910A – Calls recorded by the answering only)/network mailbox machine (Gigaset S910 only) u Missed calls Your selection is displayed (e.g. 5 for missed calls); the current setting flashes: – Unanswered calls and System –... -
Page 40: List Of Missed Alarms
If 10 entries are already stored in the list, the – AM answ.: Calls recorded by the next appointment reminder will delete the answer machine (Gigaset S910A only) oldest entry. u Number or name of caller u Date and time of call (if set, page 16) Press the talk key c to call the selected caller back. -
Page 41: Making Cost-Effective Calls
Making cost-effective calls • Making cost-effective Saving preselection numbers Ï v ¢ ¢ Telephony ¢ Preselection calls ¢ Preselection No. Enter or change the preselec- Make phone calls through a network pro- tion number (call-by-call vider who offers particularly low-cost call number). -
Page 42: Operating The Gigaset S910A Base Answer Machine
Operating the Gigaset S910A base answer machine Operating the You hear the ready tone (short tone). ¤ Now speak your announcement (at least Gigaset S910A base 3 secs.). Just as if making a call via the receiver, answer machine place the telephone against your ear and speak into the microphone at a normal volume. -
Page 43: Playing Back Messages
Operating the Gigaset S910A base answer machine Playing back messages The following is displayed (Example): There are three ways to start playing back messages on the answering machine. 0123727859362922 u Start message playback via the Voice 12.10.14 09:07 Mail menu: v ¢... -
Page 44: Deleting An Individual Message
Operating the Gigaset S910A base answer machine Additional functions during Diverting an external call to the message playback answer machine §Options§ Press the display key. Playback You can divert an incoming external call to stops. the answer machine, even if it is deactivated. -
Page 45: Activating/Deactivating Call Screening
Operating the Gigaset S910A base answer machine Activating/deactivating call Information about ring delay In Auto mode, the following applies for ring screening delay: u If there are no new messages, the answer While a message is recording, you can screen machine answers a call after 18 seconds. -
Page 46: Operating When On The Move (Remote Operation)
Operating the Gigaset S910A base answer machine Operating when on the move Activating the answer machine ¤ Phone home and let the phone ring until (remote operation) you hear: "Please enter PIN". You can check and activate your answer Enter system PIN. -
Page 47: Using The Network Mailbox
When a message is recorded, you receive a Gigaset S910: The network mailbox is call from the network mailbox. If you have preconfigured for fast access. requested Calling Line Identification, the dis- Gigaset S910A: The integrated answer- play shows the network mailbox number. -
Page 48: Eco Wdct
ECO WDCT Please note Activating Eco Mode reduces the range of the base. You are helping to protect the environment with your Gigaset S910/S910A. Setting an appointment Reducing energy consumption (calendar) By using a power-saving adapter plug, your telephone consumes less power. - Page 49 Setting an appointment (calendar) u If no appointments have been entered, ØáÚ the data input window will open immedi- ately to add the new appointment. ¤ You can enter data in the following fields: Activation: Select On or Off. Meeting Date: 15:38 Enter day/month/year in 8-digit format.
-
Page 50: Displaying Missed Appointments, Anniversaries
Setting the alarm clock Displaying missed Setting the alarm clock appointments, anniversaries Prerequisite: The date and time have already been set (¢ page 16). Missed appointments/anniversaries (¢ page 35) are displayed in the Missed Alarms list if: Activating/deactivating and u You do not accept an appointment/anni- setting the alarm clock ì... -
Page 51: Using Multiple Handsets
You can register up to six handsets to your Within 60 seconds press and hold the reg- base. istration/paging key on the base A Gigaset S910H handset can be registered (¢ page 4) (approx. 3 seconds). on up to four bases. Registering other handsets... -
Page 52: De-Registering Handsets
Using multiple handsets De-registering handsets Making internal calls You can de-register any other registered Internal calls to other handsets registered on handset from any registered Gigaset S910H the same base are free. handset. Ï v ¢ Calling a specific handset ¢... -
Page 53: Listening In To An External Call
Using multiple handsets Either Internal listening in Press the end call key. The exter- The line is engaged with an external call. nal call is transferred to the Your screen will display information to that other handset. effect. To listen in to the external call. Press and hold the talk key. -
Page 54: Using A Handset As A Room Monitor
Using a handset as a room monitor Using a handset as a Warning! u Always check the operation of the room monitor room monitor before use. For exam- ple, test its sensitivity. Check the connection if you are diverting the If the room monitor is activated, a previously room monitor to an external saved destination number is called as soon... -
Page 55: Using Bluetooth Devices
Using Bluetooth devices When the room monitor function is acti- Using Bluetooth devices vated, the idle display appears as shown below: Your Gigaset handset can communicate à wirelessly via Bluetooth™ with other devices using this technology. Á Before you can use your Bluetooth device,... - Page 56 Using Bluetooth devices Registering Bluetooth devices Editing the list of known (trusted) devices The distance between the handset in Blue- tooth mode and the activated Bluetooth Open list ò v ¢ device (headset or data device) should be no ¢ Known Devices more than 10 m.
-
Page 57: Handset Settings
Handset settings Rejecting/accepting an Handset settings unregistered Bluetooth device Your handset is preconfigured, but you can If a Bluetooth device that is not registered in change the settings to suit your individual the list of known devices tries to connect requirements. -
Page 58: Quick Access To Numbers And Functions
Handset settings Selecting number Selecting numbers/changing an Prerequisite: The digit key Q already has assignment a number assigned to it. Prerequisite: The digit key already has a number assigned to it. When the handset is in idle status: ¤ Press and hold the digit key Q. When the handset is in idle status ¤... -
Page 59: Changing The Display Language
Handset settings Briefly press the end call key a to return to Changing the display the idle display. language Please note If the analogue clock has been set as the You can view the display texts in different screensaver, the second hand is shown languages. -
Page 60: Setting Keypad Illumination
Handset settings ¤ You can enter data in the following fields: Changing the speaker/ In Charger earpiece volume Select On or Off. Out of Charger You can set the loudspeaker volume for Select On or Off. handsfree mode and the earpiece volume to five different levels. -
Page 61: Setting A Handsfree Profile
Handset settings Setting a handsfree profile Changing ringtones u Volume: You can set different handsfree profiles to optimally adapt your phone to your environ- You can choose between five volumes (1– 5; e.g., volume 3 = Š) and the "cre- ment. -
Page 62: Resource Directory
Handset settings For External Calls: Deactivating the ringtone for the Select On or Off. current call If the time control is activated: §Silence§ Press the display key. Suspend ring from: Activating/deactivating the alert Enter the start of the period in 4-digit for- tone mat. -
Page 63: Activating/Deactivating Advisory Tones
Handset settings • Playing back sounds/viewing caller Activating/deactivating pictures · advisory tones v ¢ ¢ Screensavers / Caller Pictures Your handset uses advisory tones to tell you / Sounds (select entry) about different activities and statuses. The Pictures: following advisory tones can be activated/ §View§... -
Page 64: Restoring The Handset Default Settings
Setting the base Select/change input field. Navigate in the input field. The base settings are carried out using a reg- Ñ istered Gigaset S910H handset. If necessary, delete number: press the display key. Changing the Gigaset S910A Enter number. §Save§... -
Page 65: Activating/Deactivating Music On Hold
You can change the 4-digit system PIN set on the base (default setting: 0000) to a 4-digit PIN known only by you. Gigaset S910A: Setting a system PIN facili- tates remote operation of the answer machine (¢ page 44). Ï... -
Page 66: Connecting The Base To The Pabx
Connecting the base to the PABX Connecting the base to Setting pauses the PABX Changing the pause after line seizure The following settings are only necessary if your PABX requires them; see the PABX user You can change the length of the pause that is inserted between pressing the talk key c guide. -
Page 67: Customer Care And Support
The phone cord supplied has not been used or your phone, you can contact us 24/7 at has been replaced by a new cord with the wrong www.gigaset.com/service. pin connections. ¥ Please always use the phone cord supplied or The table below contains a list of common ensure that the pin connections are correct problems and possible solutions. -
Page 68: Environment
If a product displays this statement symbol of a crossed-out rubbish bin, the product is We, Gigaset Communications GmbH, bear subject to European Direc- social responsibility and are actively com- tive 2002/96/EC. mitted to a better world. Our ideas, technol-... -
Page 69: Appendix
When it has fully dried out, you will normally Due to the constant progression in battery be able to use it again. development, the list of recommended bat- teries in the FAQ section of the Gigaset Cus- Specifications tomer Care pages is regularly updated: www.gigaset.com/service... -
Page 70: Writing And Editing Text
Appendix General specifications Writing and editing text WDCT The following rules apply when writing text: u Each key between Q and O is standard Is supported WDCT assigned several letters and characters. No. of channels 80 duplex channels u Control the cursor with u v t s. Press and hold u or v to move the cur- Radio frequency range 2402 MHz - 2483,5 MHz Duplex method... -
Page 71: Additional Functions Via The Pc Interface
The characters assigned to the key are To enable your handset to communicate shown in a selection line at the bottom left with the PC, the "Gigaset QuickSync" pro- of the screen. The selected character is high- gram must be installed on your PC (free to lighted. -
Page 72: Accessories
Accessories Accessories Gigaset handsets Upgrade your Gigaset to a cordless PABX: Gigaset S910H handset u Brilliant sound quality in handsfree mode u High-quality keypad with illumination u Plus/minus key for simple volume control u 1.8´´ TFT colour display u Bluetooth®... - Page 73 No interruptions from anonymous calls www.gigaset.com/gigasetc510h Compatibility For more information on handset functions in relation to Gigaset bases, please visit: www.gigaset.com/compatibility All accessories and batteries are available from your phone retailer. Use only original accessories. This will avoid possible health risks and personal...
-
Page 74: Mounting The Base On The Wall (Gigaset S910 Only)
Mounting the base on the wall (Gigaset S910 only) Mounting the base on the wall (Gigaset S910 only) 41 mm Approx. 5.5 mm Mounting the charger on the wall 23.5 mm Approx. 4 mm... -
Page 75: Index
Index Index Base ......changing ......connecting . - Page 76 Index Calling Line Identification ....Directory ......
- Page 77 Index Fast access Icon ......... . answer machine alarm clock .
- Page 78 Index List ....answer machine Name ......call lists .
- Page 79 Index Protecting the phone against access ..Simplified mode ..........