Table of Contents
Advertisement
Quick Links
Download this manual
See also:
User Manual
Advertisement
Chapters
Table of Contents

Related Manuals for Gigaset S820H


Summary of Contents for Gigaset S820H
- Page 1 Congratulations By purchasing a Gigaset, you have chosen a brand that is fully committed to sustainability. This product’s packaging is eco-friendly! To learn more, visit www.gigaset.com.
-
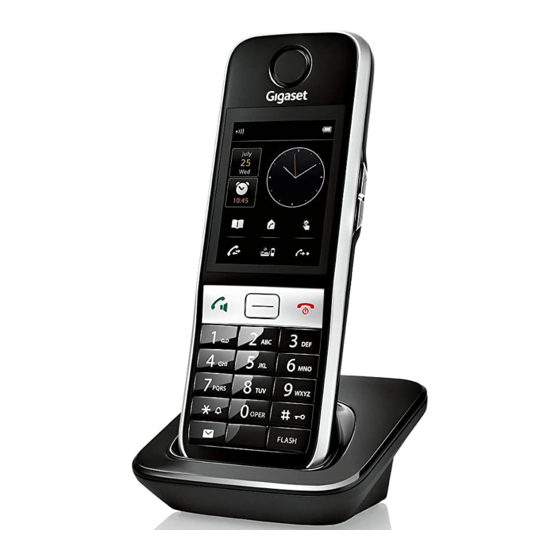
Page 3: Gigaset S820H - Touch & Type
Press and hold: enter dialling pause Message key ¢ Call up messages page ( page 9) Mini USB connection socket Connect the handset to your PC (Gigaset QuickSync) Please note To change the display language, proceed as described on page 18. en fr es... -
Page 4: Table Of Contents
Synchronization with your PC (Gigaset QuickSync) ........ -
Page 5: Safety Precautions
Do not use the devices in environments with a potential explosion hazard (e.g., paint shops). If you give your Gigaset to a third party, make sure you also give them the user guide. Remove faulty devices from use or have them repaired by our Service team, as these could inter- fere with other wireless services. -
Page 6: Getting Started
Getting started Checking the package contents One Gigaset handset, one battery cover (rear cover of the handset), two batteries, one charger with power adapter, one belt clip, one rubber seal for the USB connection, one user guide. Setting up the charger The charger is designed for use in dry rooms in a temperature range of +5°C to +45°C. -
Page 7: Setting Up The Handset For Use
¢ Use only rechargeable batteries ( page 46) recommended by Gigaset Communications GmbH, as this could otherwise result in significant health risks and personal injury. For example, the outer casing of the batteries could be destroyed or the batteries could explode. -
Page 8: Charging The Battery
14.5 hr Please note The handset may only be placed in the designated Gigaset S820/S820A base or the char- ger. The battery may heat up during charging. This is not dangerous. After a time, the charge capacity of the battery will decrease for technical reasons. -
Page 9: Display Pages
Display pages Display pages Idle display (individually customizable) You can customize the idle display to suit your needs. Bring together the key applications you want to start up directly from idle status with a single "touch". Changing the idle display Idle status Configuration mode ò... - Page 10 Please note The applications/settings shown here apply to operation with a Gigaset S820/S820A base. When operating with another base, not all applications/settings may be available. *Please note: applications/settings that are currently unavailable (e.g., because the handset is outside the range of the base) are greyed out.
- Page 11 Display pages Switching from the idle display to the menu page Applications and back: ¤ Briefly press the v menu key. Switching between menu pages: ¤ Touch the desired page in the header. Returning to the idle display from anywhere in the menu: ¤...
- Page 12 Display pages Message pop-up An advisory tone sounds as soon as a new entry arrives in Message pop-up (example) a list. The message key also flashes (if activated, see the base user guide). The message pop-up is displayed and À partially covers the idle display.
-
Page 13: Using The Telephone
Using the telephone The Gigaset S820H handset has a unique operating concept. It combines the benefits of the touchscreen with those of a conventional keypad. You navigate around the menu settings and applications and activate/deactivate functions via the touchscreen and can enter numbers and letters via the keypad. -
Page 14: Volume
Crescendo Activate/deactivate the func- tion Internal Calls Current setting for 16 Mellow Call up submenus to adjust Internal Calls settings External Calls Current setting for 06 Gigaset External Calls Return to previous display view; settings are saved en fr es... -
Page 15: Correcting Incorrect Entries
Using the telephone Switch: switching functions on/off (activating/ ‰ Activated/ deactivating) or selecting functions selected Touch the switch briefly to activate/deactivate or select/ deselect functions. Deacti- The function is activated or selected if the switch is orange vated/ ‰ (text on) or light grey ( icon). -
Page 16: Making Calls
Making calls When editing a contacts entry, the first letter and each letter following a space is automati- cally in upper case. §123§ §Abc§ : enters digits. Touch to return to the letter keypad (upper/lower case). §;-@§ : opens table with special characters; press to insert special characters. You can enter spe- cial characters (marked/diacritical characters, e.g., umlauts) by pressing the corresponding ¢... -
Page 17: One Touch Call
Making calls Dialling from the call list Menu key v ¤ — Call List Call list (example) ¤ Press c. The number of the entry marked with the All Calls green dot is dialled. ý James Foster ¤ ™ 6:30 pm, Home Touch an entry to open the detail view. -
Page 18: Accepting A Call
Making calls Accepting a call You have the following options: ¤ Press c. ¤ ¢ If Auto Answer is activated ( page 19), remove the handset from the charger. Accepting/rejecting call waiting If you receive a call during a conversation, you will hear a call waiting signal and see a corre- sponding message on the display. - Page 19 Making calls ¤ ¤ ¤ Consultation Internal If more than two handsets are registered to the base, select one handset or All. ¤ Consulting: you consult the internal participant and return to the external call: press End. Transferring the external call: you have two options to transfer the external call: ¤...
-
Page 20: Changing Phone Settings
Changing phone settings Changing phone settings Your handset comes with default settings. You can change settings individually during a call or in idle status via the menu page Settings. Changing the display language Menu key v ¤ ¤ ¤ Menu page Settings °... -
Page 21: Setting The Display Backlight
Setting the screensaver/Slideshow Choose between an analog clock/digital clock/picture/ Screensaver slideshow. You can load pictures onto your handset using ¢ the Gigaset QuickSync ( page 31) software. To show the idle display again, briefly press a or Activation the display. -
Page 22: Volume
¤ ‘ Go back with You can load additional ring tones onto your handset ¢ using the Gigaset QuickSync ( page 31) software. Activating/deactivating the ring tone ¤ Permanently activate/deactivate the ring tone: press and hold the star key *. -
Page 23: Eco Dect
ECO DECT Redial list Stored external and internal destination numbers for the baby phone (Alarm To is reset to External) Destination number for call divert. Resetting the handset (Handset Reset) deletes your settings for the configurable page ¢ page 7) and your audio and display settings. ECO DECT ... -
Page 24: Bluetooth Devices
You can exchange contacts entries using the data devices and load ring tones and pictures to ¢ the handset using the Gigaset QuickSync software ( page 31). Please note A headset must have the headset or handsfree profile. The handsfree profile is pre- ferred. - Page 25 Bluetooth devices PIN for a data device: enter any PIN on the handset and then also on the data device. PIN for a headset: 0000 is generally preset. Therefore, you only need to enter the PIN in exceptional cases. If Known Devices already contains six entries, the last entry is overwritten. Exception: a headset only overwrites a headset.
-
Page 26: Contacts (Address Book)
Contacts (address book) Contacts (address book) You can save up to four numbers, together with first names and surnames, eMail addresses, birthdays/anniversaries with signalling, VIP ring tone and caller picture in one contacts entry. You can synchronize the contacts with the Outlook contacts in your PC address book and upload ¢... -
Page 27: Deleting An Entry
Contacts (address book) Deleting an entry ¤ ¤ ¤ In the detail view: Options Delete Touch Yes to confirm Delete all contacts entries: ¤ ¤ ¤ ¤ Menu key v Ê Menu page Settings System List Cleanup Directory ¤ ¤... - Page 28 Contacts (address book) Transferring individual entries ¤ ¢ ¤ ¤ ¤ Open the detail view for the entry ( page 24) Options Copy Internal Handset ¤ Select the recipient handset. After a successful transfer: ¤ Touch Yes if another entry is to be sent. Otherwise, touch No. Transferring the entire contacts ¤...
-
Page 29: Call List
Call list Call list Your telephone stores various types of calls. Call list (example) ¤ ¢ Open the call list via the messages page ( page 9) ¢ Missed Calls or message pop-up ( page 10); open the Missed Calls list. ý... - Page 30 Calendar Setting the tones and volumes of the reminder signal Menu key v ¤ ¤ ¤ ì Audio Settings Menu page Settings Reminder Signal ¤ Set the volume using Ô / Ó or set increasing volume using the switch next to Crescendo. ¤...
-
Page 31: Alarm
Alarm Alarm Prerequisite: the date and time have already been set. You can activate/deactivate and set the alarm as follows: Menu key v ¤ ¤ Ü Alarm on/off ¤ Touch N to change the settings for the alarm: ¤ Alarm Clock Time Set the hour and minute for the wake-up time... -
Page 32: Changing The Settings
Baby phone/Security Monitor (Room Monitor) Caution Please check the functionality when you switch on. For example, test its sensitivity. Check the connection if you are diverting the baby phone to an external number. Please note that the baby monitor is only activated 20 seconds after being switched Activating the function reduces the operating time of your handset. -
Page 33: Synchronization With Your Pc (Gigaset Quicksync)
Update the firmware of your Gigaset S820 handset (via USB only). To enable your handset to communicate with a PC, the "Gigaset QuickSync" program (Version 7 or higher) must be installed on your PC (free download and more information at www.gigaset.com/gigasets820). -
Page 34: Display Icons
Display icons Display icons Options bar icons The following functions are available in the options bar depending on the operating situation: Icon Action ‘ Return to the previous display – Mute handset microphone – (orange) Unmute handset microphone — Open call list œ... - Page 35 Display icons Icon Meaning Þ USB connection active Battery charge status: White: charged over 66% White: charged between 34% and 66% White: charged between 11% and 33% Red: charged below 11% Flashing red: battery almost empty (less than 10 minutes talk time) Battery charging (current charge status): 0%–10%...
-
Page 36: Setting Options
Setting options Setting options Open the Settings menu page: ¤ Briefly press menu key v when the handset is in idle mode. ¤ Press Settings in the header. Please note Not all of the functions described in this user guide are available in all countries. á... - Page 37 Setting options Ï (Dependent on base) System ã (Dependent on base; only for Mexico) Select Services (Dependent on base) Call Pro- tection í Key 2 page 15 Quick Key 9 Dial ª Auto Answer page 19 Own Area Code page 18 Tele- Extra Area Codes (only for USA) page 18...
-
Page 38: Industry Canada Certification
Cet appareil numérique de la classe B est conforme à la norme NMB-003 du Canada. FCC / ACTA Information Warning: Changes or modifications to this unit not expressly approved by Gigaset Communications Inc. could void the FCC authority to operate the equipment. This includes the addition of any external antenna device. - Page 39 FCC / ACTA Information with this telephone system, disconnect it from the network until the problem has been corrected or until you are sure that the equipment is not malfunctioning. If trouble is experienced with this equipment, for repair or warranty information, please contact Support at 1-866 247-8758 tollfree.
- Page 40 FCC / ACTA Information Safety precautions Before using your telephone equipment, basic safety instructions should always be followed to reduce the risk of fire, electric shock and injury to persons. 1. Read and understand all instructions. 2. Follow all warnings and instructions marked on the product. 3.
-
Page 41: Service (Customer Care)
2. EXCLUSIVE REMEDY Gigaset NAM's entire liability and your exclusive remedy if the Product is defective in materials or workman- ship during the warranty period and is returned shall be that the Product will be repaired or replaced as set forth in Section 4 below. - Page 42 God, riots, acts of terrorism, spills of food or liquids, viruses or other software flaws introduced into the Product or other acts which are not the fault of Gigaset NAM and which the Product is not specified to tolerate, including damage caused by mishandling or blown fuses.
-
Page 43: Disclaimer Of Warranties
OF THE FAULT, TORT (INCLUDING NEGLIGENCE), STRICT LIABILITY, BREACH OF CONTRACT OR BREACH OF WAR- RANTY OF GIGASET NAM OR SELLER OR ANY SUPPLIER, AND EVEN IF GIGASET NAM OR SELLER OR ANY SUP- PLIER HAS BEEN ADVISED OF THE POSSIBILITY OF SUCH DAMAGES. REPAIR OR REPLACEMENT, AS PROVIDED UNDER THE WARRANTY, IS YOUR SOLE AND EXCLUSIVE REMEDY FOR BREACH OF THE LIMITED WARRANTY. -
Page 44: Governing Law
Ontario and the federal laws of Canada applicable therein, and exclude the United Nations Convention on Contracts for the International Sale of Goods. If you want to learn more about Gigaset Service or for Support on your Gigaset phone, visit our web site at http://www.gigaset.com or please call 1-866 247-8758 tollfree. -
Page 45: Questions And Answers
Questions and answers If you have any queries about the use of your telephone, suggested solutions are available on ¤ ¤ the Internet at www.gigaset.com/service FAQ First steps for troubleshooting. The table below also lists steps for troubleshooting. Registration or connection problems with a Bluetooth headset. -
Page 46: Exclusion Of Liability
Service (Customer Care) The caller's number is not displayed. 1. Caller ID is not enabled for the caller. ¥ The caller should ask his network provider to enable Caller ID. 2. Caller ID (CID) is not supported by the network provider or has not been enabled for you. ¥... -
Page 47: Environment
Environment Our environmental mission statement We, Gigaset Communications GmbH, bear social responsibility and are actively committed to a better world. Our ideas, technologies and actions serve people, society and the environment. The aim of our global activity is to secure sustainable life resources for humanity. We are com- mitted to a responsibility for our products that comprises their entire life cycle. -
Page 48: Appendix
1.2 V Capacity: 1300 mAh Handset operating times/charging times The operating time of your Gigaset depends on the capacity and age of the battery and the way it is used. (All times are maximum possible times.) Standby time (hours) * **... -
Page 49: General Specifications
Appendix Information about the USB port The handset’s battery is charged using a USB connection with a power supply of 500 mA. On USB connections with lower charging currents, the consumption of the handset itself may be greater than the recharging. In this case, the battery charge decreases. General specifications DECT DECT standard... -
Page 50: Index
Index ......Index internal ......missed . - Page 51 Keys ....Gigaset QuickSync ....
- Page 52 Index ......... . Language + region One touch call .
- Page 53 Index ....Snooze mode (alarm) ......Speaker .