Summary of Contents for Salus ST325TX
- Page 1 ST325TX Digital Room Thermostat RXBC605 RXST625 RXRT505 RXVBC605 RXWBC605 The ST325TX can be used with any of these receivers 868MHz...
-
Page 2: Product Compliance
EC Marking directive 93/68/EEC SAFETY INFORMATION These instructions are applicable to the SALUS Controls model stated on the front cover of this manual only, and must not be used with any other make or model. These instructions are intended to apply in the United Kingdom only, and should be followed along with any other statutory obligations. - Page 3 The ST325TX from SALUS Controls is a stylish and accurate electronic thermostat with a large, easy to read LCD display. The...
-
Page 4: Installation
(such as radios, TV sets, computers, etc.), and is not mounted on or in close proximity to large metal objects. Installing the ST325TX in enclosed areas such as cellars and basements is not recommended. - Page 5 RXWBC605 manual. refer to the RXRT505 receiver pairing refer to the receiver pairing refer to the to the RXBC605 manual. See page 23. manual. See page 7. RXBC605 manual. See page 16. RXST625 manual. See page 9. ST325TX INSTRUCTION MANUAL...
- Page 6 ON THE THERMOSTAT: The Arrow key is not active when the ST325TX is in NORMAL mode. To access the Menu screens, press the OK key once. The first menu displayed is the FROST menu: Use the Touch Ring to scroll through the Menus,...
- Page 7 PAIR and the RF icon are displayed. Press the OK key to start sending the RF address code to the receiver. The ST325TX thermostat display will change to show a rundown timer: The unit counts down for a period of 10 minutes, with the RF Signal indicator flashing while the signal is being transmitted.
-
Page 8: After Installation
All programmable thermostat settings will have been returned to default values. If the Reset Button is pressed, the ST325TX will behave in the same way as described above, except that any previously saved user settings stored in the internal memory will be deleted and overwritten with the default settings. -
Page 9: User Interface And Controls
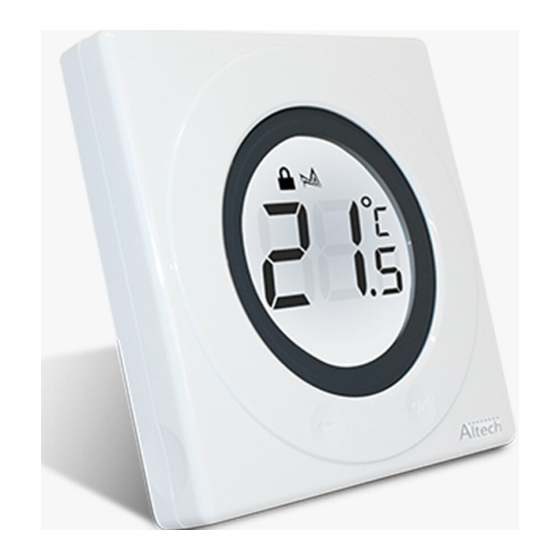
USER INTERFACE AND CONTROLS The status and operation of the ST325TX is clearly shown on the large backlit Liquid Crystal Display (LCD). The display consists of a combination of symbols and alphanumeric displays. The top row is a set of status symbols, the centre row is used to indicate temperature (in Celsius), and the bottom row is an alphanumeric display for menu and status messages. -
Page 10: Operation
OPERATION The ST325TX is configured and adjusted by the use of an innovative and stylish Touch Ring, and two touch sensitive buttons. The Touch Ring surrounds the thermostat display, and is operated very easily by moving your finger around the ring. The backlit Liquid Crystal Display (LCD) gives a highly visible, easily readable indication of the thermostat status. -
Page 11: Changing The Set Temperature
The ST325TX will go back to NORMAL mode without changing the set temperature after 10 seconds of inactivity, or after pressing the Arrow key. If the ST325TX is in FROST mode, the set temperature cannot be adjusted. Turn off FROST mode as described below to allow the set temperature to be changed. -
Page 12: Accessing The Menus
Pressing the Arrow key will return the ST325TX to NORMAL mode. The thermostat will also return to NORMAL mode after 10 seconds if no Key is pressed or if no movement is detected on the Touch Ring. - Page 13 FROST MENU Entering the FROST menu allows you to turn the frost protection mode of the ST325TX on or off. The FROST mode temperature is preset at 5 ºC; this temperature is factory set and cannot be adjusted. The FROST mode indicator will be displayed in all the FROST menu screens.
-
Page 14: Sleep Menu
ST325TX to the Menu display mode. Pressing the Touch Ring for 1 second will turn on the LCD backlight, and pressing the Touch Ring for 3 seconds will wake the ST325TX from SLEEP mode and restore the thermostat to NORMAL mode. -
Page 15: Off Mode
(Pairing ON or OFF), and confirm the choice using the OK button. Please consult the Installation section of this manual for full instructions on how to Pair the ST325TX units. OFF MODE The Low Battery indicator will be displayed if battery voltage is detected as “low”, in this case the thermostat functions normally... -
Page 16: Slide Switch
In the LOCKED position, the Touch Lock indicator will be visible on the LCD, and it will not be possible to change the ST325TX settings. If you are unable to change any thermostat settings, check that the Slide Switch is in the UNLOCKED position. -
Page 17: Maintenance
- a 1 °C increase in temperature is equal to 3% of your heating costs. MAINTENANCE The ST325TX thermostat requires no special maintenance. Periodically, the outer casing can be wiped clean using a dry cloth (please DO NOT use solvents, polishes, detergents or abrasive cleaners, as these can damage the thermostat). -
Page 18: Product Specification
Approximately 1 year Operating Frequency: 868 MHz Max. Operating Range: 100 metres (free air) 30 metres (indoors) Protection rating: IP30 Environment Operating Temperature: 0 ºC to + 50 ºC Storage Temperature: -20 ºC to + 60 ºC ST325TX INSTRUCTION MANUAL... - Page 19 ST325TX Warranty SALUS Controls warrants that this product will be free from any defect in materials or workmanship, and shall perform in accordance with its specification, for a period of two years from the date of purchase. SALUS Controls sole liability for breach of this warranty will be (at its option) to repair or replace the defective product.
- Page 20 Sales Email: sales@salus-tech.com Tel: 01226 323961 Technical Email: tech@salus-tech.com Tel: 01226 323961 SALUS Controls plc, SALUS House, Dodworth Business Park South, Whinby Road, Dodworth, Barnsley S75 3SP...


