LG LSRG309ST Owner's Manual
Hide thumbs
Also See for LSRG309ST:
- Service manual (77 pages) ,
- Manual del propietario (53 pages) ,
- Owner's manual (50 pages)

Related Manuals for LG LSRG309ST


Summary of Contents for LG LSRG309ST
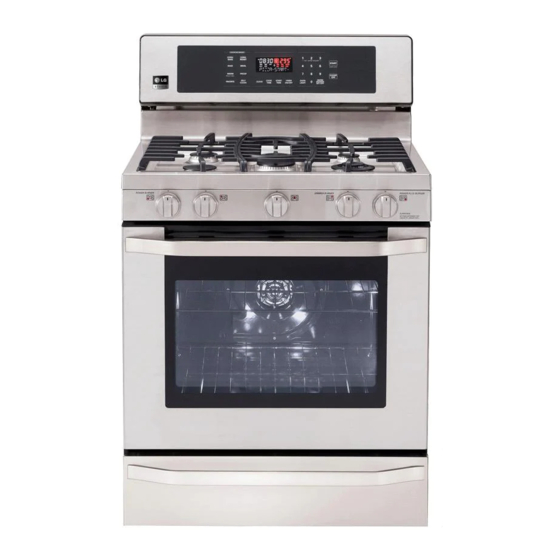
- Page 1 OWNER’S MANUAL GAS RANGE Please read this manual carefully before operating your range and retain it for future reference. LSRG309ST www.lg.com MFL33029604...
-
Page 2: Table Of Contents
TABLE OF CONTENTS TABLE OF CONTENTS Special Features PRODUCT FEATURES - WARM - PROOF ImPORTANT SAFETy INSTRUCTIONS - FAVORITE WARmING DRAWER BEFORE USE Warming Drawer Rack Positions Accessories Operating The Warming Drawer Componen ts CARE AND CLEANING HOW TO USE Gas Surface Burner How to use Gas Surface Burners - Removing and Replacing the Gas Surface... -
Page 3: Product Features
PRODUCT FEATURES MULTIPLE GAS BURNER SIZES Choose a burner to fit the size of your cookware. Cooking multiple items at once is possible by using different burners at the same time. SAFE AND CONVENIENT GAS RANGE Provides safety and convenience for cooking. Superboil (17000 BTU) can quickly bring a pot of water to a boil. -
Page 4: Important Safety Instructions
IMPORTANT SAFETy INSTRUCTIONS ImPORTANT SAFETy INSTRUCTIONS Always comply with the following precautions to avoid dangerous situations and to ensure the peak performance of your product. WARNING Indicates a hazardous situation which, if not avoided, could result in death or serious injury. CAUTION Indicates a hazardous situation which, if not avoided, could result in minor or moderate injury. -
Page 5: Safety Precautions
IMPORTANT SAFETy INSTRUCTIONS IMPORTANT SAFETY NOTICE Enforcement Act requires the Governor of California to publish a list of substances known to the state to cause birth defects or other reproductive harm, and requires businesses to warn customers of potential exposure to such substances. Gas appliances can cause minor exposure to four of these substances, namely benzene, carbon monoxide, formaldehyde and soot, caused primarily by the imperfect combustion of natural or LP gas. - Page 6 IMPORTANT SAFETy INSTRUCTIONS WARNING y This product contains chemicals known to the State of California to cause cancer. Wash hands after handing. WARNING y NEVER use your range as a space heater to heat or warm the room. Doing so may result in carbon monoxide poisoning and over- heating of the oven.
-
Page 7: Surface Burners
IMPORTANT SAFETy INSTRUCTIONS SURFACE BURNERS WARNING y Even if the top burner flame goes out, gas is still flowing to the burner until the knob is turned to the “OFF” position. If you smell gas, immediately open a window and ventilate the area for five minutes prior to using the burner. Do not leave the burners “ON”... - Page 8 IMPORTANT SAFETy INSTRUCTIONS BROILER Always use a broiler pan and a grid for excess fat and grease drainage. This will help to reduce splatter, smoke, and flare-ups. The igniter for the infrared ceramic broil burner on the ceiling of the oven will glow orange periodically during normal broil opera- tion.
- Page 9 IMPORTANT SAFETy INSTRUCTIONS OVEN When opening the door of a hot oven, stand away from the range. The hot air and steam that escape can cause burns to hands, face and eyes. WARNING NEVER block any slots, holes or passages in the oven bottom or cover an entire rack with materials such as aluminum foil.
-
Page 10: Before Use
Anti-tip kit NOTE y Contact LG Customer Service if any accessories are missing. y For your safety and extended product life, only use authorized components. y The manufacturer is not responsible for product malfunction or accidents caused by the use of separately purchased, unauthorized components or parts. -
Page 11: Components
BEFORE USE Components Make sure to understand the names and function of each part. * Throughout this manual, the features and appearance may vary depending on your model. Control panel Grates Oven vent Oval burner Small burner Medium burner Extra large burner Large burner Automatic oven light switch Knobs (5) -
Page 12: How To Use
HOW TO USE HOW TO USE Gas Surface Burners Before use Read all instructions before using. Make sure that all burners are properly placed. Make sure that all grates are properly placed before using the burner. CAUTION DO NOT operate the burner for an extended period of time without cookware on the grate. -
Page 13: Gas Burners
HOW TO USE Gas burners Using the gas surface burners Your gas range cooktop has five sealed gas burners. Be sure that all of the surface burners are placed in the These can be assembled and separated. Follow the guide correct positions. -
Page 14: Top-Of-Range Cookware
HOW TO USE In Case of Power Failure: Using a Wok: In case of a power failure, you can light the gas surface burn- If using a wok, it is recommended that you use a 14-inch or ers on your range with a match. smaller flat-bottomed wok. -
Page 15: Using The Griddle
HOW TO USE Using the Griddle Preheat the griddle according to the guide below and adjust for the desired setting. Type of Food Preheat Conditions Cook Setting Warming Tortillas none 5 (MED) Pancakes HI 3 min. Hamburgers HI 5 min. Fried Eggs HI 5 min. -
Page 16: How To Use The Oven
HOW TO USE How to Use the Oven Before use Read all instructions before using. Make sure the electrical power cord and the gas valve are properly connected. Check it for safety. Check the correct use of the range depending on the type of food you will cook. - Page 17 HOW TO USE Do not block, touch or place items around the oven vent during cooking. Your oven is vented through ducts at the center above the burner grate. Do not block the oven vent when cooking to allow for proper air flow. Do not touch vent openings or nearby surfaces during the use of any cooking operation.
-
Page 18: Using The Control Panel
HOW TO USE Using the Control Panel Display Name Description CONVECTION BAKE Touch the key to select baking with the Convection function. BAKE Touch the key to enter the normal bake function. – Touch this key to hold food warm in the oven. –... -
Page 19: Temperature
HOW TO USE Operating Instructions To decrease(-) temperature adjustment Touch and hold the WARM key for 3 seconds. Then touch the WARM key once and “Adj” will display. How to set the convection auto conversion function Using the number key, enter the temperature amount you wish to decrease(-). -
Page 20: Clock
HOW TO USE How to turn the interior oven light on/ How to Set the Clock Time: off: The clock must be set to the correct time of the day in order to the automatic oven timing functions work properly. The oven light automatically turns ON when the door is Touch the CLOCK key once to set. -
Page 21: Lockout
HOW TO USE How to Use the Timer How to Use the Oven Lockout Feature The timer does not control oven operations. The maximum setting on the timer is 11 hours and 59 minutes. The oven lockout feature automatically locks the oven door and prevents most oven controls from being turned on. -
Page 22: Removing And Replacing The Oven Racks
HOW TO USE Removing and Replacing the Preheating and Pan Placement Oven Racks Preheat the oven if the recipe calls for it. To preheat, set the oven at the correct temperature. Preheating is necessary CAUTION when convection baking and for good results when baking •... -
Page 23: Bake
HOW TO USE Power Outage BAKE The oven or broiler can not be used during a power outage. BAKE is used to prepare foods such as pastries, breads, If the oven is in use when a power failure occurs, the oven casseroles and roasts. -
Page 24: Broil
HOW TO USE BROIL Serve the food immediately, and place the pan outside the Your oven is designed for CLOSED DOOR broiling. oven to cool during the meal for easiest cleaning. Place the food on the grid of the broiler pan. Use LO Broil to cook foods such as poultry or thick cuts of meat thoroughly without over-browning them. - Page 25 HOW TO USE Broiling Chart Broiling times will be affected by the size, weight, thickness, starting temperature and your preference of doneness. This guide is based on meats at refrigerated temperatures. Your oven has 7 rack positions. Quantity and/or Rack First Side Second Side Food...
-
Page 26: Cook Time (Timed Cook)
HOW TO USE COOK TImE (TImED COOK) START TImE (DELAyED TImED COOK) The TIMED COOK feature allows you to set the oven to cook for a specific length of time. This feature can only be used with the BAKE, CONVECTION BAKE, CONVECTION ROAST The automatic timer of the DELAYED TIMED COOK func- tion will turn the oven ON and OFF at the time you select. -
Page 27: Convection Bake
HOW TO USE CONVECTION BAKE Cookware for Convection Cooking Convection baking allows for even cooking and excellent Check to see if your cookware leaves room for air circulation in results when using multiple racks at the same time. It could the oven before using your convection oven. -
Page 28: Convection Roast
HOW TO USE CONVECTION ROAST Roasting Rack Instructions The CONVECTION ROAST feature is designed to give When preparing meats for convection roasting, use the optimum roasting performance. CONVECTION ROAST broiler pan, grid and roasting rack. The broiler pan will catch combines cooking with the convection fan to roast meats grease spills and the grid will help prevent grease and poultry. -
Page 29: Warm
HOW TO USE WARm multi-Rack Baking This function will maintain an oven temperature of 170°F. You can bake foods with excellent results using multiple racks The WARM function will keep cooked food warm for serving because heated air is circulated evenly throughout the oven. up to 3 hours after cooking has finished. -
Page 30: Proof
HOW TO USE PROOF FAVORITES Setting the PROOF function: The FAVORITES function is used to record and recall your favorite recipe settings. You can store and recall up to three This feature maintains a warm oven for rising yeast leavened different settings. -
Page 31: Warming Drawer
WARMING DRAWER WARmING DRAWER Warming Drawer Rack Positions Warming Drawer food/power level recommendations The rack can be used in 2 ways: If you keep several different foods hot, set the control to the • In the upright position to allow low profile food items to be food needing the highest setting. - Page 32 WARMING DRAWER To Crisp Food Items When Using the Warming Drawer • Place food in a low sided dish or pan. The warming drawer will keep hot, cooked foods at serving temperature. Always start with hot food. • Preheat on 1(Low) setting. •...
-
Page 33: Care And Cleaning
CARE AND CLEANING CARE AND CLEANING Gas Surface Burner CAUTION y DO NOT clean this appliance with bleach. y To prevent burns, wait until the cooktop has cooled down before touching any of its parts. Removing and Replacing the Gas Surface Burner Grates and burner caps/heads can be removed for care and cleaning. -
Page 34: Burner Grates
CARE AND CLEANING Burner Grates The range consists of three separate professional-style grates. For maximum stability, these grates should only be used when in their proper position. The two side grates can be interchanged from left to right and front to back. The center grate can be interchanged from front to back. -
Page 35: Oven Air Vents
CARE AND CLEANING Oven air vents Oven Door Air openings are located at the rear of the cooktop, at the top and bottom of the oven door, and at the bottom of the range. Do not hand clean oven door gasket Remove any debris from door NOTE... -
Page 36: Removing And Replacing The Oven Door And Warming Drawer
CARE AND CLEANING Removing and Replacing the Replacing the oven door Oven Door and Warming Drawer 1. Firmly grasp both sides of the door at the top. CAUTION • The door is very heavy. Be careful when removing and lifting the door. •... - Page 37 CARE AND CLEANING Removing the Warming Drawer Replacing the Warming Drawer WARNING 1. Pull the bearing glides to the front of the chassis glide. Disconnect the electrical power to the range at the main 2. Align the glide on each side of the drawer with the glide fuse or circuit breaker panel.
-
Page 38: Self Clean
CARE AND CLEANING SELF CLEAN The self clean cycle uses extremely hot temperatures to During the self clean cycle, the cooktop elements and clean the oven cavity. While running the Self Clean cycle, warming drawer cannot be used. you may notice smoking or an odor. This is normal; especially if the oven is heavily soiled. - Page 39 CARE AND CLEANING Setting Self Clean with a delayed After the Self Clean cycle start • The oven door will remain locked until oven temperature has cooled. Remove all racks and accessories from the oven. • You may notice some white ash in the oven. Wipe it off with a damp cloth or a soap-filled steel wool pad after Touch the SELF CLEAN key.
-
Page 40: Changing The Oven Light
CARE AND CLEANING Changing the Oven Light Broiler Pan and Grid The oven light is a standard 40-watt appliance bulb. It will turn on when the oven door is open. When the oven door is closed, touch the OVEN LIGHT key to turn the light on or off. NOTE Remove the broiler pan and grid from the oven before operating the self clean cycle. -
Page 41: Before Requesting Service
BEFORE REQUESTING SERVICE BEFORE REQUESTING SERVICE Symptoms and Questions Possible Cause/Solution Top burners do not light or do not burn evenly y The plug on range is not completely inserted in the electrical outlet. y Make sure the electrical plug is inserted into a live, properly grounded outlet. y Burner slits on the side of the burner may be clogged. - Page 42 BEFORE REQUESTING SERVICE Symptoms and Questions Possible Cause/Solution Oven light does not work y The light bulb is loose or defective. y Tighten or replace the bulb. y The plug on range is not completely inserted in the electrical outlet. y Make sure the electrical plug is inserted into a live, properly grounded outlet.
- Page 43 BEFORE REQUESTING SERVICE Symptoms and Questions Possible Cause/Solution Strong odor y An odor from the insulation around the inside of the oven is normal for the first few times the oven is used. y This is temporary. Fan noise y The convection fan may turn on and off automatically. y This is normal.
-
Page 44: Warranty
WARRANTy LG Electronics Inc. will repair or replace your product, at LG’s option, if it proves to be defective in material or workmanship un- der normal use, during the warranty period set forth below, effective from the date of original consumer purchase of the product. - Page 45 MANUAL DEL PROPIETARIO ESTUFA DE GAS Lea detenidamente estas instrucciones antes utilizar y guárdelas como referencia para el futuro. LSRG309ST www.lg.com P/No.: MFL33029604...
- Page 46 INDIcE DE cONTENIDOs IndIcE dE cOntEnIdOS ASADO POR CONVECCIÓN cArActEríStIcAS dEL PrOductO Características especiales - CALENTAR InStruccIOnES dE SEGurIdAd - FERMENTAR IMPOrtAntES - FAVORITOS cAJÓn cALEntAdOr AntES dE uSAr Disposición de las posiciones del soporte de la Accesorios gaveta de calentamiento Componentes Funcionamiento del Cajón Calentador cÓMO uSAr...
- Page 47 cARAcTERísTIcAs DEL PRODUcTO DIVERsOs TAMAÑOs DE HORNILLAs A gAs Elija la hornilla que mejor se adapte al tamaño de su batería de cocina. Es posible utilizar varias hornillas a la vez para cocinar distintas cosas al mismo tiempo. EsTUFA A gAs sEgURA, cONVENIENTE Proporciona seguridad y conveniencia para cocinar.
- Page 48 INsTRUccIONEs DE sEgURIDAD IMPORTANTEs InStruccIOnES dE SEGurIdAd IMPOrtAntES Cumpla siempre con lo indicado en las siguientes señales de avisos de seguridad para evitar situaciones peligrosas y para asegura- rse de obtener el máximo rendimiento de su producto. ADVERTENcIA Indica una situación peligrosa que puede resultar en lesiones graves o aún la muerte si no es evitada. PREcAUcIóN Indica una situación peligrosa que, de no ser evitada, puede resultar en lesiones menores a moderadas.
-
Page 49: Precauciones De Seguridad
INsTRUccIONEs DE sEgURIDAD IMPORTANTEs AVISO IMPORTANTE DE SEGURIDAD La Ley de Cumplimiento dispone que el Gobernador de California debe publicar una lista de sustancias conocidas por el Estado que pueden ocasionar defectos de nacimiento u otros daños reproductivos; asimismo, requiere que se advierta a los clientes los efectos de la exposición a tales sustancias. - Page 50 INsTRUccIONEs DE sEgURIDAD IMPORTANTEs ADVERTENcIA y Este producto contiene quimicos conocidos por el Estado de California de causar cáncer. Lávese las manos después de manipular. ADVERTENcIA y NUNCA utilice el artefacto para calentar o aclimatar la habitación. Hacerlo podría causar la intoxicación por monóxido de carbono y el sobrecalentamiento del horno.
- Page 51 INsTRUccIONEs DE sEgURIDAD IMPORTANTEs HORNILLAS DE LA SUPERFICIE ADVERTENcIA y Aunque la llama de la hornilla se apague, el gas continúa saliendo hasta que la perilla se gire a la posición "OFF" (APAGADO). Si huele gas, abra una ventana de inmediato y ventile el lugar por cinco minutos antes de utilizar la hornilla. No desatienda las hornillas cuando éstas se encuentren en posición "ON"...
- Page 52 INsTRUccIONEs DE sEgURIDAD IMPORTANTEs ASADOR Siempre use una cacerola de asado y una parrilla para drenar el exceso de grasa y cebo, esto ayudará a reducir salpicaduras, humo y llamaradas. El encendedor del asador cerámico infrarrojo que se encuentra localizado en la parte superior del interior del horno brillará...
- Page 53 INsTRUccIONEs DE sEgURIDAD IMPORTANTEs HORNO Cuando abra la puerta de un horno caliente, aléjese lo más posible del aparato. El aire caliente y el vapor que salen del aparato podrían provocar quemaduras en sus manos, cara y/u ojos. ADVERTENcIA NUNCA obstruya ninguna ranura, orificio o conducto ubicado en la parte inferior del horno. Tampoco cubra ningún estante con materiales tales como papel de aluminio.
- Page 54 Equipo anti-vuelco NOTA y Comuníquese con el Centro de Atención al Cliente de LG en caso de que falte algún accesorio. y Por su seguridad y para lograr una óptima durabilidad del producto, utilice únicamente componentes autorizados. y El fabricante no será responsable por el mal funcionamiento del producto o por accidentes causados por el uso de compo- nentes o piezas no autorizadas, compradas por separado.
- Page 55 ANTEs DE UsAR componentes Asegúrese de entender los nombres y función de cada pieza. * A lo largo de este manual, las características y apariencia del producto pueden variar dependiendo de su modelo. Panel de control Rejillas Ventilación del horno Quemador oval Quemador pequeño Quemador medio...
- Page 56 cóMO UsAR cÓMO uSAr cómo usar las hornillas a gas de la superficie Antes de usar Lea todas las instrucciones antes de usar el producto. Asegúrese de que todas las hornillas estén correctamente colocadas. Asegúrese de que todas las parrillas están correctamente ubicadas antes de encender las hornillas.
-
Page 57: Hornillas A Gas
cóMO UsAR Hornillas a Gas uso de las hornillas a gas de la su- perficie La cocina de su estufa tiene cinco hornillas selladas a gas. Estas pueden ser ensambladas y separadas. Siga la guía a Asegúrese de que todas las hornillas de la superficie continuación. - Page 58 cóMO UsAR En caso de falla en la energía uso de wok: eléctrica: Si usa un wok, se recomienda que utilice un wok de base plana de 14 pulgadas como máximo. Asegúrese de que la En caso de que haya una falla en la energía eléctrica, puede base del wok se asiente firmemente en la rejilla.
-
Page 59: Usando La Parrilla
cóMO UsAR usando la parrilla Precaliente la parrilla según la siguiente guía y ajuste la potencia que desee. Tipo de alimento Condiciones de Ajuste de precalentamiento cocción Tortillas calientes sin precalentar 5 (MED) Panqueques HI 3 min. Hamburguesas HI 5 min. Huevos fritos HI 5 min. - Page 60 cóMO UsAR cÓMO uSAr EL HOrnO Antes de usar Lea todas las instrucciones antes de usar. Asegúrese de que el cable de alimentación eléctrica y la válvula de gas estén correctamente conectados. Verifíquelo por cuestiones de seguridad. Verifique cómo utilizar de manera correcta la estufa, dependiendo del tipo de comida a cocinar.
- Page 61 cóMO UsAR No obstruya, toque o coloque objetos alrededor del conducto de venti- lación del horno cuando el mismo esté encendido. Su horno es ventilado a través de conductos ubicados en el centro, encima de la parrilla de la hornilla. No obstruya la ventilación del horno cuando éste se encuentre en funcionamiento;...
- Page 62 cóMO UsAR cómo usar el panel de control Pantalla Nombre Descripción HORNEADO POR CONVECCIÓN Toque el tecla para escoger la función de horneado por convección. HORNEADO Toque el tecla para activar la función de horneado normal. – Toque este mando para mantener los alimentos calientes dentro del horno. –...
- Page 63 cóMO UsAR Instrucciones de Funcionamiento Para reducir (-) el ajuste de temperatura Mantenga pulsado el tecla WARM durante 3 segundos. A continuación, toque una vez el tecla WARM y se mostrará como fijar la función de auto conversión el indicador “Adj”. de convección del horno inferior Usando los teclas numéricos, introduzca la cifra de tem- peratura que desea reducir (-).
- Page 64 cóMO UsAR cómo encender/apagar la luz interior del cómo ajustar el reloj: horno: El reloj debe ajustarse con la hora correcta del día para que las funciones de temporización del horno funcionen correcta- La luz del horno se prende automáticamente al abrir la puerta. mente.
- Page 65 cóMO UsAR cómo usar el temporizador: cómo utilizar la característica de blo- queo del horno: El temporizador no controla las funciones del horno. El ajuste La característica de bloqueo del horno automáticamente máximo para el temporizador es de 11 horas y 59 minutos. bloquea la puerta del horno y no permite que la mayoría de Toque el mando TIMER ON/OFF una vez para ajustar los controles del horno puedan encenderse.
-
Page 66: Estantes Del Horno
cóMO UsAR Sacar y Volver a colocar los Precalentamiento y colocación Estantes del Horno de Ollas y Sartenes Precaliente el horno si la receta lo requiere. Para precalentar, PREcAUcIóN ajuste el horno a la temperatura correcta. El precalentamiento • Volver a colocar los estantes del horno antes de es necesario al usar el horneado por convección y para encender el horno para evitar quemaduras. -
Page 67: Papel De Aluminio
cóMO UsAR corte del Suministro Eléctrico HOrnEAr La función de HORNEADO se utiliza para preparar platillos El horno o el asador no se podrán usar cuando haya una tales como pasteles, panes, guisados y comidas asadas. Se interrupción en el suministro eléctrico. puede programar el horno para que hornee a cualquier tem- Si el horno está... - Page 68 cóMO UsAR ASAr Sirva la comida inmediatamente y deje la plancha fuera del Su horno está diseñado para asar a la parrilla con la PUERTA horno para enfriarse durante la comida y así facilitar su limp- CERRADA. ieza. Colocar los alimentos sobre la parrilla de la bandeja de Use el ajuste LO Broil de potencia baja para cocinar por asado.
- Page 69 cóMO UsAR tabla para la Función de Asar El tamaño, peso, grosor, temperatura de inicio y sus preferencias de cocción afectarán a los tiempos del asado a la parrilla. La información recogida en esta guía tiene como base carnes a tem- El horno dispone peraturas refrigeradas.
- Page 70 cóMO UsAR tIEMPO dE cOccIÓn (cOccIÓn HOrA dE InIcIO (cOccIÓn tEMPOrIzAdA) tEMPOrIzAdA rEtArdAdA) La función COCCIÓN TEMPORIZADA le permite configurar el El tempor izador automát ico de l a función COCCIÓN TEM- horno para que cocine durante un período de tiempo especí- PORIZADA RETARDADA ENCENDERÁ...
- Page 71 cóMO UsAR cOnVEccIÓn HOrnEAdO utensilios de cocina para el cocinado por convección El horneado por convección permite un cocinado parejo y por lo tanto excelentes resultados incluso usando múltiples Antes de usar el horno por convección, verifique sus uten- bandejas al mismo tiempo. Puede también disminuir el silios de cocina dejen espacio para que el aire circule dentro tiempo de cocinado operando el modo CONVECCIÓN HOR- del horno.
- Page 72 cóMO UsAR cOnVEctIOn rOASt (ASAdO Instrucciones de la Parrilla Asadora POr cOnVEccIÓn) Al preparar las carnes para asarlas por convección, utilice la asadera, la rejilla y la parrilla asadora. La asadera retendrá los La característica Conv. Roast (rostizado por convección) se derrames de grasa y la rejilla ayudará...
- Page 73 cóMO UsAR Horneado de Varias Bandejas cALEntAr Esta función mantendrá el horno a una temperatura de 170°F. Como el aire caliente está circulando uniformemente por el La función CALENTAR mantendrá caliente la comida cocinada horno, los alimentos pueden hornearse obteniendo excelen- para servir hasta 3 horas después de finalizada la cocción.
- Page 74 cóMO UsAR FErMEntAr FAVOrItOS Configuración de la función FERMENTAR: La función FAVORITOS se usa para grabar y recuperar la configuración de sus recetas favoritas. Usted puede alma- Esta función mantiene el horno caliente para leudar productos cenar y recuperar hasta tres configuraciones diferentes. con levadura antes de hornearlos.
- Page 75 cóMO UsAR cAJÓn cALEntAdOr disposición de las posiciones del NOTA soporte de la gaveta de • El Cajón Calentador se apagará automáticamente luego de tres horas. calentamiento • No se recomienda calentar comidas frías en el Cajón Calentador. El soporte puede usarse de dos maneras: recomendaciones para el nivel de Potencia del •...
- Page 76 cóMO UsAR Al usar la Gaveta de calentamiento Volver a Hacer crujientes Alimentos ya Blandos La gaveta de calentamiento mantendrá calientes los alimentos • Introduzca los alimentos en platos o recipientes de pared cocinados a la temperatura idónea para servirlos. Introduzca baja.
- Page 77 cUIDADO y LIMPIEzA cuIdAdO y LIMPIEzA Hornilla a gas de la superficie PREcAUcIóN y NO limpie este artefacto con blanqueadores. y Para prevenir quemaduras, espere hasta que la cocina se haya enfriado antes de tocar cualquiera de sus partes. cómo extraer y volver a colocar las hornillas a gas de la superficie Las parrillas y tapas/cabezales de las hornillas pueden extraerse para limpiarlos.
-
Page 78: Parrillas De Las Hornillas
cUIDADO y LIMPIEzA Parrillas de las hornillas La estufa contiene tres parrillas separadas de estilo profesional. Para logar su máxima estabilidad, estas parrillas solo deben ser utilizadas cuando estén en la posición correcta. Las dos parrillas laterales pueden intercambiarse de izquierda a derecha y del frente hacia atrás. -
Page 79: Puerta Del Horno
cUIDADO y LIMPIEzA Puerta del horno conductos de ventilación del horno Los orificios de ventilación se encuentran en la parte trasera de la estufa, en la parte superior e inferior de la puerta del horno, y en la parte inferior de la estufa. No limpie a mano la junta de la puerta del horno... - Page 80 cUIDADO y LIMPIEzA Sacar y Volver a colocar la Volver a colocar la puerta del horno Puerta del Horno y el cajón 1. Sostenga firmemente de la parte superior ambos lados calentador de la puerta. REcAUcIóN • La puerta es muy pesada. Tenga cuidado al remover y levantar la puerta.
- Page 81 cUIDADO y LIMPIEzA Sacar el cajón calentador Volver a colocar el cajón calentador ADVERTENcIA 1. Tire de los rieles portantes hacia el frente del bastidor del riel. Desconecte la energía eléctrica de la cocina desde el fusible principal o el panel interruptor de circuitos. 2.
- Page 82 cUIDADO y LIMPIEzA AutO-LIMPIEzA El ciclo de auto-limpieza utiliza temperaturas extremada- Durante un ciclo de auto-limpieza no se podrán utilizar las mente elevadas para limpiar la cavidad del horno. Al ejecutar hornallas de la estufa ni el cajón calentador. el ciclo de Auto-Limpieza, puede percibir humo u olores. NOTA Esto es normal;...
- Page 83 cUIDADO y LIMPIEzA configuración de la Auto-limpieza Luego del ciclo de Auto-Limpieza con un Inicio retardado • La puerta del horno continuará bloqueada hasta que haya descendido la temperatura del horno. • Es posible que note algo de ceniza blanca en el horno. Extraiga todos los estantes y accesorios del horno.
-
Page 84: Bandejas Del Horno
cUIDADO y LIMPIEzA cómo cambiar la luz del horno cómo limpiar la bandeja y la rejilla para asar La luz del horno es una bombilla estándar para artefactos de 40 vatios (watts). Se encenderá cuando la puerta del horno Rejilla esté... - Page 85 ANTEs DE sOLIcITAR sERVIcIO TÉcNIcO AntES dE SOLIcItAr SErVIcIO tÉcnIcO Síntomas y preguntas Posible causa/ solución Los quemadores no se prenden o sus y El tomacorriente del horno no está introducido correctamente en la toma de pared. llamas no son uniformes. y Asegúrese de que el tomacorriente está...
- Page 86 ANTEs DE sOLIcITAR sERVIcIO TÉcNIcO Síntomas y preguntas Posible causa/ solución La luz del horno no funciona y La bombilla puede estar floja o fundida. y Ajuste o cambie la bombilla. y El enchufe eléctrico no está conectado completemente en una toma de corriente. y Cerciórese de que el enchufe eléctrico esté...
- Page 87 ANTEs DE sOLIcITAR sERVIcIO TÉcNIcO Síntomas y preguntas Posible causa/ solución Olor fuerte y La emisión de ciertos olores procedentes del aislamiento en torno al interior del horno se considera normal durante los primeros usos. y Esto es temporal. Ruido en el ventilador y El ventilador de convección puede prenderse o apagarse automáticamente.
- Page 88 GArAntíA LG Electronics Inc. reparará o reemplazará su producto, a elección de LG, si sus materiales o mano de obra son defectuosos bajo uso normal, durante el período de garantía establecido a continuación, el que entrará en vigencia a partir de la fecha de compra del producto por parte del consumidor original.
- Page 89 nOtA...
- Page 90 nOtA...
- Page 91 nOtA...
- Page 92 LG Customer Information Center 1-800-243-0000 USA, Consumer User 1-888-865-3026 USA, Commercial User 1-888-542-2623 CANADA Register your product Online! Rev.07 www.lg.com Printed in Mexico...