Olympus C-2500L Instructions Manual
Hide thumbs
Also See for C-2500L:
- Instructions manual (194 pages) ,
- Additional functions (33 pages) ,
- Brochure & specs (2 pages)
Table of Contents
Advertisement
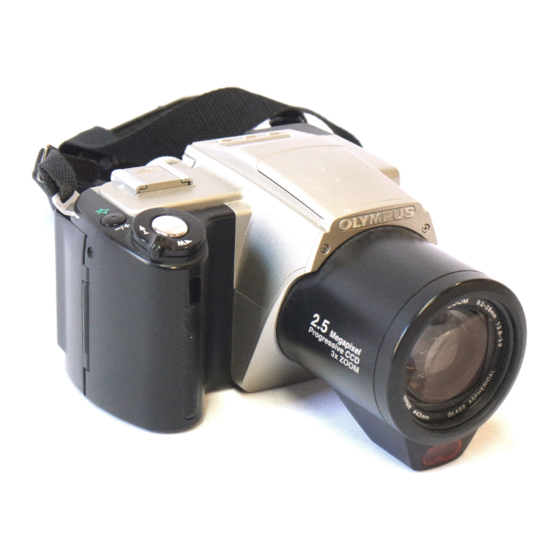
C-2500L
ENGLISH
Digital Camera Instructions
•Before using your camera, read this manual carefully to ensure correct use.
•We recommend that you take test shots to get accustomed to your camera before taking important
photographs.
Downloaded From camera-usermanual.com
Preparations
Taking Pictures
Other Ways to Use Your Camera
For Better Images
Processing Images on Personal Computer
Setting Camera's System
Miscellaneous
Advertisement
Table of Contents

Related Manuals for Olympus C-2500L


Summary of Contents for Olympus C-2500L
- Page 1 Preparations Taking Pictures Other Ways to Use Your Camera For Better Images Processing Images on Personal Computer C-2500L Setting Camera’s System Miscellaneous ENGLISH Digital Camera Instructions •Before using your camera, read this manual carefully to ensure correct use. •We recommend that you take test shots to get accustomed to your camera before taking important photographs.
-
Page 2: Important Safety Instructlons
CAUTION: TO REDUCE THE RISK OF ELECTRIC SHOCK, DO NOT REMOVE COVER (OR BACK) NO USER-SERVICEABLE PARTS INSIDE gerous voltage points or short-out parts that could result in REFER SERVICING TO QUALIFIED OLYMPUS SERVICE PERSONNEL a fire or electric shock. Never spill liquid of any kind on the product. -
Page 3: For Safe Use
Declaration of Conformity FOR SAFE USE Model Number: C-2500L Thank you for purchasing the Olympus digital camera. Trade Name: OLYMPUS Before you start to use your new camera, please read these Responsible party: Olympus America lnc. instructions carefully to obtain optimum performance and a... -
Page 4: Care And Storage
BATTERY HANDLING This camera uses four AA nickel metal hydride batteries or 1. IF YOU NOTICE AN UNUSUAL SMELL, NOISE, OR AA NiCd batteries. (Olympus brand AA nickel metal hydride SMOKE EMITTING FROM THIS CAMERA, UNLOAD THE batteries are recommended.) BATTERIES CAREFULLY TO AVOID BEING BURNED. -
Page 5: Table Of Contents
Setting Camera's System Turning the Power ON ............11 Setting Date/Time..............74 Taking Pictures ..............13 Setting Info Display on LCD Monitor: ON/OFF.....74 Camedia C-2500L Shooting Modes ........14 Setting Meter/Feet Display ...........75 Mode Selection..............15 Setting Image Display............75 Selecting SmartMedia/ CompactFlash Memory Card..15 Setting Time Interval before Stand-by (In the Shooting Taking Pictures in the P Mode..........16... -
Page 6: To The User
This function may not be available in all regions. Notes about printing with a printer which supports DPOF • C-2500L cannot edit the DPOF preprint setup that was set with other equipment. Edit the setup with the equipment which originally was used for the set up. - Page 7 Preparations Downloaded From camera-usermanual.com...
-
Page 8: Check Your Accessories
Check Your Accessories Check whether all the following accessories are included. If something is missing or broken, contact the place of purchase. Camera Lens cap Lithium battery (CR2025) Strap (with Lens cap holder) Remote control and its instructions Video cable RS-232C PC serial cable Instructions (This manual) Conversion connector... - Page 9 Power cable for the battery charger Battery charger AA Ni-MH batteries (four) Instructions for the battery charger SmartMedia(SSFDC-32MB) Index labels (2 pieces) Static-free case Write-protect adhesive seals(4 pieces) Instructions for SmartMedia No CompactFlash is included. Purchase commercially, if necessary. Downloaded From camera-usermanual.com...
-
Page 10: Names And Functions Of Parts
Names and Functions of Parts Camera Body Spot metering button (P. 32)/ Flash (P. 20) Control panel (P. 5) Write-Protect button (P. 27) Hot shoe (P. 43) Flash mode button (P. 21)/ Shutter release button (P. 14) Information button (P. 53) Zoom lever (P. - Page 11 Photoreceptor (P. 25) Lens AF illuminator (P. 18)/ Self-timer signal (P. 24) Control Panel Resolution mode (P. 39) CompactFlash memory card (P. 15) Shutter speed (P. 34)/ Distance (P. 31) SmartMedia memory card (P. 15) Battery check (P. 11) Number of storable pictures (P. 11)/ Error code (P.
-
Page 12: Attaching The Strap
NOTE • Rig up the strap as shown in the illustration. Olympus will not assume any responsibility whatsoever for damage if the camera is dropped because the strap was improperly rigged and came loose. -
Page 13: Charge Batteries With Charger
Charge Batteries with Charger Charge the bundled Ni-MH batteries with the included charger. Set the nickel-metal hydride batteries in the charger. Charged lamp Plug the charger into an electrical outlet as shown left. It takes about 3 hours to fully charge the batteries. Read the instruction manual which comes with the charger. -
Page 14: Using The Ac Adapter (Option)
74 about how to adjust the calendar-system. Using the AC Adapter (Option) The separately sold Olympus adapter allows you to power the camera from a typical AC 120V wall outlet. Check that the power to the camera is OFF, and then plug the adapter's cord into an electrical outlet. -
Page 15: Taking Pictures
Taking Pictures Downloaded From camera-usermanual.com... -
Page 16: Loading Smartmedia/Compactflash Memory Cards
Loading SmartMedia / CompactFlash Memory Cards The Camedia C-2500L can take both SmartMedia and CompactFlash memory cards simultaneously, or either of them at a time. The pictures you take are stored on these cards. Loading SmartMedia Memory Card You can use not only Olympus SmartMedia 3V(3.3V) cards, but any brand SmartMedia 3V(3.3V) cards. -
Page 17: Turning The Power On
• See page 15 for how to select the memory card to store images when both the SmartMedia card and the CompactFlash card are set. • When using Non Olympus brand SmartMedia and the CompactFlash, format them with the Camedia C-2500L before using them. Caution •... - Page 18 AA Ni-MH batteries and battery charger bun- dled with the C-2500L. • When operating with exhausted batteries, frame number blinks on the control panel after a picture is taken or power is turned on. In this case, the picture was not taken normally.
-
Page 19: Taking Pictures
Taking Pictures After turning ON the power and setting up the camera, you are ready to take pictures. Dioptor adjustment If the autofocus mark is blurred or otherwise hard to see, you can adjust lens power with the diopter adjustment dial. The dial can be turned with your left thumb as you watch the mark come sharply into focus. -
Page 20: Camedia C-2500L Shooting Modes
P Mode (Program Mode) Aperture and shutter speed are set automatically by the Camedia C-2500L. All you have to do to get sharp clear images is to press the shutter release button. Images are quick and easy. -
Page 21: Mode Selection
Mode Selection The Camedia C-2500L has three modes for you to use: P mode, A mode and M mode. Modes are selected with the mode dial prior to taking pictures. Mode Dial M mode Manual mode A mode Aperture mode... -
Page 22: Taking Pictures In The P Mode
Taking Pictures in the P Mode With the P mode, exposure is set automatically by the camera. The default setting is autofocus, which sets focus automatically, for the camera. All you have to do to get sharp clear images is press the shutter release button. A good way to learn the basics of using your camera is to take pictures. - Page 23 Hard-to-(Auto)Focus Subjects Although the autofocus can lock on virtually any subject, the Camedia C-2500L cannot bring the following subjects into focus. In such cases, the green lamp inside the viewfinder blinks and the shutter release button is disabled. In some cases, the shut- ter release button will respond to touch, but the image will be out-of-focus.
-
Page 24: Locking Focus
Locking Focus Focus-locking is a technique for bringing a subject into focus which is not within the autofocus mark (center) of the Camedia C-2500L. It can be performed as explained below. While looking into the viewfinder, move the autofocus mark over the subject you want to photograph and press the shutter release button down halfway. -
Page 25: Using The Zoom Lever
Green lamp Using the Zoom Effectively Zooming changes the focal point by moving the lens crystals. The Camedia C-2500L mounts an optical 3x magnification zoom lens. Moving the zoom lever moves the lens crystals and changes the focal point. • TELE Picture angle is narrower and the subject comes out bigger than usual. -
Page 26: Flash Photography
Flash Photography This section explains how to take pictures with a flash. Flashes are used in lighting up and taking pictures of backlighted subjects or the dark area as well as in taking pictures in dark places. The camera has features, such as flash synchronization effect, which fires the flash at the beginning or end of a slow shutter. - Page 27 Flash Mode Selection This section explains how to set the flash mode. Set the mode dial to "P", "A" or "M". Press the [ ] button. Every time the [ ] button is pressed, the flash mode changes as fol- lows.
- Page 28 Red-Eye Reducing Flash In the red-eye reducing mode, before the actual flash is emitted, 10 short preliminary flashes are fired in rapid sequence. These short flashes con- tract the subject's pupils and, hence, reduce the incidence of red eyes seen in conventional flash photographs. Press the flash pop-up button.
-
Page 29: Using The Self-Timer/Remote Control
The flash can be turned OFF to photograph sunsets or night scenes, or for taking pictures in museums where flash photography is prohibited. If the flash is out, close the flash. Check that appears on the control panel and press the shut- ter release button down all the way. - Page 30 Press the shutter release button down halfway to lock the focus. The green lamp inside the viewfinder will light up to indicate the cam- era is ready to take the picture. Cover the viewfinder with the lens cap holder to block incoming light from the viewfinder.
-
Page 31: Viewing Images
Determine the composition, and cover the viewfinder with the lens cap holder to block incoming light from the view finder. Point the remote control at the camera and press the transmit button. Remember to be within the remote control's transmis- sion range.(Read the remote control instructions) The camera will emit a tone when it receives the signal. -
Page 32: Viewing Images As An Index
Viewing Images as an Index Images can be displayed as an index of 4 or 9 frames. It is convenient when looking for the picture that you want to display. Set the mode dial to Press the [SM/CF] button and select the card which contains the images you want to view. -
Page 33: Write-Protecting Images
Directions in which you can move are marked with will disappear at the end of images. NOTE • Images have the same range of movement at 4x as at 2x magnifica- tion. You can view specific parts of a 4x magnified image in the fol- lowing way. -
Page 34: Erasing Images
Erasing Images Images you do not need can be easily erased. You have the choice of erasing just one image at a time or clearing the entire card. One-Frame Erase The following procedure erases only the image displayed on the LCD monitor. -
Page 35: Other Ways To Use Your Camera
Other Ways to Use Your Camera Downloaded From camera-usermanual.com... -
Page 36: Macro Mode
Macro Mode The macro mode is for taking pictures of small subjects at very close distance. Ranges as small as 9 x 11 cm ( 3.5 x 4.3 in.) can be taken when photographed from 0.3 (1 ft.)m away.(TELE) Set the mode dial to "P", "A" or "M". Press the [FOCUS] button. -
Page 37: Infinity Mode
You can set ISO rating to that of 35mm film. There are 3 ratings: 100, 200 and 400. The higher the level, the better photographs You can take various flash-lit pictures using an extension flash (sold separately ) designed specifically for the Camedia C-2500L. -
Page 38: Setting Metering Mode
Metering measures the brightness of the subject before the picture is taken. This information is used then to determine expo- sure. With the Camedia C-2500L , you can select between centre metering and spot metering.The default is centre metering. Centre Metering Spot Metering This is the metering technique used generally in picture-taking. -
Page 39: Exposure Compensation
Exposure Compensation P MODE A MODE In the P and A modes, you can compensate exposure to ±2EV in 1/3 EV steps. "P" / "A" Set the mode dial to "P" or "A". While holding down the [+/-] button, set the exposure compen- sation with the right / left point of the jog dial. -
Page 40: Setting Shutter Speed
Portraits Portraits Try recalling a portrait you have seen. Many times, a portrait of a singer or movie star shows the subject in focus with a plain or out-of- focus background. You can take portrait-like shots by making the back- ground hazy so that the subject stands out. -
Page 41: Manual Exposure
Fast Taking Pictures of Moving Objects By changing the shutter speed, you can change the way someone run- ning or a car in a race comes out. This special effect is done in the M mode with the manual shutter speed feature. The faster the shutter speed (1/500, 1/1000 sec, etc.), the more an object in motion seems frozen. -
Page 42: Types Of Menus
Types of Menu This section explains menus displayed on C-2500L. The menus vary according to modes: shooting modes ( P mode, A mode and M mode ) and playback mode. Menus in the P mode, A mode and M mode •... -
Page 43: Using The Jog Dial
You can set ISO rating to that of 35mm film. There are 3 ratings: 100, 200 and 400. The higher the level, the better photographs You can take various flash-lit pictures using an extension flash (sold separately ) designed specifically for the Camedia C-2500L. -
Page 44: Setting Menus
Setting Menus Menus can be displayed on the LCD monitor so that you can select and set up camera features. This section explains the menu format and how to operate them. About Menus Available user-setting Item Cursor Setting Menus Press the [ ] button. -
Page 45: Setting Resolution
You can set ISO rating to that of 35mm film. There are 3 ratings: 100, 200 and 400. The higher the level, the better photographs You can take various flash-lit pictures using an extension flash (sold separately ) designed specifically for the Camedia C-2500L. - Page 46 Specifying File Format (JPEG/TIFF) for SHQ Images With SHQ images, you can save files in a JPEG (compressed) format or TIFF (noncompressed) format. Set the mode dial to "P", "A" or "M". Press the [ ] button or the [OK] button. The first menu will appear on the LCD monitor.
-
Page 47: Setting Iso Rating
You can set ISO rating to that of 35mm film. There are 3 ratings: 100, 200 and 400. The higher the level, the better photographs You can take various flash-lit pictures using an extension flash (sold separately ) designed specifically for the Camedia C-2500L. -
Page 48: Sequence Mode
Sequence Mode The Camedia C-2500L lets you take up to five images in quick succes- sion by simply holding down the shutter release button. Set the mode dial to "P", "A", or "M". Press the [ ] button. The first menu appears on the LCD mon- itor. -
Page 49: Taking Pictures Using Exclusive Extension Flash
You can set ISO rating to that of 35mm film. There are 3 ratings: 100, 200 and 400. The higher the level, the better photographs You can take various flash-lit pictures using an extension flash (sold separately ) designed specifically for the Camedia C-2500L. - Page 50 Taking Pictures Using Extension Flash Check that the built-in flash is retracted. If not, retract it. Turn ON power to the extension flash. NOTE • To override flash emission from the exclusive extension flash, set its power to OFF. Select one of the flash modes. The flash has four modes: Auto-flash, Red-eye reducing flash, and Fill-in flash.
- Page 51 You can set ISO rating to that of 35mm film. There are 3 ratings: 100, 200 and 400. The higher the level, the better photographs You can take various flash-lit pictures using an extension flash (sold separately ) designed specifically for the Camedia C-2500L.
- Page 52 Non-exclusive Extension Flash That Can Be Used with This Camera Use the flash (sold separately) designed specifically for the Camedia C-2500L if possible. If you want to use non-exclusive extension flashes on the market, extension flashes must satisfy the following conditions in order to be used with the Camedia C-2500L.
-
Page 53: Setting Flash Control
You can set ISO rating to that of 35mm film. There are 3 ratings: 100, 200 and 400. The higher the level, the better photographs You can take various flash-lit pictures using an extension flash (sold separately ) designed specifically for the Camedia C-2500L. - Page 54 Quick Focus Distance The focal distance used in quick focus picture-taking is set as follows. Set the mode dial to "P", "A" or "M". Press the [Menu] button. The first menu will appear on the LCD monitor. Align the cursor with with the top / bottom point of the jog dial.
-
Page 55: Setting White Balance
You can set ISO rating to that of 35mm film. There are 3 ratings: 100, 200 and 400. The higher the level, the better photographs You can take various flash-lit pictures using an extension flash (sold separately ) designed specifically for the Camedia C-2500L. -
Page 56: Manual White Balance
When the white light is memorized, "GOOD" will be displayed on the LCD monitor. Press the [OK] button again to execute the white balancing reference setting. If the light source is not properly memorized, “NO GOOD X” is displayed on the LCD monitor. In this case, press the [OK] button again to return to the display in while keeping the previously set white balancing reference value. -
Page 57: Flash Synchronization Effect
Press the shutter release button down halfway. This will lock the focus and exposure. The green lamp inside the viewfinder will light up to indicate the camera is ready to take the pic- ture. Press the shutter release button down all the way. The picture will be taken using the memorized white balance as a reference. - Page 58 Press the flash pop-up button. The flash will popup. Press the shutter release button down halfway to lock the focus on the subject. Press the shutter release button down all the way. The picture will be taken with the flash being fired at the beginning of the shutter release.
-
Page 59: Reset Settings Of Shooting Modes
You can set ISO rating to that of 35mm film. There are 3 ratings: 100, 200 and 400. The higher the level, the better photographs You can take various flash-lit pictures using an extension flash (sold separately ) designed specifically for the Camedia C-2500L. -
Page 60: Slide Shows
Picture information display SmartMedia/CompactFlash Pixels Protect ON/OFF memory card Resolution Aperture Exposure compensation [SM] [SM] Shutter speed [1712 ~1368] + 2.0 F5.6 1/5000 4500K White balance compensation - 0.7 101OLYMP Folder name PC240001.JPG ’99.12.24 10:47 File name Frame No. Date/Time Flash compensation Slide Shows Images displayed on the LCD monitor can be automatically forwarded one frame at a time, as in a slide show. -
Page 61: Copying Images
You can set ISO rating to that of 35mm film. There are 3 ratings: 100, 200 and 400. The higher the level, the better photographs You can take various flash-lit pictures using an extension flash (sold separately ) designed specifically for the Camedia C-2500L. -
Page 62: Clearing All The Frames
Clearing All the Frames The entire SmartMedia / CompactFlash can be cleared as follows. Set the mode dial to Press the [SM/CF] button and select the card to clear all the frames. Press the [ ] button. The menu will appear on the LCD monitor. Align the cursor with in the case of CompactFlash) with the top/bottom point of the jog dial. -
Page 63: Print Setup
Images made with the Camedia C-2500L and stored on SmartMedia or CompactFlash memory card can be printed in the following ways. • Using the Camedia C-2500L, you can specify the number of copies to print out, the position where the date and the time should appear on the print and other information (Preprint Setup). -
Page 64: Preprint Setup
Preprint Setup You can store information such as the number of copies to print out on either SmartMedia or a CompactFlash. This procedure is called "preprint setup". Preprint setup is only effective for prints made at stores that can print out using DPOF-ready printers and DPOF systems. Setting the Number of Copies to Print Out This procedure stores the number of copies to print out via a printer, etc. - Page 65 You can set ISO rating to that of 35mm film. There are 3 ratings: 100, 200 and 400. The higher the level, the better photographs You can take various flash-lit pictures using an extension flash (sold separately ) designed specifically for the Camedia C-2500L.
- Page 66 Downloaded From camera-usermanual.com E-60...
-
Page 67: For Better Images
For Better Images Downloaded From camera-usermanual.com... -
Page 68: About Focusing
When you want to take sharp pictures of plant pistils or stamen, the results are often out-of-focus if an ordinary zoom is used. However, sharp clear images are possible with the Camedia C-2500L using the macro or super macro (in the "WIDE" mode only) modes. -
Page 69: Nighttime Photography
When the Subject Is Not in the Centre of the Frame It is hard to focus on a subject if it is not in the center of the frame, but you can bring the subject to the autofocus mark just enough to lock focus on it, and then, without lifting your finger off of the shutter release button, compose the frame as you like and take the picture. -
Page 70: How To Use 2Nd Curtain Synchronization Effect
When pictures are taken under fluorescent light or a special light source, the colors may lose their overall balance. With the Camedia C-2500L, pictures taken under fluorescent light can come out in natural-looking colors by changing the refer- ence tone with the "white balancing with reference" feature in the [WB] menu (P. 49). -
Page 71: Processing Images On Personal Computer
Processing Images on Personal Computer Downloaded From camera-usermanual.com... -
Page 72: Processing Images On Personal Computer
How to Connect to Personal Computer Connecting the Camedia C-2500L to a personal computer makes it possible to download images from the card in the camera to the PC. The connection will differ depending on the type of PC used. - Page 73 Connecting to Personal Computers The Camedia C-2500L can be connected to a personal computer as fol- lows. Apple Macintosh Install CAMEDIA Master 1.11. For an explanation on installation, see the online manual. Check that power to both the computer and camera is OFF.
-
Page 74: Transferring Images To A Personal Computer
Transferring Images to a Personal Computer Transferring Images via Provided CAMEDIA Master 1.11 By installing the provided software (CAMEDIA Master1.11), you can download images to a computer via the serial cable and access the fol- lowing functions. For installation and operation, refer to the CAMEDIA Master 1.11’s online manual. -
Page 75: Viewing Images Stored On The Card On Your Computer
Viewing Images Stored on the Card on Your Computer You can view images stored on SmartMedia/CompactFlash memory card via the CAMEDIA Master 1.11. Start the CAMEDIA Master 1.11 installed on the computer. Click on "My Camera" icon. A thumbnail index of stored images will be displayed. Place the cursor on the desired image and double-click on it. -
Page 76: Processing Images Via Software On Your Computer
Processing Images via Software on Your Computer You can process images (changing tones, composing, and so on) via the CAMEDIA Master 1.11 or other application software. This section explains some of the processing using the CAMEDIA Master 1.11. Making Dark Images Brighter Some images may come out darker than expected. - Page 77 Correcting Blurry Images In some cases the whole image may be blurred. In other cases, only the objects surrounding the subject are blurred, while the subject itself is in focus. Use the CAMEDIA Master 1.11 Sharpen when this happens to sharpen the whole image.
- Page 78 Composing Images with Templates You can easily compose images with templates on the CAMEDIA Master 1.11. Place the cursor on the image you want to compose and double- click on it. This will display the selected image. Select [Image] - [Template Superimpose] on the menu bar. This will display the compose window .
-
Page 79: Setting Camera's System
Setting Camera’s System Downloaded From camera-usermanual.com... -
Page 80: Setting Date/Time
To check the date and the time when the C-2500L recorded the image, use CAMEDIA Master. The software can tell you the original date and time. -
Page 81: Setting Meter/Feet Display
Setting Meter/Feet Display You can change the units of distance that are displayed when taking pictures that are focused manually. The distance can be displayed in meters (m) or feet (ft). Set the mode dial to "P", "A" or "M". Press the [ ] button. -
Page 82: Setting Time Interval Before Stand-By (In The Shooting Modes)
Setting Time Interval before Stand-by (In the Shooting Modes) The power save function puts the camera into the stand-by mode automatically if the camera is not operated for a set time using the procedure below. The camera also enters the stand-by mode when viewing images as well as when taking pictures. To resume viewing images this case, simply press the ON/OFF button. -
Page 83: Formatting Smartmedia/Compactflash Memory Cards
The below procedure explains how to format SmartMedia and CompactFlash memory cards. Before using cards that have for- matted by a personal computer or by a digital camera that we did not manufacture, please reformat them using the C-2500L. If trouble occurs, reformat the card. When a card is reformatted, all data on it is erased. -
Page 84: About The File Name
About the File Name Files and folders are named in one of the following three modes; AUTO FILE, AUTO FOLDER, and NAME RESET. C-2500L names the file No. from 0001-9999, and the folder No. from 101 - 999. Naming modes can be selected from the FILE NAME menu. - Page 85 When the file number 9999 is reached, the camera automatically creates a new folder and the next image will be stored in that folder with the file number 0001. At this time, the number of the newly created folder will be one digit higher than that of the highest-numbered folder on the card.
- Page 86 NAME RESET With the NAME RESET function, the camera does not hold the file num- ber of the image in memory. Instead, the camera stores files with numbers that are sequential from the largest file number in the highest-numbered folder on the card. Even when switching between the SmartMedia and CompactFlash, or when the card is changed, or even when the power is switched off and then on again, the camera assigns numbers to new files according to file numbers on the currently selected card.
-
Page 87: Miscellaneous
Miscellaneous Downloaded From camera-usermanual.com... -
Page 88: Glossary
Communicator and Microsoft Internet Explorer. Pictures taken the exposure which has been set under AE. When increasing, with the Camedia C-2500L can be viewed with a browser. it is called "Plus compensation", and when decreasing, it is called "Minus compensation". - Page 89 It is best used with subjects of high light- dark contrast or to measure light in a particular spot only. In the case of the C-2500L, the camera meters the exposure within the autofocus mark of the viewfinder.
-
Page 90: Questions And Answers
Yes, you can. Please visit our Internet home page amount of LCD monitor use, the frequency of flash use, (http://www.olympus.com). as well as by the kind of battery used and the environ- mental conditions under which the camera is used. Using the LCD monitor frequently will use up your batteries more quickly. -
Page 91: Error Code
CAN NOT This image cannot be opened with OPEN FILE the C-2500L. Images photographed with a differ- ent digital camera should be viewed using the same camera. If the card is dirty, clean it with a tis- sue. -
Page 92: Trouble Shooting
Trouble Shooting When the orange lamp keeps blinking for over 50 sec- Operating Problems onds with the flash popped up, the flash is out of order. - Have it repaired. The camera does not work. The LCD monitor is hard to read. The power is OFF. - Page 93 The picture is too bright. The flash was set to the Fill-In Flash mode. - Set the flash to a mode other than Fill-In Flash. (P. 22) The subject was very bright. - Either meter or point the camera away from overly bright subjects.
-
Page 94: Specifications
LCD monitor and print Quick adjustment them with the exclusive printer. Lens : Olympus lens9.2 ~ 28mm, F2.8 ~ Automatic calendar system 3.9, 7 elements in 7 groups. : Up to the year 2030 Equivalent to 36 ~ 110 mm lens... - Page 95 Downloaded From camera-usermanual.com...