Panasonic KX-FP200 Operating Instructions Manual
Compact plain paper fax
Hide thumbs
Also See for KX-FP200:
- Operating instructions manual (80 pages) ,
- Operating instructions manual (80 pages)
Table of Contents
Advertisement
Compact Plain Paper FAX
Model No.
KX-FP200
KX-FP195
OPERATING INSTRUCTIONS
Please read these Operating Instructions
before using the unit and save for future
reference.
FOR OPERATION ASSISTANCE,
CALL 1-800-HELP-FAX (1-800-435-7329)
TO GET STARTED
EASILY,
PLEASE READ
THIS SECTION FIRST.
¡ ¡ This product is designed for use in the
United States of America, and may not
operate in other countries. (See page 74 for
more details.)
¡Este producto ha sido diseñado para su uso
en los Estados Unidos de América, y puede
no funcionar correctamente en otros países.
(Consulte la página 74 para tener más
detalles.)
Advertisement
Table of Contents

Related Manuals for Panasonic KX-FP200


Summary of Contents for Panasonic KX-FP200
-
Page 1: Operating Instructions
Compact Plain Paper FAX Model No. KX-FP200 KX-FP195 OPERATING INSTRUCTIONS Please read these Operating Instructions before using the unit and save for future reference. FOR OPERATION ASSISTANCE, CALL 1-800-HELP-FAX (1-800-435-7329) TO GET STARTED EASILY, PLEASE READ THIS SECTION FIRST. ¡ ¡ This product is designed for use in the United States of America, and may not operate in other countries. - Page 2 Thank you for purchasing the Panasonic Compact Plain Paper Facsimile. Welcome to the world of Panasonic facsimiles. This Panasonic compact plain paper facsimile combines the telephone, fax, copier, and TAM interface functions to provide you with more efficient office or home use. By utilizing these convenient features, you can maximize the effectiveness of this unit.
-
Page 3: Important Safety Instructions
Important safety instructions When using this unit, basic safety precautions should always be followed to reduce the risk of fire, electric shock, or personal injury. 1. Read and understand all instructions. 2. Follow all warnings and instructions marked on this unit. 3. -
Page 4: Table Of Contents
Before you start ¡Included accessories RRRRRRRRRRRRRRRRRRRR 6 Accessory order information RRRRRRRRRRRRRRRRR 6 ¡ Quick Start Overview RRRRRRRRRRRRRRRRRRRRRRRRR 7 ¡ Installation Installing the diverter RRRRRRRRRRRRRRRRRRRR 8 ¡ Installing the paper RRRRRRRRRRRRRRRRRRRRR 8 ¡ Connecting the telephone line and the power outlet RRRRRR 10 ¡... - Page 5 Summary of user programmable features RRRRRRRRRRRR 43 Setting the FAX mode ring count RRRRRRRRRRRRRRR 44 Special Setting the TEL/FAX mode ring count RRRRRRRRRRRRR 45 Setting the silent fax recognition ring countRRRRRRRRRRR 45 Settings Setting the dialing mode RRRRRRRRRRRRRRRRRRR 46 Changing the logo print position RRRRRRRRRRRRRRR 46 Sending documents overseas RRRRRRRRRRRRRRRR 47 Film/Paper save reception RRRRRRRRRRRRRRRRRR 48 Receiving oversized documents RRRRRRRRRRRRRRR 49...
-
Page 6: Before You Start
Before you start Included accessories Power cord RRR 1 pc. Telephone line Part No. PQJA200Z cord RRRRRR 1 pc. Part No. PQJA59V Diverter RRRRR 1 pc. Paper tray RRRR 1 pc. Part No. PFUS1074Z Part No. PFYEFP200M ¡If any items are missing or damaged, check with the place of purchase. ¡The part numbers listed above are subject to change without notice. -
Page 7: Overview Rrrrrrrrrrrrrrrrrrrrrrrrr
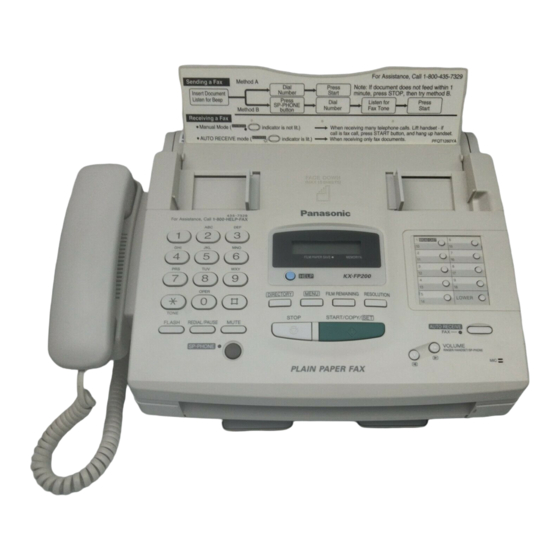
Overview Document entrance Speaker Recording paper exit Paper stacker Diverter For Assistance, Call 1-800-435-7329 Document guide(s) Front cover open lever Microphone (Used to talk the other party when using the speakerphone.) Document exit Paper tray Recording paper entrance Document feeder tray Recording paper set lever... -
Page 8: Installation
Installation Installing the diverter Insert the diverter into the slots on the main unit until it clicks into place. Installing the paper The recording paper size that can be loaded is letter or legal. The paper tray can hold up to 150 sheets of 75 g/m (20 lb.) paper. - Page 9 Fan the stack of paper to avoid a paper jam and insert the paper into the paper tray. ¡The height of the stack of the paper should not exceed the upper limit on the paper tray, or it may cause a paper jam. ¡The paper should not be over the tab.
-
Page 10: Connecting The Telephone Line And The Power Outlet Rrrrrr
Connecting the telephone line and the power outlet 1. Connect the handset and handset cord. 2. Connect the telephone line cord. 3. Connect the power cord. ¡When the power is turned on for the first time, the unit will print an information list about the starter film. -
Page 11: Location Of Controls Rrrrrrrrrrrrrrrrrrrr
Location of controls Checks the amount of remaining film (p. 67). Dial keypad Used to print a quick reference (see below). Used to initiate/exit programming. Used for speed dialing (p. 28, 29). OPER TONE FLASH REDIAL/PAUSE MUTE SP-PHONE Used for voice muting (p. 15). Used for the speakerphone operation (p. -
Page 12: Setting The Date And Time
Before using your unit, program the correct date and time, your logo and your facsimile telephone number. This information will be printed on the top of each page transmitted from your unit. Your logo FROM : Panasonic Fax system Setting the date and time Press (MENU). Display:... -
Page 13: Setting Your Logo Rrrrrrrrrrrrrrrrrrrrr
Setting your logo The logo can be a company, division or personal name in an abbreviated form. Press (MENU). Display: SYSTEM SET UP Press , then YOUR LOGO Press (START/COPY/SET). LOGO= Enter your logo up to 30 characters using the dial keypad and direct call station keys. -
Page 14: Setting Your Facsimile Telephone Number Rrrrrrrrrrr
Setting your facsimile telephone number Press (MENU). Display: SYSTEM SET UP Press , then YOUR TEL NO. Press (START/COPY/SET). NO.= Enter your facsimile telephone number up to 20 digits. ¡The button inserts a space and the a “+”. ¡If you make a mistake, press (STOP) to delete the wrong number to the left of the cursor. -
Page 15: Making Voice Calls Rrrrrrrrrrrrrrrrrrrrr
Basic operations Making voice calls Press (SP-PHONE) or lift the handset. Dial the phone number. ¡If you misdial, hang up and dial again. When the other party answers, speak into the microphone or handset. When finished, press (SP-PHONE) or hang up the handset. -
Page 16: Answering Voice Calls Rrrrrrrrrrrrrrrrrrr
Answering voice calls When the unit rings, press (SP-PHONE) or lift the handset. When finished, press (SP-PHONE) or hang up the handset. Ringer volume Press (VOLUME) (’/‘) while the unit is idle. ¡4 levels (high/middle/low/off) are available. To turn the ringer off: 1. -
Page 17: Making A Copy Rrrrrrrrrrrrrrrrrrrrrr
Making a copy Any transmittable document can be copied. Open the document feeder tray. Insert the document (up to 15 sheets) FACE DOWN until a beep tone is heard. Adjust the document guides to the width of the document. Press (RESOLUTION) repeatedly to the desired setting, if needed (see below). -
Page 18: Transmitting Documents Rrrrrrrrrrrrrrrrrr
Transmitting documents Open the document feeder tray. Insert the document FACE DOWN (up to 15 sheets) until a beep tone is heard. Adjust the document guides to the width of the document. Press (RESOLUTION) repeatedly to the desired setting, if needed (see page 17). Press (SP-PHONE) or lift the handset. -
Page 19: Receiving Documents (Receive Mode, Etc.) Rrrrrrrrrrr
Receiving documents Setting the receive mode The unit has two receive modes: The AUTO RECEIVE mode allows your unit to receive all calls automatically without your assistance. Use this mode when you wish to use the unit solely as a facsimile machine or when you are going out. The MANUAL RECEIVE mode lets you answer calls by lifting the handset. -
Page 20: Memory Reception
Receiving documents Allowing you to answer all calls manually (TEL mode) When the unit rings, press (SP-PHONE) or lift the handset to answer the call. When: — document reception is required, — a slow beep is heard, or — no sound is heard, press (START/COPY/SET). - Page 21 Receiving fax documents only (FAX mode) Setting up the unit for fax reception Turn on the AUTO RECEIVE mode by pressing (AUTO\RECEIVE) until the FAX indicator light goes on. ¡The display shows the following message. Display: FAX MODE ¡The unit will automatically answer all calls and only receive fax documents.
-
Page 22: Connecting A Telephone Answering Machine
Special receiving modes EXT.TAM mode (recording voice messages and/or receiving documents) This unit can be connected to an external telephone answering machine (TAM). When the EXT.TAM mode is set, the facsimile unit and telephone answering machine will work as follows. »... - Page 23 Changing the setting of the AUTO RECEIVE mode Change the AUTO RECEIVE setting from the FAX mode to the EXT.TAM mode. Press (MENU). Display: SYSTEM SET UP Press , then AUTO RECEIVE Press (START/COPY/SET). MODE=FAX Press to select EXT.TAM. MODE=EXT.TAM[ ¡To return to the FAX mode, select FAX.
- Page 24 EXT.TAM mode Securing the remote operation for the answering machine (remote TAM activation ID) Some remote codes on your answering machine may be same as the remote fax activation code on the facsimile unit. This feature prevents the facsimile unit from activating the fax function when you operate the answering machine from a remote location using the same remote code.
-
Page 25: Tel/Fax Mode (Automatic Voice And Fax Recognition) Rrrrrrrrr
TEL/FAX mode (automatic voice and fax recognition) Use this mode when you wish to receive voice calls with rings, but do not want to hear the unit ring when faxes are received. When a call is received, the unit will work as follows. The unit will automatically answer the line without ringing. - Page 26 TEL/FAX mode Helpful hints when using the TEL/FAX mode » If an extension telephone is connected, the facsimile unit and the extension telephone will ring as follows. The extension telephone will ring once. 5 sec. TEL/FAX ring count If a fax calling tone (slow beep) is detected, the unit will automatically activate the fax function to receive documents...
-
Page 27: Automatic Dialing
(PROG. MODE). Both functions cannot be used at the same time. Speed dialing: 100 additional dialing stations (60 stations if your unit is a KX-FP195). These stations are assigned to 2-digit numbers (00–99 for KX-FP200, 00–59 for KX-FP195). Press (MENU) until the following message is displayed. -
Page 28: Making Voice Calls Using Automatic Dialing Rrrrrrrrrrrr
Press (LOWER), then press the desired direct call station key. Using speed dialing: Press (DIRECTORY), then press desired 2-digit number (00–99 for KX-FP200 and 00–59 for KX-FP195). Transmitting documents using automatic dialing Insert the documents FACE DOWN. Using one-touch dialing: For upper stations (1–9) -
Page 29: Electronic Telephone Directory
Electronic telephone directory (selecting a station name in the directory) The station names stored in memory are automatically registered into the electronic telephone directory in alphabetical order. You can make a fax or voice call by selecting the desired station name on the display. If you wish to send a fax, insert the documents into the document tray first. -
Page 30: Rrrrrrrrrrrrrrrrr
Telephone Voice contact (talking to the caller during or after fax reception or transmission) You can have a conversation with the same call after the fax message is completed. This will save the extra expense and time of making another call. This feature works only when the other party’s unit is equipped with a voice contact feature. -
Page 31: Tone, Flash And Redial/Pause Buttons Rrrrrrrrrrr
TONE, FLASH and REDIAL/PAUSE buttons TONE button The TONE (*) button is used for rotary pulse dial services and allows you to temporarily change from pulse to tone mode during a dialing operation. When you hang up, the unit will automatically return to the pulse mode. -
Page 32: Polling (Retrieving Fax Documents) Rrrrrrrrrrrrrrrrr
Special sending features Polling (retrieving fax documents) The polling feature allows you to receive a document from another compatible machine where you pay for the call. This saves the sending party the call charges. Receive polling To place a call and recover a document from another machine, follow the steps below. -
Page 33: Delayed Transmission (Sending A Fax At A Later Time) Rrrrrrrrr
Delayed transmission (sending a fax at a later time) Using a built-in clock, this unit can send documents automatically at a specific time. This allows you to take advantage of low-cost calling hours offered by your telephone company. The delayed transmission can be reserved to take place up to 24 hours in advance. -
Page 34: Transmitting Documents From Memory Rrrrrrrrrrrrrr
The unit is able to scan and store documents into memory, and then transmit the stored documents. The memory capacity is approx. 28 pages for the KX-FP200 and approx. 14 pages for the KX-FP195, based on CCITT No. 1 test chart in standard resolution. For the CCITT No. 1 test chart, see page 74. -
Page 35: Transmitting Documents To Multistations Rrrrrrrrrrrrr
2-digit number (00–99 for KX-FP200 and 00–59 for KX-FP195). ¡To enter other phone numbers, repeat this step (up to 117 stations for KX-FP200, 77 stations for KX-FP195). Press (START/COPY/SET) after entering all of the desired phone numbers. - Page 36 The memory capacity is approx. 28 pages for the KX-FP200 and approx. 14 pages for the KX-FP195, based on CCITT No. 1 test chart in standard resolution. For the CCITT No. 1 test chart, see page 74.
-
Page 37: Reserving Transmission During Fax Reception Rrrrrrrrrrr
Reserving transmission during fax reception While the unit is receiving documents, you can reserve your fax transmission to another station. The unit will automatically transmit documents after fax reception is completed. Insert the documents FACE DOWN during fax reception. Enter the phone number by using regular dialing, one-touch dialing, speed dialing or the electronic telephone directory. -
Page 38: Remote Fax Receiving
Special receiving features Remote fax receiving (using an extension phone to receive a fax message) If you have an extension phone connected to your facsimile unit or on the same line, it is possible to receive a manual fax message. Using the extension phone, dial the remote fax activation code. This saves you from going to the facsimile unit and pressing (START/COPY/SET). -
Page 39: Junk Mail Prohibitor
Junk mail prohibitor (preventing the reception of unwanted fax documents) This feature prevents reception from facsimile machines whose phone numbers are not stored in one-touch dialing and speed dialing. Store the phone numbers from where you want to receive documents (see page 27). Important: ¡This feature does not work when: —the unit is set to the TEL mode,... - Page 40 Receiving with a distinctive ring service This feature can only be used by those who subscribe to a distinctive ring pattern service from their telephone company. For more information on the availability of this service, please contact your telephone company before setting this feature to ON. The distinctive ring service gives you up to 3 phone numbers on a single telephone line, each having a different ringing pattern.
- Page 41 Enhanced copy features Making an extension copy Use this feature to enlarge a document to twice the length of the paper that is currently being used in the paper tray. This feature is used to reverse the film/paper save function (see page 48). Sample of enlarged copy: When you wish to enlarge the top half of the document: Original document...
-
Page 42: Making A Reduction Copy Rrrrrrrrrrrrrrrrrrrr
Making a reduction copy When you copy documents that are longer than the recording paper, the unit can reduce the original document and print it out on one page by programming a suitable reduction rate. The reduction rate is determined by a combination of the size of the recording paper and original document. -
Page 43: Special Settings
Special Settings Summary of user programmable features Basic features Code Feature SET DATE & TIME YOUR LOGO YOUR TELEPHONE NUMBER PRINT TRANSMISSION REPORT AUTO RECEIVE MODE FAX RING COUNT MANUAL RECEIVE MODE TEL/FAX DELAYED RING REMOTE TAM ACTIVATION DIALING MODE MEMORY TRANSMISSION Advanced features Code... - Page 44 Setting the FAX mode ring count This feature determines the number of rings after which the unit answers a call in the FAX mode. You can choose from 1 to 4 rings. Helpful hints: ¡To answer a call before the unit does, increase the number of rings. ¡If you find receiving faxes from machines with the automatic transmission feature difficult, decrease the number of rings.
- Page 45 Setting the TEL/FAX mode ring count This feature determines the number of rings after which the unit automatically answers a call in the TEL/FAX mode. You can choose from 1 to 4 rings. Press (MENU). Display: SYSTEM SET UP Press , then TEL/FAX RING Press (START/COPY/SET).
-
Page 46: Setting The Dialing Mode
Setting the dialing mode The unit will automatically set the dialing mode to TONE or PULSE when the unit is turned on if this feature is set to AUTO. If you cannot dial, change the dialing mode setting to TONE or PULSE by following the instructions below. Press (MENU). -
Page 47: Sending Documents Overseas
Sending documents overseas You may experience difficulty in transmitting documents overseas. This feature makes sending documents easier as the transmission speed is slowed down. Before starting transmission, follow the steps below. Press (MENU). Display: SYSTEM SET UP Press , then OVERSEAS MODE Press (START/COPY/SET). - Page 48 Film/Paper save reception Use this feature if you wish to save film and recording paper when receiving two or more faxed pages. When this feature is set, the unit will reduce documents to half their length and print out two pages of documents on one page.
-
Page 49: Receiving Oversized Documents
Receiving oversized documents When the size of the documents sent by the other party is as large as, or larger than the recording paper, the unit can reduce each page of the document and print it out on the recording paper by programming a suitable reduction rate. -
Page 50: Changing The Display Contrast
Changing the display contrast Use this feature to adjust the brightness of the display. NORMAL: (Pre-selected setting) DARKER: Used when the display contrast is too light. Press (MENU). Display: SYSTEM SET UP Press , then LCD CONTRAST Press (START/COPY/SET). MODE=NORMAL [ Press to select the desired setting. - Page 51 Setting the silent detection This feature allows the facsimile unit to activate the fax function automatically when a silent pause longer than 4 seconds is detected in the EXT.TAM mode. Helpful hints: ¡If you wish to receive documents from stations that do not send a calling tone after dialing, activate this feature.
-
Page 52: Setting The Friendly Reception
Setting the memory reception alert When received documents are stored into memory, the unit will alert you with beep tones. If you hear slow beeps, clear the printing problem or supply paper to print the stored documents. The beep tones will stop. Press (MENU). - Page 53 Signaling your pager that you have received a fax document This feature allows your unit to call your pager when your unit receives a fax message. Press (MENU). Display: SYSTEM SET UP Press , then FAX PAGER Press (START/COPY/SET). MODE=OFF Press to select “ON”.
- Page 54 Setting the film detection If this feature is activated, the display will show the following message when the remaining film prints approx. 15 letter size documents. Display: FILM NEAR EMPTY ¡If you are using regular film (100 m roll), the unit also prints a report. Press (MENU).
-
Page 55: Resetting The Advanced Features
Resetting the advanced features Use this feature to return the advanced features (see page 43) to their initial settings. Press (MENU). Display: SYSTEM SET UP Press , then SET DEFAULT Press (START/COPY/SET). RESET=NO Press to select “YES”. RESET=YES Press (START/COPY/SET). RESET OK? ¡If this feature is not required, press (STOP). -
Page 56: Printing Reports And Lists
Printing reports and lists You can print out the following reports/lists from your unit. Feature list—provides you with the current settings of the basic and advanced programming features (see page 43). Telephone number list—provides you with phone numbers and their station names which are stored in automatic dialing. - Page 57 Setting the transmission report printing One of the following choices is available. ERROR: The transmission report will print out only when fax transmission fails. The report will always print out, indicating whether fax transmission is successful or not. OFF: The report will not print (pre-selected setting). Press (MENU).
- Page 58 Sample of journal report JOURNAL NO. OTHER FACSIMILE START TIME 1234567 Jan. 21 02:14PM 9998765 Jan. 21 02:17PM 2121444 Jan. 21 02:18PM 555556677 Jan. 22 10:35AM +987 1234 Jan. 22 11:02AM Sample of transmission report XMT REPORT NO. OTHER FACSIMILE START TIME COMPANY ABC Jan.
-
Page 59: Troubleshooting
Troubleshooting Error messages on the display If the unit detects a problem, one or more of the following messages will appear on the display. DISPLAY MESSAGE ¡There is something wrong with the unit. Contact our service personnel (p. 72). CALL SERVICE ¡The front cover is open. - Page 60 Error messages on the display DISPLAY MESSAGE ¡The other fax machine does not have a polling feature. Check with the other POLLING ERROR party. ¡The receiving unit is busy or ran out of recording paper. Try again. REDIAL TIME OUT ¡The document is jammed.
-
Page 61: Fax Transmission
Before requesting help General PROBLEM I cannot make and receive calls. I cannot make calls. The unit does not work. The unit does not ring. The REDIAL/PAUSE button does not function properly. The receive mode does not function as explained on page 19. During programming, I cannot enter the remote fax activation code or the remote TAM activation ID. -
Page 62: Fax Reception
Before requesting help Fax reception PROBLEM I cannot receive documents automatically. The recording image is faint. The printing quality is poor. A blank sheet is ejected after the received documents are printed out. In the EXT.TAM mode PROBLEM I cannot receive documents automatically. -
Page 63: If A Power Failure Occurs
In the EXT.TAM mode PROBLEM While I answer a call with the answering machine, the facsimile unit switched to the fax mode and I cannot talk with the other party. Copying PROBLEM A dirty pattern or a black line appears on the copied documents. The copied image is distorted. -
Page 64: Clearing A Recording Paper Jam
Clearing a recording paper jam If the unit does not eject any recording paper during reception or copying, the recording paper has jammed. Remove the jammed paper by following the display message on this page and page 65. When paper has jammed under the film cartridge The display will show the following message. - Page 65 Replace the film cartridge by matching the blue label side of the cartridge with that on the unit. Close the front cover securely by pushing down on both ends. When paper has jammed near the recording paper entrance The display will show the following message. CHECK PAPER Remove the jammed paper as follows.
-
Page 66: Clearing A Document Jam
Clearing a document jam If the unit does not release the original document during feeding, remove the document as follows. Slide the front cover open lever forward to unlock the front cover and lift to open. Remove the jammed document carefully. Close the front cover securely by pushing down on both ends. - Page 67 Remove the used film. Remove the four gears from the used film cores. Caution: ¡The film is not reusable. You can order a new film for replacement through your nearest Panasonic dealer. Film cartridge Front cover open lever Blue gear...
- Page 68 Replacing the film or film cartridge Insert the blue gear into the blue core of the new film. Insert the three green gears into the remaining cores of the new film. Insert the film into the cartridge so that the blue gear matches the blue label on the cartridge.
-
Page 69: Cleaning The Inside Of The Unit
Cleaning the inside of the unit Cleaning the document feeder unit If misfeeding occurs frequently or dirty patterns or black bands appear on a copied or transmitted document, clean the document feeder rollers, sub roller, rubber flap, white plate and glass. Disconnect the power cord and the telephone line cord. -
Page 70: General Information
General Information FCC information If required by the telephone company, inform them of the following. ¡FCC Registration No.: (found on the bottom of the unit) ¡Ringer Equivalence No.: (found on the bottom of the unit) ¡The particular telephone line to which the equipment is connected. -
Page 71: Limited Warranty
One Panasonic Way, Secaucus, New Jersey 07094 Panasonic Consumer Electronics Company or Panasonic Sales Company (collectively referred to as “the warrantor”), will repair this product with new or refurbished parts, free of charge, in the USA or Puerto Rico for one (1) year from the date of original purchase in the event of a defect in materials or workmanship. -
Page 72: Service Center Directory
Customer Satisfaction Center 2F-3, One Panasonic Way, Secaucus, NJ 07094 (Headquarters) 201-348-9090 (9:00am–8:00pm Monday–Friday, EST) ACCESSORY PURCHASES 1-800-332-5368 (Consumer orders only) Panasonic Services Company Accessory Order Office, 20421-84th Avenue South Kent, WA 98032 (6:00am–6:00pm Monday–Friday, 6:00am–10:30am Saturday, PST) (Visa, Mastercard, Discover card, American Express, Check) AUTHORIZED SERVICENTERS... -
Page 73: User Information
¡Attach a letter, detailing the symptom or problem, to the outside of the carton. ¡Send the unit to an authorized service center, prepaid and adequately insured. ¡Do not send your unit to the Panasonic Consumer Electronics Company or to any executive or regional sales offices. These locations do not repair consumer products. - Page 74 Reception: Approx. 38 W / Copy: Maximum: Approx. 160 W 120 V AC, 60 Hz (This unit will not function at 50 Hz.) KX-FP200: Approx. 28 pages KX-FP195: Approx. 14 pages (Based on CCITT No. 1 Test Chart in standard resolution) ⁄...
- Page 75 One-touch dialing list (for KX-FP200) Direct call Name/Phone No. Station No. Direct call Name/Phone No. Station No. 10 ((LOWER) 1) 11 ((LOWER) 2) 12 ((LOWER) 3) 13 ((LOWER) 4) 14 ((LOWER) 5) 15 ((LOWER) 6) 16 ((LOWER) 7) 17 ((LOWER) 8)
- Page 76 Speed dialing list (for KX-FP200) Station Name/Phone No. Station Name/Phone No. Station Name/Phone No.
- Page 77 One-touch dialing list (for KX-FP195) Direct call Name/Phone No. Station No. Direct call Name/Phone No. Station No. 10 ((LOWER) 1) 11 ((LOWER) 2) 12 ((LOWER) 3) 13 ((LOWER) 4) 14 ((LOWER) 5) 15 ((LOWER) 6) 16 ((LOWER) 7) 17 ((LOWER) 8) 18 ((LOWER) 9)
- Page 78 Speed dialing list (for KX-FP195) Station Name/Phone No. Station Name/Phone No.
- Page 79 Index Advanced features RRRRRRRR 43 Resetting RRRRRRRRRRR 55 Automatic dialing RRRRRRR 27, 28 Automatic dialing mode setting RRR 10 AUTO RECEIVE button RRRR 19, 21 AUTO RECEIVE mode RRR 19, 21, 23 Basic features RRRRRRRRRR 43 BROAD CAST key RRRRRRR 35, 36 Cleaning RRRRRRRRRRRRR 69 Communication messages RRRRR 58 COPY button RRRRRRRRRRR 17...
- Page 80 The Panasonic Fax Advantage Consumer Service Program. Panasonic knows that if your fax machine is not up and running, neither is your business. That’s why we created the Panasonic Fax Advantage Program. Included at no extra cost with the purchase of a Panasonic...