
Related Manuals for Zanussi ZDM17301WA


Summary of Contents for Zanussi ZDM17301WA
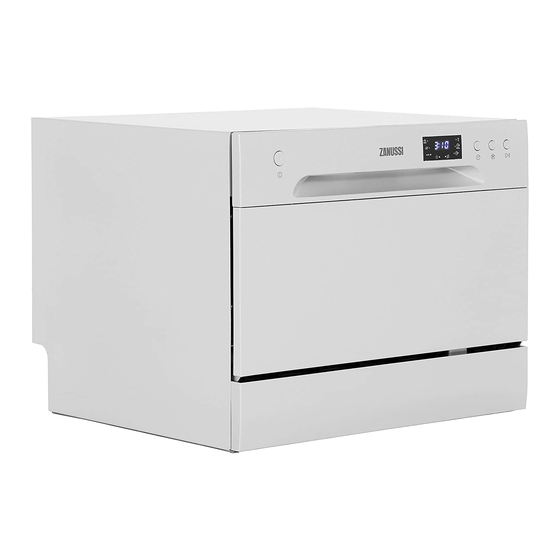
- Page 1 User Manual GETTING STARTED? EASY. ZDM17301SA ZDM17301WA EN User Manual Dishwasher...
-
Page 2: General Safety
SAFETY INFORMATION Before the installation and use of the appliance, carefully read the supplied instructions. The manufacturer is not responsible if an incorrect installation and use causes injuries and damages. Always keep the instructions with the appliance for future reference. GENERAL SAFETY This appliance is intended to be used in household and similar •... -
Page 3: Safety Instructions
capabilities or lack of experience and knowledge if they have been given supervision or instruction concerning use of the appliance in a safe way and understand the hazards involved. Do not let children play with the appliance. • Keep all detergents away from children. •... -
Page 4: Table Of Contents
PRODUCT DESCRIPTION GENERAL OVERVIEW Salt container Inlet hose connection Detergent dispenser Mains cable Rinse aid dispenser Basket Spray arm Cutlery basket Filters Inlet hose Rating plate Funnel Drain hose... -
Page 5: Control Panel
CONTROL PANEL On / off button Programmes Display Start / Pause Delay Start INDICATORS Indicator Description Intensive programme Normal programme ECO programme Rinse aid Salt Quick Plus programme 20 min party programme Glass programme... - Page 6 PROGRAMMES PROGRAMMES Degree of Detergent Phases in the Duration Energy Programme soiling pre-wash / Water (l) Rinse aid cycle (min) (kWh) Type of load main wash Heavy , • Pre- 3g / 15g 10.0 dried-on wash Intensive soiling 50°C Pans, •...
-
Page 7: Salt Container
Starting a programme with Delay Start Cancelling a programme 1. Close the appliance door. Press and hold on/off button for about 3 seconds 2. Open the water tap. to cancel the programme. 3. Press the on/off button to activate the Make sure that there is detergent in appliance. -
Page 8: Detergent Dispenser
The water softener To change the water softener setting: The water softener removes minerals from the 1. Close the appliance door. water supply, which would have a detrimental effect 2. Press on/off button on the washing results and on the appliance. 3. -
Page 9: Rinse Aid Dispenser
2. Fill the rinse aid dispenser (G) with rinse aid. The mark ''MAX'' shows the maximum level. 3. Close the detergent dispenser. Press the lid until the release button locks into position. 3. Remove the spilled rinse aid with an absorbent 4. -
Page 10: Spray Arm
HINTS AND TIPS LOADING THE BASKET Mix spoons with other cutlery to prevent them from bonding together. The rows of prongs in the basket can be lowered to load pots, pans and bowls. The cutlery basket has 2 cutlery grids that can be easily removed. -
Page 11: Filters
CARE AND CLEANING MAINTENANCE 1. Turn the fine filter (B) counterclockwise and remove the filter assembly. WARNING! Before maintenance, 2. Remove the coarse filter (A) by pulling it out deactivate the appliance and from the fine filter (B). disconnect the mains plug from the 3. -
Page 12: Rating Plate
Problem and alarm code Possible solution The appliance does not fill with water. • Make sure that the water tap is open. • The programme display shows E1. • Make sure that the pressure of the water supply is • An intermittent acoustic signal sounds not too low. - Page 13 THE WASHING AND DRYING RESULTS ARE NOT SATISFACTORY Problem Possible cause Possible solution The dishes are not clean. The selected programme was Make sure that the programme not applicable for the type of is applicable for the type of load and/or for the degree of load and/or for the degree of soil.
- Page 14 Code Meaning Possible cause Required temperature is not Malfunction of heating element. reached. Overfilled. Too much inlet water or some dishwasher element leaks. INSTALLATION ASSEMBLY WARNING! Make the electrical Make sure to position the appliance connection with the power cord. with minimum space of 50mm on both sides of fully open door.
-
Page 15: Technical Information
• The appliance is levelled and fixed properly. you do not remove the membrane, remaining food • The inlet valve is open. can cause a blockage in the drain hose spigot. • Inlet hose connections are fully tightened and not leaking. •... - Page 16 WWW.ZANUSSI.COM/SHOP...