Table of Contents
Advertisement
¡Please read these instructions (including "Limited Warranty" and "Customer Services Directory") carefully before using this product
and keep this manual for future reference.
¡Prière de lire attentivement ces instructions (y compris la "Garantie limitée" et le "Répertoire des services à la clientèle") avant d'utiliser ce
produit et conserver ce manuel d'utilisation pour s'y référer ultérieurement.
¡Lea con atención estas instrucciones antes de utilizar el producto y guarde este manual para poderlo consultar en el futuro.
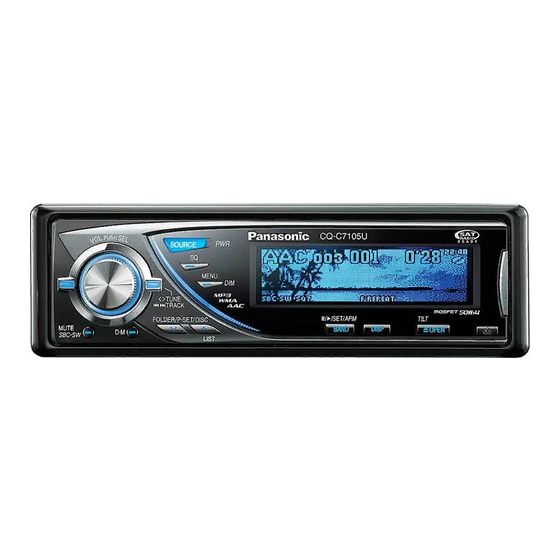
CQ-C7205U/C7105U
Model:
(CQ-C7205U)
TEXT
AAC WMA MP3 CD Player/Receiver
Récepteur/lecteur CD avec lecture AAC/WMA/MP3
Reproductor de CD, AAC, WMA y MP3/receptor
Operating Instructions
Operating Instructions
Manuel d'instructions
Manuel d'instructions
Manual de Instrucciones
Manual de Instrucciones
Advertisement
Chapters
Table of Contents
Troubleshooting

Related Manuals for Panasonic CQ-C7105U


Summary of Contents for Panasonic CQ-C7105U
- Page 1 Model: ¡Please read these instructions (including “Limited Warranty” and “Customer Services Directory”) carefully before using this product and keep this manual for future reference. ¡Prière de lire attentivement ces instructions (y compris la “Garantie limitée” et le “Répertoire des services à la clientèle”) avant d’utiliser ce produit et conserver ce manuel d’utilisation pour s’y référer ultérieurement.
-
Page 2: Safety Information
They contain instructions about how to use the sys- tem in a safe and effective manner. Panasonic assumes no responsibility for any problems resulting from failure to observe the instructions given in this manual. - Page 3 Installation of this unit requires special skills and experience. For maximum safety, have it installed by your dealer. Panasonic is not liable for any problems resulting from your own installation of the unit. ❑ Follow the instructions to install and wire the prod- uct.
-
Page 4: Before Reading These Instructions
REFER SERVICING TO QUALIFIED PERSONNEL. Before Reading These Instructions Panasonic welcomes you to our constantly growing family of electronic products owners. We endeavor to give you the advantages of precise electronic and mechanical engineering, manufactured with carefully selected components, and assembled by people who are proud of the reputation their work has built for our company. We know this product will bring you many hours of enjoyment, and after you discover the quality, value and reliability we have built into it, you too will be proud to be a member of our family. - Page 5 Before Reading These Instructions (continued) XXXXXXXXXXXXXXX XXXXXXXXXXXXXXXXX XXXXXXXXXXXXXX XXXXXXXXXXXXXXXX OO-OOOOO Operating Instructions (YFM284C662CA) POWER SOURCE MENU BAND BAND MUTE MUTE RANDOM SCAN REPEAT TUNE TUNE DISP DISP NUMBER CAR AUDIO Remote Control Unit (including a battery) (CR2025) (EUR7641010) Q'ty: 1 Lock Cancel Plate Rear Support Strap (YFG044C002ZA)
- Page 6 EST. For hearing or speech impaired TTY users, TTY : 1-877-833-8855 Accessory Purchases: Purchase Parts, Accessories and Instruction Books online for all Panasonic Products by visiting our Web Site at: http://www.pasc.panasonic.com or, send your request by E-mail to: npcparts@panasonic.com...
- Page 7 5770 Ambler Drive, Mississauga Ontario L4W 2T3 PANASONIC PRODUCT LIMITED WARRANTY Panasonic Canada Inc. warrants this product to be free from defects in materials and workmanship and agrees to remedy any such defect for a period as stated below from the date of original purchase.
- Page 8 Customize Initially stored moving images and still images are editable to taste. IMAGE STUDIO* allows you to process images from a digital camera or other devices without difficulty. * This software is downloadable from Panasonic Web site (http://panasonic.co.jp/pas/en/software/customize/index.html) page 31)
-
Page 9: Table Of Contents
Contents English ¡ Safety Information ¡ Before Reading These Instructions ¡ Features ¡ Controls Layout ¡ Preparation (Clock adjustment etc.) ¡ General ¡ Sound Control ¡ Radio ¡ CD Player ¡ MP3/WMA/AAC Player ¡ Audio Setting ¡ Function Setting (Security Function Setting etc.) ¡... - Page 10 Controls Layout Note: This instruction manual explains operations for use with the buttons on the main unit. (Different operations excluded) SOURCE Source PWR Power TUNE page 20) TRACK (FILE) page 22, 24) page 15) PUSH SEL Select page 28) MUTE SBC-SW Super Bass Control-Subwoofer CQ-C7205U/C7105U...
-
Page 11: Number Buttons
Number Buttons – 0 to 9 Number NUMBER POWER SRC (SOURCE) RANDOM RANDOM SCAN SCAN BAND Pause/Play REPEAT REPEAT Auto Preset Memory TUNE TRACK (FILE) (Preset) P·SET DISC (FOLDER) Although most of the functions of this unit are executable with both the main unit and remote control, the following functions are excluded. -
Page 12: Preparation (Clock Adjustment Etc.)
Battery which contains Perchlorate Material – spe- cial handling may apply. See www.dtsc.ca.gov/hazardouswaste/perchlorate. Back side Note: Battery Information: Battery Type: Panasonic lithium battery (CR2025) Battery Life: Approximately 6 months under normal use (Included in the remote control) (at room temperature) - Page 13 The following functions are activated when the Security Function is ON. page 29) ¡ The security indicator lights up when removing the face plate. Security Indicator You may need to set the following depending on the devices to be connected. Using Subwoofer ¡...
- Page 14 General This chapter explains how to turn on or off the power, how to adjust the volume, etc. Power on Press [SOURCE] (PWR: POWER). Power off Hold down [SOURCE] (PWR: POWER) until you hear a beep, then release it. You can remove the face plate to prevent it from being stolen.
- Page 15 Open/Eject Press [uOPEN]. When a disc is already loaded, the disc will automatically be ejected. Cautions ¡ To avoid damaging the face plate, do not push it down or place objects on it while it is open. ¡ Do not pinch your finger or hand in the face plate. ¡...
-
Page 16: General
General (continued) The source changes as follows every time [SOURCE] is pressed. Radio FM1, FM2, FM3, AM Player When loading CD When loading a disc containing compressed audio files AUX 1 Device connected to the AUX terminal of the this unit CQ-C7205U/C7105U page 20) When connecting DVD Changer... - Page 17 The display changes as follows every time [DISP: DISPLAY] is pressed. Note: The graphic pattern and still image are selectable. page 30) At power-on: Mode Folder hierarchy (Compressed Audio Player mode only.) Ordinary display + graphic pattern Only graphic pattern Note: The graphic equalizer of 19 bands (S.A.) is selectable when selecting a graphic pattern.
-
Page 18: Sound Control
Sound Control The equalizer curve is selectable from among preset 6 types (FLAT, ROCK, POP, VOCAL, JAZZ, and CLUB) depending on your listening category. SQ changeover The SQ category is changed every time [SQ] (Sound Quality) is pressed. Note: Setting of SQ, bass/treble and volume are influenced one another. - Page 19 The rear speaker can be used as a substitutional subwoofer when a subwoofer is not connected. Holding down [SBC-SW] for 2 sec. or more toggles SBC-SW on and off. Off (default) Lights when SBC-SW is activated. Notes: ¡ If ON is selected, the settings of subwoofer level adjustment and subwoofer low pass filter are activat- page 28) CQ-C7205U/C7105U...
-
Page 20: Radio
Radio This chapter explains how to listen to the radio. Press [SOURCE] to select the radio mode. Press [BAND] to select a band. Select a station. Band Preset Number You can assign your favorite broadcasting station to the [D·M] button. As the result of doing that, your favorite broadcasting station can be received even if the unit is in the CD mode or other modes. -
Page 21: Auto Preset Memory
Up to 6 stations can be preset in AM, FM1, FM2, and FM3 respectively. Preset stations can be simply called up by pressing [}] (P-SET) or [{] (P-SET). Notes: ¡ Direct selection can be executed with [1] to [6] but- tons on remote control. -
Page 22: Cd Player
CD Player Cautions ¡ This unit does not support 8 cm (3”) discs. ¡ Do not use irregularly shaped discs. ¡ Do not use discs that have a seal or label attached. ¡ To avoid damaging the face plate, do not push it down or place objects on it while it is open. - Page 23 Random and Repeat play can be set. Press [MENU] to display the menu dis- play. For using the remote control, hold down [SEL] (MENU) for 2 sec. or more. Turn [VOL] to select a function to be adjusted. For using the remote control, use [}] or [{].
- Page 24 MP3/WMA/AAC Player This unit can play MP3, WMA, and AAC files. When a disc is already loaded, press [SOURCE] to select the compressed audio mode. Press [uOPEN] to open the face plate. When a disc is already loaded ( will automatically be ejected. Load a disc with the printed side facing The face plate closes automatically, and the unit rec- ognizes the disc and starts playing automatically,...
- Page 25 Notes: ¡ Refer to the pages 26 and 27 for cautions. ¡ This unit does not support a MIX mode CD (a CD containing both CD-DA and compressed audio files). In case of using such a CD, problems may occur such as anacoustic playback. Random and Repeat play can be set.
-
Page 26: Mp3/Wma/Aac Player
MP3/WMA/AAC Player (continued) Each of MP3 (MPEG Audio Layer-3), WMA (Windows Media™ Audio), and AAC (Advanced Audio Coding) is a format for compressed audio file. These formats allow users to save all the files contained in approximately 10 pieces of existing CDs on one piece of CD-R/RW. - Page 27 Compressed audio file writing ¡ Do not save an audio file (CD-DA file) and a com- pressed audio file on the same disc. Failure to observe this may result in difficulty in playing. ¡ If compressed audio files formatted with two or more types are saved on the same disc, each format shall have a different folder.
-
Page 28: Audio Setting
Audio Setting Adjustment to each speaker and an optional subwoofer Press [PUSH SEL: SELECT] to display the AUDIO menu dis- play. For using the remote control, use [SEL] (MENU). Press [PUSH SEL: SELECT] to select a mode to be adjusted. For using the remote control, use [SEL] (MENU). -
Page 29: Function Setting (Security Function Setting Etc.)
Function Setting Adjustment to display on the FUNCTION menu Press [MENU] to display the menu dis- play. For using the remote control, hold down [SEL] (MENU) for 2 sec. or more. Press [ ] or [ ] to display the FUNC- TION menu. -
Page 30: Display Setting
Display Setting Adjustment to display on the DISPLAY menu Press [MENU] to display the menu display. For using the remote control, hold down [SEL] (MENU) for 2 sec. or more. Press []] or [[] to display the DISPLAY menu. Turn [VOL] to select a function to be adjusted. -
Page 31: Customize The Display (Customize Function)
You can edit the moving images and still images that are initially stored in the unit. You also can use the data that is downloaded from the Panasonic Web site and the data that is stored with a digital camera or other devices and processed with exclusive software, IMAGE STUDIO. -
Page 32: Error Display Messages
In such a case, try customizing again. ¡ The default image exists on the Panasonic Web site. If you would like to restore it, download the image from the site. Error Display Messages... -
Page 33: Troubleshooting
Check and take steps as described below. If the described suggestions do not solve the problem, it is recommended to take the unit to your nearest authorized Panasonic Servicenter. The product should be serviced only by qualified personnel. Please refer the checking and the repair to professionals. Panasonic shall not be liable for any accidents arising out of neglect of checking the unit or your own repair after your checking. - Page 34 Perform the speaker wiring in accordance with the wiring diagram. The safety device works. Consult your dealer, or your nearest Panasonic Servicenter. Antenna installation or wiring of antenna cable is faulty. Check whether the antenna mounting position and its wiring are correct. In addition, check to see whether the antenna ground is securely connected to the chassis.
- Page 35 Problem The disc is inserted upside down. Insert a disc correctly. No playback or disc ejected There is a flaw or foreign material on the disc. Remove the foreign material, or use a flawless disc. Sound skipping or There is a flaw or foreign material on the disc. noise Remove the foreign material, or use a flawless disc.
- Page 36 Troubleshooting (continued) Problem Possible cause Possible solution The battery is inserted in the wrong direction. A wrong battery is inserted. aInsert a correct battery in the correct direction. The battery is weak. aReplace the battery with new one. No response to The aiming direction of the remote control unit is wrong.
-
Page 37: Error Display Messages
Error Display Messages Display (After 5 seconds) To next file automatically System Upgrade Guidebook Note: Refer to the Possible cause The disc is dirty, or is upside down. Check the disc. The disc has scratches. Check the disc. No operation by some cause. Unplug the power cord and plug it again. -
Page 38: Notes On Discs
Your product is designed and manufactured to ensure the minimum of maintenance. Use a soft cloth for routine exterior cleaning. Never use benzine, thinner, or other solvents. If the fuse blows out, consult your dealer, or your nearest authorized Panasonic Servicenter. Warning ¡... -
Page 39: Specifications
Specifications Power Supply Tone Controls (Bass/Treble) Equalizer Center Frequency Variable Range of Equalizer Current Consumption Maximum Power Output Speaker Impedance Pre-amp output voltage Subwoofer-output voltage Pre-amp output impedance Subwoofer-output impedance Dimensions (Main Unit) Weight (Main Unit) Sampling Frequency DA Converter Pick-Up Type Light Source Wavelength... - Page 40 Memorandum CQ-C7205U/C7105U...
- Page 41 Memorandum CQ-C7205U/C7105U...
- Page 42 Panasonic Consumer Electronics Company, Division of Panasonic Corporation of North America One Panasonic Way, Secaucus, New Jersey 07094 http://www.panasonic.com © 2006 Matsushita Electric Industrial Co., Ltd. All Rights Reserved Panasonic Sales Company, Division of Panasonic Puerto Rico, Inc. (“PSC”) Ave. 65 de Infanteria, Km. 9.5...
- Page 43 Plaque-support arrière Regleta de soporte trasera ✽ Panasonic Consumer Panasonic Sales Company, Electronics Company, Division of Panasonic Puerto Division of Panasonic Rico, Inc. (“PSC”) Corporation of North America Ave. 65 de Infanteria, Km. 9.5 One Panasonic Way, Secaucus, San Gabriel Industrial Park,...
- Page 44 Si tiene alguna dificultad, consulte al instalador profesional que le quede automóvil. más cerca para que le ayude. Fuse (15 A) Refer fuse replacement to your nearest authorized Panasonic Servicenter. Do not try fuse replacement by yourself. Fusible (15 A) Confiez le remplacement de fusible au centre de service après-vente Panasonic agréé...
- Page 45 Guide pratique de mise à niveau de système ¡ For upgrading your system, read this manual carefully before use. This manual should be retained for future reference after read. ¡ Veuillez lire attentivement ce mode d'emploi avant toute utilisation pour faire la mise à niveau du système. Conserver ce manuel dans un endroit sûr pour toute consultation ultérieure.
- Page 46 They contain instructions about how to use the sys- tem in a safe and effective manner. Panasonic assumes no responsibility for any problems resulting from failure to observe the instructions given in this manual.
- Page 47 Installation of this unit requires special skills and experience. For maximum safety, have it installed by your dealer. Panasonic is not liable for any problems resulting from your own installation of the unit. ❑ Follow the instructions to install and wire the prod- uct.
- Page 48 Before Reading These Instructions This book is an instruction manual that explains how to operate your purchased head unit and its remote control as an accessory when the head unit is connected to optional devices. (Remote Control Unit XM Satellite Radio Receiver XMD-1000: manufactured by XM Satellite Radio Page 14)
- Page 49 Contents English ¡ Safety Information ¡ Before Reading These Instructions ¡ General ¡ Disc Changer ¡ iPod Control ¡ XM Receiver ¡ Sirius Satellite Radio Receiver ¡ Hands-Free Phone System ¡ Troubleshooting Français Español CQ-C7205U/C7105U...
-
Page 50: General
General DVD Changer The optional adapter Changer: CA-CC30U) Panasonic DVD changer unit (CX-DH801U). For details, refer to the operating instructions for the DVD changer unit. page 8, 10) CD Changer The optional adapter Changer: CA-CC30U) Panasonic CD changer unit (CX-DP880U). For details, refer to the operating instructions for the CD changer unit. - Page 51 The source changes as follows every time [SOURCE] is pressed. Radio FM1, FM2, FM3, AM Operating Instructions) Player When loading CD Operating Instructions) When loading a disc containing compressed audio files Operating Instructions) AUX 1 Device connected to the AUX terminal of the this unit System-up Connector Device connected to the System-up Connector of this unit...
-
Page 52: Disc Changer
Disc Changer Connected an optional CD changer or an optional DVD changer can be controlled by this unit. Load a magazine (discs). When a magazine is already loaded, press [SOURCE] to select the CD changer mode. The unit recognizes the magazine and starts playing automatically. - Page 53 Notes: ¡ When CX-DP880U or CX-DH801U is connected, a CD-RW disc is playable. ¡ Trouble may occur while playing CD-Rs. Refer to the section on “Notes on CD/CD Media (CD-ROM, CD-R, CD-RW)”. Operating Instructions) Random and Repeat play can be set. Press [MENU] to display the menu dis- play.
- Page 54 Disc Changer Connected an optional DVD changer (CX-DH801U) can be controlled by this unit. Load a magazine (discs). When a magazine is already loaded, press [SOURCE] to select the DVD changer mode. The unit recognizes the magazine and starts playing automatically.
- Page 55 Repeat play can be set. Press [MENU] to display the menu dis- play. For using the remote control, hold down [SEL] (MENU) for 2 sec. or more. Turn [VOL] to select a function to be adjusted. For using the remote control, use [}] or [{].
-
Page 56: Ipod Control
iPod Control Connection of the optional direct cable for iPod (CA-DC300U) allows users to operate the iPod including file selection and file sequence change with the buttons on this unit. Connect the iPod. Press [SOURCE] to select the iPod mode. Playback starts. Note: If playback does not start, press [BAND] (y / 5). - Page 57 Notes: ¡ The iPod equipped with a dock connector is exclusively connectable. Further information about the controllable iPod is described below. Controllable iPod/software version ¡3rd generation iPod/ver. 2.3 ¡4th generation iPod/ver. 3.1.1 ¡5th generation iPod/ver. 1.1.2 (Video playback is not supported.) ¡iPod Photo/ver.
-
Page 58: Xm Receiver
XM Receiver Connecting XM receiver ¡Connect the optional XM receiver (XMD-1000) with optional Digital Adapter. Getting Started It is required to sign up to become an XM Satellite Radio subscriber. After checking your XM Satellite Radio ID, sign up on the XM’s website or by calling them. Check of XM Satellite Radio ID ¡... - Page 59 Connect the optional XM receiver (XMD-1000). ¡ To connect the XM receiver (XMD-1000), it is required to use an optional extension cord that is produced by XM exclusively for Panasonic prod- ucts. ¡ “RADIO ID” is displayed with channel 0.
-
Page 60: Category Selection
XM Receiver (continued) You can toggle the category on and off every time you hold down [BAND] for 2 sec. or more. If the category is set to on, the unit operates as follows for each button: Do not set Category to ON while receiving Channel 1. Failure to observe this disables channel change. -
Page 61: Sirius Satellite Radio Receiver
Sirius Satellite Radio Receiver Over 120 channels of the best entertain- ment and completely commercial-free music for your car, home or office. Only SIRIUS has more than 65 original music channels, from today’s hits to R&B oldies to classical master- pieces. - Page 62 Sirius Satellite Radio Receiver (continued) Press [SOURCE] to select the Sirius Satellite Radio mode. Press [BAND] to select a band. Notes: ¡ “– – – –” is displayed when there is no information. ¡ “UPDATING” is displayed when channel informa- tion is updated.
- Page 63 Press [MENU] to display the menu dis- play. For using the remote control, hold down [SEL] (MENU) for 2 sec. or more. Turn [VOL] to select a function to be adjusted. For using the remote control, use [}] or [{]. Press [PUSH SEL] to determine the selection.
-
Page 64: Hands-Free Phone System
Hands-Free Phone System Be sure to read “Safety Information” in the Operating Instructions for the Hands-Free Phone System before use. Connecting Hands-Free Phone System Connect the Hands-Free Phone System (CY-BT100U) and establish the pairing. Refer to the instruction manual for the Hands-Free Phone System for further information. - Page 65 Notes: ¡ This item is not selectable by pressing [SOURCE], but activated by receiving an incoming call. ¡ Only outline is described here. Refer to the operating instructions for the Hands-Free Phone System for further information. Note: Speaker output is adjustable only when receiving calls.
-
Page 66: Troubleshooting
Check and take steps as described below. If the described suggestions do not solve the problem, it is recommended to take the unit to your nearest authorized Panasonic Servicenter. The product should be serviced only by qualified personnel. Please refer the checking and the repair to professionals. Panasonic shall not be liable for any accidents arising out of neglect of checking the unit or your own repair after your checking. - Page 67 Display Display Cannot receive Sirius Satellite Radio Verify the wiring. Hardware error messages. Check the hardware. Sirius antenna unconnected. Connect the Sirius antenna. User’s registration has not been carried out. Complete user’s registration. A channel that is not included in the agreement was selected. Select a channel that is included in the agreement.
- Page 68 Panasonic Consumer Electronics Company, Division of Panasonic Corporation of North America One Panasonic Way, Secaucus, New Jersey 07094 http://www.panasonic.com © 2006 Matsushita Electric Industrial Co., Ltd. All Rights Reserved Panasonic Sales Company, Division of Panasonic Puerto Rico, Inc. (“PSC”) Ave. 65 de Infanteria, Km. 9.5...