Table of Contents
Advertisement
Quick Links
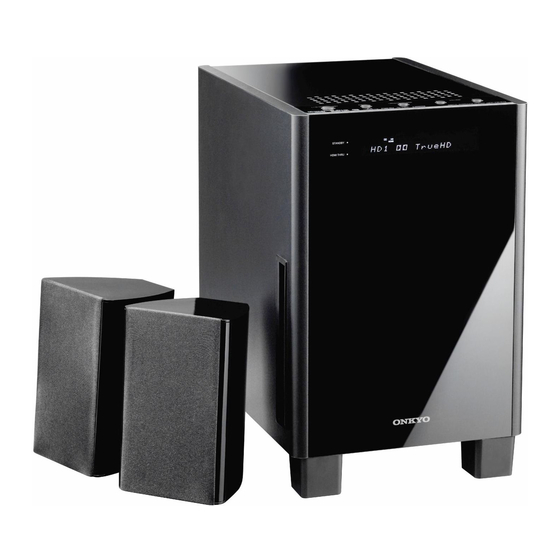
Digital Surround System
HTX-22HDX
Instruction Manual
Thank you for purchasing this Onkyo product. Please
read this manual thoroughly before making any con-
nections or plugging in your new Onkyo product.
Following the instructions in this manual will enable
you to obtain optimum performance and listening
enjoyment from your new Onkyo product.
Please retain this manual for future reference.
Contents
Introduction...............................................2
Connections............................................14
Turning On ..............................................27
Playing Your AV Components ...............28
Using the Listening Modes....................32
Setup........................................................37
Troubleshooting......................................46
HDMI ........................................................49
Specifications .........................................51
Using ........................................53
E
n
Advertisement
Table of Contents
Troubleshooting

Related Manuals for Onkyo HTX-22HDXPAW


Summary of Contents for Onkyo HTX-22HDXPAW
- Page 1 Digital Surround System HTX-22HDX Instruction Manual Thank you for purchasing this Onkyo product. Please read this manual thoroughly before making any con- nections or plugging in your new Onkyo product. Following the instructions in this manual will enable you to obtain optimum performance and listening enjoyment from your new Onkyo product.
-
Page 2: Important Safety Instructions
WARNING: TO REDUCE THE RISK OF FIRE OR ELECTRIC SHOCK, DO NOT EXPOSE THIS APPARATUS TO RAIN OR MOISTURE. CAUTION: TO REDUCE THE RISK OF ELECTRIC SHOCK, DO NOT REMOVE COVER (OR BACK). NO USER-SERVICEABLE PARTS INSIDE. REFER SERVICING QUALIFIED PERSONNEL. -
Page 3: Precautions
AC Fuse—The AC fuse inside the unit is not user-serviceable. If you cannot turn on the unit, contact your Onkyo dealer. Care—Occasionally you should dust the unit all over with a soft cloth. For stubborn stains, use a soft cloth dampened with a weak solution of mild detergent and water. -
Page 4: Package Contents
We, ONKYO EUROPE ELECTRONICS GmbH LIEGNITZERSTRASSE 6, 82194 GROEBENZELL, GERMANY declare in own responsibility, that the ONKYO product described in this instruction manual is in compliance with the corresponding technical standards such as EN60065, EN55013, EN55020 and EN61000-3-2, -3-3. GROEBENZELL, GERMANY... -
Page 5: Speaker Precautions
Putting them on uneven or unstable sur- faces, where they may fall and cause dam- age, will affect the sound quality. • The HTX-22HDXPAW Amp/Subwoofer is designed to be used in the upright vertical position only. Do not use it in the horizontal or tilted position. -
Page 6: Table Of Contents
Making HDMI Connections...19 Connecting Components with Digital Outputs ...21 Connecting Components with Analog Outputs ...22 Connecting Onkyo Components ...23 Turning On the HTX-22HDX ... 27 Connecting the Power Cord... 27 Turning On and Standby... 27 Playing Your Components ... 28 Basic HTX-22HDX Operation ... -
Page 7: Features
• 40 W maximum power • 6Ω impedance • Gloss finish Designed especially for use with the HTX-22HDX, the optional Onkyo SKS-22X speaker package consists of a center speaker and two surround speakers that can be connected directly to the HTX-22HDX. - Page 8 Manufactured under license from Dolby Laboratories. Dolby, Pro Logic, and the double-D symbol are trade- marks of Dolby Laboratories. *4. VLSC is a registered trademark of Onkyo Corporation. *5. Music Optimizer™ is a trademark of Onkyo Corporation. Theater-Dimensional is a trademark of Onkyo Corporation.
-
Page 9: Getting To Know The Htx-22Hdx
Getting to Know the HTX-22HDX Top Panel and Front For detailed information, see the pages in parentheses. ON/STANDBY button (27) INPUT button (28) LISTENING MODE button (32) VOLUME []/[] buttons (28) STANDBY indicator (red) (27) HDMI Thru indicator (orange) (44) Remote-control sensor (12) Bass-reflex port Display... -
Page 10: Display
Getting to Know the HTX-22HDX Display MULTI CH HDMI For detailed information, see the pages in parentheses. Listening mode and format indicators Indicator Listening mode/input format Dolby Digital Dolby Digital Plus Dolby TrueHD DTS Express Audio HD HR DTS-HD High Resolution Audio HD MSTR DTS-HD Master Audio Direct Stream Digital... -
Page 11: Rear Panel
Getting to Know the HTX-22HDX Rear Panel For detailed information, see the pages in parentheses. HDMI IN 1, IN 2, IN 3, and OUT (49) COAXIAL DIGITAL IN 1 (21) OPTICAL DIGITAL IN 2 and IN 3 (21) REMOTE CONTROL (23) AC INLET (27) FRONT SPEAKERS, CENTER SPEAKER, and SURROUND SPEAKERS (17) -
Page 12: Remote Controller
Aiming the Remote Controller When using the remote controller, point it toward the HTX-22HDX’s remote control sensor, as shown below. Remote control sensor STANDBY indicator Approx. 16 ft. (5 m) 30° 30° HTX-22HDXPAW... -
Page 13: Using The Remote Controller
L NIGHT button (36) MUTING button (29) RETURN button (38) INPUT SELECTOR []/[] buttons (28) Buttons that are not explained here are intended for use with an Onkyo Blu-ray/ DVD player/recorder or RI Dock with iPod (see pages 25 and 26). -
Page 14: Connecting The Speakers
You can enjoy DVDs featuring Dolby Digital or DTS. With analog or digital TV, you can enjoy Dolby Pro Logic II, DTS, or Onkyo’s original DSP listening modes. Speaker positions for a 5.1-channel system are shown below. -
Page 15: Affixing The Rubber Feet
You can improve the sound quality by affixing the included rubber feet to raise the speakers off the mounting surface thereby reducing the contact area. The feet also make the speakers stable and prevent them from moving around. ■ Rubber Feet for the Amp/Subwoofer HTX-22HDXPAW Amp/Subwoofer underside ■ Rubber Feet for the Front Speakers Rubber foot... -
Page 16: Speaker Connection Precautions
Connecting the Speakers Speaker Connection Precautions Read the following before connecting your speakers: • Disconnect the power cord from the wall outlet before making any connections. • Connect only speakers with an impedance of 6 ohms or higher. • Read the instructions supplied with your speakers. -
Page 17: Connecting Only The Front Speakers
Connecting 5.1 Speakers With additional speakers, such as the optional Onkyo SKS-22X speaker package, you can enjoy 5.1-channel surround sound. The following hookup diagram shows how to connect the included front speakers, a center speaker, and left and right surround speakers. -
Page 18: Connecting Av Components
Connecting AV Components About AV Connections • Before making any AV connections, read the manuals supplied with your other AV compo- nents. • Don’t connect the power cord until you’ve completed and double-checked all AV connec- tions. Optical Digital Jacks The HTX-22HDX’s optical digital jacks have shutter-type covers that open when an optical plug is inserted and close when it’s removed. -
Page 19: Making Hdmi Connections
Connecting AV Components Making HDMI Connections You can connect components with HDMI outputs to the HTX-22HDX’s HDMI IN 1, IN 2, and IN 3 inputs and connect your HDMI TV to the HTX-22HDX’s HDMI OUT. You need HDMI cables to make HDMI connections. When you connect a component to an HDMI jack, the HDMI indicator on the display lights up. - Page 20 Connecting AV Components • To listen to an HDMI source component through the HTX-22HDX, you must configure your system so that video from the HDMI source component can be displayed on your TV (i.e., on your TV, select the HDMI input that’s connected to the HTX-22HDX’s HDMI OUT). This is necessary because a component identification check has to be performed on your TV before an HDMI source component can output any signals.
-
Page 21: Connecting Components With Digital Outputs
Connecting AV Components Connecting Components with Digital Outputs You can connect components with digital audio outputs to the HTX-22HDX’s DIGITAL COAX- IAL IN 1, OPTICAL IN 2, and OPTICAL IN 3 inputs. Choose a digital input (coaxial or optical) that matches the digital audio output on your source component. To enjoy Dolby Digital and DTS, you must connect your Blu-ray/DVD player/recorder with an optical or coaxial digital audio cable. -
Page 22: Connecting Components With Analog Outputs
Connecting AV Components Connecting Components with Analog Outputs You can connect components with analog audio outputs to the HTX-22HDX’s LINE 1 and LINE 2 inputs and enjoy surround sound with Dolby Pro Logic II, DTS, and Onkyo’s original DSP listening modes. Notes: •... -
Page 23: Connecting Onkyo Components
Auto Power On/Standby If you turn on or start playback on the Onkyo RI-capable component or Onkyo Dock with iPod, the HTX-22HDX will automatically turn on and select the RI-capable component or iPod as the input source. Similarly, when the HTX-22HDX is set to Standby, the Onkyo RI-capable compo- nent or Onkyo Dock with iPod will also go on Standby. - Page 24 • If you use your iPod with any other accessories connected, playback detection may not work. • If you adjust the volume control on your iPod while it’s inserted in an ND-S1 or Onkyo Dock, make sure it’s set to a suitable level before plugging in your earphones.
- Page 25 *4. Exits the DVD player’s setup menu or returns to the previous menu. Note: • When you connect an Onkyo RI-capable component to LINE 1 or LINE 2, change the input display for that input to match the type of component that you connect (see page 30).
- Page 26 Connecting AV Components Controlling an Onkyo Dock (iPod) The following buttons can be used to control an Onkyo Dock with iPod that’s connected with . See page 23 for hookup and setting information. TOP MENU button Works the same as the ND-S1’s [iPod/PC] button.
-
Page 27: Turning On The Htx-22Hdx
Turning On the HTX-22HDX Connecting the Power Cord AC INLET CAUTION : SPEAKER IMPEDANCE 6 ~ 16Ω/SPEAKER Supplied power cord Before connecting the power cord, connect all of your speakers and other components. Connect the supplied power cord to the HTX-22HDX’s AC INLET. -
Page 28: Playing Your Components
Playing Your Components Basic HTX-22HDX Operation STANDBY HDMI Thru Press the HTX-22HDX’s [INPUT] button repeatedly to select an input source. To select an input source with the remote controller, use its [INPUT SELECTOR] buttons. The input source will change 1 second after you release the [INPUT] or [INPUT SELECTOR] button. -
Page 29: Setting The Display Brightness
Playing Your Components SLEEP Setting the Display Brightness You can adjust the brightness of the display. Press the remote controller’s [DIMMER] but- ton repeatedly to select dim, dimmer, or normal brightness. Muting the HTX-22HDX You can temporarily mute the output of the HTX-22HDX. -
Page 30: Displaying Source Information
Playing Your Components Displaying Source Information You can display various information about the current input source as follows. Press the remote controller’s [DISPLAY] button repeatedly to cycle through the avail- able information. The following information can typically be displayed: Input source & volume Signal format* or sampling frequency Input source &... - Page 31 Playing Your Components Notes: • To listen to the TV’s audio by using the ARC (Audio Return Channel), in HDMI Setup, HDMI Control must be set to On and ARC must be set to Auto (see page 44). • DIGITAL IN 1 (DIG1), DIGITAL IN 2 (DIG2), or DIGITAL IN 3 (DIG3) cannot be set the same.
-
Page 32: Using The Listening Modes
Using the Listening Modes Selecting the Listening Modes For a description of each listening mode, see “About the Listening Modes” on page 33. • The Dolby Digital and DTS listening modes can only be selected if your Blu-ray/DVD player/recorder is connected to the HTX-22HDX with a digital audio connection (coaxial, optical, or HDMI). -
Page 33: About The Listening Modes
Using the Listening Modes About the Listening Modes The HTX-22HDX’s listening modes can transform your listening room into a movie theater or concert hall, with high fidelity and stunning surround sound. Speaker Layout Input Sources The following audio formats are supported by the listening modes. ... -
Page 34: Using The Listening Modes
Using the Listening Modes Listening Modes Listening Mode In this mode, audio from the input source is output without sur- round-sound processing. The Sp Config and Sp Distance set- tings are active, but much of the processing set via Audio Adjust is disabled. - Page 35 Use this mode with stereo movies (e.g., TV, DVD, VHS). · Neo:6 Music Use this mode with stereo music sources (e.g., CD, radio, cas- sette, TV, VHS, DVD). Onkyo Original DSP Modes Listening Mode This mode is suitable for old movies and other mono sources.
-
Page 36: Late Night Function
Using the Listening Modes Late Night Function With the Late Night function, you can reduce the dynamic range of Dolby Digital material so that you can still hear quiet parts even when listening at low volume levels—ideal for watching movies late at night when you don’t want to disturb anyone. -
Page 37: Setup
Setup Setup Menus The setup menus appear on the display and provide a convenient way to change settings. From the main menu, settings are organized into eight submenus. Main menu 1. Subwoofer 2. Front 3. Center 1. Sp Config 4. Surround 5. -
Page 38: Changing Settings
—Continued Setup On-screen Setup Menus The onscreen setup menus appear on the TV connected to the HDMI OUT. Note: • The onscreen setup menus can be displayed only when the video input signal is 480p, 576p, 720p, 1080i, or 1080p, or when no video signal present. - Page 39 This setting only applies to the speakers that you specified as Small. To get the best bass performance from your speaker system, you need to set the crossover frequency according to the size and frequency response of your speakers. Use the diameter of the smallest speaker in your system when choosing the crossover fre- quency.
- Page 40 —Continued Setup Sp Distance (Speaker Distance) With the Speaker Distance settings, you can specify the distances from the speakers to your listening position. ■ Unit feet: Distances can be set in feet. Range: 1 to 30 feet in 1-foot steps. meters: Distances can be set in meters.
- Page 41 —Continued Setup ■ Panorama With this setting, you can broaden the width of the front stereo image when using the Dolby Pro Logic II listening mode. Panorama function on. Off: Panorama function off (default). ■ Dimension With this setting, you can move the sound field forward or backward when using the Dolby Pro Logic II listening mode.
- Page 42 —Continued Setup ■ Front 5.1ch With this setting, you can specify how your five surround speakers (front L/R, center, and surround L/R) are arranged to get the best effect from the Theater-Dimensional listening mode. Front speaker Surround speaker Yes: Select this if you’ve arranged your five speakers so that they are all at the front.
- Page 43 —Continued Setup Volume Setup This section explains items on the Volume Setup menu. ■ MaxVolume With this setting, you can limit the maximum volume. The Maximum Volume range is Off, 79 to 30. The default value is Off. ■ Pon Vol (Power on Volume) This setting determines what the volume will be each time the HTX-22HDX is turned on.
- Page 44 —Continued Setup “Search…” → “(name)” → “RIHD On” If the HTX-22HDX cannot receive the name of a component, it will be displayed as “Player*” or “Recorder*”, etc (“*” will be a number when there’s two or more components). • Select Off if a connected component is incompatible or you’re not sure about its compatibility.
-
Page 45: Specifying The Digital Signal Format
—Continued Setup Notes: • Select Off if your TV is incompatible or you’re not sure about its compatibility. • The TV Control setting can be set only when the above Control and Power Control settings are both set to On. Note: •... -
Page 46: Troubleshooting
HTX-22HDX, look for a solution in this sec- tion. If you can’t resolve the issue yourself, contact your Onkyo dealer. Before you contact your Onkyo dealer, try resetting the HTX-22HDX, as follows: To reset the HTX-22HDX to its factory defaults, turn it on and, while holding down the [LISTENING MODE] button, press the [ON/STANDBY] button. - Page 47 HTX-22HDX’s remote control sensor (page 12). Can’t control other components • To control an Onkyo RI-capable component or RI Dock with iPod that’s connected with , remember to point the remote controller at the HTX-22HDX, not the other device.
-
Page 48: Troubleshooting
5 sec- onds, and then plug it back in again. Onkyo is not responsible for damages (such as CD rental fees) due to unsuccessful recordings caused by this unit’s malfunction. -
Page 49: Hdmi (High-Definition Multimedia Interface)
HDMI (High-Definition Multimedia Interface) About HDMI Designed to meet the increased demands of digital TV, HDMI (High Definition Multimedia Interface) is a new digital interface standard for connecting TVs, projectors, Blu-ray/DVD player/recorder, set-top boxes, and other video components. Until now, several separate video and audio cables have been required to connect AV components. - Page 50 HDMI (High-Definition Multimedia Interface) Notes: • The HDMI video stream is compatible with DVI (Digital Visual Interface), so TVs and dis- plays with a DVI input can be connected by using an HDMI-to-DVI adapter cable. (Note that DVI connections only carry video, so you’ll need to make a separate connection for audio.) However, reliable operation with such an adapter is not guaranteed.
-
Page 51: Specifications
Specifications Subwoofer System with Built-in Amplifier (HTX-22HDXPAW) Type: Rated Output Power (FTC): (IEC): Subwoofer Frequency Response: 35 Hz–200 Hz Amp Frequency Response: Input Sensitivity and Impedance: 150 mV/ 47 kΩ (FL/FR) Signal to Noise Ratio: Cabinet Capacity: Power Supply: North American... - Page 52 —Continued Specifications Front Speaker (HTX-22HDXST) Type: Input Sensitivity/Impedance: Maximum Input Power: Output Sound Pressure Level: Frequency Response: Cabinet Capacity: × × Dimensions (W Weight: Driver Unit: Terminal: Other: Specifications and features are subject to change without notice. Full range bass-reflex 6 Ω...
-
Page 53: Using An -Compatible Tv, Player, Or Recorder
, which stands for Remote Interactive over HDMI, is the name of the system control function found on Onkyo components. The HTX-22HDX can be used with CEC (Consumer Electronics Control), which allows system control over HDMI and is part of the HDMI standard. - Page 54 Using an -compatible TV, Player, or Recorder ■ Connections and Set Up Blu-ray/DVD player/recorder, etc. STANDBY HDMI Thru HTX-22HDX DIGITAL AUDIO connection (OPTICAL) TV, projector, etc. Connect the HDMI OUT jack to the HDMI input jack of the TV. Connect the audio output from the TV to the DIGITAL OPTICAL IN 3 jack of the HTX-22HDX using an optical digital cable.
- Page 55 Using an -compatible TV, Player, or Recorder • Even if you set to output audio on the TV speakers, audio will be output from the speakers connected to the HTX-22HDX when you adjust the volume or switch the input on the HTX-22HDX. To output audio from the TV speakers, re-do the operations on the TV.
- Page 56 Unit 1&12, 9/F, Ever Gain Plaza, Tower 1, 88, Container Port Road, Kwai Chung, N.T., HONG KONG Tel: 852-2429-3118 Fax: 852-2428-9039 http://www.ch.onkyo.com/ I1003-1 SN 29400185 (C) Copyright 2010 ONKYO CORPORATION Japan. All rights reserved. * 2 9 4 0 0 1 8 5 *...