Table of Contents
Advertisement
Quick Links
Digital Surround System
HTX-22HD
Instruction Manual
Thank you for purchasing this Onkyo product. Please
read this manual thoroughly before making any con-
nections or plugging in your new Onkyo product.
Following the instructions in this manual will enable
you to obtain optimum performance and listening
enjoyment from your new Onkyo product.
Please retain this manual for future reference.
Contents
Introduction.............................................. 2
Connections ........................................... 16
Turning On & First Time Setup ............. 30
Basic Operation
Playing your AV components .................. 39
Using the Listening Modes ................... 42
Advanced Setup..................................... 56
Troubleshooting..................................... 71
E
n
Advertisement
Table of Contents

Related Manuals for Onkyo HTX-22HD


Summary of Contents for Onkyo HTX-22HD
- Page 1 Turning On & First Time Setup ..... 30 Basic Operation Playing your AV components ....39 Thank you for purchasing this Onkyo product. Please read this manual thoroughly before making any con- Using the Listening Modes ....42 nections or plugging in your new Onkyo product.
-
Page 2: Important Safety Instructions
WARNING: WARNING AVIS TO REDUCE THE RISK OF FIRE OR ELECTRIC RISK OF ELECTRIC SHOCK RISQUE DE CHOC ELECTRIQUE DO NOT OPEN NE PAS OUVRIR SHOCK, DO NOT EXPOSE THIS APPARATUS TO RAIN OR MOISTURE. The lightning flash with arrowhead symbol, within an equilateral triangle, is intended to alert the user to the CAUTION: presence of uninsulated “dangerous voltage”... -
Page 3: Precautions
AC Fuse—The AC fuse inside the unit is not user- serviceable. If you cannot turn on the unit, contact your Onkyo dealer. Care—Occasionally you should dust the unit all over with a soft cloth. For stubborn stains, use a soft cloth dampened with a weak solution of mild detergent and water. - Page 4 We, ONKYO EUROPE ELECTRONICS GmbH LIEGNITZERSTRASSE 6, 82194 GROEBENZELL, GERMANY declare in own responsibility, that the ONKYO product described in this instruction manual is in compliance with the corresponding technical standards such as EN60065, EN55013, EN55020 and EN61000-3-2, -3-3. GROEBENZELL, GERMANY K.
-
Page 5: Speaker Precautions
Speaker Precautions Placement Input Signal Warning • The subwoofer cabinet is made out of wood The speakers can handle the specified input and is therefore sensitive to extreme tem- power when used for normal music reproduc- peratures and humidity, do not put it in loca- tion. -
Page 6: Supplied Accessories
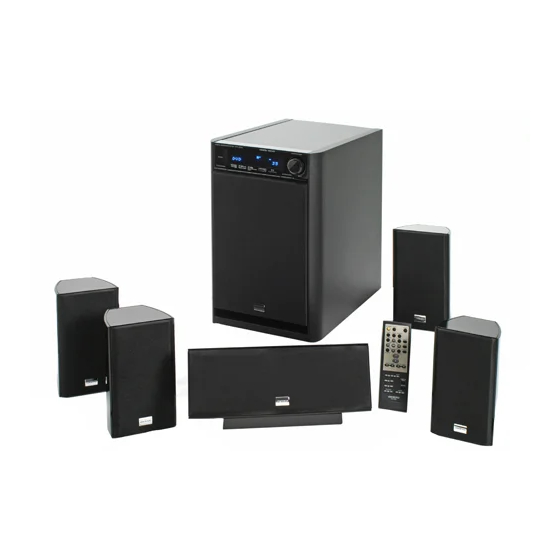
Supplied Accessories Make sure you have the following accessories: Optical digital audio cable (5 ft., 1.5 m) HTX-22HDPAW Amp/Subwoofer Cork spacers for the Amp/Subwoofer (x4) HTX-22HDST Front Speakers Cork spacers for the front speakers (x8) * In catalogs and on packaging, the letter at the end of Remote controller and two batteries (AA/R6) the product name indicates the color. -
Page 7: Table Of Contents
Digital Outputs ........22 Connecting Components with Analog Outputs.......23 Connecting Components with HDMI ..24 Making HDMI Connections.......25 Connecting Onkyo Components ..26 Turning On the HTX-22HD ......30 Connecting the Power Cord .....30 Turning On and Standby ......31 First Time Setup .........32 Automatic Speaker Setup (Audyssey 2EQ)........32... -
Page 8: Features
• 40 W maximum power • Rounded wooden cabinet Designed especially for use with the HTX-22HD, the optional Onkyo SKS-11 speaker pack- age consists of a center speaker and two surround speakers that can be connected directly to the HTX-22HD. - Page 9 Manufactured under license from Audyssey Laboratories. U.S. and foreign patents pending. Audyssey 2EQ and Dynamic EQ are trademarks of Audyssey Laboratories. Theater-Dimensional is a trademark of Onkyo Corporation. Apple and iPod are trademarks of Apple Computer, Inc., registered in the U.S. and other countries.
-
Page 10: Getting To Know The Htx-22Hd
Getting to Know the HTX-22HD Front Panel Display LISTENING MODE button See “Display” on page 11. Selects the listening modes. STANDBY indicator Lights up when the HTX-22HD is on Standby and flashes while a signal is being received from the remote controller. ON/STANDBY button Sets the HTX-22HD to On or Standby. -
Page 11: Display
Getting to Know the HTX-22HD —Continued Display Listening mode and format indicators Show the selected listening mode and audio input signal format. Listening mode/input Indicator format Dolby Digital Dolby Digital Plus Dolby TrueHD DTS Express Audio HD HR DTS-HD High Resolution Audio HD MSTR DTS-HD Master Audio... -
Page 12: Connections
(Remote Interactive) jack can be or projector with an HDMI input. connected to the jack on another SETUP MIC -capable Onkyo component for Only used with the Audyssey 2EQ auto- remote and system control. matic speaker setup. The automatic To use , you must make an analog speaker setup microphone connects here. - Page 13 7.1-channel surround sound. LINE 1 and LINE 2 INPUT These analog audio inputs are for con- necting components with an analog audio output, such as a VCR, TV, or Onkyo RI Dock. See pages 16–26 for hookup information.
-
Page 14: Remote Controller
Remote Controller Installing the Batteries Aiming the Remote Controller When using the remote controller, point it Open the battery compartment, as toward the HTX-22HD’s remote control sen- shown. sor, as shown below. Remote control sensor STANDBY indicator Approx. 16 ft. (5 m) Insert the two supplied batteries (AA/ 30˚... -
Page 15: Using The Remote Controller
Used with the Sleep function. ON/STANDBY button Buttons that are not explained here are Sets the HTX-22HD to On or Standby. intended for use with an Onkyo DVD player or RI Dock with iPod (see pages 28 SETUP button and 29). -
Page 16: Connecting The Speakers
You can enjoy DVDs featuring Dolby Digital or DTS. With analog or digital TV, you can enjoy Dolby Pro Logic IIx, DTS Neo:6, or Onkyo’s original DSP listening modes. Speaker positions for a 7.1-channel system are shown below. -
Page 17: Affixing The Cork Spacers
Connecting the Speakers —Continued Affixing the Cork Spacers You can improve the sound quality by affixing the included cork spacers to raise the speakers off the mounting surface thereby reducing the contact area. The spacers also make the speakers stable and prevent them from moving around. ■... -
Page 18: Speaker Connection Precautions
Connecting the Speakers —Continued Speaker Connection Precautions Making the Connections Read the following before connecting your Remove the pre- speakers: cut insulation • Disconnect the power cord from the wall from the ends of outlet before making any connections. the speaker •... -
Page 19: Connecting Only The Front Speakers
Connecting the Speakers —Continued Connecting only the Front Speakers The following hookup diagram shows how to connect the included front speakers for 2.1-channel operation. Front right speaker Front left speaker Red line Red terminal White line White terminal Red line White line Supplied speaker Supplied speaker... -
Page 20: Connecting Surround Back Speakers
Connecting the Speakers —Continued Connecting Surround Back Speakers For 7.1-channel surround sound, in addition to the 5.1 speakers shown in the hookup diagram on page 19, you’ll need a pair of surround back speakers and a power amp to drive them. Using an RCA audio cable, connect the HTX-22HD’s SURROUND BACK PRE OUT jacks to the audio input on the power amp, as shown below. -
Page 21: Connecting Av Components
Connecting AV Components About AV Connections • Before making any AV connections, read the manuals supplied with your other AV compo- nents. • Don’t connect the power cord until you’ve completed and double-checked all AV connec- tions. Optical Digital Jacks The HTX-22HD’s optical digital jacks have shutter-type covers that open when an optical plug is inserted and close when it’s removed. -
Page 22: Connecting Components With Digital Outputs
Connecting AV Components —Continued Connecting Components with Digital Outputs You can connect components with digital audio outputs to the HTX-22HD’s COAXIAL IN, OPTICAL IN 1, and IN 2 inputs. Choose a digital input (coaxial or optical) that matches the digital audio output on your source component. To enjoy Dolby Digital and DTS, you must connect your DVD player with an optical or coaxial digital audio cable. -
Page 23: Connecting Components With Analog Outputs
Connecting Components with Analog Outputs You can connect components with analog audio outputs to the HTX-22HD’s LINE 1 and LINE 2 inputs and enjoy surround sound with Dolby Pro Logic IIx, DTS Neo:6, and Onkyo’s original DSP listening modes. Notes: •... -
Page 24: Connecting Components With Hdmi
Connecting AV Components —Continued Connecting Components with HDMI About HDMI Designed to meet the increased demands of digital TV, HDMI (High Definition Multimedia Interface) is a new digital interface standard for connecting TVs, projectors, DVD players, set- top boxes, and other video components. Until now, several separate video and audio cables have been required to connect AV components. -
Page 25: Making Hdmi Connections
Connecting AV Components —Continued Making HDMI Connections You can connect components with HDMI outputs to the HTX-22HD’s HDMI IN 1 and IN 2 inputs and connect your HDMI TV to the HTX-22HD’s HDMI OUT. You need HDMI cables to make HDMI connections. Note: •... -
Page 26: Connecting Onkyo Components
(Remote Interactive) control system. Auto Power On/Standby If you turn on or start playback on the Onkyo DVD player or RI Dock with iPod, the HTX-22HD will automatically turn on and select the DVD player or iPod as the input source. Similarly, when the HTX-22HD is tuned on or set to Standby, the DVD player and iPod will also turn on or go on Standby. - Page 27 —Continued • To use functionality with your Onkyo MiniDisc recorder, CD recorder, or RI Dock, con- nect it to the LINE 1 or LINE 2 input, and assign that input to the TAPE input selector. Then, change the Input Display to MD, CDR, or DOCK as appropriate (see page 38).
- Page 28 Connecting AV Components —Continued Controlling an Onkyo DVD Player The following buttons can be used to control Pause [ ] button an Onkyo DVD player that’s connected with Pauses playback. . See page 26 for hookup and setting Next [ ] button information.
- Page 29 Controlling an RI Dock (iPod) The following buttons can be used to control Previous [ ] button an Onkyo RI Dock with iPod that’s connected Restarts the current song. Press it twice to with . See page 26 for hookup and setting select the previous song.
-
Page 30: Turning On The Htx-22Hd
Turning On the HTX-22HD Connecting the Power Cord Power cord varies from country to country To wall outlet Supplied power cord Before connecting the power cord, connect all of your speakers and other components. Connect the supplied power cord to the HTX-22HD’s AC INLET. Plug the other end of the power cord into a suitable wall outlet. -
Page 31: Turning On And Standby
If you did, see “HDMI Input Setup” on page 37. ■ Did you connect an -capable Onkyo MiniDisc recorder, CD recorder, or RI Dock to the LINE 1 or LINE 2 input? If you did, see “Audio Input Setup” on page 36 and “Changing the Input Display” on... -
Page 32: First Time Setup
First Time Setup This section explains the settings that you need to make before using the HTX-22HD for the very first time. Automatic Speaker Setup (Audyssey 2EQ) With the supplied calibrated microphone, Audyssey 2EQ automatically determines the number of speakers connected, their size for purposes of bass management, optimum crossover frequen- cies to the subwoofer (if present), and distances from the primary listening position. - Page 33 First Time Setup —Continued Using Audyssey 2EQ Notes: • If the HTX-22HD is muted, it will be unmuted automatically when the auto- matic speaker setup starts. • It takes about 10 minutes to complete the automatic speaker setup for three positions.
- Page 34 First Time Setup —Continued Press [ENTER]. When the following display appears, move the speaker setup microphone to measurement point (page 32), and then press [ENTER]. Once you’ve pressed [ENTER], stand by a wall or in a corner so that your body doesn’t interfere with the test sig- nals.
- Page 35 First Time Setup —Continued ❑ Error Messages Write Error While the automatic speaker setup is in progress, one of the following error messages may appear: This message appears if saving fails. ❑ Ambient noise is too high To Retry the Automatic Speaker Setup This message appears if there’s too much Press the [ENTER] button.
-
Page 36: Audio Input Setup
First Time Setup —Continued Audio Input Setup Use the Up and Down [ buttons to select “1.Input Assign,” and then press [ENTER]. SETUP ENTER Use the Up and Down [ buttons to select “Audio Input,” and then press [ENTER]. When you connect a component to an analog or digital input, you must assign that input to an input selector. -
Page 37: Hdmi Input Setup
First Time Setup —Continued HDMI Input Setup Press the [SETUP] button. Setup closes. If you connect a video component to an HDMI input, you must assign that input to an input selector. For example, if you connect your DVD player to HDMI IN 1, you must assign Notes: HDMI IN 1 to the DVD input selector. -
Page 38: Changing The Input Display
Changing the Input Display Use the Up and Down [ buttons to select an input If you connect an -capable Onkyo Mini- selector, and use the Left and Disc recorder, CD recorder, or RI Dock to the Right [ ] buttons to HTX-22HD’s LINE 1 or LINE 2 input, for... -
Page 39: Playing Your Components
Playing Your Components Basic HTX-22HD Operation Press the HTX-22HD’s [INPUT] button repeatedly to select an input source. HTX-22HD To select an input source with the remote controller, use its [INPUT SELECTOR] buttons. Remote controller Depending on which input selectors you have assigned to input jacks (page 36), you can select the following input selectors: DVD, VCR/DVR, CBL/SAT, GAME/TV, TAPE, TUNER, CD. -
Page 40: Setting The Display Brightness
Playing Your Components —Continued Using the Sleep Timer With the sleep timer, you can set the HTX- DIMMER SLEEP 22HD so that it turns off automatically after a specified period. Press the remote controller’s [SLEEP] button repeatedly to select the required sleep time. MUTING The sleep time can be set from 90 to 10 minutes in 10 minute... -
Page 41: Displaying Source Information
Playing Your Components —Continued DISPLAY Displaying Source Information You can display various information about the current input source as follows. Press the remote controller’s [DISPLAY] button repeatedly to cycle through the available information. The following information can typically be displayed: Input source &... -
Page 42: Using The Listening Modes
Using the Listening Modes Selecting the Listening Modes To select the listening modes, Remote repeatedly press the [LISTEN- controller For a description of each listening mode, see ING MODE] buttons on the “About the Listening Modes” on page 49. HTX-22HD or remote controller. •... -
Page 43: Listening Modes Available For Each Source Format
Using the Listening Modes —Continued Listening Modes Available for Each Source Format Analog and PCM Sources Multichannel PCM Multi 32–96 kHz* 176.4/192 kHz 176.4/ Source format channel 32–96 Multi- Mono/ Multi- Mono/ Analog channel Multiplex channel Multiplex Media CD, TV, radio DVD, Blu-ray disc DVD, Blu-ray disc Listening Mode... - Page 44 Using the Listening Modes —Continued Dolby Digital and Dolby Digital Plus Sources Dolby Digital Dolby Digital Plus Source format Mono/ Mono/ Multichannel Multichannel Multiplex Multiplex Media DVD, DTV, etc. Blu-ray, HD DVD Listening Mode ✔ ✔ ✔ ✔ ✔ ✔ Direct ✔...
- Page 45 Using the Listening Modes —Continued DTS Sources DTS, DTS 96/24 Source format Discrete/Matrix Multichannel Mono Media DVD, CD, etc. DVD, CD, etc. Listening Mode ✔ ✔ ✔ ✔ Direct ✔ ✔ ✔ ✔ Stereo ✔ ✔ ✔ ✔ Mono ✔ DTS, DTS 96/24 ✔...
- Page 46 Using the Listening Modes —Continued TrueHD Sources TrueHD TrueHD 192 kHz Source format Mono/ Mono/ Multichannel Multichannel Multiplex Multiplex Media Blu-ray, HD DVD Blu-ray, HD DVD Listening Mode ✔ ✔ ✔ ✔ ✔ ✔ Direct ✔ ✔ ✔ ✔ ✔ ✔...
- Page 47 Using the Listening Modes —Continued DTS-HD Sources DTS-HD High Resolution DTS-HD Master Audio Source format Multichannel Mono Multichannel Mono Media Blu-ray, HD DVD Blu-ray, HD DVD Listening Mode ✔ ✔ ✔ ✔ ✔ ✔ Direct ✔ ✔ ✔ ✔ ✔ ✔...
- Page 48 Using the Listening Modes —Continued DTS Express and DSD Sources DTS Express Source format Multichannel Multichannel Mono (5.1) Media Blu-ray, HD DVD SACD Listening Mode ✔ ✔ ✔ ✔ ✔ Direct ✔ ✔ ✔ ✔ ✔ Stereo ✔ ✔ ✔ ✔...
-
Page 49: About The Listening Modes
Using the Listening Modes —Continued also benefit from the dramatic spatial effects About the Listening Modes and vivid imaging. If you’re not using any The HTX-22HD’s listening modes can trans- surround back speakers, Dolby Pro Logic II form your listening room into a movie theater will be used instead of Dolby Pro Logic IIx. - Page 50 Using the Listening Modes —Continued Dolby Digital Plus DTS Neo:6 Developed for use with HDTV, including the This mode expands any 2-channel source for new video disc formats Blu-ray and HD 7.1-channel playback. It uses seven full-band- DVD, this is the latest multichannel audio width channels of matrix decoding for format from Dolby.
- Page 51 This works by controlling how sounds reach the listener’s left and right ears. Good results may not be possible if there’s Onkyo Original DSP Modes too much reverb, so we recommend that you use this mode in an environment with little or Mono Movie no natural reverb.
-
Page 52: Using The Audio Adjust Settings
Using the Listening Modes —Continued Use the Up and Down [ buttons to select an option, and use the Left and Right ] buttons to change it. SETUP The Audio Adjust menu items are explained below. ENTER Using the Audio Adjust Settings When you’ve finished, press the [SETUP] button. - Page 53 Using the Listening Modes —Continued PLIIx/Neo:6 Neo:6 Music ■ Center Image PLIIx Music (2 ch Input) The DTS Neo:6 Music listening mode creates These settings apply to only 2-channel stereo 6-channel surround sound from 2-channel sources. stereo sources. With this setting, you can If you’re not using any surround back speak- specify by how much the front left and right ers, these settings apply to Dolby Pro Logic...
- Page 54 Using the Listening Modes —Continued T-D (Theater-Dimensional) Dynamic EQ ■ LstnAngl (Listening Angle) ■ Dynamic EQ With this setting, you can optimize the The- With Dynamic EQ, you can enjoy great sound ater-Dimensional listening mode by specify- even when listening at low volume levels. ing the angle of the front left and right Dynamic EQ solves the problem of deterio- speakers relative to your listening position.
-
Page 55: Late Night Function
Using the Listening Modes —Continued • The effect of the Late Night function depends on the material that you are play- ing and the intention of the original sound designer, and with some material there will be little or no effect when you select the CH SEL different options. -
Page 56: Advanced Setup
Advanced Setup Manual Speaker Setup Press the [SETUP] button. This section explains how to set the speaker settings manually. This can be useful for checking the speaker setting or making changes if you add additional speakers to Use the Up and Down [ your system after running the automatic buttons to select “2. - Page 57 Advanced Setup —Continued Press the Down [ ] button to Press the Down [ ] button to select “Cntr” (Center), and then select “Surr B” (Surround Back) and use the Left and use the Left and Right [ buttons to select: Right [ ] buttons to Small: Select if the center...
- Page 58 Advanced Setup —Continued Speaker cone Crossover diameter frequency Over 8 in. 40/50/60Hz* (20 cm) SETUP 6-1/2 to 8 in. 80Hz (16–20 cm) 5-1/4 to 6-1/2 in. 100Hz ENTER (13–16 cm) 3-1/2 to 5-1/4 in. 120Hz (9–13 cm) Under 3-1/2 in. 150Hz (default)/ (9 cm) 200Hz*...
- Page 59 Advanced Setup —Continued Double Bass Speaker Distances These settings are set automatically by This setting is not set automatically by the Automatic Speaker Setup function the Automatic Speaker Setup function (see page 32). (see page 32). With the Double Bass function, you can boost With the Speaker Distance settings, you can bass output by feeding bass sounds from the specify the distances from the speakers to...
- Page 60 Advanced Setup —Continued Notes: While “Unit” is displayed, use • To return to the previous menu, press the the Left and Right [ ] but- [RETURN] button. tons to select “feet” or • The Center and Subwoofer distances can “meters,” and then press be set up to 5 ft.
- Page 61 Advanced Setup —Continued Surr BkL: Surround back left Use the Up and Down [ speaker. buttons to select “2. Speaker Surr L: Surround left Setup,” and then press speaker. [ENTER]. Subwfr: This subwoofer. Notes: • Speakers that you set to No or None in the “Speaker Config- uration”...
- Page 62 Advanced Setup —Continued Use the Left and Right [ buttons to select: Off: Tone off, response flat. Audyssey: The tone for each SETUP speaker is set automatically by the Automatic Speaker Setup function. Be sure to select this setting after hav- ENTER ing performed the Automatic Speaker Setup.
- Page 63 Advanced Setup —Continued Use the Up and Down [ buttons to select a frequency. Use the Left and Right [ buttons to adjust the level at that frequency. The volume at each frequency can be adjusted from –6 to +6 dB in 1 dB steps.
-
Page 64: Source Setup
Advanced Setup —Continued Source Setup Use the Up and Down [ buttons to select an item, and This section explains items on the Source then press [ENTER]. Setup menu. Items can be set individually for each input selector. SETUP Use the Left and Right [ buttons to change it. - Page 65 Advanced Setup —Continued A/V Sync Name Edit When using your DVD player’s progressive You can enter a custom name of up to 10 scanning function, you may find that the pic- characters for each input selector. When an ture and sound are out of sync. With the A/V input selector with a custom name is selected, Sync setting, you can correct this by applying the custom name will be displayed instead of...
-
Page 66: Volume Setup
Advanced Setup —Continued Volume Setup Repeat step 5 to enter up to 10 characters. This section explains items on the Volume To move the cursor to the left or Setup menu. right, press the Left or Right ] button respectively. To delete the character at the current cursor position, press the [MUTING] button. -
Page 67: Hdmi Setup
Advanced Setup —Continued HDMI Setup Use the Up and Down [ buttons to select an item, and This section explains items on the HDMI use the Left and Right [ Setup menu. buttons to change it. The items are explained below. Press the [SETUP] button. - Page 68 Notes: • RIHD, which stands for Remote Interactive over HDMI, is the name of the system con- trol function found on certain Onkyo com- ponents. The HTX-22HD can be used with CEC (Consumer Electronics Control), which allows system control over HDMI and is part of the HDMI standard.
- Page 69 Advanced Setup —Continued • Select Disable if a connected component is TV Ctrl (Control) incompatible or you’re not sure about its Select Enable to control the HTX-22HD from compatibility. an RIHD-compatible TV connected via • If operation is unreliable when set to HDMI.
-
Page 70: Specifying The Digital Signal Format
Advanced Setup —Continued DTS: Only DTS format input signals (excluding DTS- HD) will be heard. If the input signal is not DTS, SETUP the DTS indicator will flash and there will be no sound. Auto (default): The format is ENTER detected automatically. -
Page 71: Troubleshooting
Onkyo dealer. as those that can play DVDs, the default setting is off. Before you contact your Onkyo dealer, • With some DVD-Video discs, you need to select try resetting the HTX-22HD, as follows: an audio format from a menu or with the AUDIO To reset the HTX-22HD to its factory defaults, button on your DVD player’s remote controller. - Page 72 Noise can be heard controller mode. • Using cable ties to bundle audio cables with • To control an Onkyo DVD player or RI Dock power cords, speaker cables, and so on can with iPod that’s connected with , remember degrade audio performance, so don’t use them.
- Page 73 5 seconds, and then plug it back in again. Onkyo is not responsible for damages (such as CD rental fees) due to unsuccessful recordings caused by this unit’s malfunction. Before you record impor- tant data, make sure that the material will be recorded correctly.
-
Page 74: Specifications
Specifications Subwoofer system with built-in amplifier (HTX-22HDPAW) Type: Bass-reflex with built-in amplifier × Rated Output Power (IEC): 5 ch (FL/FR/C/SL/SR) 25 W at 6 ohms, 1 kHz, 1ch driven, THD 1% × 1 ch (SW) 50 W at 3 ohms, 100 Hz, 1ch driven, THD 1% Subwoofer Frequency Response: 35 Hz–200 Hz Amp Frequency Response: FL/FR: 10 Hz–100 kHz (Direct mode) - Page 75 Memo...
- Page 76 Unit 1&12, 9/F, Ever Gain PlazaTower 1, 88, Container Port Road, Kwai Chung, N.T., HONG KONG Tel: 852-2429-3118 Fax: 852-2428-9039 http://www.ch.onkyo.com/ I0804-1 SN 29344714 (C) Copyright 2008 ONKYO CORPORATION Japan. All rights reserved. * 2 9 3 4 4 7 1 4 *...