Table of Contents
Advertisement
Quick Links
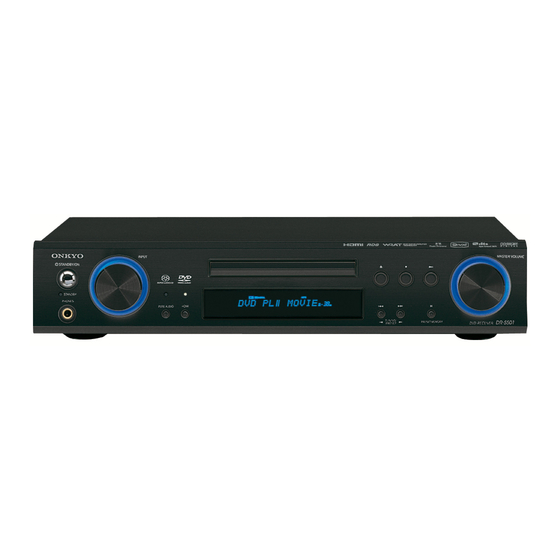
DVD Receiver
DR-S501
Instruction Manual
Thank you for purchasing the Onkyo DVD
receiver. Read this manual carefully before using
your new DVD receiver. A good understanding
of its features and operation will allow you to
achieve optimum performance and enjoyment.
Keep this manual for future reference.
Contents
Overview ......................................... 2
Connections.................................. 17
Getting Started and Setting up ... 29
Basic Operations.......................... 31
Playback Techniques ................... 44
Advanced Operations .................. 52
Detailed Settings .......................... 55
Miscellaneous information .......... 68
Remote Control Codes List
–The end of this manual–
E
n
Advertisement
Table of Contents

Related Manuals for Onkyo DR-S501


Summary of Contents for Onkyo DR-S501
- Page 1 DVD Receiver DR-S501 Instruction Manual Thank you for purchasing the Onkyo DVD receiver. Read this manual carefully before using your new DVD receiver. A good understanding of its features and operation will allow you to achieve optimum performance and enjoyment.
-
Page 2: Important Safety Instructions
WARNING: TO REDUCE THE RISK OF FIRE OR ELECTRIC SHOCK, DO NOT EXPOSE THIS APPARATUS TO RAIN OR MOISTURE. CAUTION: TO REDUCE THE RISK OF ELECTRIC SHOCK, DO NOT REMOVE COVER (OR BACK). NO USER-SERVICEABLE PARTS INSIDE. REFER SERVICING QUALIFIED PERSONNEL. -
Page 3: Precautions
5. Never Touch this Unit with Wet Hands—Never handle this unit or its power cord while your hands are wet or damp. If water or any other liquid gets inside this unit, have it checked by your Onkyo dealer. 6. Handling Notes •... -
Page 4: Declaration Of Conformity
We, ONKYO EUROPE ELECTRONICS GmbH LIEGNITZERSTRASSE 6, 82194 GROEBENZELL, GERMANY declare in own responsibility, that the ONKYO product described in this instruction manual is in compliance with the corresponding technical standards such as EN60065, EN55013, EN55020 and EN61000-3-2, -3-3. GROEBENZELL, GERMANY ONKYO EUROPE ELECTRONICS GmbH K. -
Page 5: Supplied Accessories
Supplied Accessories Make sure you have the following accessories: RC-704S Remote controller & 2 batteries (AA/R6) Video cable (RCA) (1.5 m) Indoor FM antenna AM loop antenna Power cord * In catalogs and on packaging, the letter at the end of the product name indicates the color. -
Page 6: Introduction
HDMI, the HDMI logo and High-Definition Multimedia Inter- face are trademarks or registered trademarks of HDMI licens- ing LLC. *6 “Theater-Dimensional” is a trademark of Onkyo Corporation. Apple and iPod are trademarks of Apple, Inc., registered in the U.S. and other countries. -
Page 7: Table Of Contents
Contents Overview Important Safety Instructions ... 2 Precautions ... 3 Supplied Accessories... 5 Introduction ... 6 Features ... 6 Disc Notes ... 8 Before Using the DVD receiver ... 11 Installing the Batteries ... 11 Using the Remote Controller ... 11 Front &... -
Page 8: Disc Notes
Introduction—Continued Disc Notes Supported Discs The DVD receiver supports the following discs. Disc Logo DVD-Video DVD-Audio Super Audio DVD-R DVD-RW Video CD Audio CD CD-R CD-RW JPEG CD – DVD+R/RW – The DVD receiver supports DVD+R/RW discs recorded in the following formats: •... - Page 9 Introduction—Continued MP3/WMA/JPEG Compatibility • The DVD receiver can play/display MP3, WMA, and JPEG files recorded on CD-R, CD-RW, DVD-R, DVD-RW, DVD+R and DVD+RW discs. • Discs must be in ISO 9660 Level 2 or Joliet format (folders can be up to eight levels deep). Music files recorded on discs that use the HFS (hierarchical file system) cannot be played.
- Page 10 Introduction—Continued Handling Discs • Never touch the underside of a disc. Always hold discs by the edge, as shown. • Never attach adhesive tape or sticky labels to discs. Cleaning Discs • For best results, keep your discs clean. Fingerprints and dust can affect the sound and picture quality and should be removed as follows.
-
Page 11: Before Using The Dvd Receiver
Before Using the DVD receiver Installing the Batteries To open the battery compartment, press the small hollow and slide off the cover. Insert the two supplied batteries (AA/R6) in accordance with the polarity diagram inside the battery compartment. Put the cover onto the remote controller and slide it shut. -
Page 12: Front & Rear Panels
Front & Rear Panels For detailed information, refer to the pages in brackets. Front Panel STANDBY/ON button [28] This button is used to set the DVD receiver to On or Standby. STANDBY indicator [28] This indicator lights up when the DVD receiver is in Standby. -
Page 13: Display
Front & Rear Panels—Continued Display MUTING indicator This indicator flashes while the DVD receiver is muted. Tuning indicators AUTO: This indicator lights up when the Auto Tun- ing mode is selected, and disappears when the Man- ual Tuning mode is selected. : This indicator lights up when the DVD receiver is tuned into a radio station. -
Page 14: Rear Panel
Here you can connect other video equipment. Input jacks include composite video and analog audio input. VIDEO 2/DOCK INPUT [26] Here you can connect Onkyo RI DOCK or other video equipment. Input jacks include composite video and analog audio input. SUBWOOFER PRE OUT [18] A powered subwoofer can be connected here. -
Page 15: Remote Controller
Front & Rear Panels—Continued Remote Controller STANDBY/ON button* [28] This button is used to set the DVD receiver to Standby or turn on. Don’t turn on the DVD receiver until you’ve com- pleted, and double checked all connections (pages 23–27). Number buttons* [44, 45, 66] These buttons are used to enter title, chapter, and track numbers and to enter times for locating spe-... - Page 16 Front & Rear Panels—Continued Basic Playback buttons* Pause button [33, 35] This button is used to pause playback. While play- back is paused, pressing this button moves the video forward one frame at a time. Play button [33] This button is used to start playback. Stop button [34] This button is used to stop playback.
-
Page 17: Connections
Connecting the DVD receiver Placing the Speakers Front Left and Right Speakers • Place the front left and right speakers symmetrically and so that the distance from the listening position is the same. • When placing speakers, direct the speakers toward the position of the listener’s ears where the listener sits to enjoy music or movies. - Page 18 Connecting the DVD receiver—Continued Connecting the Speaker Cables Strip about 15 mm of insu- lation from the ends of the speaker cables, and twist the bare wires tightly, as shown. Unscrew the terminal. Fully insert the bare wires. Screw the terminal tight. The following illustration shows which speaker should be connected to each pair of terminals.
-
Page 19: Connecting Antenna
Connecting the DVD receiver—Continued Connecting Antenna This section explains how to connect the supplied indoor FM antenna and AM loop antenna, and how to connect commercially available outdoor FM and AM antennas. The DVD receiver won’t pick up any radio signals with- out any antenna connected, so you must connect the antenna to use the tuner. - Page 20 Connecting the DVD receiver—Continued Connecting an Outdoor FM Antenna If you cannot achieve good reception with the supplied indoor FM antenna, try a commercially available out- door FM antenna instead. Notes: • Outdoor FM antennas work best outside, but usable results can sometimes be obtained when installed in an attic or loft.
-
Page 21: Av Cables & Connectors
Connecting the DVD receiver—Continued AV Cables & Connectors Video Cable HDMI Component video Composite video (supplied) Scart (European model only) Audio Cable Optical digital Coaxial digital Analog Jack HDMI connections can carry uncompressed, stan- dard or high definition digital video and digital audio, for the best picture and sound quality. -
Page 22: Video Output/Video Setting Matrix
Connecting the DVD receiver—Continued Video Output/Video Setting Matrix The following matrix shows how the video outputs work in relation to the various video settings. Setting Video output HDMI Component Composite SCART (European model only) *1 No picture will be output from other than HDMI when you connect the TV that the native resolution is “720p” or “1080i”. *2 If your TV doesn’t support progressive scanning, you’ll get no picture. -
Page 23: Before Making Any Connections
Connecting the DVD receiver—Continued Before Making Any Connections • Read the manuals supplied with your AV components. • Don’t connect the power cord until you’ve completed all audio and video connections. RCA AV Connection Color Coding RCA AV connections are usually color coded: red, white, and yellow. -
Page 24: Connecting Your Tv (Video Connection)
Connecting the DVD receiver—Continued Connecting Your TV (video connection) • Connect the DVD receiver directly to your TV. If you connect the DVD receiver through a VCR, TV/VCR combination, or video selector, the picture may be dis- torted because DVD-Video discs are usually copy pro- tected. -
Page 25: Connecting Other Av Component
Connecting the DVD receiver—Continued Connecting Other AV Component You can use an AV cable to connect VIDEO 1 INPUT L/R or V jack to your AV component such as a set top box, VCR, and DVD recorder. Connect your AV component’s analog audio and Video output jack to the DVD receiver’s VIDEO 1 INPUT L/R or V jack. -
Page 26: Connecting An Ri Dock
■ iPod without video Connect your RI Dock’s analog audio output jacks to the DVD receiver’s VIDEO 2/DOCK INPUT jacks. Connect the RI Dock with an cable. (Onkyo DS-A1 hookup shown below.) Notes: • Optical digital audio input is assigned for VIDEO 1... -
Page 27: Connecting Your Hdtv Or Av Component With An Hdmi Connection
Connecting the DVD receiver—Continued Connecting your HDTV or AV component with an HDMI connection This section shows how to connect the DVD receiver to an HDTV, projector, or game console that has an HDMI input/output socket. What is HDMI? HDMI (High Definition Multimedia Interface) is a new connection format that can carry uncompressed, stan- dard or high definition digital video and digital audio. -
Page 28: Connecting The Power/Turning On The Dvd Receiver
Connecting the Power/Turning on the DVD receiver Before connecting • Make sure that all the connections on pages 17–27 are complete (the connection to a TV is required). STANDBY/ON STANDBY indicator STANDBY/ON Plug the supplied power cord into the AC INLET and then into the power outlet on the wall. -
Page 29: Initial Setup
Initial Setup This chapter explains the settings you need to make the very first time the DVD receiver is turned on. Basically this manual contains procedures using the remote controller. ENTER ENTER First Time Setup The very first time you turn on the DVD receiver, the “Initial Setup”... -
Page 30: Hdmi And Progressive Settings
HDMI and Progressive Settings HDMI Note: Stop playback before perform these settings. Setting the HDMI This section explains how to turn on the HDMI OUT and change the video resolution when your TV or projector is connected to the HDMI OUT. Press the DVD receiver’s [HDMI] button to turn on HDMI. -
Page 31: Understanding Common Operations
Remote DVD receiver controller You can select DVD, FM, AM, or connected other AV component (set top box, Onkyo RI Dock) as the input source. Use the DVD receiver’s INPUT selector to select the input source. To select the input source with the remote controller, press the INPUT [ ] or [ ] button repeatedly. -
Page 32: Muting The Dvd Receiver
Understanding Common Operations—Continued Muting the DVD receiver You can temporarily mute the output of the DVD receiver. Press the [MUTING] button. Remote controller The output is muted and the MUTING indicator flashes on the display, as shown. MUTING To unmute the DVD receiver, press the [MUTING] button again, or adjust the volume. -
Page 33: Playing Discs
Playing Discs This chapter covers basic playback. Advanced playback functions are covered in the “Advanced Playback” on page 44. Press Open/Close [ disc tray. DVD receiver The input source is automatically set to DVD. Load a disc. Load a disc with the label side facing up, using the disc tray guide to align the disc (if you’re loading a double-sided DVD disc, load it with the side you want to... -
Page 34: Select Next & Previous Track/Chapter
Playing Discs—Continued ■ Stop To stop playback, press the Stop ] button. DVD receiver Playback stops and the Play tor disappears. • When you stop playback of a DVD-Video disc, the DVD receiver Remote controller remembers the point at which play- back was stopped and “Resume”... -
Page 35: Fast Forward & Reverse
Playing Discs—Continued Fast Forward & Reverse DVD-V DVD-A SACD This section explains how to fast forward and reverse. ■ Fast During playback, press the [ forward button to start fast forward. Playback fast forwards and “ appears onscreen. To change the fast-forward speed, press the [ ] button repeatedly to select: x2, x4, x8, x16. -
Page 36: Navigating Dvd & Vcd Disc Menus
Playing Discs—Continued Number buttons TOP MENU ENTER Navigating DVD & VCD Disc Menus DVD-V DVD-A DVD-Video discs usually have a menu from which you can select titles, chapters, and other options, including soundtracks, subtitles, and audio formats (e.g., Dolby Digital or DTS). VCDs that support PBC (Playback Control) may also have an onscreen menu. -
Page 37: Navigating Mp3, Wma & Divx Discs
002. Track02 003. Track03 004. Track04 005. Track05 006. Track06 007. Track07 Name: Onkyo Artist Name: Onkyo Album Name: Onkyo For MP3 playback Subsequent tracks in the same folder are played in order. Press the Stop [ ] button to stop... -
Page 38: Viewing A Slideshow Of Jpeg Images
Playing Discs—Continued Viewing a Slideshow of JPEG Images JPEG This section explains how to display a slideshow of JPEG images on your TV. Load a JPEG disc. The “Disc Navigator” appears. DATA Disc – – – – 1/17 /jpg 001. jpg 002. -
Page 39: Listening To The Radio
Listening to the Radio Number buttons TUNING DISPLAY Using the Tuner With the built-in tuner you can enjoy AM and FM radio stations. You can store your favorite stations as presets for quick selection. Listening to the Radio Use the INPUT [ select either AM or FM. -
Page 40: Presetting Am/Fm Stations
Listening to the Radio—Continued ■ Tuning into Stations by Frequency You can tune into AM and FM stations directly by enter- ing the appropriate frequency. Press the [SEARCH] button. Within 8 seconds, use the num- ber buttons to enter the fre- quency of the radio station. -
Page 41: Using Rds (European Models Only)
Listening to the Radio—Continued Using RDS (European models only) RDS only works with European models and only in areas where RDS broadcasts are available. When tuned into an RDS station, the RDS indicator appears. RDS indicator T - D DSP STEREO FM ST ■... -
Page 42: Using The Listening Modes
Using the Listening Modes Selecting Listening Modes See “About the Listening Modes” in the right column for detailed information about the listening modes. Press the [LISTENING MODE] button to select a listening mode. Pressing this button repeatedly cycles through all of the listening modes that can be used with the current input source. - Page 43 Using the Listening Modes—Continued T-D (Theater-Dimensional) Listening Angle Setting With this setting, you can specify the angle of the front left and right speakers relative to the listening position. Processing for the Theater-Dimensional listening mode is based on this setting. Ideally, the front left and right speakers should be equidistant from the listening posi- tion and at an angle close to one of the three available settings.
-
Page 44: Advanced Playback
Advanced Playback Number buttons ENTER Selecting Chapters/Titles/Tracks/ Folders by Number DVD-A DVD-V SACD With the “Search” function you can select chapters, titles, and tracks by number. To use the function with DVD, DVD playback is required. Press the [SEARCH] button. The “Search”... -
Page 45: Searching By Time
Advanced Playback—Continued Number buttons ENTER Searching by Time DVD-A DVD-V SACD With the “Search” function you can search by time. During playback, press the [SEARCH] button twice. The “Search” window appears onscreen. Search Disc Time DVD-VIDEO -:- -:- - Use the number buttons to enter a time. -
Page 46: Repeat Playback
Advanced Playback—Continued REPEAT Repeat Playback DVD-A DVD-V SACD With the “Repeat” function you can play a disc, title, chapter, group, track, or folder over-and-over again. During playback, press the [REPEAT] button repeatedly to select a repeat option. The selected repeat option appears onscreen. -
Page 47: Random Playback
Advanced Playback—Continued RANDOM Random Playback DVD-V DVD-A SACD With the “Random” function you can enjoy a random selection of titles, chapters, groups, tracks, or folders. During playback, press the [RAN- DOM] button repeatedly to select a random option. The selected random option appears onscreen. -
Page 48: Memory Playback
Advanced Playback—Continued Number buttons ENTER Memory Playback DVD-A DVD-V SACD With the “Memory Playback” function you can create your own memory list of titles, chapters, and tracks. Press the [MEMORY] button. The “Memory List” window appears onscreen, as shown. Title/Folder Current/Total 001 / 019 Current/Total --- / 078 The top row ( ) is used to enter title/ folder and chapter/track numbers. -
Page 49: Last Memory
Advanced Playback—Continued Deleting Items from the List Use the Up/Down [ tons to select it, and then press the [CLR] button. The item is deleted and subsequent items move up the list. Editing Steps Use the Up/Down [ tons to select the step. Use the Left/Right [ tons and number buttons to edit the title/folder (group) or chapter/... -
Page 50: Zooming
Advanced Playback—Continued ZOOM Zooming DVD-V JPEG With the Zoom function you can enlarge any part of the picture. During playback or while play- back is paused, press and hold the [ZOOM] button for 3 seconds. “Zoom x1.0” appears onscreen. HOLD Press the [ZOOM] again repeat- edly to Zoom in. -
Page 51: Selecting Soundtracks
Advanced Playback—Continued AUDIO Selecting Soundtracks DVD-V DVD-A SACD Some DVD-Video discs feature soundtracks in several languages or audio formats (e.g., Dolby Digital or DTS). Music DVD-Video discs and DVD-Audio discs some- times feature audio in several formats, such as PCM, Dolby Digital, or DTS. -
Page 52: Disc And Input Information
Disc and Input Information Displaying Information You can display various information about the current disc, or input source as follows. Press the [DISPLAY] button Remote controller repeatedly to cycle though the available information. During playback of a disc, various information appears onscreen. The operating status (e.g., Stop, Play, Resume) and disc type information is displayed along the top of the screen. -
Page 53: Controlling Other Components
Controlling Other Components Controlling a TV connected to the DVD receiver You can control a TV. You must enter the appropriate remote control code first. Number buttons ENTER Entering Remote Control Codes Look up the appropriate remote control code in the “Remote Con- trol Codes list”... -
Page 54: Controlling An Apple Ipod In Ri Dock Connected To The Dvd Receiver
Controlling Other Components—Continued Controlling an Apple iPod in RI Dock connected to the DVD receiver When operating an Apple iPod in RI Dock with an connection, you can control it by DVD receiver’s remote controller. When Using an RI Dock: •... -
Page 55: Configuring The Dvd Receiver
Configuring the DVD receiver Setup Menu Here you can configure the DVD receiver in this menu on display. The configurations are common for the all input settings excluding “AVSync”, “Video1 Input”, “Video2 Input”, and “AMFreq”. Press and hold the [SETUP] but- ton for 3 seconds. - Page 56 Configuring the DVD receiver—Continued Speakers Output Balance Here you can adjust the output balance of speakers. The balance can be adjusted from “L + 12” to “R + 12” in 1 steps. Note: When the listening mode is set to “Direct” or “Pure Audio”, no effect will be produced.
- Page 57 Configuring the DVD receiver—Continued Crossover Frequency This setting only applies to the speakers that you speci- fied as “Small” in the “Front Speakers Size” on page 56. To get the best bass performance from your speaker sys- tem, you need to set the crossover frequency according to the size and frequency response of your speakers.
-
Page 58: Dvd Onscreen Setup Menus
DVD Onscreen Setup Menus This chapter explains the various functions and settings of the onscreen setup menus. Functions and settings are arranged into six menus: Picture, Audio, Language, Display, Operation Setting, and Initial Setup. The following table lists all the functions and settings, with a brief description and page number where you can find full details. -
Page 59: Using The Onscreen Setup Menus
DVD Onscreen Setup Menus—Continued Menu Setting Parental Lock Security Code Operation Setting DVD Priority Contents SACD Priority Contents DivX Registration Initial Setup TV Shape HDMI Output Setting On-Screen Language Using the Onscreen Setup Menus This section explains how to navigate the onscreen setup menus. ENTER SETUP Press the INPUT [... -
Page 60: Picture Menu
DVD Onscreen Setup Menus—Continued Picture Menu TV Shape With this setting you can select a picture format to match the aspect ratio of your TV. 4:3 Letter box (default): Choose this option if you have a standard TV (4:3 aspect ratio). When you watch widescreen DVD-Video movies, the entire pic- ture will be visible and there will be... -
Page 61: Progressive Setting
DVD Onscreen Setup Menus—Continued Progressive Setting With this setting you can set the component video output to progressive or interlaced. While the “HDMI Output Setting” is set to “On”, this setting is fixed at “Progres- sive” and cannot be changed. See page 30 for more information. -
Page 62: Audio Menu
DVD Onscreen Setup Menus—Continued PAL Output Setting With this setting you can specify how the DVD receiver outputs video signals when playing NTSC format DVD-Video discs or Video CDs. Auto (default): Use this option if your TV supports both PAL and NTSC. -
Page 63: Language Menu
DVD Onscreen Setup Menus—Continued Language Menu On-Screen Language With this setting you can select a language for the onscreen setup menus and messages. Select one of the displayed languages. Disc Menu Language With this setting you can select your preferred language for disc menus. - Page 64 DVD Onscreen Setup Menus—Continued ■ Selecting Other Languages This section explains how to select other languages for disc menus, audio, and subtitles. Select “Others” from the “Disc Menu Language”, “Audio Lan- Remote controller guage”, or “Subtitle Language” menu, and then press [ENTER]. Use the Left/Right [ ]/[ ] buttons to select the code.
-
Page 65: Display Menu
DVD Onscreen Setup Menus—Continued DivX Subtitle Some DivX video discs include subtitles in one or more languages. The disc packaging will usually inform you about which subtitle languages are available. With this setting you can select your preferred language for DivX subtitles. When you play a DivX disc with mul- tiple language subtitles, your preferred language will be selected automatically. -
Page 66: Operation Setting Menu
DVD Onscreen Setup Menus—Continued Operation Setting Menu Setting the Parental Lock With the Parental Lock function you can block access to certain scenes that the authors have flagged as being unsuitable for children. Select “Operation Setting” menu in the setup. Use the Up/Down [ tons to select “Parental Lock”, Remote controller... - Page 67 DVD Onscreen Setup Menus—Continued DVD Priority Contents This setting determines what is played when a DVD-Audio disc also contains DVD-Video material. DVD-AUDIO (default): The DVD-Audio material is played. DVD-VIDEO: The DVD-Video material is played. SACD Priority Contents SACDs have two separate areas for storing audio tracks—one for multichannel audio, the other for 2- channel stereo audio.
-
Page 68: Additional Information
Additional information Resetting the receiver Use this procedure to reset all the receiver’s settings to the factory default. Note that resetting the DVD receiver will delete your radio presets and custom settings. Turn on the DVD receiver. Using the front panel buttons, hold down the Stop [ DVD receiver press [STANDBY/ON] button. -
Page 69: Glossary
Additional information—Continued ■ MP3, WMA, JPEG & DivX Files MP3, WMA, JPEG, and DivX files are typically orga- nized into folders. The DVD receiver handles MP3, WMA, JPEG, and DivX files as tracks. ROOT 001 MP3/WMA/JPEG/DivX (CD-R/RW, DVD-R/RW, DVD+R/RW) Folder 1 Track 001.mp3 (001.wma) - Page 70 See also “Digital audio.” T-D (Theater-Dimensional) This is a virtual surround-sound technology that was developed by Onkyo Corporation. For details, see page 42. WMA is short for Windows Media Audio and refers to an audio compression technology developed by Microsoft Corporation.
-
Page 71: Troubleshooting
If the DVD receiver turns off when you set the volume to maximum, disconnect the power cord, and contact your Onkyo dealer. Audio The sound is not heard or very quiet •... -
Page 72: Video
Troubleshooting—Continued The subwoofer produces no sound • When you play source material that contains no infor- mation in the LFE channel, the subwoofer produces no sound. • Make sure the subwoofer is configured correctly (page 55). Headphones makes noise or no sound •... -
Page 73: Tuner
Troubleshooting—Continued Tuner Reception is noisy, FM stereo reception is noisy, or the FM ST indicator doesn’t appear • Relocate your antenna. • Move the DVD receiver away from your TV or com- puter. • When listening to an AM station, operating the remote controller may cause noise. -
Page 74: Connection With External Devices
Troubleshooting—Continued No sound, or sound is distorted • No sound is output when scanning discs other than audio CDs and SACDs. • Check that the disc is free from dust and dirt, and that it is not damaged (page 10). •... -
Page 75: Hdmi Status Mode
Troubleshooting—Continued HDMI Status Mode If you’re using an HDMI connection and there’s no picture or sound, you can check the status of the HDMI connection by pressing and holding down the DVD receiver’s [DISPLAY] button for 10 seconds until a message ID appears on the display. -
Page 76: Specifications
Specifications Amplifier Section Rated Output Power (IEC) 2 ch 50 W at 6 ohms, 1 kHz, 2 ch driven THD (Total Harmonic Distortion) 0.9% (Power Rated) 0.08% (1 kHz, 1 W) Input Sensitivity and Impedance 200 mV/47 k (LINE) Frequency Response 5 Hz - 100 kHz/+1 dB - 3 dB (Direct mode) Signal to Noise Ratio 106 dB (LINE, IHF-A) -
Page 77: Remote Control Codes List
Remote Control Codes List 0264 Acura 0009 0092, 0108, 0653, Addison 1150 Admiral 0093, 0463 0761, 0783, 0815, Advent 0817, 0842 Aiko 0092 Aiwa 1916 0009, 0030, 0208, 0264, 0361, 0602, Akai 0672, 0702, 0753, 0812, 1935 Akura 0264 Alba 0009, 0037, 0371 Albatron 0700, 0843... - Page 78 Remote Control Codes List—Continued 0037 Electroband 0000 Electrograph 1755 Electrohome 0463 Elektra 0017, 1661 Elin 0037 Elta 0009 0154, 0171, 0178, Emerson 0180, 0236, 0361, 0463, 0623 Envision 0030, 0813 Erres 0037 0171, 0812 Ether 0009, 0030, 0161 Etron 0009 Feilang 0009 Feilu...
- Page 79 Remote Control Codes List—Continued Kaige 0009, 0264, 0817 Kaisui 0009 Kanghua 0896 0001, 0009, 0264, Kangli 0661, 0817 Kangyi 0009, 0264 Karcher 0610 Kathrein 0556 0180 Kendo 0037 Kenwood 0030 Khind 0706, 0896 Kioto 0054, 0556, 0706 0765, 0767 0037 0053, 0108, 0150, Kolin 0180, 0474, 1150,...
- Page 80 Remote Control Codes List—Continued Palladium 0418 Palsonic 0773 Panama 0264 0037, 0051, 0054, 0161, 0208, 0226, Panasonic 0250, 0508, 0650, 0896, 1168, 1175, 1177 0009, 0051, 0208, 0226, 0264, 0508, Panda 0698, 0706, 0780, 0817 Pausa 0009 0030, 0047, 0051, Penney 0060, 0156, 0178, 1347, 1378...
- Page 81 Remote Control Codes List—Continued Squareview 0171 0180 Standard 0009 Starlite 0180 Studio Experi- 0843 ence Sunkai 0865 Superscan 0093, 0864 Supra 0056 Supreme 0000 Susumu 0474 0587, 0748, 0865, 0870, 0871 Swisstec 0880 0030, 0054, 0171, Sylvania 1314 Symphonic 0171, 0180 0000, 0060, 0092, Synco 0093, 0178, 0451,...
- Page 82 Memo...
- Page 83 Memo...
- Page 84 Unit 1&12, 9/F, Ever Gain PlazaTower 1, 88, Container Port Road, Kwai Chung, N.T., HONG KONG Tel: 852-2429-3118 Fax: 852-2428-9039 http://www.ch.onkyo.com/ SN 29344555 (C) Copyright 2007 ONKYO CORPORATION Japan. All rights reserved. HOMEPAGE http://www.onkyo.com/ Y0708-1 * 2 9 3 4 4 5 5 5 *...