Table of Contents
Advertisement
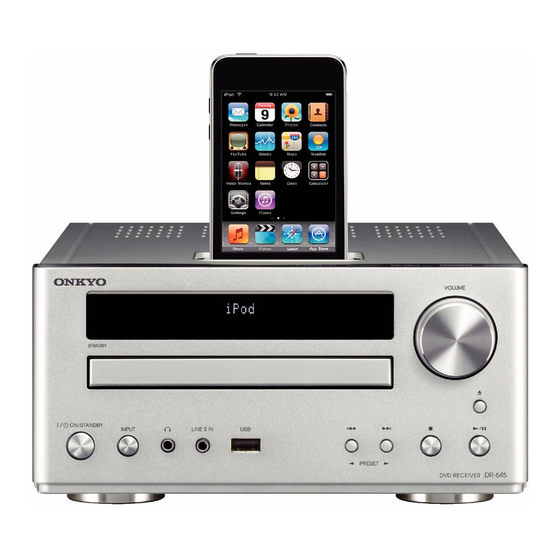
DVD Receiver
DR-645
Instruction Manual
Thank you for purchasing an Onkyo DVD Receiver.
Please read this manual thoroughly before making
connections and plugging in the unit.
Following the instructions in this manual will enable
you to obtain optimum performance and listening
enjoyment from your new DVD Receiver.
Please retain this manual for future reference.
Contents
Introduction ...................................2
Connections...................................8
Basic Operation...........................18
Settings ........................................25
Listening to the FM Radio ..........29
Troubleshooting ..........................31
E
n
Advertisement
Table of Contents

Related Manuals for Onkyo DR-645


Summary of Contents for Onkyo DR-645
- Page 1 DVD Receiver DR-645 Instruction Manual Thank you for purchasing an Onkyo DVD Receiver. Please read this manual thoroughly before making connections and plugging in the unit. Following the instructions in this manual will enable you to obtain optimum performance and listening enjoyment from your new DVD Receiver.
-
Page 2: Introduction
Introduction WARNING: TO REDUCE THE RISK OF FIRE OR ELECTRIC SHOCK, DO NOT EXPOSE THIS APPARATUS TO RAIN OR MOISTURE. CAUTION: TO REDUCE THE RISK OF ELECTRIC SHOCK, DO NOT REMOVE COVER (OR BACK). NO USER-SERVICEABLE PARTS INSIDE. REFER SERVICING QUALIFIED PERSONNEL. -
Page 3: Precautions
If water or any other liquid gets inside this unit, have it checked by your Onkyo dealer. 8. Handling Notes • If you need to transport this unit, use the original packaging to pack it how it was when you originally bought it. -
Page 4: Declaration Of Conformity
We, ONKYO EUROPE ELECTRONICS GmbH LIEGNITZERSTRASSE 6, 82194 GROEBENZELL, GERMANY declare in own responsibility, that the ONKYO product described in this instruction manual is in compliance with the corresponding technical standards such as EN60065, EN55013, EN55020 and EN61000-3-2, -3-3. GROEBENZELL, GERMANY ONKYO EUROPE ELECTRONICS GmbH K. -
Page 5: Standard Accessories
Standard Accessories FM antenna × 1 RCA video cable × 1 AC power cord × 1 Batteries (AAA, R03, UM-4) × 2 Remote control (RC-798S) × 1 Instruction manual (this document) × 1 Note • In catalogs and on packaging, the letter at the end of the product name indicates the color. -
Page 6: Features
Features Highlights • Compact-Size Home Entertainment DVD Systems for iPod • iPod Direct Connection via Top Panel • Front Panel USB Interface for Flash Drives Amplifier / DVD Player / USB Features (North American) • 20 W/Ch, 8 ohms, 20 kHz, 2Ch Driven (FTC) (Others) •... -
Page 7: Table Of Contents
Contents Introduction Important Safety Instructions ... 2 Precautions... 3 Standard Accessories ... 5 Using Remote Control ... 5 Features ... 6 Connections Connecting the DVD receiver... 8 FM Antenna Connection... 8 Speaker Connection... 8 Connection to a TV... 9 Connection to Audio Components etc... 10 Identifying the Parts... -
Page 8: Connections
Connections Connecting the DVD receiver FM Antenna Connection Connect the supplied FM antenna to the FM ANTENNA socket on the unit. If reception is poor, connect the outdoor antenna. Note • Before attaching a 75 ohm coaxial cable, disconnect the supplied FM antenna. -
Page 9: Connection To A Tv
Connection to a TV Caution • Turn the power off to all components before making connections. • Read the instructions of each component you intend to use with this unit. • Be sure to insert each plug securely. To prevent hum and noise, avoid bundling the signal interconnection cables together with the AC power cord or speaker cables. -
Page 10: Connection To Audio Components Etc
Connection to Audio Components etc. Caution • Turn the power off to all components before making connections. • Read the instructions of each component you intend to use with this unit. • Be sure to insert each plug securely. To prevent hum and noise, avoid bundling the signal interconnection cables together with the AC power cord or speaker cables. -
Page 11: Identifying The Parts
Identifying the Parts Main Unit g h i j k l m n ■ Top view a Remote control sensor Receives signals from the remote control. Point the remote control at this sensor when operating the remote control. b Display c Disc tray d VOLUME knob Turn this knob (or press q VOL w of the remote... -
Page 12: Remote Control
Remote Control a 9 ON/STANDBY button Use this button to turn the unit on and standby. The STANDBY indicator lights in the standby mode. It turns off when the unit is turned on. b iPod/USB button Use this button to select an “iPod” or “USB Source”. c DVD button Use this button to select a “DVD Source”. - Page 13 p 7 button In DVD, iPod or USB mode, use 7 to skip tracks/files/songs. e PRESET button In FM mode, use e PRESET to select a preset channel. q PROG button In DVD or USB mode, use PROG to programme tracks.
-
Page 14: Discs
CD standard may not play back correctly in this unit. If you use such discs in this unit, Onkyo Corporation and its subsidiaries cannot be responsible for any consequences or guarantee the quality of reproduction. If you experience problems with such non-standard discs, you should contact the producers of the disc. - Page 15 • This unit cannot display the bit-rate of VBR (variable bit-rate) files correctly. • The disc must be finalized in order to play. • This unit is NOT compatible with multi-session discs. • The CD-ROM must be ISO 9660 compatible. •...
-
Page 16: Ipod
iPod To play your iPod through this unit, you must first attach the Universal Dock Adapter for your model of iPod. Compatible iPod models Made for: • iPod touch (1st and 2nd generation) • iPod classic • iPod (5th generation) •... -
Page 17: Usb Flash Drive Compatibility
USB flash drive compatibility • Only USB flash drive can be used. • Some MP3 players etc. that can connect via the USB port cannot be played back with this unit. • Hard disk drives, CD/DVD drives, and others connected via USB cannot be used. -
Page 18: Basic Operation
Basic Operation Basic Operation Press 9 ON/STANDBY to turn the unit on. • The unit turns on with the source that was last selected. Press DVD, iPod/USB, FM, or LINE to select a source. The selected source is shown on the front panel’s display. -
Page 19: Basic Operation
Basic Operation Recording a Source You can record a source onto a CD recorder or a cassette tape recorder connected to the COAXIAL DIGITAL AUDIO OUT jack or the LINE OUT jacks. Select a source to be recorded by pressing DVD, iPod/USB, FM, or LINE. -
Page 20: On-Screen Menu
On-screen Menu An on-screen menu is shown when a DVD, USB or Video CD with Playback Control (PBC) content is loaded. The way in which the menu works may differ according to disc. DVD menus Use q/w/e/r to select the menu item from a DVD, and confirm the selection using the ENTER. -
Page 21: Basic Operations For Ipod, Disc And Usb Flash Drive
Basic Operations for iPod, Disc and USB Flash Drive Pausing playback (Freezing the picture) Press 1/3 to pause audio playback. Any DVD or Video CD image is frozen. Press 1/3 again to restart playback. Caution • If this unit is left in “pause” mode for an extended period of time with the screen saver set to on, the screen saver will automatically start on the television. -
Page 22: Selecting Subtitles
Selecting Subtitles Repeated presses of SUBTITLE cycle through available languages on a disc. • Subtitles do not always appear immediately after the language has been selected. It may take a few seconds until the subtitles appear. • Some captions on some discs cannot be removed or changed using this button. -
Page 23: Changing The Display Mode
Changing the Display Mode Each time DISPLAY is pressed during playback, following information appears on the screen. ■ Title Elapsed time Title Remain time Chapter Elapsed time Chapter Remaining time Display off ■ CD/Video CD Single Elapsed time Single Remain time Total Elapsed time Total Remain time ■... -
Page 24: Programmed Playback (Dvd/Vcd/Cd)
Time Search You can start playback from the specified hour/minute/ second. During playback, press SEARCH twice. “GO TO -:- -:-” appears on the screen. Enter your desired hour, minute and second using the number buttons. Playback starts from the selected part. Programmed Playback (DVD/VCD/CD) Up to 20 chapters/tracks can be programmed in the desired order. -
Page 25: Settings
Settings Settings Introduction This chapter describes how to use the SETUP menu. Most settings and adjustments are required to be set when you first use the system. Turn on the unit and the connected television or monitor. • The SETUP menu is available only in the “DVD Source”... -
Page 26: Audio Setup
OSD (ON SCREEN DISPLAY) LANGUAGE Select the desired language for on screen menus of the unit from the following: (European and North American) ENGLISH FRANÇAIS DEUTSCH ITALIANO ESPAÑOL (Hong Kong) English Chinesetrad SCREEN SAVER The screen saver starts up if nothing is played back and no operations are performed for 4 minutes. -
Page 27: Video Setup
VIDEO SETUP TV MODE This setting allows the selection of interlaced (INTERLACE) or progressive-scan (PROGRESSIVE) video from the component video outputs. PROGRESSIVE: For progressive scan TV: turn on the progressive scan mode. INTERLACE: For ordinary TV: turn on the interlace mode. •... -
Page 28: Preference
PREFERENCE TV TYPE PAL: Select this when the unit is connected to a PAL TV. AUTO: Select this when the unit is connected to a Multi TV. NTSC: Select this when the unit is connected to an NTSC AUDIO, SUBTITLE, DISC MENU You can select a preferred language for audio, subtitle and disc menu. -
Page 29: Listening To The Fm Radio
Listening to the FM Radio Listening to the FM Radio Press FM to select “FM Radio”. Hold down q TUNING w for more than 1 seconds to select the station you want to listen to (Auto selection). When a station is tuned in, the tuning process will stop automatically. -
Page 30: Listening To An External Source
Listening to an External Source Connect a cassette tape deck etc. to LINE 1 IN jack of the unit using commercially-available RCA cables. Or Connect the audio output jack of a portable audio player to the LINE 2 IN jack of the unit. •... -
Page 31: Troubleshooting
■ Resetting the System setup 1. Turn the unit on. 2. Press 2 for 3 seconds while holding down the 1/3. 3. Release 2 and 1/3 when “DR-645**” appears on the display. 4. Press 2. ■ Resetting the DVD setup To reset the custom settings on OSD to its default value, try the following procedure. - Page 32 Disable the password for parental control or change the rating level. If condensation is suspected, unplug the AC power cord and leave DR-645 for two to three hours in the room temperature before playing any discs. ■ Poor radio reception Increase the distance between the unit and your TV or VCR.
-
Page 33: Specifications
Specifications Amplifier Section Rated Output Power All channels: (North American) 20 watts minimum continuous power per channel, 8 ohm loads, 2 channels driven from 20 Hz to 20 kHz, with a maximum total harmonic distortion of 10% (FTC) (Others) 2 ch × 40 W at 4 ohms, 1 kHz (IEC) THD (Total Harmonic Distortion) 10% (Power Rated)/0.05% 30 (1 kHz, 4 Ω, 1 W) - Page 34 ■ HDMI Output ■ Video Outputs Component Composite ■ Audio Inputs Analog 2 (LINE1/LINE2) ■ Audio Outputs Digital 1 (Coaxial) Analog 1 (LINE) Subwoofer Pre Output Speaker Outputs SPEAKERS (L/R) Phones 1 (3.5 ø) ■ Others iPod Connector • Design and specifications are subject to change without notice.
- Page 35 Memo...
- Page 36 Unit 1 & 12, 9/F, Ever Gain Plaza Tower 1, 88, Container Port Road, Kwai Chung, N.T., Hong Kong. Tel: 852-2429-3118 Fax: 852-2428-9039 http://www.ch.onkyo.com/ SN 29400514A (C) Copyright 2010 ONKYO CORPORATION Japan. All rights reserved. Y1009-2 * 2 9 4 0 0 5 1 4 A *...